


Whether you’re enjoying a gaming session with teammates or brainstorming with colleagues across continents, using a proxy with Discord can enhance your experience.
But why should you even bother with proxies in the first place? For some, it's about bypassing restrictions in workplaces, schools, or locations where Discord access is limited. For others, it's about maintaining anonymity and securing data on the internet. Whatever your reason, a well-configured proxy ensures that you stay connected without compromising speed or stability.
In this guide, we’ll walk you through everything you need to know—from acquiring proxies to setting them up on various devices, testing their effectiveness, and even disabling them when necessary. By the end, you'll have complete control over your Discord connection, no matter where you are.
Before starting: Get free proxy for Discord
Before we get started on how to use a proxy with Discord, we first need to obtain proxies. Ideally, you want a proxy that allows you to test its proxy servers before making a financial commitment. Fortunately for us, Webshare provides 10 high-quality proxies on its free plan. And the best part? They’re free forever and yours to keep.
To get started, visit the Webshare website and sign up for the free plan—no credit card info required. After signing up, log in to your account to find your free proxies on the Dashboard.
Easiest method: Discord proxy for Chrome
If you’re looking for a quick and easy way to use a proxy with Discord, the Webshare Chrome extension is your best bet. It allows you to set up a proxy in just a few clicks without modifying your system-wide settings.
Follow these steps to access Discord through a proxy while keeping your regular internet connection unchanged:
Step 1: Install the Chrome Extension
Navigate to Chrome proxy extension download page on your browser and click "Add extension for free".
On the Webshare extension page, click the Add to Chrome button to download and install the extension on your browser.
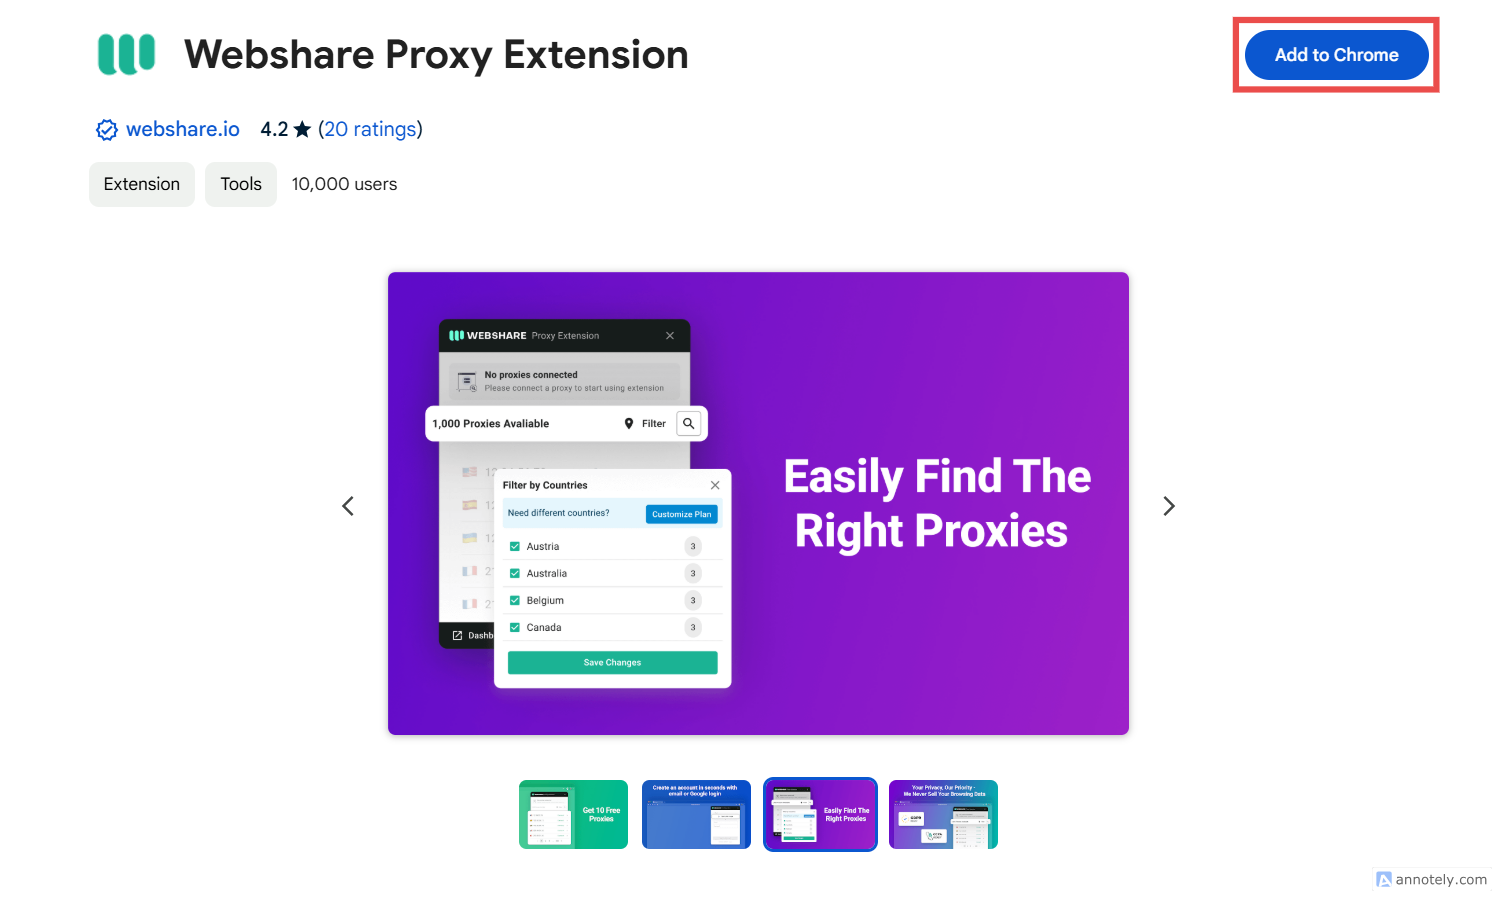
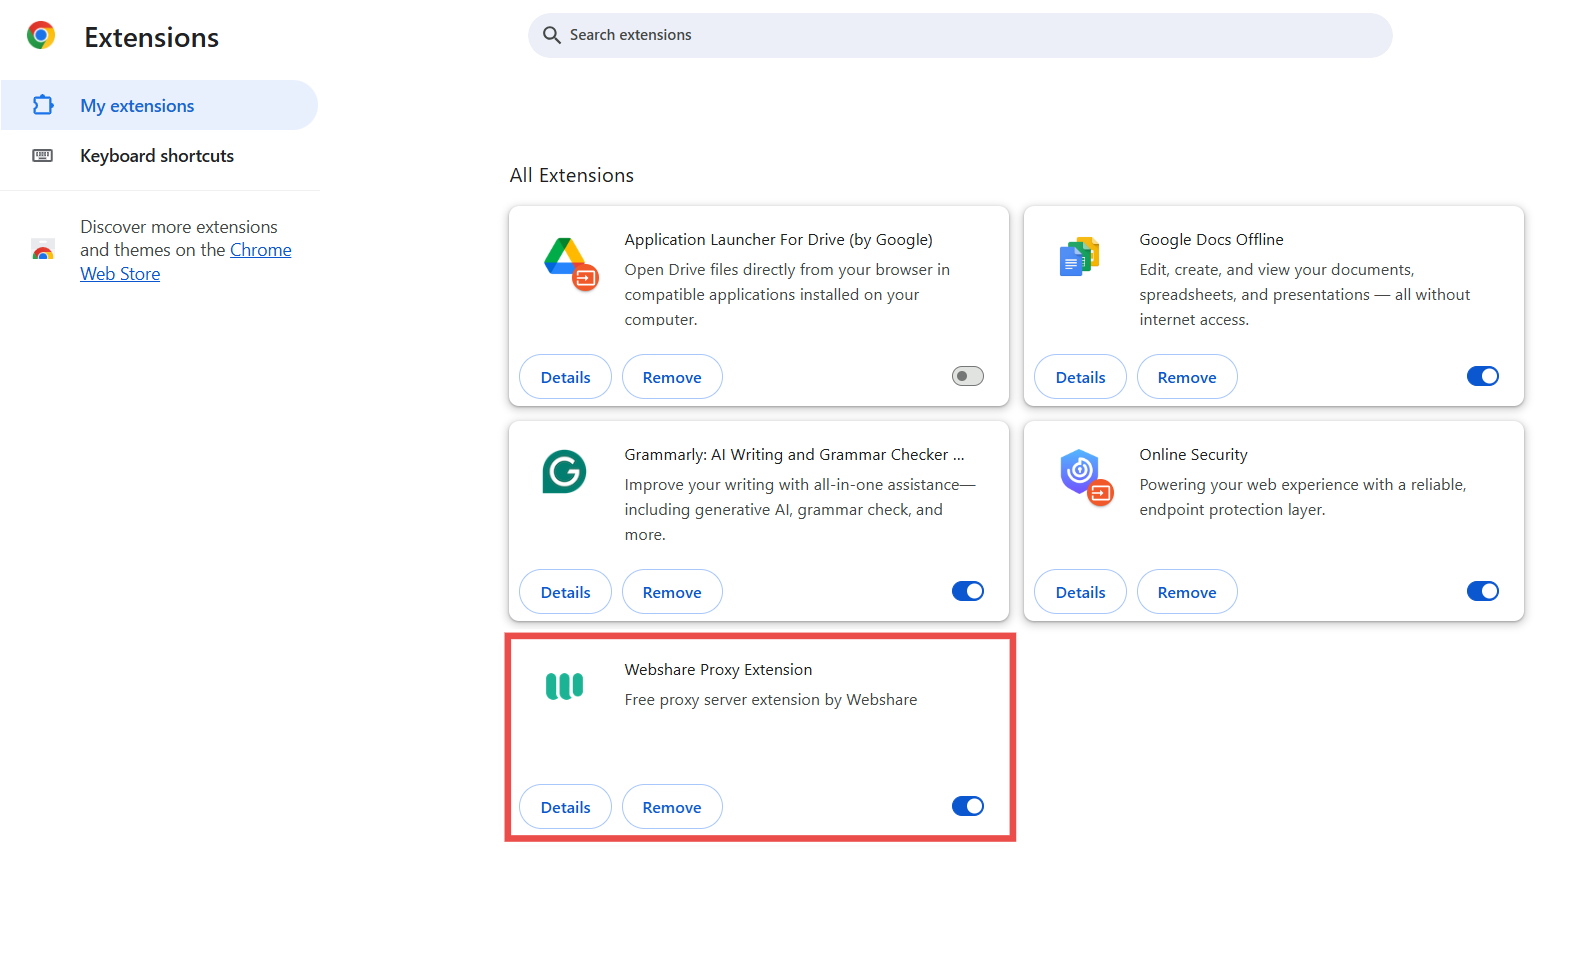
The extension should be automatically activated on your Chrome browser after installation. However, you can confirm this by opening your extension manager and checking that the Webshare Proxy Extension is toggled on.
Step 2: Connect to a proxy
Find the Webshare Proxy Extension on your browser’s extensions bar and click on it. If you aren’t already signed into your Webshare account, follow the instructions to log in.
Next, select a proxy from the list of available proxies on your account and click Connect.
Each proxy routes your web traffic through a specific country, which is indicated by the country’s flag next to the proxy’s IP address. It is advisable to select a country that hasn’t restricted Discord, otherwise you would be unable to connect to the platform.
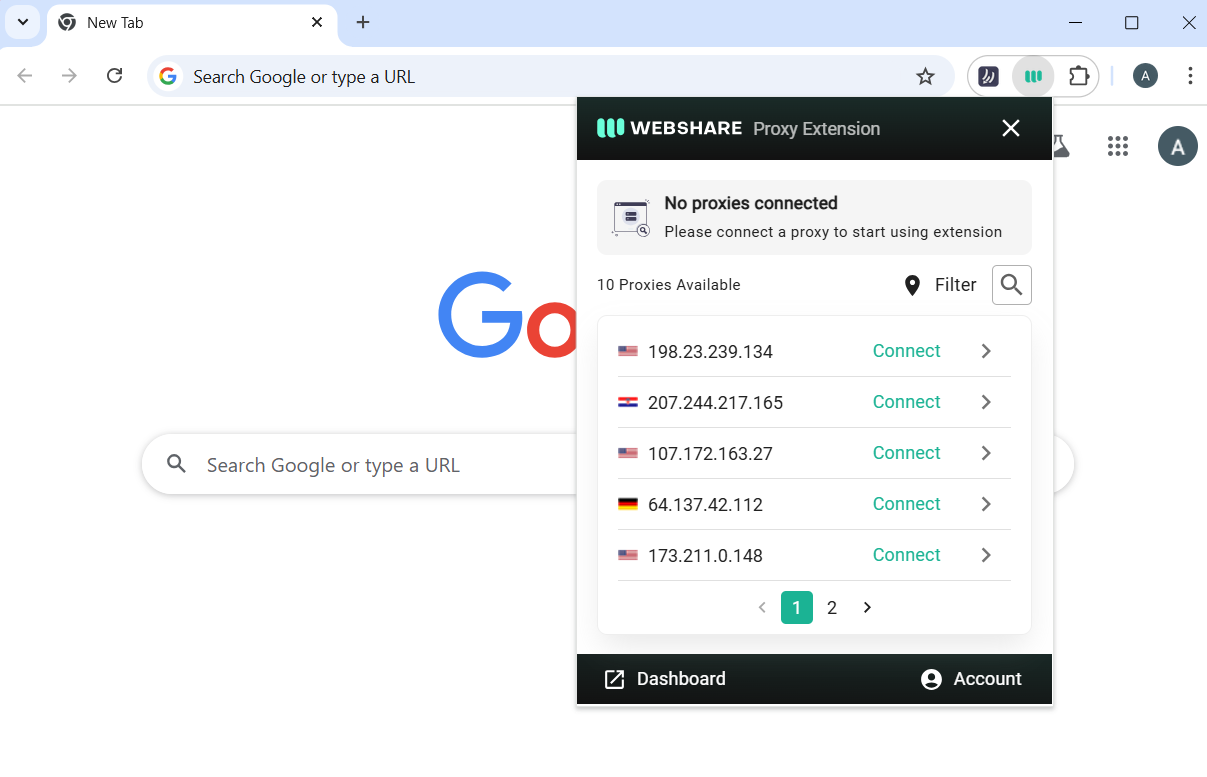
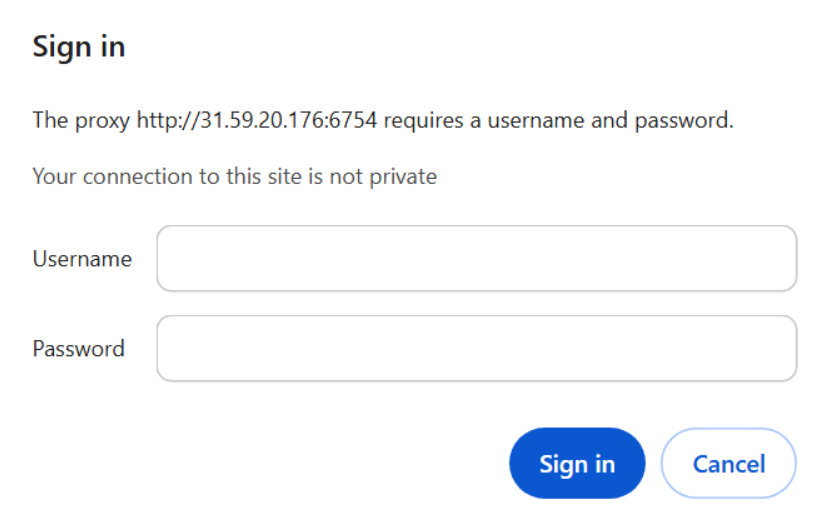
After connecting to a proxy, you may be prompted to sign in with a username and password. To do so, retrieve your sign-in details by clicking the arrow next to the proxy’s IP address and checking the Proxy Details.

Discord proxy for Windows instructions
There are two ways of setting up Discord proxy for Windows—manual and automatic. The manual setup is the default option, it usually requirs less effort despite what its name may assume.
Step 1: Open the Proxy settings:
Search for “Settings” in the Windows search bar and open the application. Alternatively, press Windows key + I to launch the Settings application from anywhere on your PC.
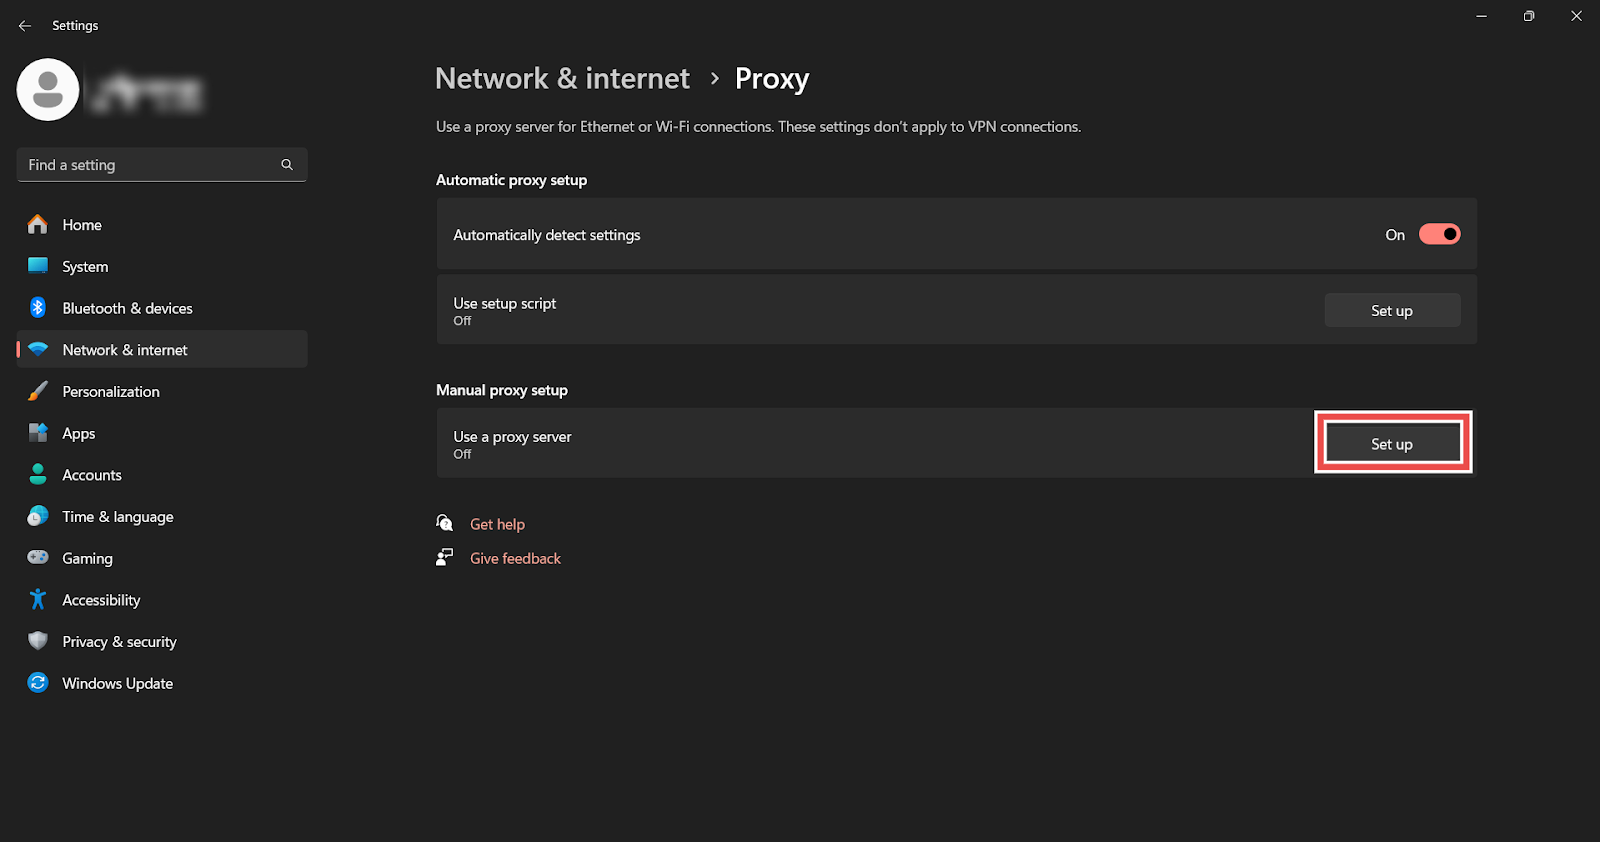
Once the app is open, navigate to Network & internet > Proxy.

Here, you will find Automatic proxy setup and Manual proxy setup. We are only concerned with the Manual setup, so scroll down to its section and click on the Set up button. If you’ve previously configured a proxy, click on the Edit button instead.
Step 2: Use Manual proxy setup
After clicking the Set up button, you’ll be greeted with the Edit proxy server page.
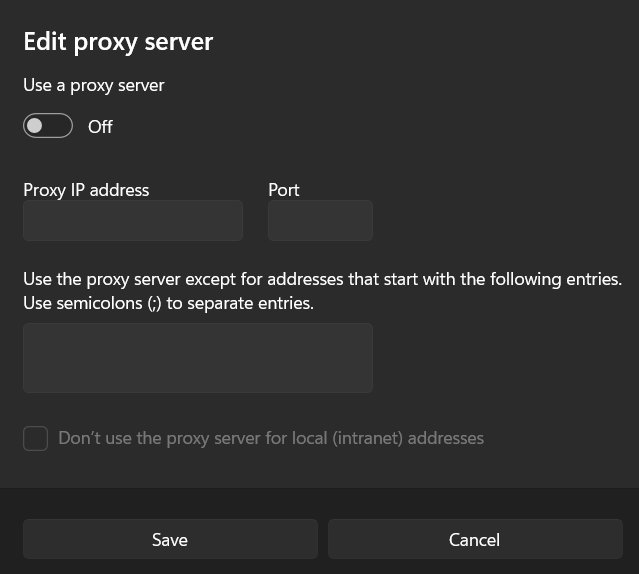
Toggle On the Use a proxy server option.
Next, enter your preferred proxy IP address and port in the appropriate input fields. You can use the credentials from any of the proxies available on your Webshare account. Note that some proxies may require you to sign in with a username and password.
Click on Save to apply the proxy to your PC.
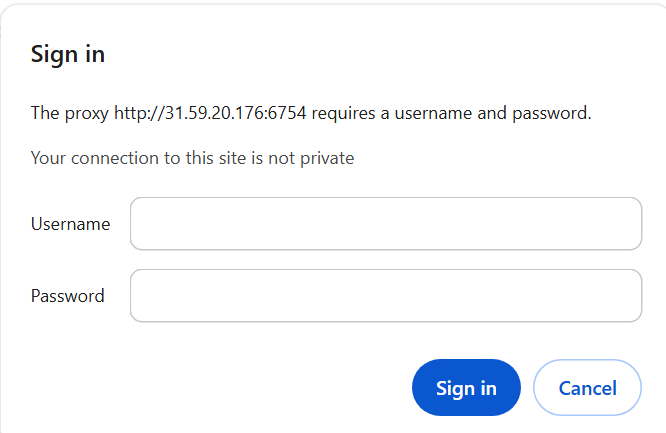
Once you’ve set up your proxy, open your preferred browser and try visiting a website. If the site loads and asks for proxy authentication, enter username and password for your proxy listed in the proxy list dashboard page.
The proxy affects all web traffic through your PC, including native applications and browsers. As a result, this single configuration applies to the Discord app as well as its website.
Discord proxy for Android instructions
Unlike iOS, Android is an open-source operating system that’s available to thousands of device manufacturers. Moreover, it’s implemented in many different flavors and skins, resulting in different interfaces across devices.
But that’s not a problem for us, setting up Discord proxy is similar on most Android devices, so you should be able to follow these instructions.
Step 1: Open Wi-Fi settings
You can access your Wi-Fi settings by swiping down to open the Quick Settings Panel and long-pressing the Wi-Fi icon. Another method is to open the Settings app, and navigate to Connections > Wi-Fi.
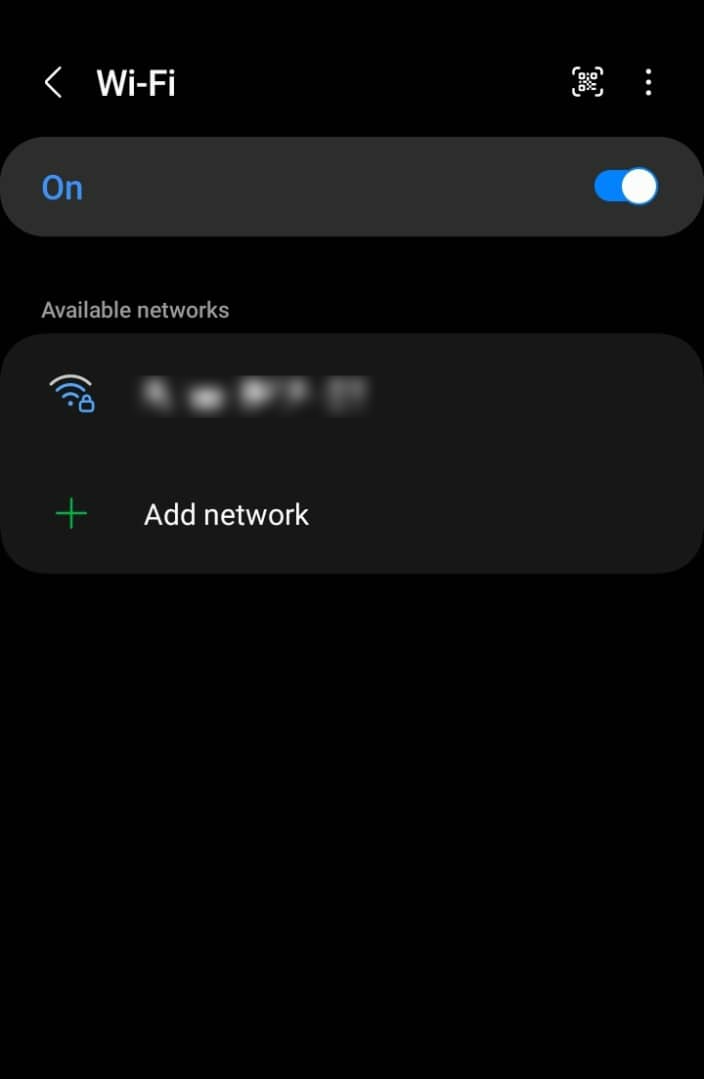
Tap on the name of the Wi-Fi you want to connect to and enter its password if required. Once you’re connected, tap on the Wi-Fi name again to open its settings. On some devices, you may need to tap on the gear icon next to the name.
Step 2 Configure Proxy Settings
On the Wi-Fi settings page, scroll down until you find the Proxy settings. On some devices you need to tap on Advanced Settings first, while on others you should tap the View More dropdown.

Tap on Proxy to see three options: None, Manual, and Auto-config. Select manual to reveal the Proxy host name and Proxy port input fields. Retrieve the proxy details from your Webshare dashboard and fill out the fields.
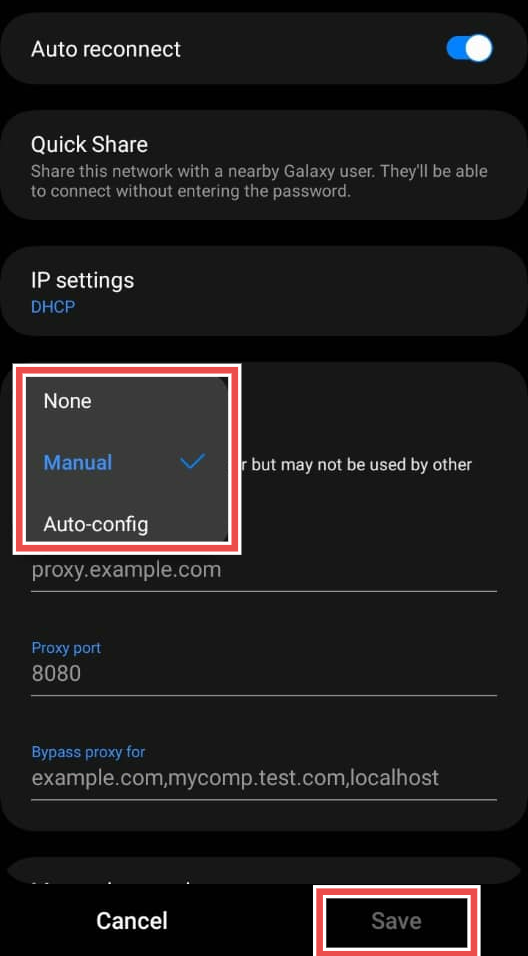
Tap on Save to confirm your changes. You may be required to sign in to the proxy server after setting up the manual proxy or when trying to browse the internet. Simply use the username and password on your Webshare dashboard.
Most devices include a third option to Bypass proxy for a comma-separated list of websites. This feature allows you to visit those websites without routing through a proxy. This way, you can access websites where proxies don’t work properly.
How to test Discord proxy?
After setting up a proxy server on your device, it’s advisable to test that it works for Discord. To do this, open your browser and visit the Discord website. If the site loads and asks for proxy authentication, sign in with the username and password for your proxy.
You can find your sign-in details on your Webshare account’s proxy list page.
Try logging in to your Discord account by entering your email and password or scanning the QR code with your mobile device.

If your proxy is set up correctly, you would be able to log in without issues and access your Discord friends and communities.

On Windows and Android devices, you can test the proxy on the Discord app by launching it and logging into your account.
Another way to test the proxy is using online tools like WhatIsMyIP to check your IP address. Visit the website and wait for the page to show your public IP address, IP location, and Internet Service Provider (ISP). Check that the information displayed matches the proxy you’re currently connected to.
How to turn off Discord proxy?
Using a Discord proxy offers advantages like increased privacy and access to your blocked account. However, there are times when you may need to turn off your proxy server. For example, proxies may introduce lag or high ping, making your voice calls and messaging slower.
Whatever your reason for turning off the proxy server, here’s how to do it on the Chrome extension, Windows, and Android.
Turn off Discord proxy on Chrome extension
Navigate to your browser’s extension bar and click on the Webshare Proxy Extension. If you’re connected to a proxy, click on Disconnect.
That’s all you need to do—it’s literally as simple as clicking a button. If you need to use the proxy again, open the extension and click on Connect. This way, you can connect to and disconnect from a proxy on the fly.
Turn off Discord proxy on Windows
Open Proxy settings by launching the Settings app on your Windows PC and navigating to Network & internet > Proxy.
Next, scroll down to the Manual proxy setup and click on Edit. Toggle off Use a proxy server to deactivate the Proxy IP address and Port fields. Click Save and your PC will immediately confirm your changes.
You can confirm that the proxy is turned off by using WhatIsMyIP. The IP address and ISP shown should match your PC’s original IP address and ISP.
Tip: Quickly check your PC’s original IP address by opening the command prompt and entering “ipconfig”. Look for IPv4 Address under your active Wi-Fi or Ethernet connection.
Turn off Discord proxy on Android
Open Proxy settings by launching the Settings app on your Android device and navigating to Connections > Wi-Fi. Tap on the name of Wi-Fi with the configured proxy (on some devices, tap on the gear icon instead).
In the Wi-Fi settings, scroll down to find the Proxy dropdown and tap on it to reveal three options: None, Manual, and Auto-config. Select None to disable the proxy on the Wi-Fi, then tap on Save. This action hides the Proxy host name and Proxy port details.
What is the best proxy to use with Discord?
When looking for the best proxy to use with Discord, Webshare comes out on top thanks to its ease of use, cross-platform compatibility, and generous free plan. It provides a Chrome extension for quick proxy connection and switching, allowing users to bypass complex configurations.
It also works across Windows, macOS, Android, and iOS, ensuring a seamless experience on any device. Webshare's free plan includes 10 proxies, making it an attractive option for those who need a reliable proxy without an upfront cost.


