Get 10 Free Proxies For Dolphin Anty
In this tutorial, we will focus on two key methods for proxy integration within Dolphin Anty. First, we will explore how to set up a single proxy, a useful approach for personal browsing or specific tasks. Following that, we'll delve into the process of setting up batch proxies, which is ideal for managing multiple proxies simultaneously for more extensive operations. Let’s get started!
What is Dolphin Anty?
Dolphin Anty is a high-performance anti-detection browser designed for users seeking enhanced privacy and security online. It provides advanced features to protect against tracking and fingerprinting, making it ideal for web scraping, automated testing, and managing multiple online accounts.
Beyond proxy management, Dolphin Anty includes robust tools for handling browser fingerprints and simulating various device profiles. Using advanced algorithms, it dynamically adjusts browser attributes—such as user-agent strings, screen resolutions, and plugins—to minimize the risk of detection. This fingerprint management system, combined with features for device emulation and automation, enables users to perform tasks discreetly and effectively.
Before starting
To set up Webshare proxies on Dolphin Anty, you will need an account on Webshare. We offer 10 premium proxies for free to newcomers, with no credit card or coupon code required. Simply sign up for a Webshare account, and the 10 free proxies will be assigned to you automatically.
How to set up a single proxy in Dolphin Anty?
Setting up a single proxy in Dolphin Anty will take five simple steps:
1. Download Dolphin Anty
First, you need to download Dolphin Anty. Visit the official DolphinAnty website and download the application compatible with your operating system. Follow the installation instructions provided on the website to install the software on your device.
2. Create a profile
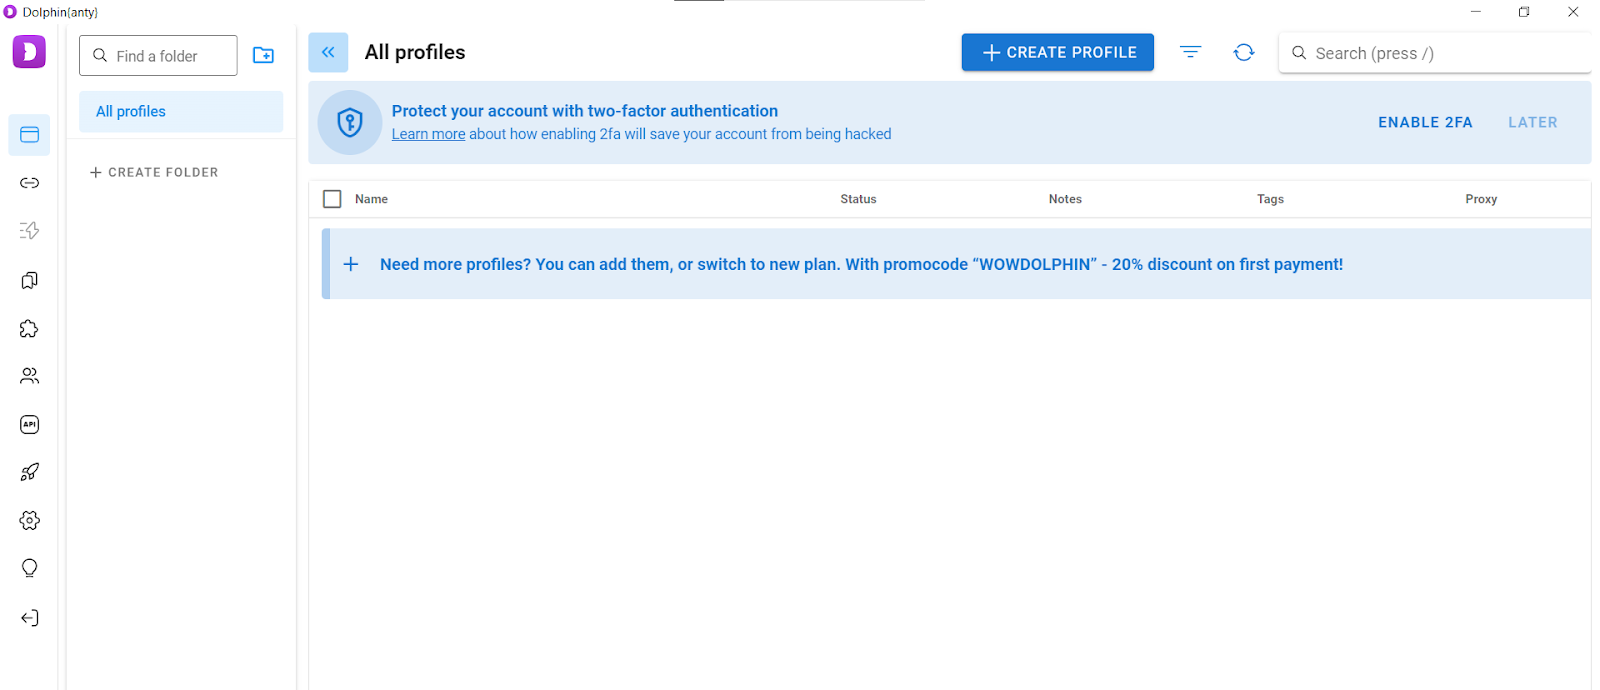
To begin, make sure you are on the Browsers view within DolphinAnty. Look for the "+ CREATE PROFILE" button and click on it to bring up the profile creation form.
3. Configure Your profile
The creation form presents several options to tailor your profile according to your requirements.
- Choose a Name: Assign a distinctive name to your profile for easy identification. Additionally, you can add a "Status" to describe the state of your proxy and use "Tags" to categorize and manage multiple profiles efficiently.
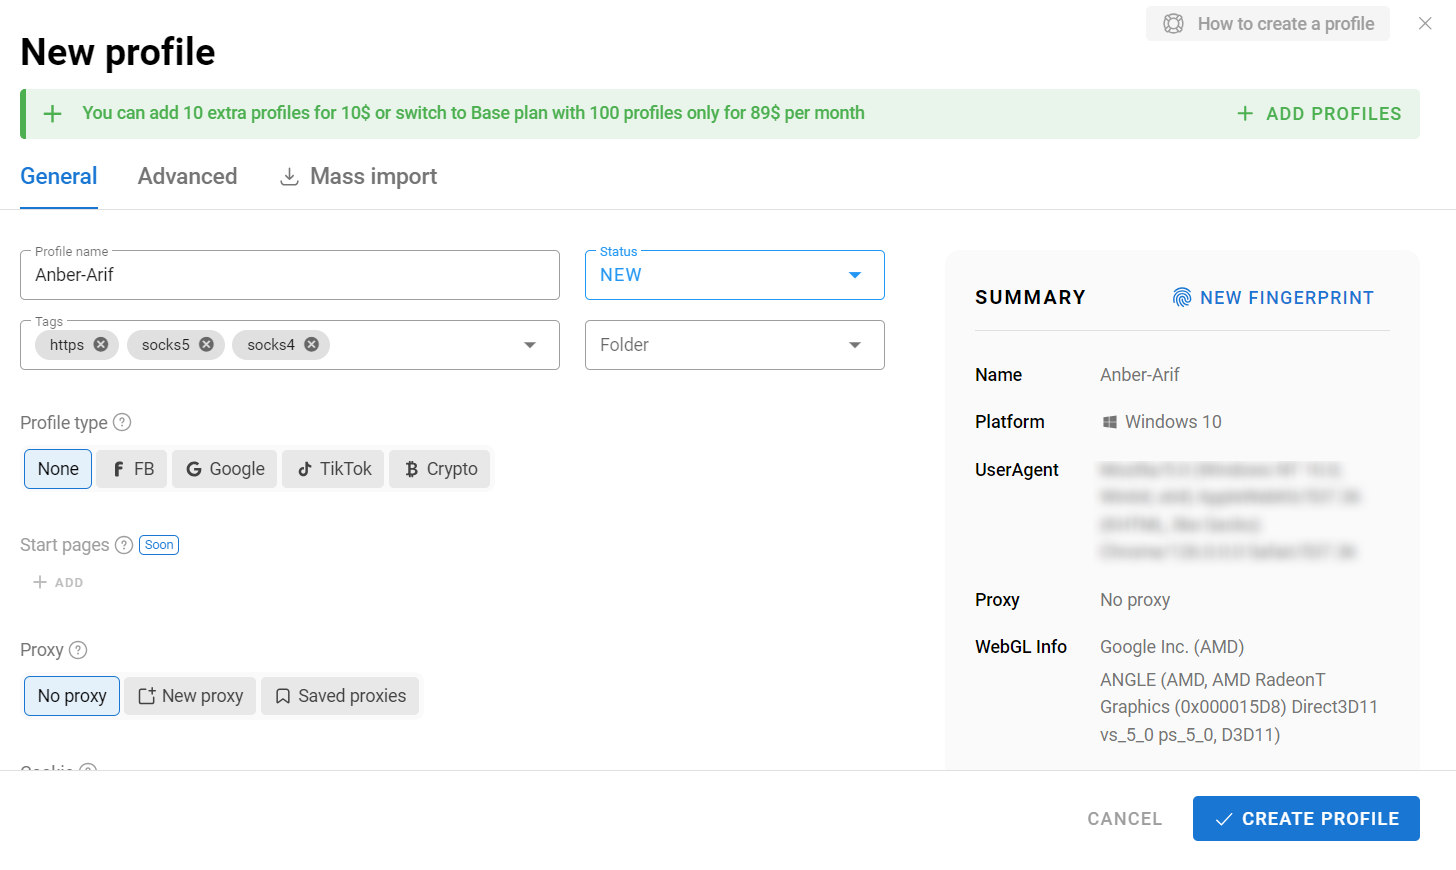
- Select the Profile Type: You can also specify a type, which helps in organizing and sorting your profiles more effectively.
4. Configure a Proxy
- Option 1 - Add a New Proxy: Select "New Proxy" to enter the proxy settings.
- Select Proxy Protocol: Choose the proxy protocol suitable for your needs from HTTP, SOCKS4, SOCKS5, or SSH. For this example, select "HTTP."
- Input Proxy Details: Dolphin Anty supports various proxy formats. If you have a one-line configuration from AnyIP, you can paste it directly into the "proxy" field.
- Test Proxy: Click the test button to verify the proxy settings. If the credentials are correct, you’ll see the proxy’s IP, location, and time zone below the proxy field.
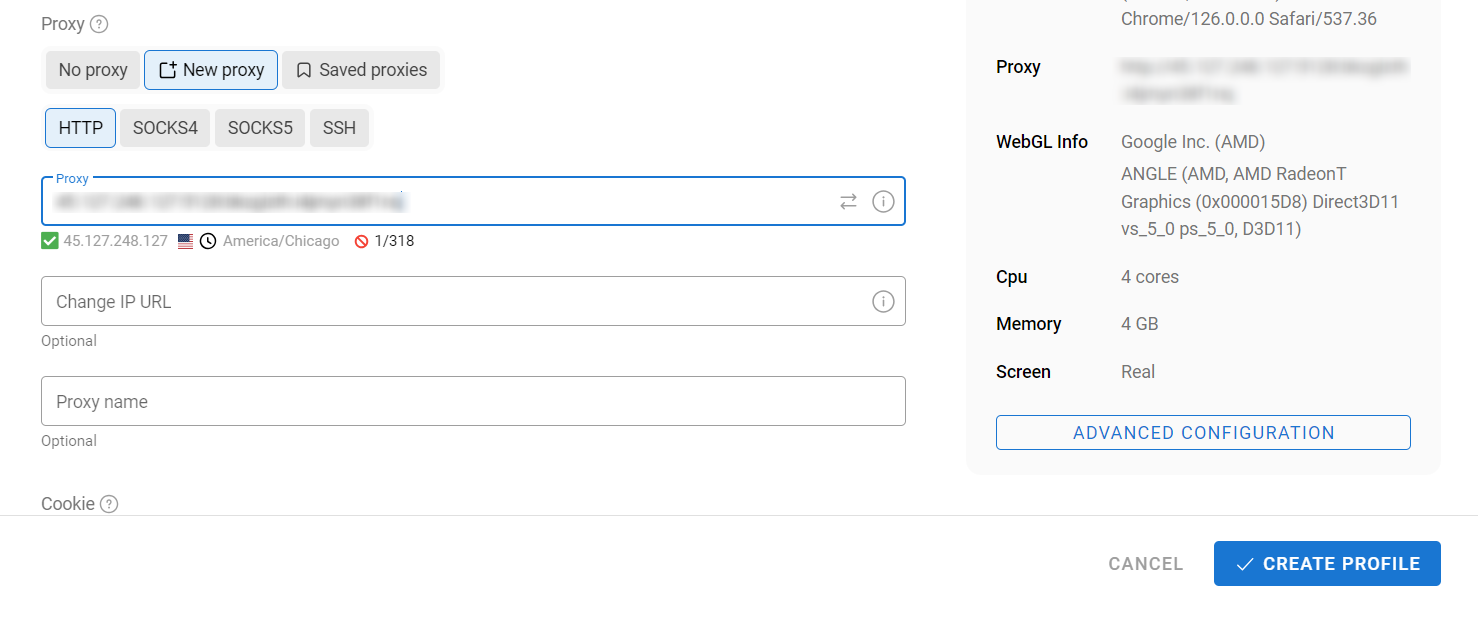
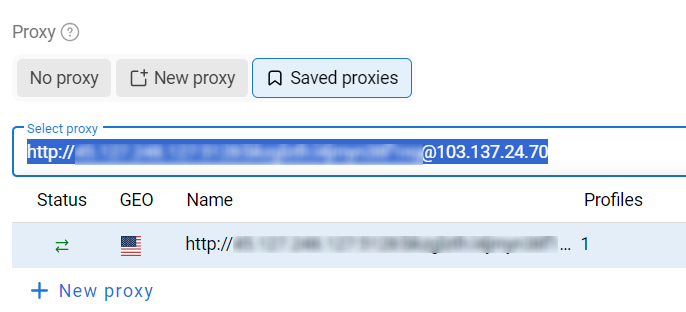
- Option 2 - Add a Saved Proxy: Select "Saved Proxies" to view a list of proxies you have saved. Choose the desired proxy from your saved list to use for this profile.
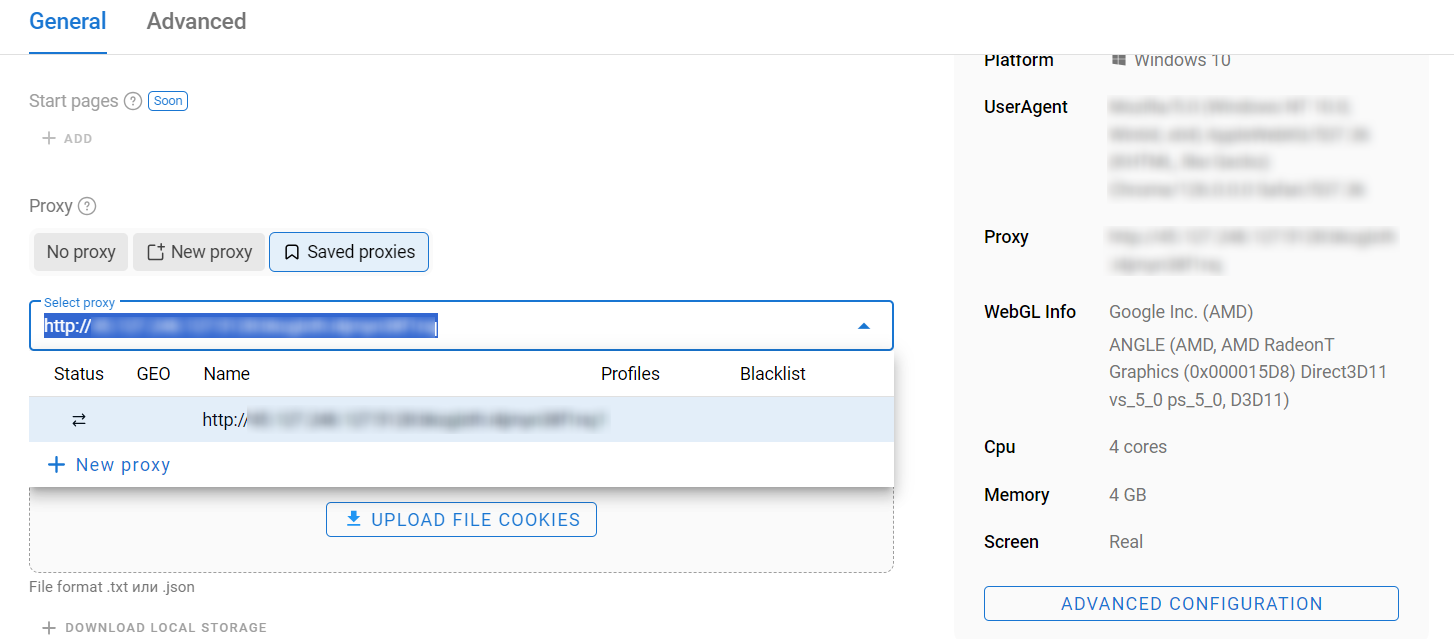
5. Static IP Address Configuration
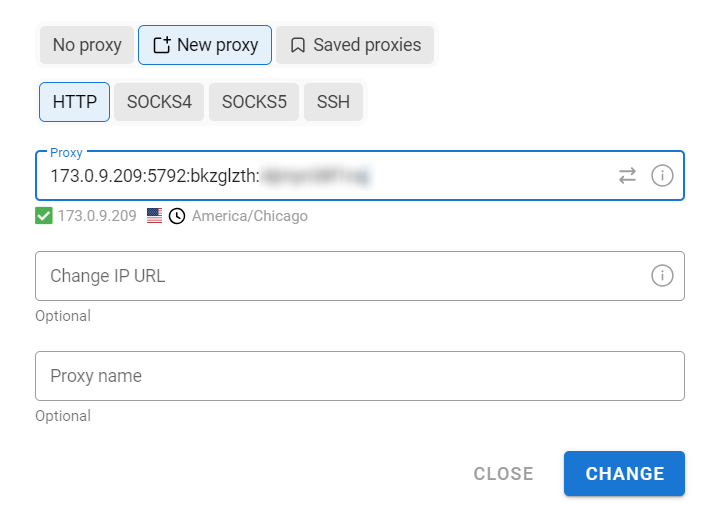
Static IP address proxies include Datacenter proxies and Static residential proxies. To set up a proxy connection, you will need specific information found on your account’s proxy list page.
- Proxy Type (Internet protocol): Select HTTP or SOCKS5.
- IP/Host: Enter the Proxy Address number provided in your account’s proxy list (e.g., 185.199.229.156).
- Port: Use the specific port number listed (e.g., 7492).
Example configuration for a static IP address proxy is as:
6. (Optional) Rotating IP Address Configuration
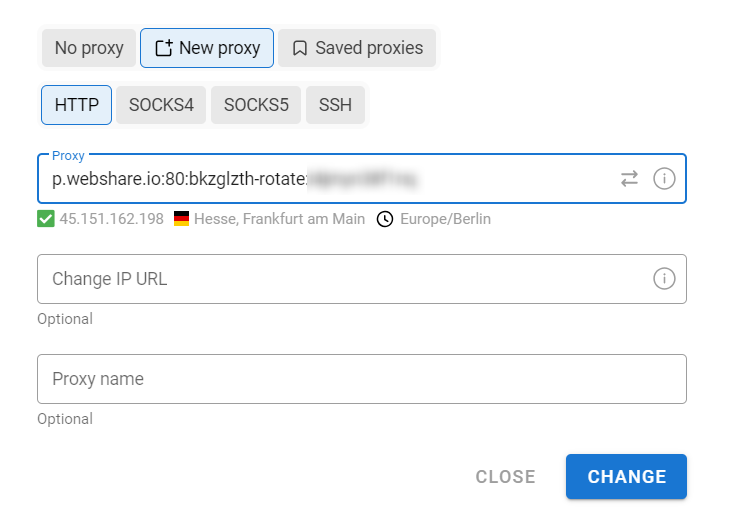
Rotating IP address proxies include Datacenter proxies and Residential proxies. These can be configured using the Rotating Proxy Endpoint available to all users.
- Proxy Type (Internet protocol): Select HTTP or SOCKS5.
- IP/Host: Use the domain name provided (e.g., p.webshare.io).
- Port: Enter the proxy port number (e.g., 80).
To use country-specific rotating IP addresses, configure the country settings on your Rotating Proxy Endpoint configuration page. Select your preferred countries by clicking the ‘Filter by Country’ button under Proxy Country.
Please note that changing your Proxy country will update your Proxy username field, which you will need to update in your settings.
Example configuration for a rotating IP address proxy is as:
7. Save the profile
After configuring your profile with all the necessary settings, save it by clicking the "+ CREATE" button.
8. Start the profile
- Launch the Profile: Click on “START” to activate the profile. Dolphin Anty will open a new browser instance based on Google Chrome.

- Verify Profile Details: The new browser window will display the name of your profile along with the Dolphin Anty extension, which provides session details.
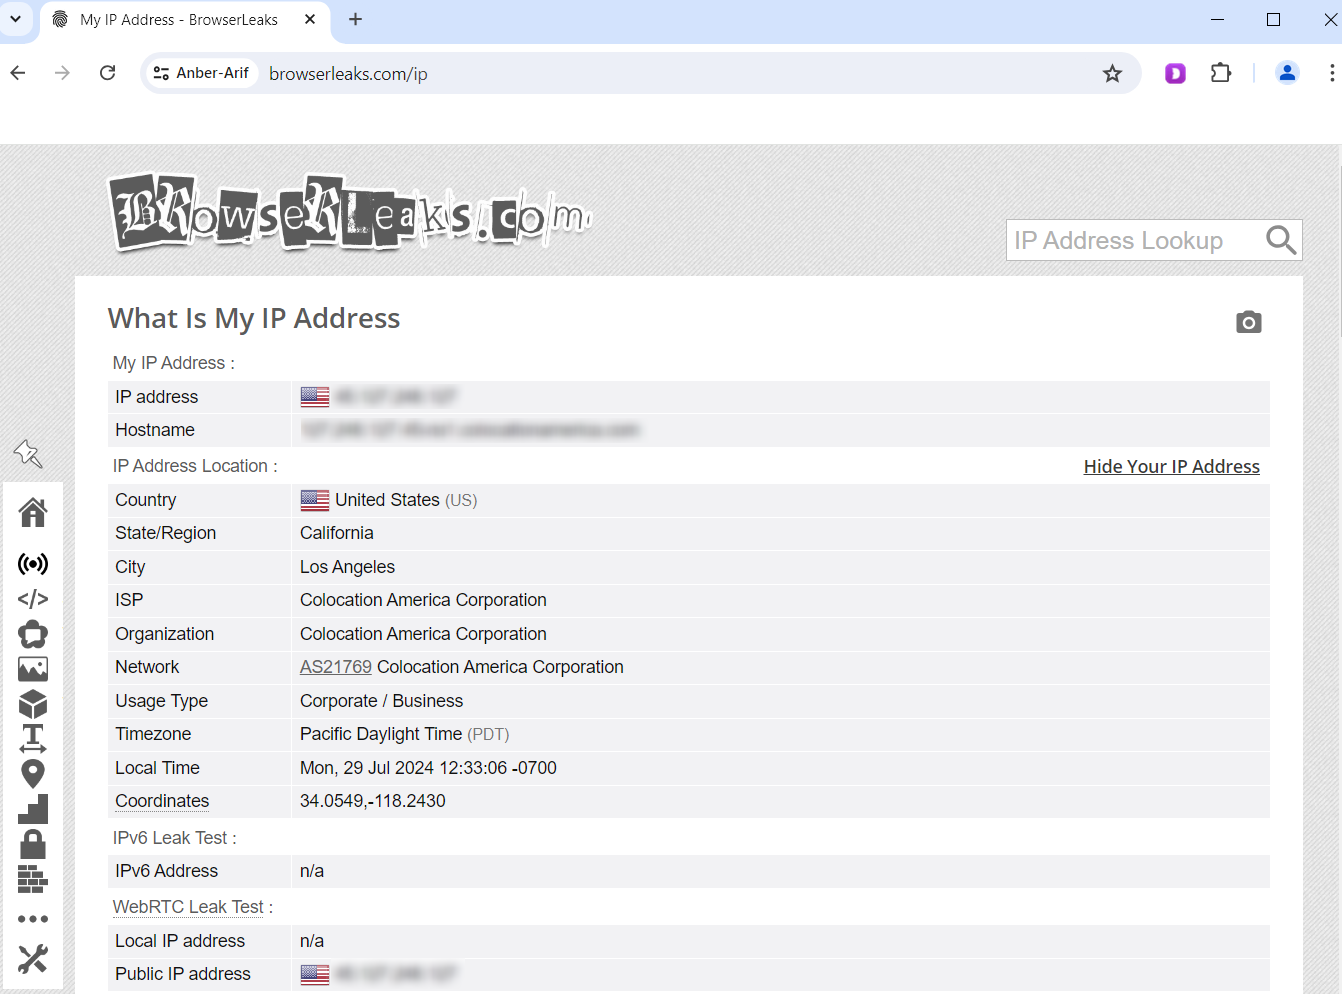
- Test the Proxy: Visit a site like browserleaks.com/ip to ensure your proxy is functioning correctly.
- Secure Browsing: You can now use this browser instance to surf the internet securely and anonymously.
How to set up batch proxies in Dolphin Anty?
Setting up batch proxies in Dolphin Anty is a streamlined process that allows you to manage multiple proxies efficiently. Follow these detailed steps to configure batch proxies:
1. Prepare your proxy list
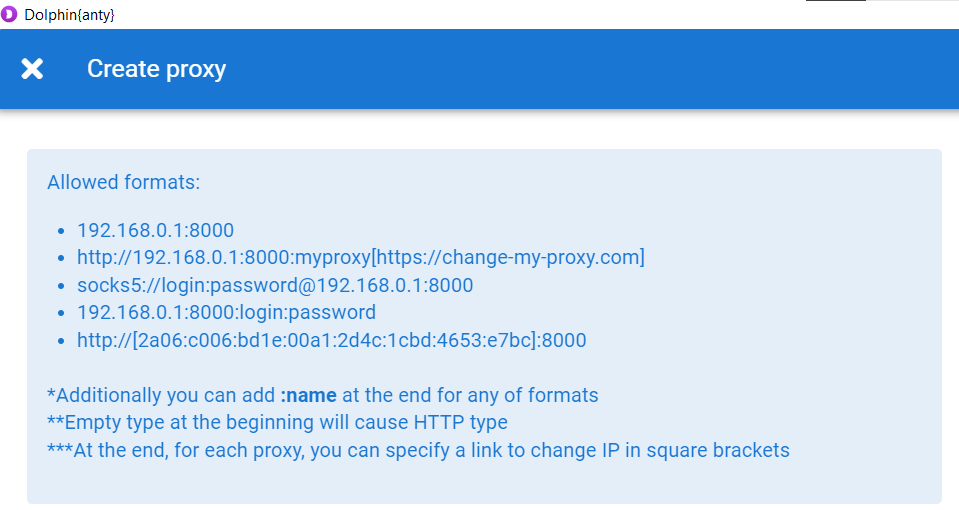
Ensure that your proxies are listed in a .txt or .csv file. The basic format should be:
- proxyIP: port:username:password
- Example: 192.168.1.1:8080:username1:password1
If you are using Webshare, log into your account, navigate to the Proxy list page, and click the Download button. This will download a text file with your proxy configuration. Open this file and copy all the contents for the next steps.
2. Create proxy
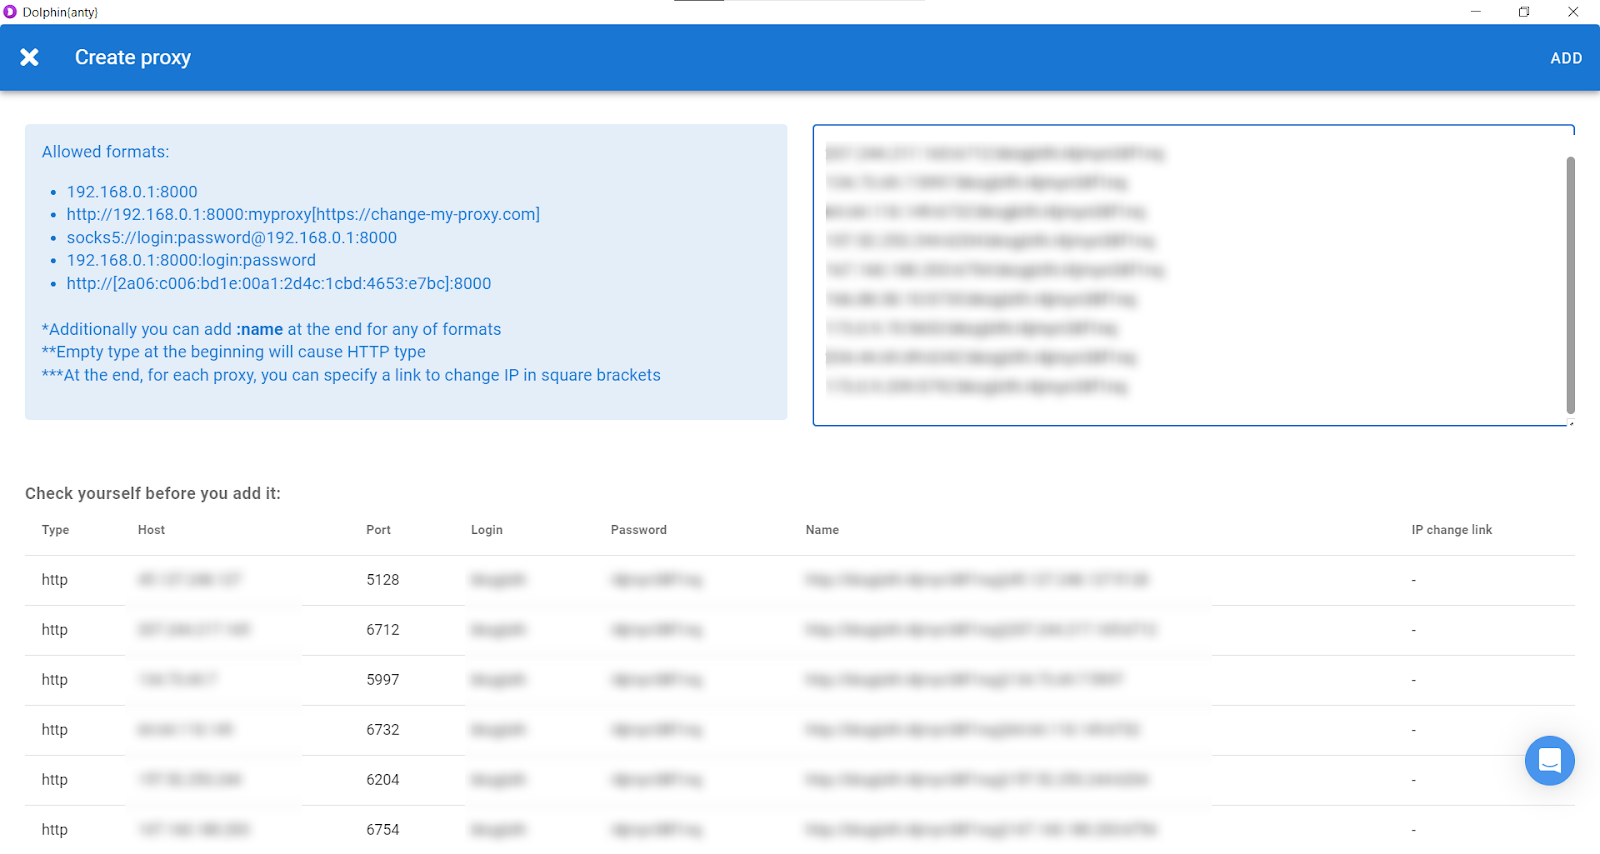
In the dashboard, open the “Proxies” tab on the left panel and click the “+” button to initiate the process of adding proxies in bulk.

3. Paste your proxies
On the left, the available input formats will be displayed. Paste the list of proxies in the selected format into the fields on the right and click the “Add” button.
4. IP rotation
The imported proxies will be displayed in the “Proxy” tab. By clicking on a specific proxy, you can check the connection and, if necessary, add a link for IP rotation.


Later, when creating or editing a profile, instead of manually setting a proxy, you can simply select it from the list and link it to a specific profile.
Wrapping up: proxy setup in Dolphin Anty
Understanding how to set up single and batch proxies in Dolphin Anty is essential for maintaining high levels of privacy and efficiency in your online activities. The single proxy setup provides a quick and straightforward way to enhance your anonymity, while the batch proxy setup allows for more complex operations, such as managing multiple accounts and large-scale web scraping, with ease.


