


DuoPlus is the first anti-detect cloud phone, designed for automation, TikTok growth, and business scaling. It helps you deploy real ARM mobile devices with GPS and SIM data from different locations to run ads, manage short videos, and handle live sales without issues.
Using a proxy with DuoPlus solves common problems like account bans, IP tracking, and access restrictions. For example, if you're running multiple TikTok accounts for marketing, using the same IP across all of them can trigger security checks or bans. A proxy assigns a unique IP to each account to make it look like they are being managed from different real devices in different locations.
Therefore, in this guide, we’ll cover two simple ways to set up proxies with DuoPlus. You'll learn how to integrate a single proxy, set up batch proxies, and configure a residential proxy.
Before Starting
To start with, we initially have to get some proxies. These will be utilized later in this guide. Webshare offers access to 10 free proxies, which can be used by anyone who signs in, even without providing credit card details. These proxies provide 1GB of monthly bandwidth and support IP addresses from multiple countries.

To start off, go to the Webshare website and create an account. Following your sign-up, you will receive your free proxies. On the home page, click the “Proxy List” section, and you will see the details of the proxies.
To get started, we are using the free plan, but if you need more proxies or bandwidth, you can explore Webshare’s paid plans.
How to set up a single proxy in DuoPlus?
The following steps will walk you through how to get started with setting up a single proxy.
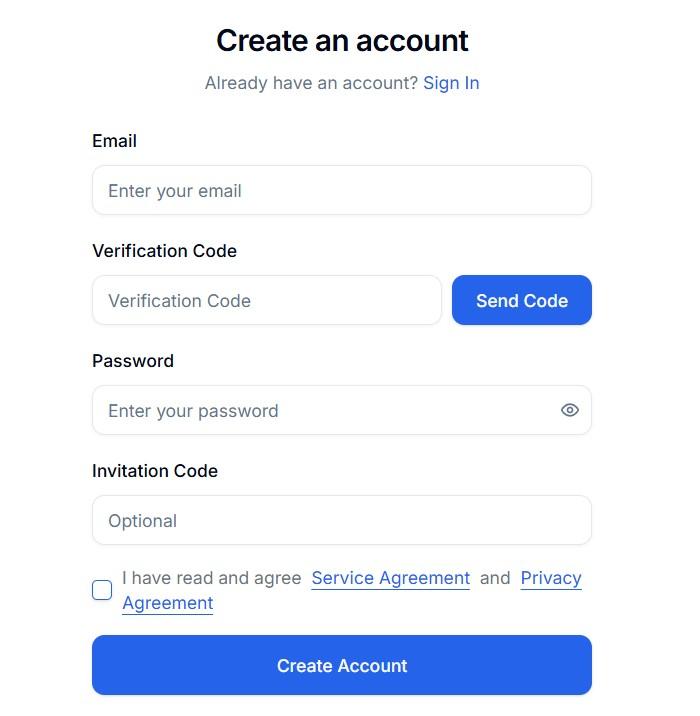
Step 1: Sign up for DuoPlus
Go to the DuoPlus website and create an account by entering your email address. In the verification code field, enter the code you receive. Set a password, and if you have an invitation code, you can enter it as well.
Step 2: Access Proxy Settings
Sign in to your DuoPlus account by entering your username and password. Then, you will be taken to the DuoPlus home page.
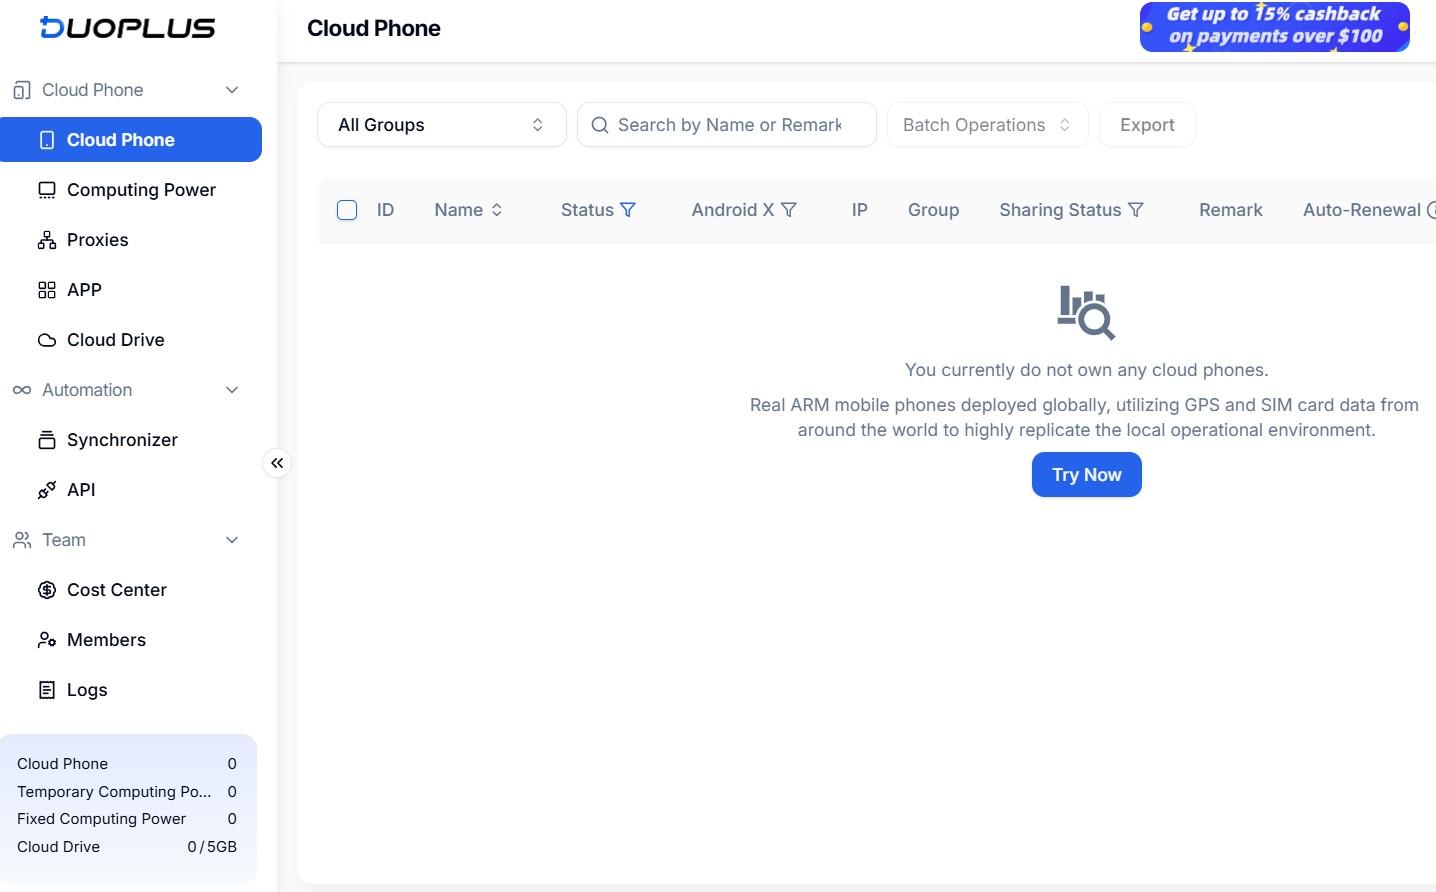
Click on “Proxies” in your left side menu. Then, the Proxies page will be visible. Next, click on the “Add” button.

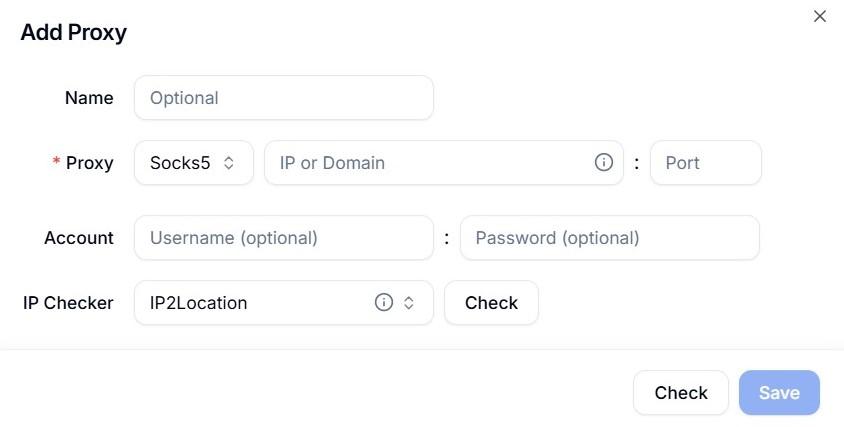
Then, the “Add Proxy” dialog box would appear.
Step 3: Enter Proxy details and confirm
Fill out the required proxy details.
- Proxy IP address: Enter the IP address or domain.
- Proxy Port: Provide the port number.
- Proxy Account: If needed, provide the username and password. It's typically needed for most paid proxy providers. For Webshare's instance, you find it in your dashboard.
Once all the details are added, click on the “Check” button. You will be indicated with the following successful message “Proxy IP connection test passed.” and the proxy details. Click on the “Save” button to finish off the setup process.

You have now successfully set up a single proxy in DuoPlus.
Optional: How to set up rotating proxies in DuoPlus?
The process of setting up a rotational proxy is similar to the process of setting up a normal proxy. To configure the rotational proxy, fill out the required proxy details.
- Proxy Name: Rotating Proxy
- Proxy IP address: Enter the IP address or domain. For Webshare users, follow this guide.
- Proxy Port: Provide the port number.
- Proxy Account: If needed, provide the username and password.

How to set up batch proxies in DuoPlus?
With Batch proxies, you can add multiple proxies at once. Instead of adding proxies one by one, you can import them in bulk. This is especially useful for users who need to switch between different IP addresses or locations frequently.
The following are the steps to be followed to set up batch proxies in DuoPlus.
Step 1: Access Batch Proxy Settings
Go to the DuoPlus home page. Click on “Proxies” in your left side menu. Then, the Proxies page will be visible. Next, click on the “Batch Add” button.

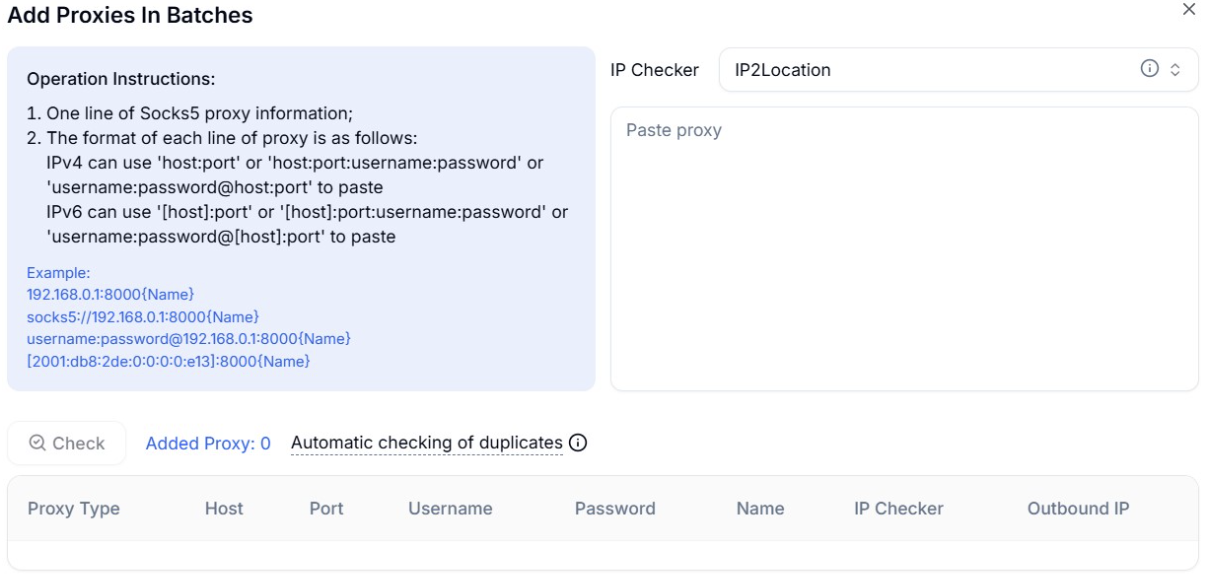
Then, the “Add Proxies In Batches” window is displayed.
Step 2: Enter Proxy details in Batch
In the batch input field, enter the proxy details using the following format.
- host:port:username: password
Each proxy should be on a new line.
Note: At present, DuoPlus only supports Socks5 proxy IPs. Other proxy types, such as HTTP(S) and SSH, are not compatible.
When adding proxies in batches, follow the correct format based on whether you are using an IPv4 or IPv6 address.
IPv4 Proxy Format
For IPv4 addresses, you can use any of the following formats.
- host: port
- host:port:username: password
- username:password@host: port
IPv6 Proxy Format
For IPv6 addresses, enclose the host in square brackets [ ]. You can use these formats.
- [host]: port
- [host]:port:username: password
- username:password@[host]: port
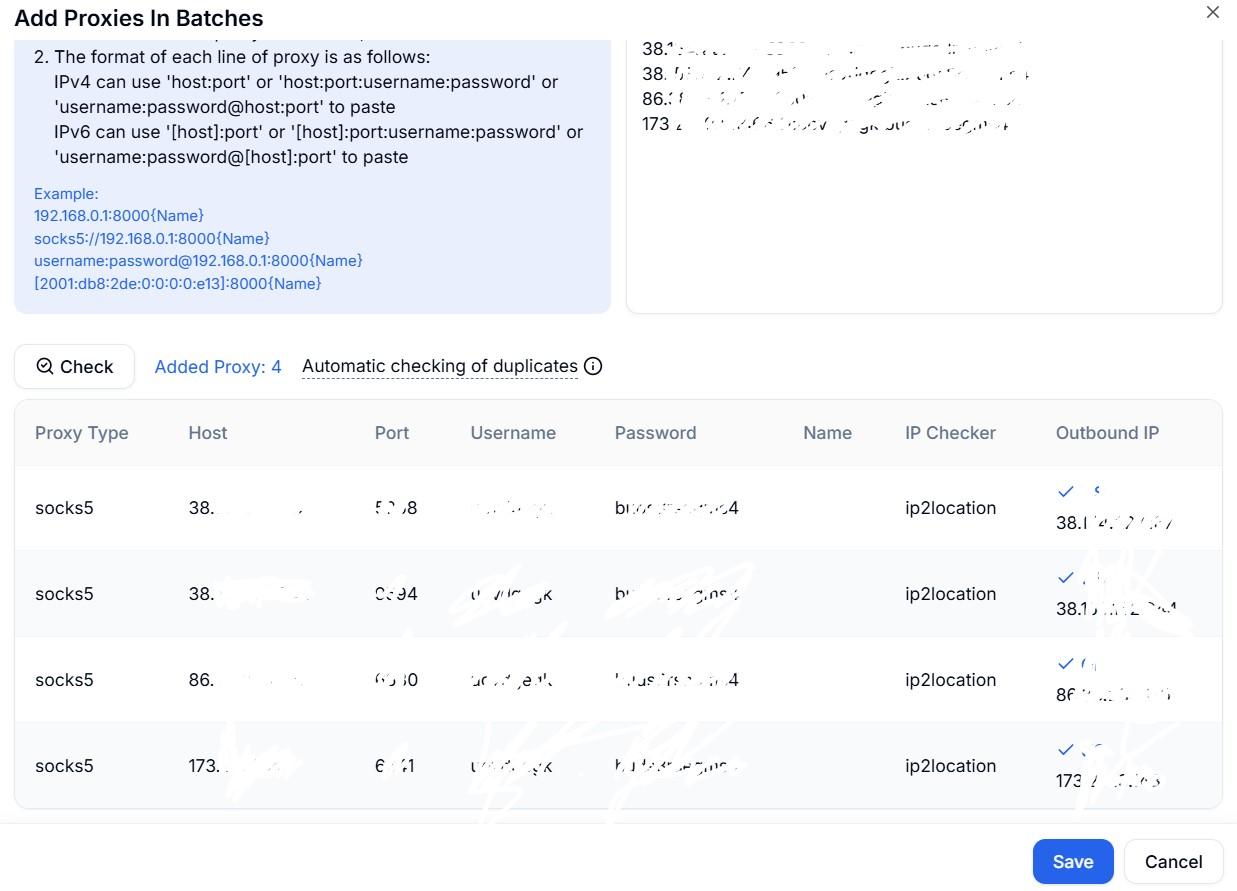
Step 3: Confirm and review proxies
After the batch proxy details are entered, click on the “Check” button. The proxies will be added, and they will be listed as shown below.
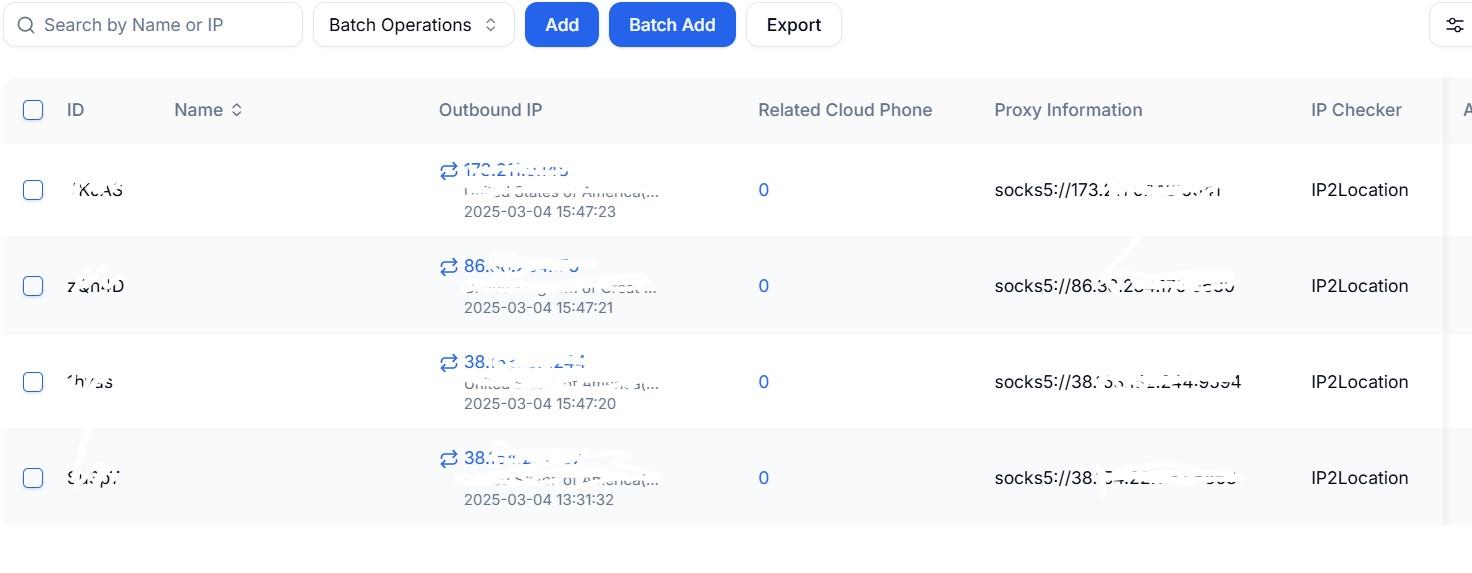
You have successfully set up batch proxies in DuoPlus.
Now that your proxies are set up, you can manage multiple accounts and avoid restrictions without worrying about bans.


