Mozilla Firefox is one of the most popular and widely used web browsers, known for its emphasis on privacy, security, and customization. With its open-source foundation and powerful extension ecosystem, Firefox provides users with a flexible browsing experience.
In this article, we'll explore how to set up a proxy in Firefox. Whether you're looking to enhance your online privacy, access geo-restricted content, or secure your web activity, configuring a proxy can be a vital step in achieving those goals. We'll guide you through the process, step-by-step, to ensure you're able to set up a proxy smoothly.
How to set up a proxy in Firefox
Follow the steps below to configure a proxy in Firefox:
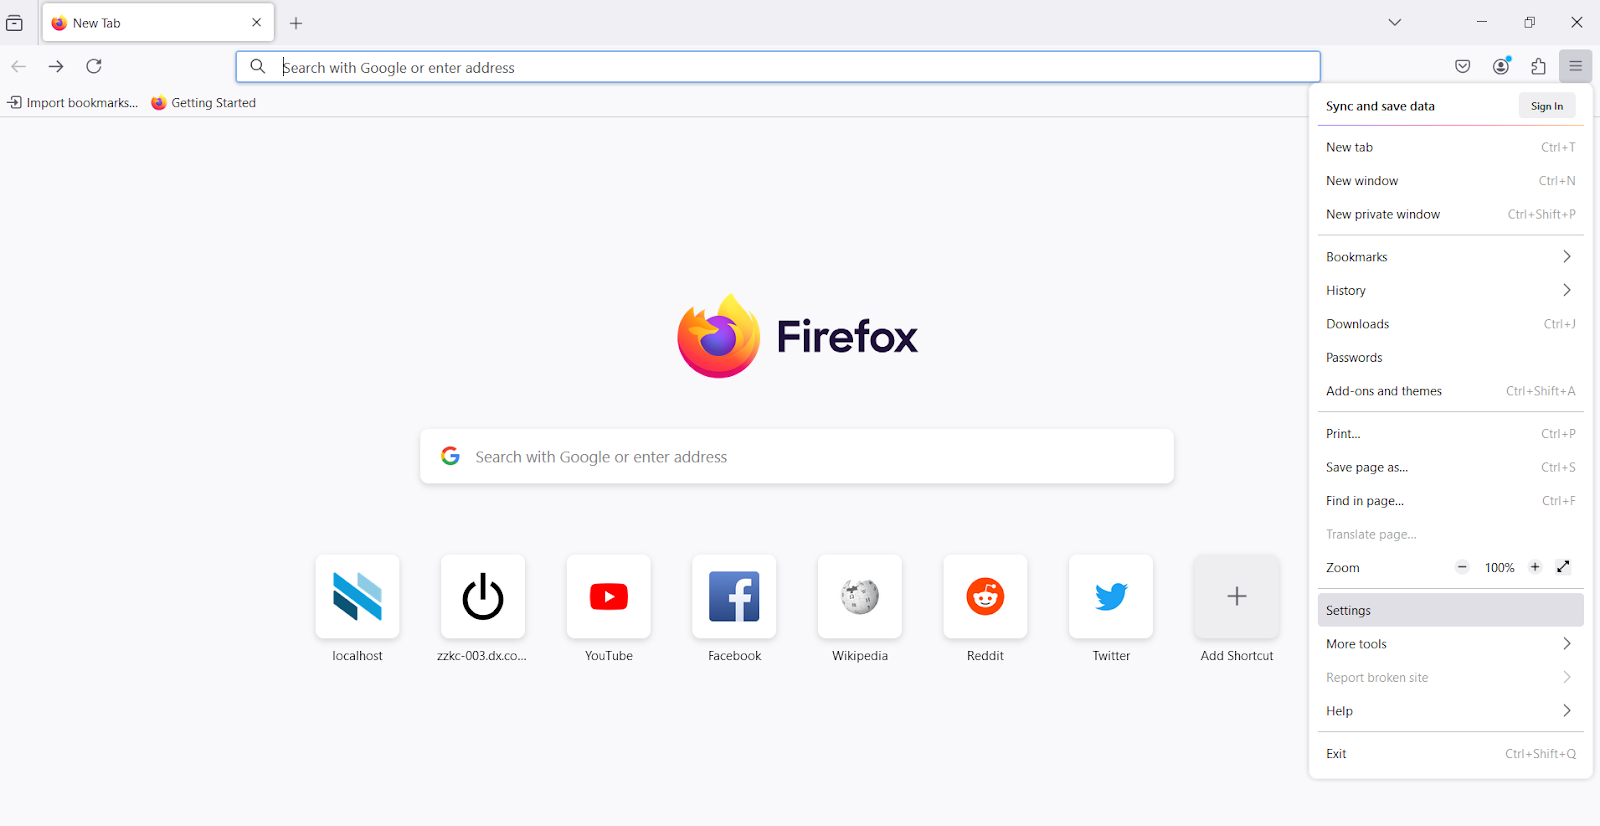
1. Open Firefox preferences
To begin configuring a proxy in Firefox:
- Launch Firefox on your device.
- In the upper-right corner, click on the Menu button (three horizontal lines).
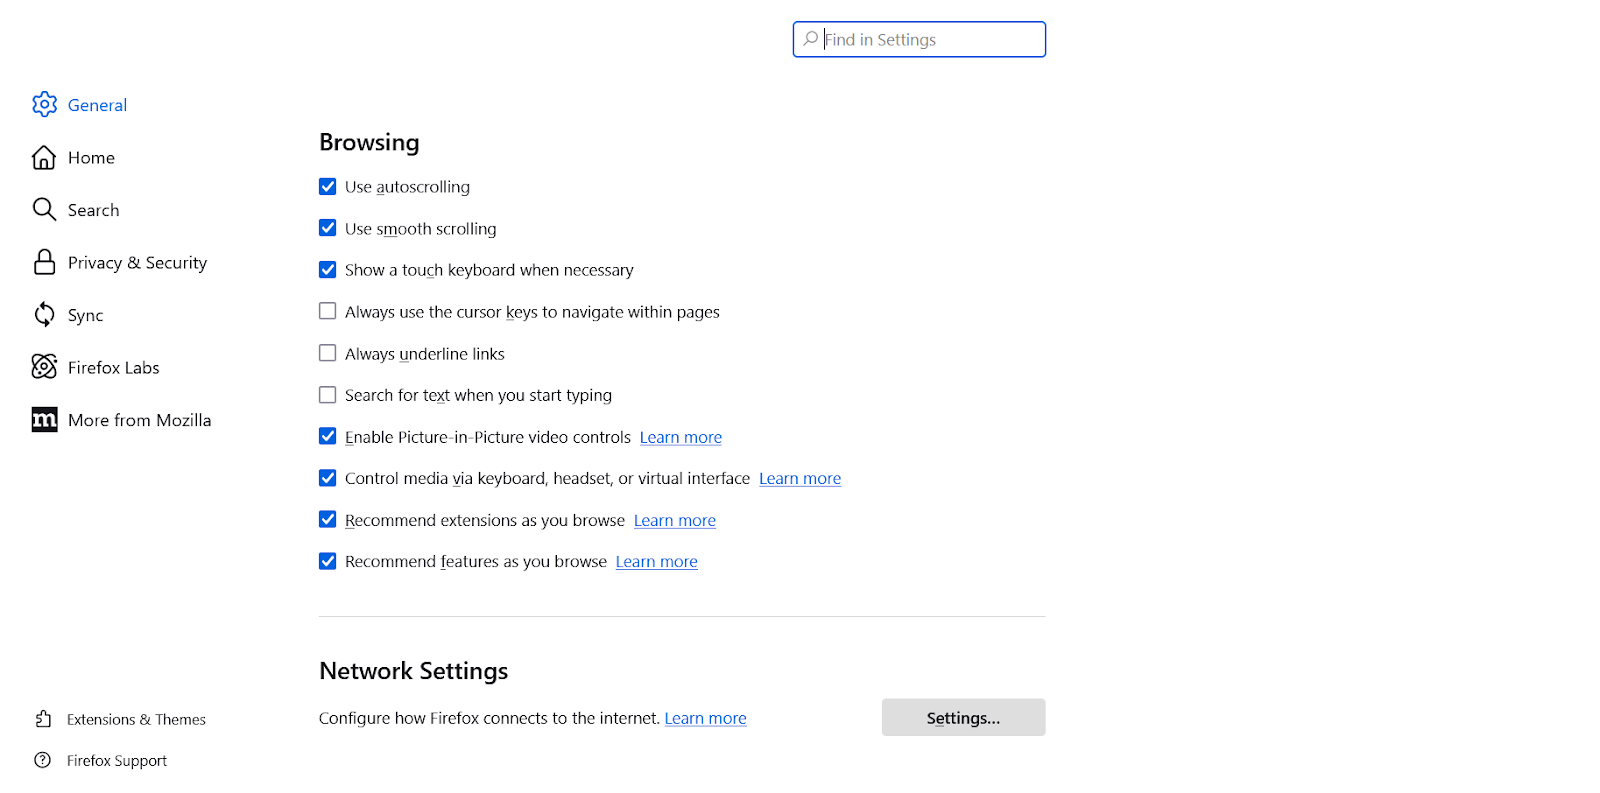
- Select Settings (or Preferences if you're using macOS).

- Alternatively, you can access the settings directly by typing about:preferences in the Firefox address bar and pressing Enter.
3. Choose a proxy configuration option
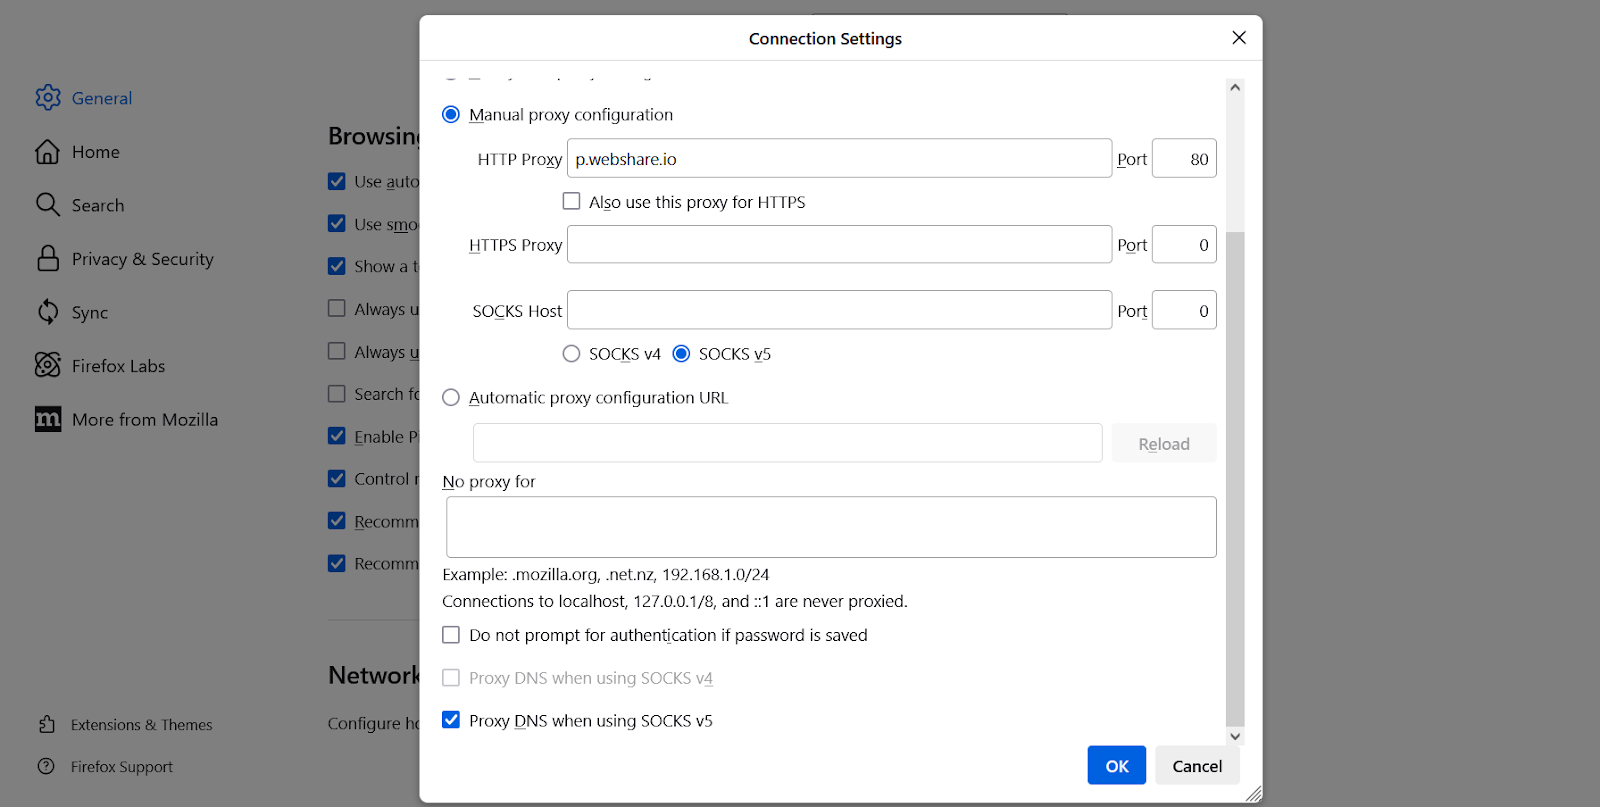
In the Connection Settings window, you’ll see several proxy configuration options:
- No Proxy: This option disables the use of a proxy.
- Auto-detect proxy settings for this network: Firefox will automatically detect if there are proxy settings for your current network.
- Use system proxy settings: This option allows Firefox to use the same proxy configuration as your operating system.
- Manual proxy configuration: This is where you can manually enter specific proxy server details.
- Automatic proxy configuration URL: If you have a URL for a proxy configuration file (PAC file), you can enter it here.
To manually configure a proxy, choose Manual proxy configuration.

4. Enter proxy server details
You can find your proxy server details (IP address, port, and type) in your Webshare account after signing up for their free proxies. Once you have the details, enter them by selecting Manual proxy configuration:
- HTTP Proxy: If you want to route normal web traffic (HTTP) through a proxy, enter the IP address or domain name of the proxy server in the HTTP Proxy field, and specify the Port.
- HTTPS Proxy: To route secure (HTTPS) traffic, enter the server details in the HTTPS Proxy field.
- SOCKS Host: If you're using a SOCKS proxy (which works with both HTTP and other types of traffic), enter the server details in the SOCKS Host field.

5. Set proxy bypass (optional)
If there are specific websites or IP addresses you don’t want to route through the proxy server, you can define them in the No Proxy for field. This allows you to bypass the proxy for certain destinations.

6. Save and apply proxy settings
Once you've entered the proxy server details and configured any necessary exceptions, click OK to save the settings.
Now, Firefox will start using the configured proxy for all web traffic.
Wrapping Up: Setting up a proxy in Firefox
By following the steps in this guide, you can easily configure a proxy to mask your IP address, protect your online activity, and access region-locked websites. The flexibility Firefox offers with manual and automatic proxy configuration options ensures you can tailor your browsing experience to your specific needs. Whether you're looking to maintain anonymity online or simply manage your network traffic, using a proxy in Firefox provides a reliable solution.


