Get 10 Free Proxies For FoxyProxy
FoxyProxy is a powerful browser extension that simplifies the process of using proxies with Google Chrome and Firefox. It allows users to easily manage proxy settings, switch between multiple proxies, and route traffic through specific proxies based on URL patterns, all from a simple interface. This extension is especially useful for users who need flexibility and control over their proxy configurations, whether for privacy, bypassing geo-restrictions, or testing network settings.
In this article, we'll guide you step-by-step through the process of setting up FoxyProxy on both Google Chrome and Firefox.
Setting up FoxyProxy on Firefox
Follow these steps to install and configure FoxyProxy on Firefox:
1. Install the FoxyProxy extension
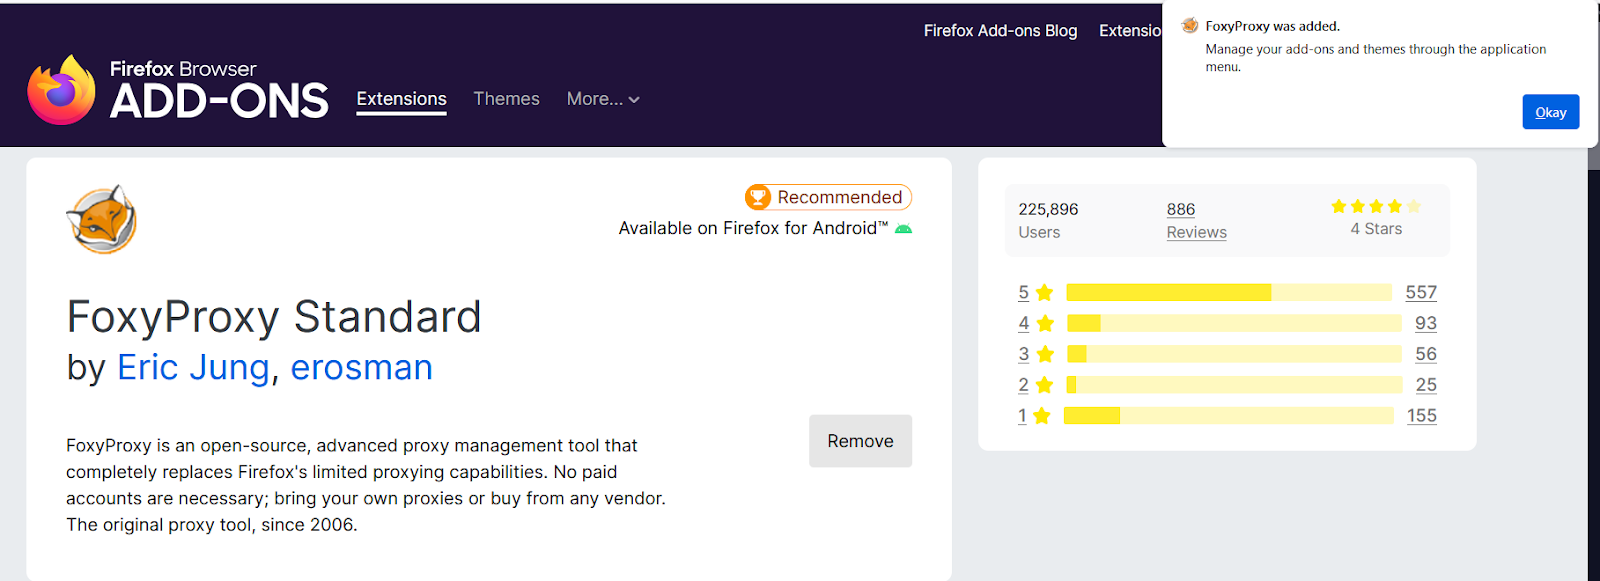
- Open Firefox, visit the Firefox Add-ons website and search for the FoxyProxy Standard extension.

- Click Add to Firefox, then click Add in the confirmation prompt.
2. Access the FoxyProxy icon
- After installation, the FoxyProxy icon will appear in the Firefox toolbar.
- If you don’t see it, click the menu button (three horizontal lines) and go to Add-ons and Themes to find FoxyProxy and manage its settings.
3. Open the FoxyProxy settings
- Click the FoxyProxy icon in the toolbar and select Options to open the settings page.

4. Add a new proxy
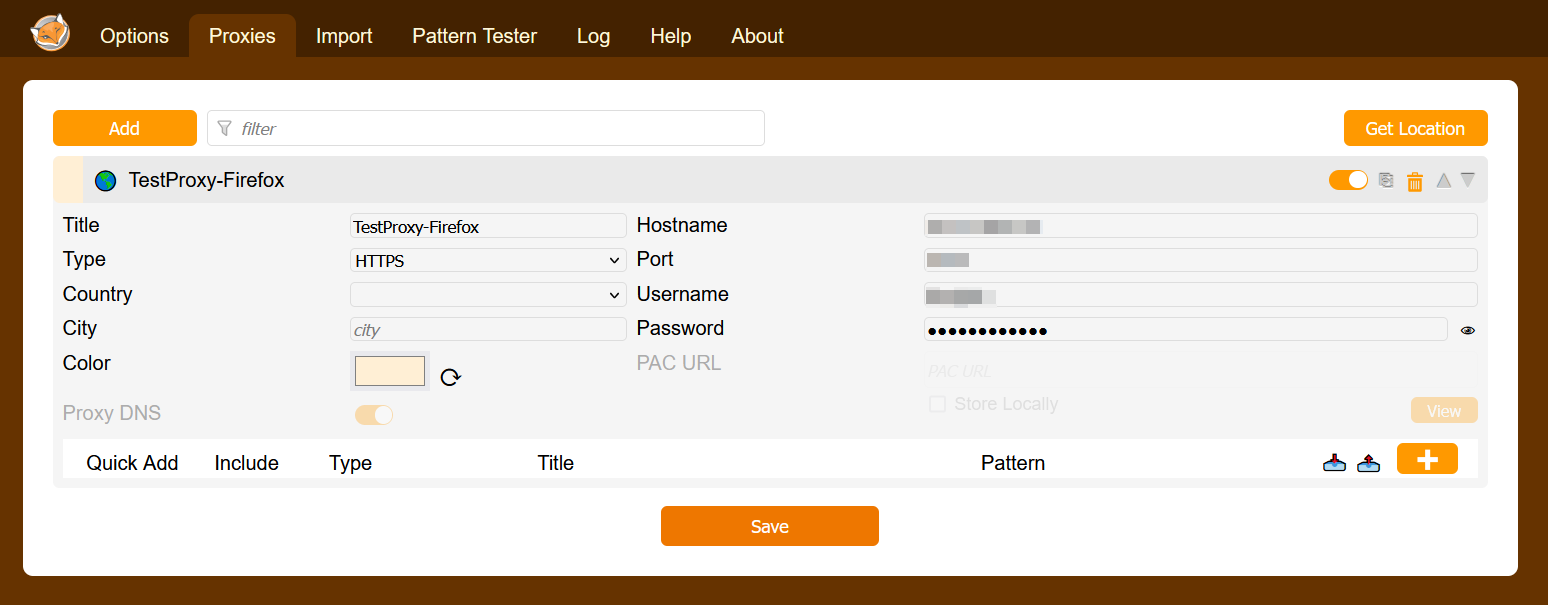
- On the Proxies tab, click the Add button and fill in the necessary details, as discussed above. If you do not have proxies, get 10 for free from Webshare.
- Click Save to store your proxy settings.
5. Activate the proxy
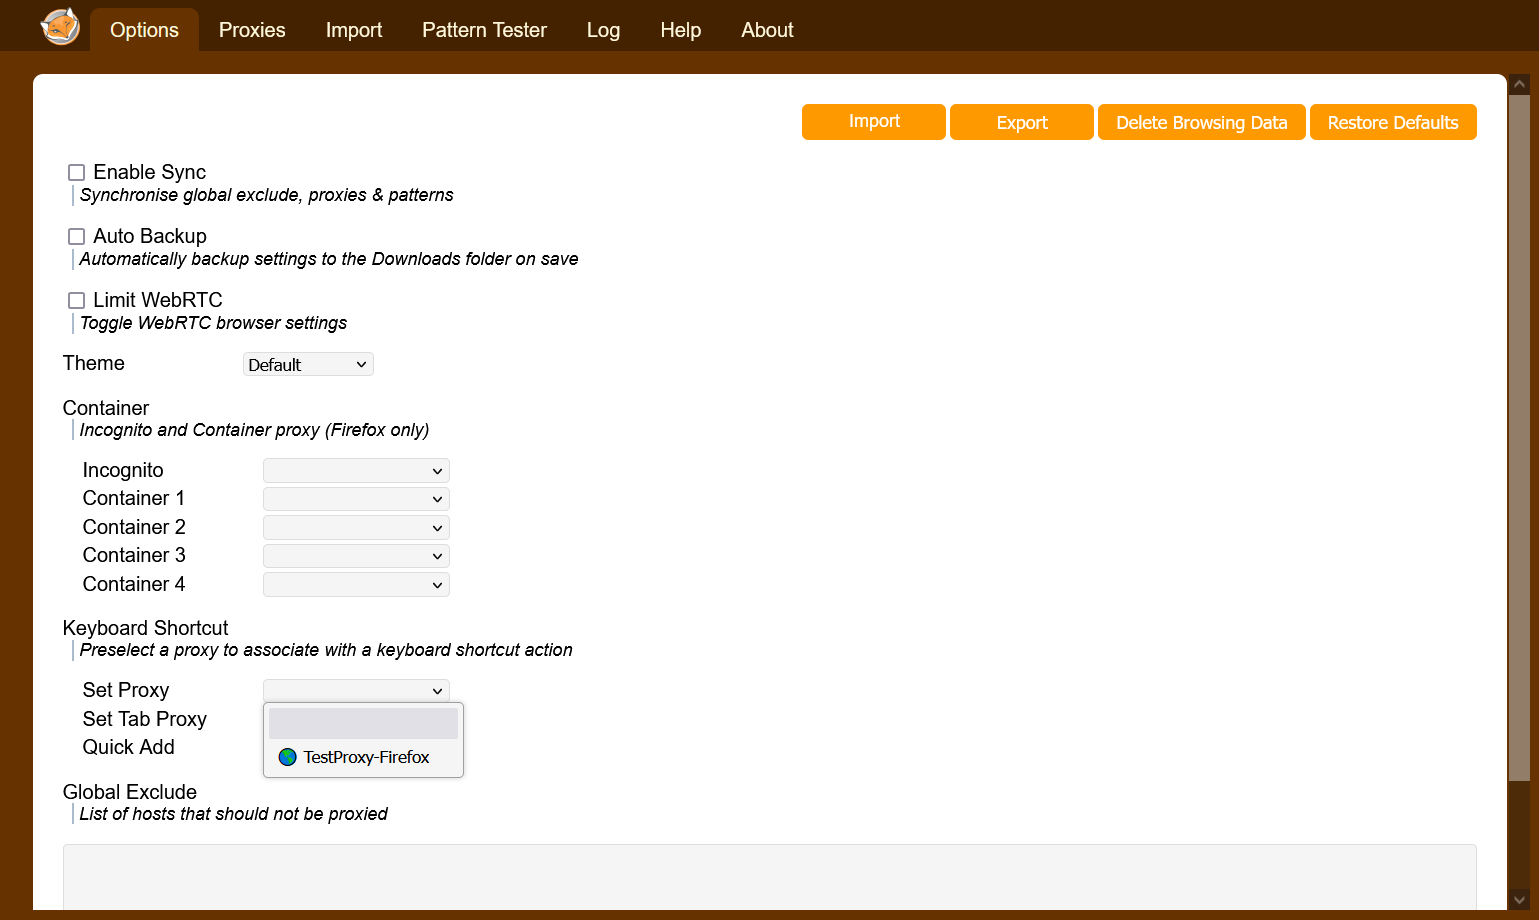
- After saving, go back to the FoxyProxy main page and enable the proxy by selecting it from the dropdown list.
Setting up FoxyProxy on Google Chrome
Follow these steps to install and configure FoxyProxy on Google Chrome:
1. Install the FoxyProxy extension
- Open Google Chrome and visit the Chrome Web Store.
- In the search bar, type FoxyProxy and press Enter.
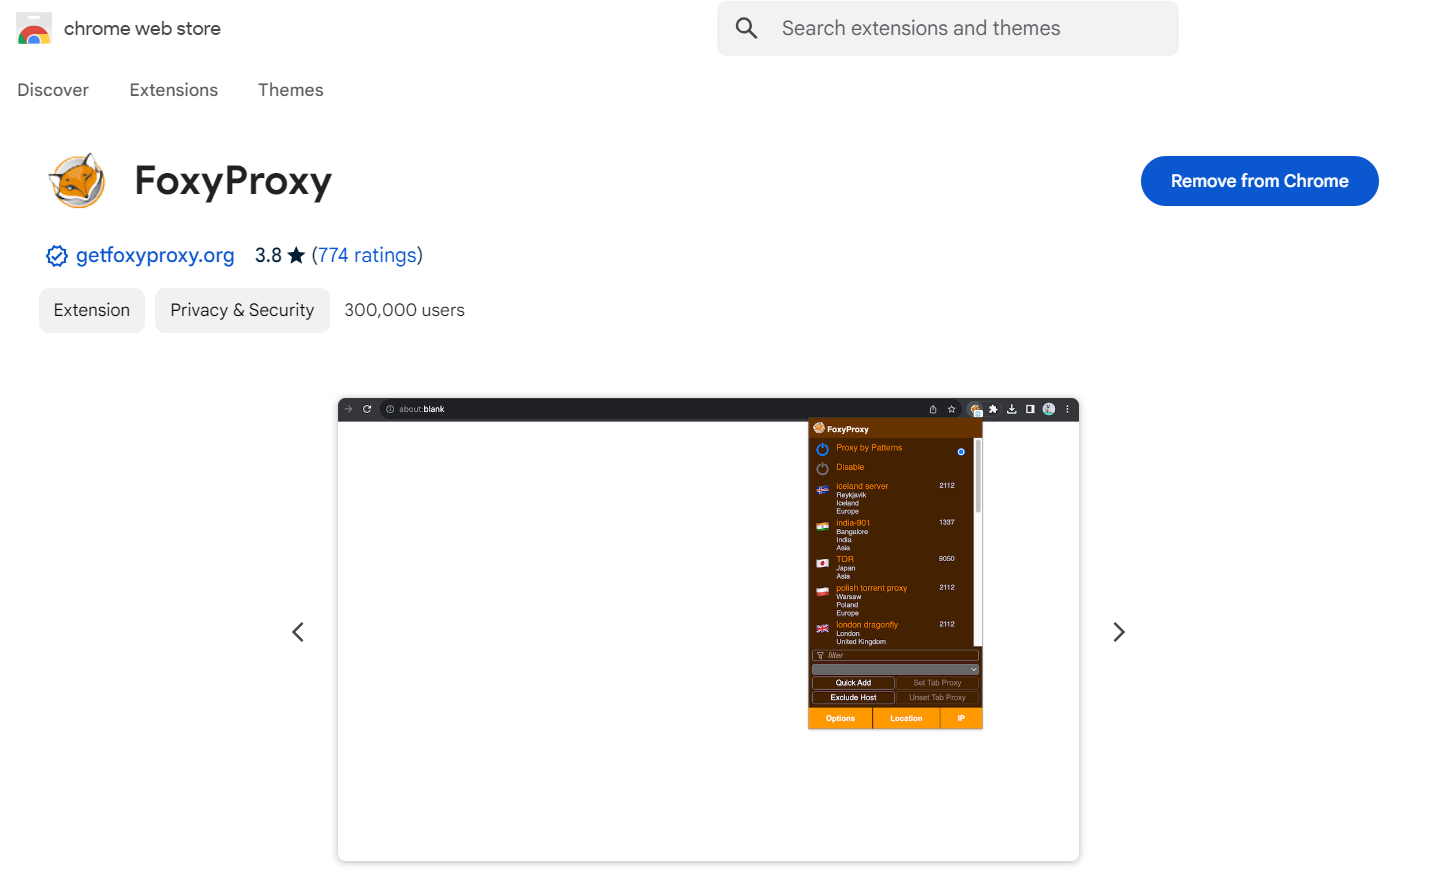
- Select FoxyProxy Standard from the search results.
- Click Add to Chrome and then Add Extension in the confirmation dialog.
2. Access the FoxyProxy icon
- After installation, you’ll notice the FoxyProxy icon (a fox head) in the Chrome toolbar.
- If you don’t see it, click the Extensions menu and pin FoxyProxy to the toolbar for easier access.
3. Open the FoxyProxy settings
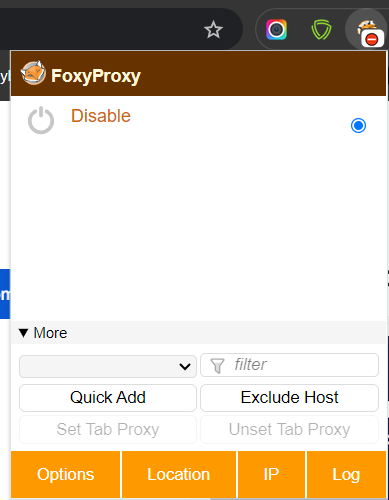
- Click the FoxyProxy icon in the toolbar to open the extension menu.
- From the dropdown, click Options to access the settings page.
4. Add a new proxy
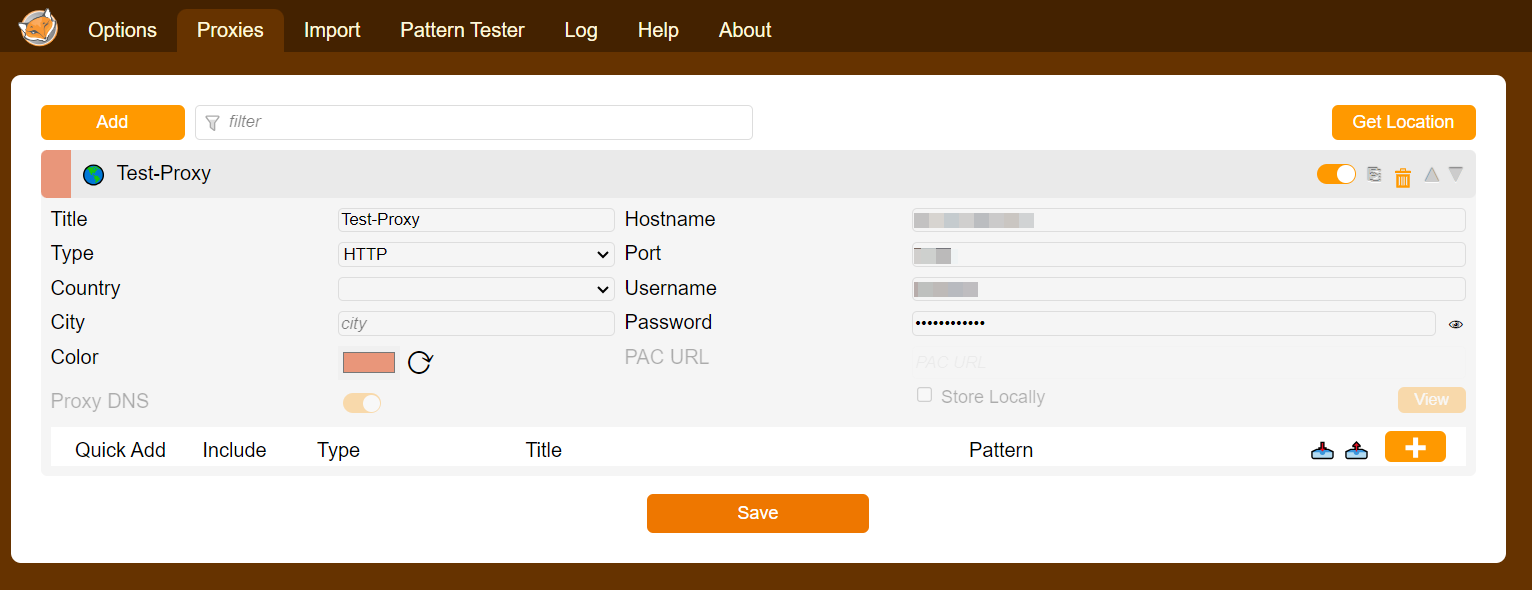
- On the FoxyProxy options page, go to the Proxies tab and click the Add button.

- In the dialog that appears, you'll need to fill in the following fields:some text
- Title: Give your proxy a name (e.g., "Test-Proxy").
- Type: Select the proxy type (HTTP, HTTPS, SOCKS, etc.).
- Hostname: Enter the proxy server's IP address or hostname.
- Port: Provide the port number for the proxy.
- Username/Password: If authentication is required, enter your proxy credentials.
- You can find your proxy server details in your Webshare account after signing up for their free proxies.

5. Save and activate the proxy
- Once you’ve entered all the proxy details, click Save to store the configuration.
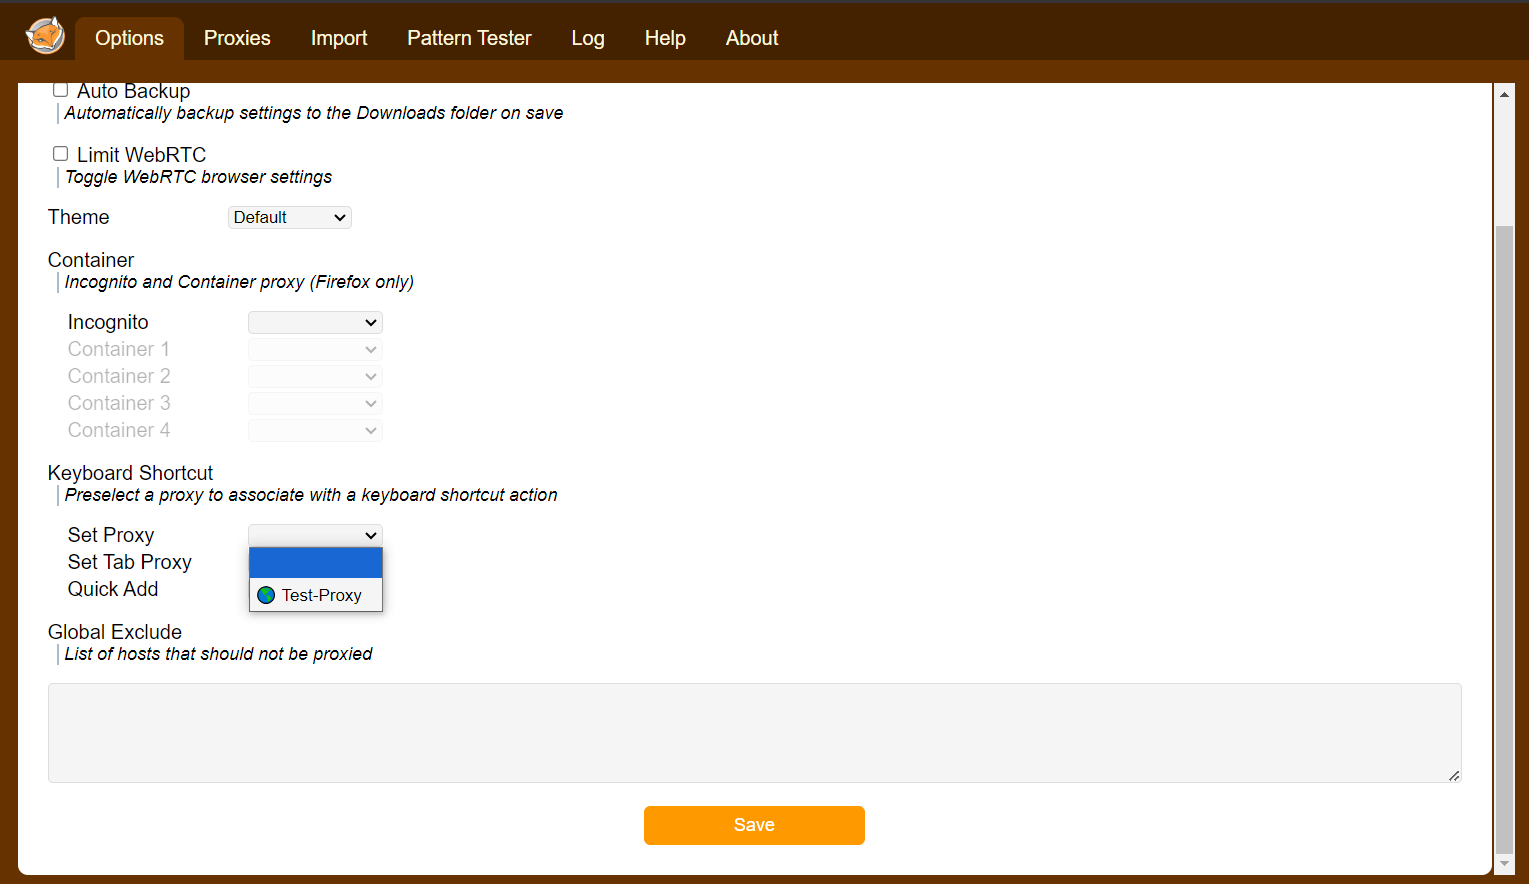
- Back on the main Options page, enable the proxy by selecting it from the dropdown list.
6. Set proxy rules (optional)
- To create custom rules for routing traffic through your proxy, click on the Pattern Tester tab.
- Define URL patterns for specific websites to automatically route them through the selected proxy, leaving other traffic unaffected.

Wrapping up: setting up FoxyProxy in Chrome and Firefox
With FoxyProxy, managing proxies becomes a simple and efficient process. Whether you're using it for enhanced privacy, accessing geo-blocked content, or managing multiple IP addresses for various tasks, FoxyProxy streamlines the process across both Chrome and Firefox. By following the steps in this guide, you can seamlessly integrate FoxyProxy into your browsing experience, offering enhanced control and flexibility.


