Get 10 Free Proxies For Ghost Browser
Integrating proxies into your browser can increase your online privacy and security. Ghost Browser is a good browser for this as it can manage multiple sessions and profiles simultaneously. In this tutorial, we'll show you the steps needed to integrate your proxies obtained from a reputed site like Webshare with Ghost Browser. We will cover two main methods, setting up a single proxy and configuring batch proxy list. By the end of this guide, you’ll be able to easily switch between different proxies and change the way you browse the internet. We guarantee this guide will help you get the most out of your Webshare proxies with Ghost Browser.
What is Ghost Browser?
Ghost Browser is a web browser focused on productivity, designed for tech professionals, marketers, and developers who need to manage multiple online accounts and sessions simultaneously. It allows users to create isolated workspaces, each with its own set of cookies, sessions, and proxy settings. This feature is required to manage multiple social media accounts, web development, and testing environments without constant logouts.
Before starting
To use Ghost Browser with Webshare proxies, you'll need to get your proxies from Webshare. Thankfully, Webshare provides a simple method for creating an account and provides 10 free proxies without requiring a credit card. Simply sign up on the Webshare website, and you'll instantly receive 10 free proxy IP addresses.

These proxies can be easily integrated with Ghost Browser. They allow you to manage multiple browsing identities and sessions. Webshare proxies offer a reliable method to manage social media accounts, test environments, and improve your online privacy. Take advantage of this offer and create your Webshare account to get started with your Ghost Browser proxy integration.
How to set up a single proxy in Ghost Browser?
You can easily set up a single proxy on the Ghost browser by following the steps shown below.
1. Download Ghost Browser
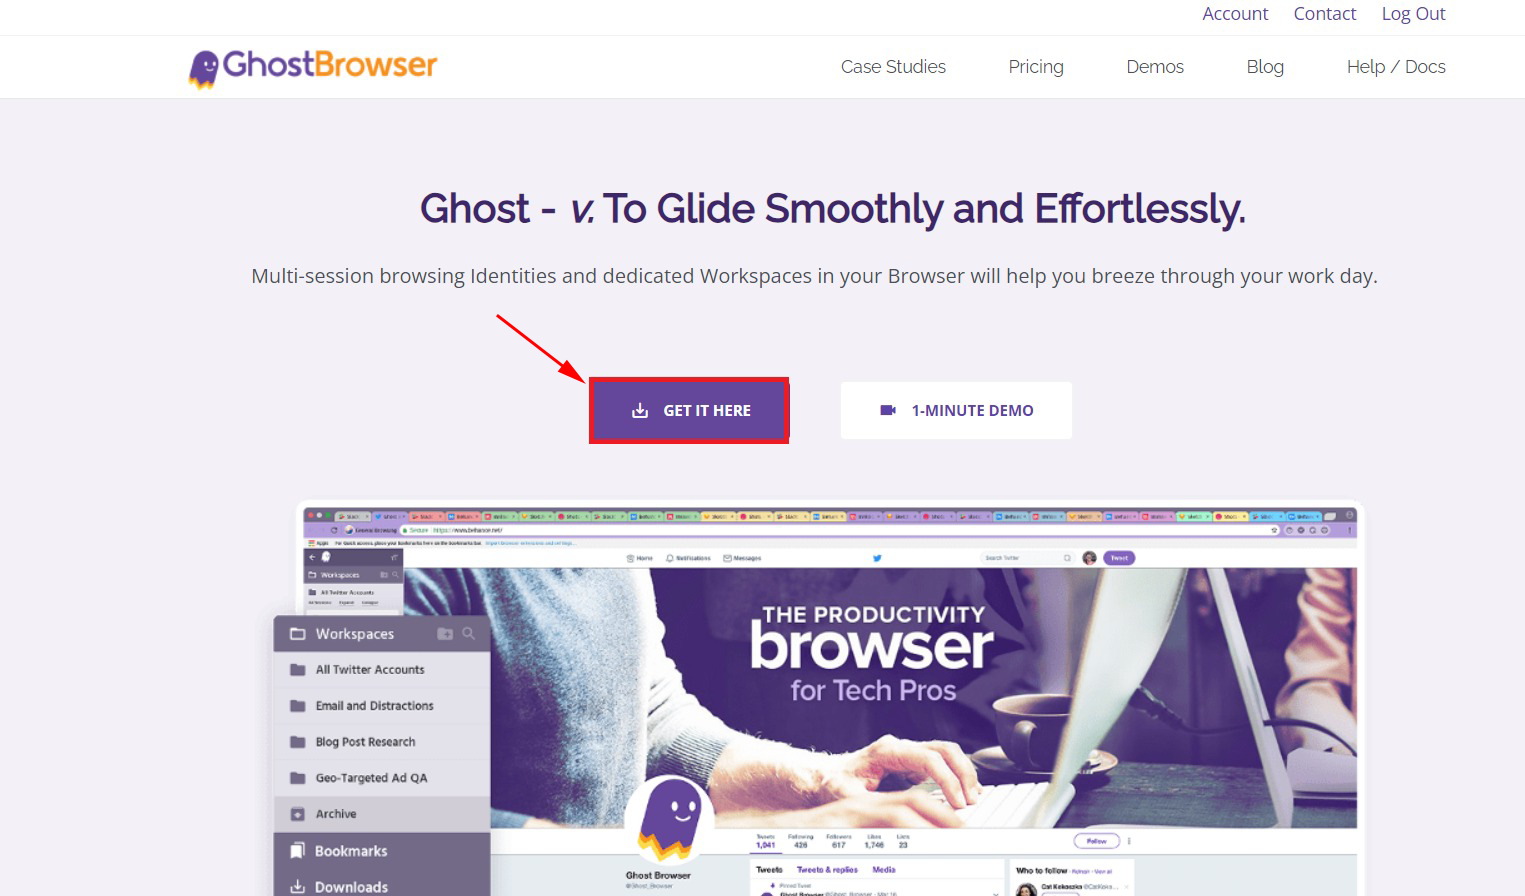
Once you go to the Ghost browser landing page, you have to click on the “Get it Here” button. Afterwards, you have to enter a valid email address and then check your email to confirm the trial subscription. Once confirmed, you will be prompted to enter a password, your name, and your use cases for the browser. You are also given a chance to post any questions you might have. Following these steps, you will be provided with the download links, which you can use to download Ghost Browser. Next, you can install it on your computer.
2. Go to Ghost Proxy Control
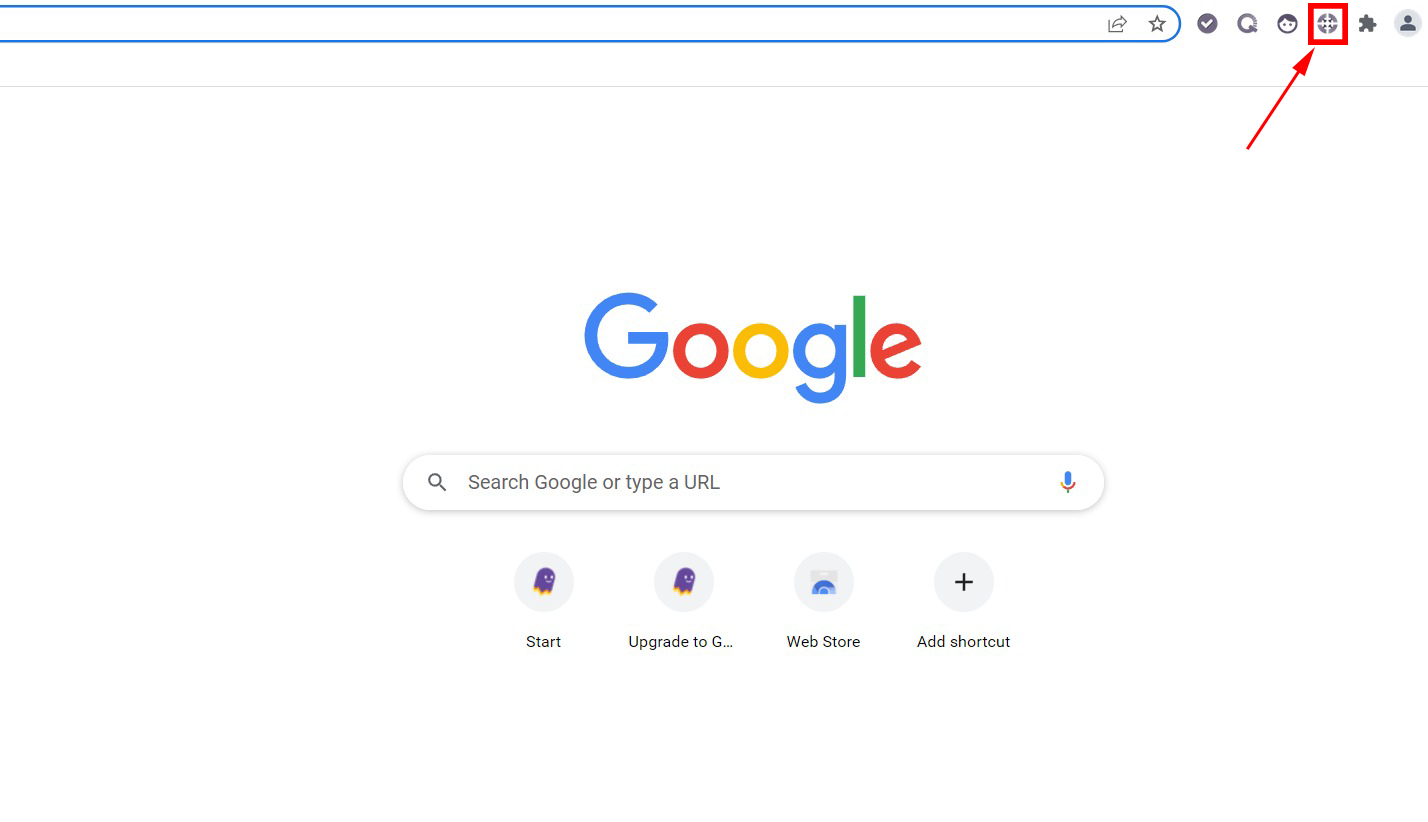
Once you have launched Ghost Browser, you will have to click on the Ghost Proxy Control icon in the top right corner of the browser. To configure with proxies you must select the Add/Edit Proxies button.
3. Fill out your proxy settings
The next section is quite important, as we will be adding and testing out the proxies here. There are two primary options for configuring this field, static or rotating proxies.
A static proxy is suitable for most needs. However, if you frequently need to access websites that restrict access based on your IP address, you may benefit from using a rotating proxy. In such cases, consider purchasing additional proxies for IP rotation to avoid access issues.
Static IP address configuration
As we are going to set up a single proxy you must move to the Add a Single Proxy tab. You will be presented with a form. Here you will have to enter the proxy details that you obtained from the proxy list page in Webshare.
Eg: Name: proxy1, IP: 49.123.241.122, Port:4220, Username: username, password:password
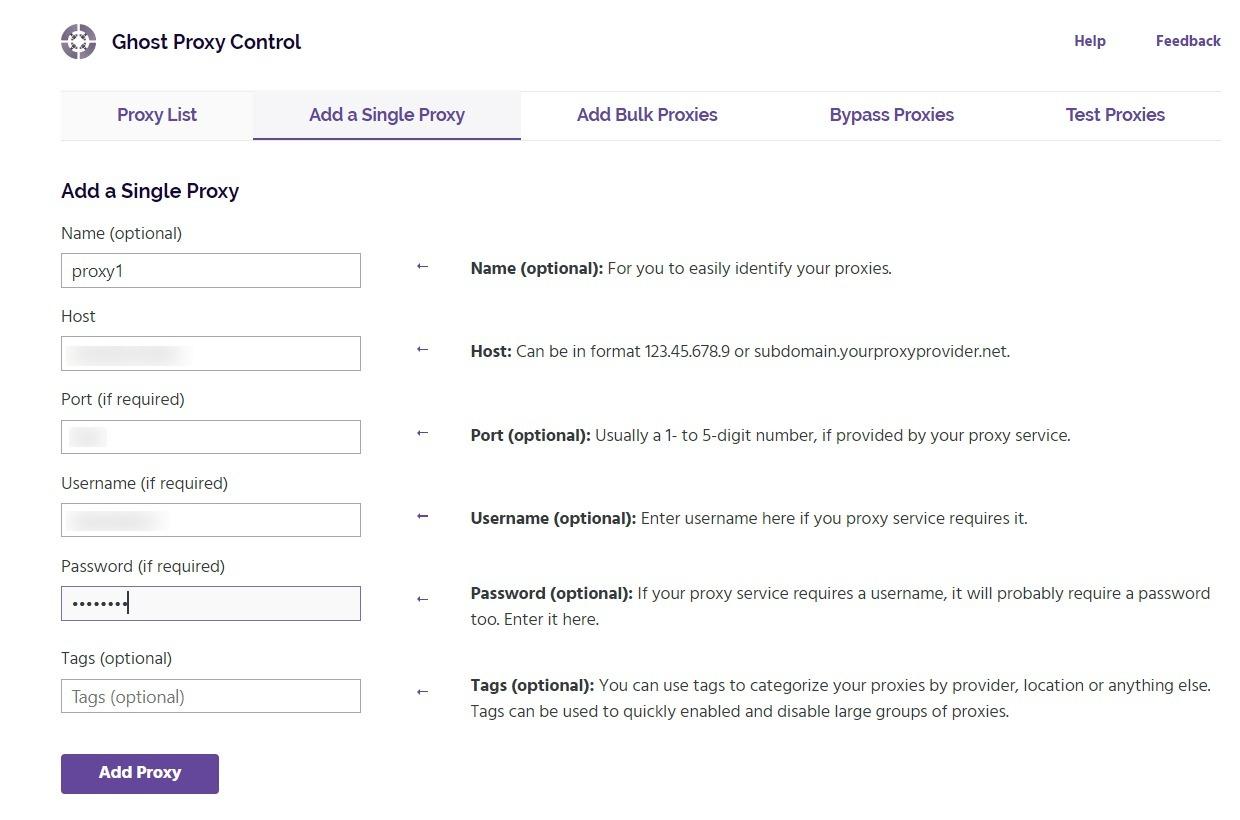
Once you have filled these fields, double-check and then just click on Add Proxy. Now you can check in the Proxy List tab that the proxy has been added.
Rotating IP address configuration
Ghost Browser supports rotating IP address configurations, providing improved browsing flexibility and anonymity. The setup process is similar to configuring a static address, with one key difference. You will need a Domain Name, which you can obtain from the Rotating Proxy page in your proxy provider setup.
Eg: Name: proxy2, IP: p.webshare.io, Port:80, Username: username:rotate, password:password
4. Test proxies
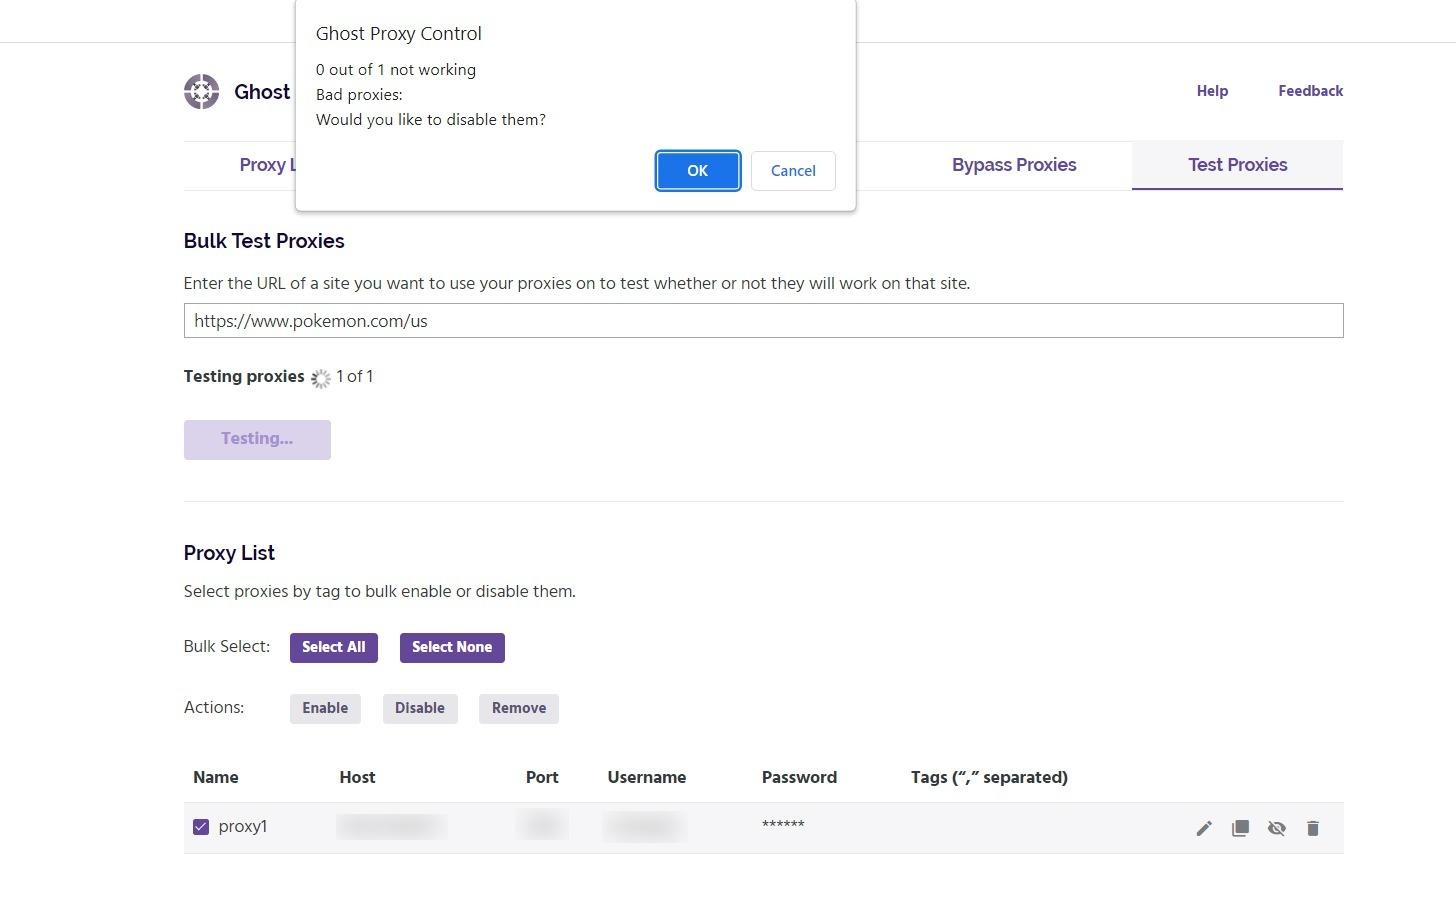
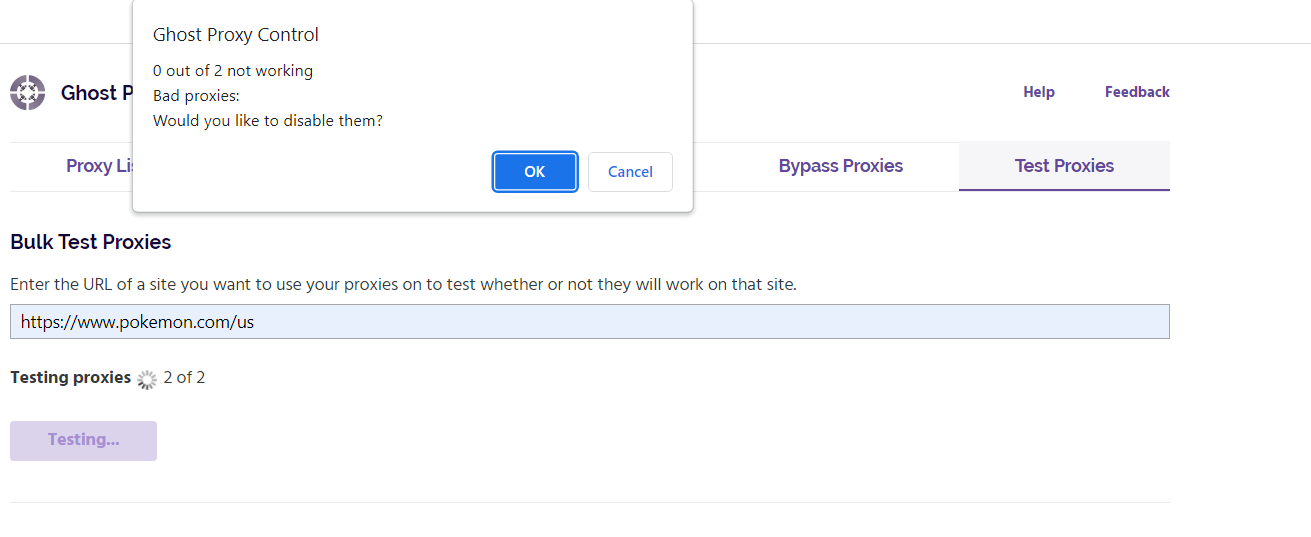
Now we have to test the proxy that we have just added. Therefore just go to the Test Proxies tab and choose the proxy that you want to test. Next, enter the site that you want to use your proxies on and click on Test. You will get a pop-up that will tell you whether the proxy is working or not.
5. Start browsing

Now that you have made sure that the proxy works, all you have to do is go to the Proxy List tab, select the proxy you want, and then click on Enable. Now you can freely search the web with your new proxy. If you want to check whether you are using the proxy you can go to a site like IPinfo to check your IP information.
How to set up a batch proxy list in Ghost Browser?
A batch proxy setup can save you a lot of time while reducing your workload when managing projects that require multiple IP addresses. By following these steps, you can quickly and efficiently configure your proxies.
1. Create a proxy list
First, you have to move to the Bypass Proxies tab on your Ghost Proxy Control. To add bulk proxies in Ghost Browser, you will need to generate a CSV file. Begin by selecting "Export Sample File" to download a template. The template will have the following format.

Fill in the proxy list according to the provided format with the proxies obtained from Webshare’s Proxy List Page. For proxies with sub-user authentication, include the username and password. If you're using whitelisted IPs, make sure that they are properly whitelisted according to the service's guidelines. The “Custom Name” and “Tags” fields are optional, but make sure that everything is separated by commas for Ghost Browser to read the list correctly. An example is given below.

2. Mass import
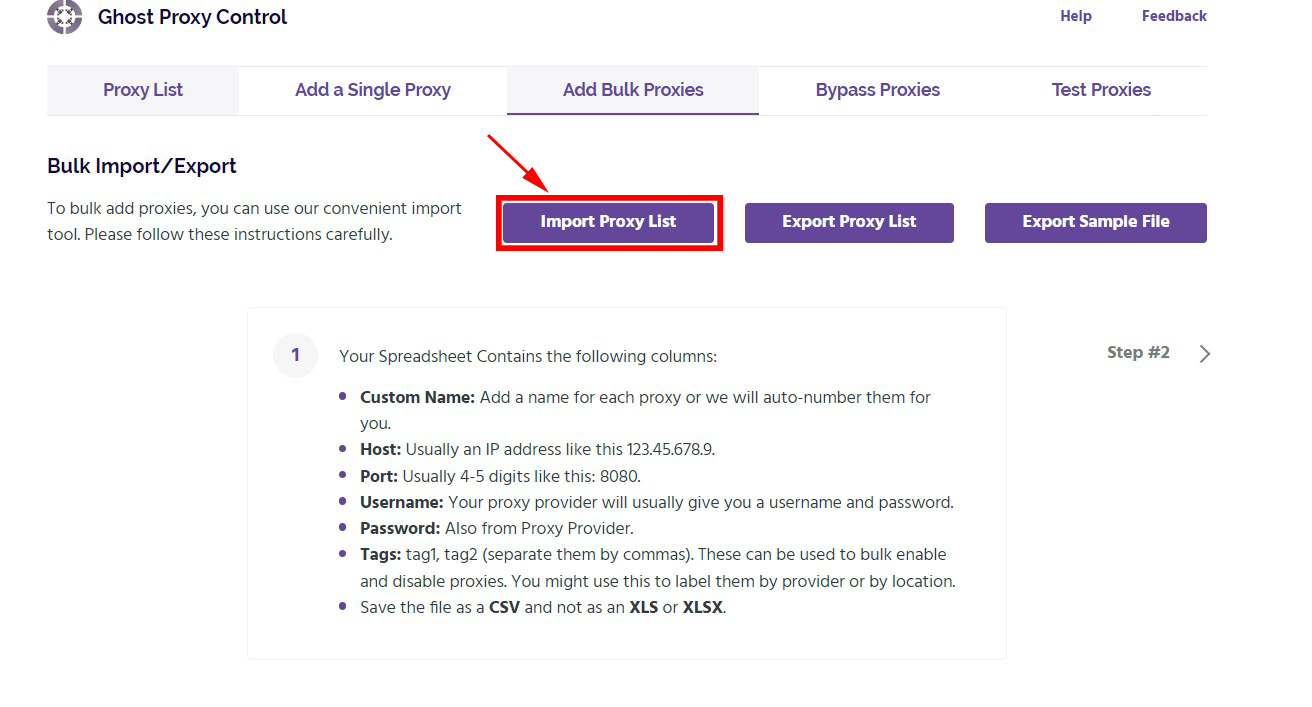
Once your CSV file is prepared with the necessary proxy details, you can import it into Ghost Browser to configure the proxies. To do this, go to the proxy settings in Ghost Browser and look for the option to import proxies. Select the updated CSV file, and Ghost Browser will automatically read the file and configure the proxies based on the information provided.
3. Test your IP addresses
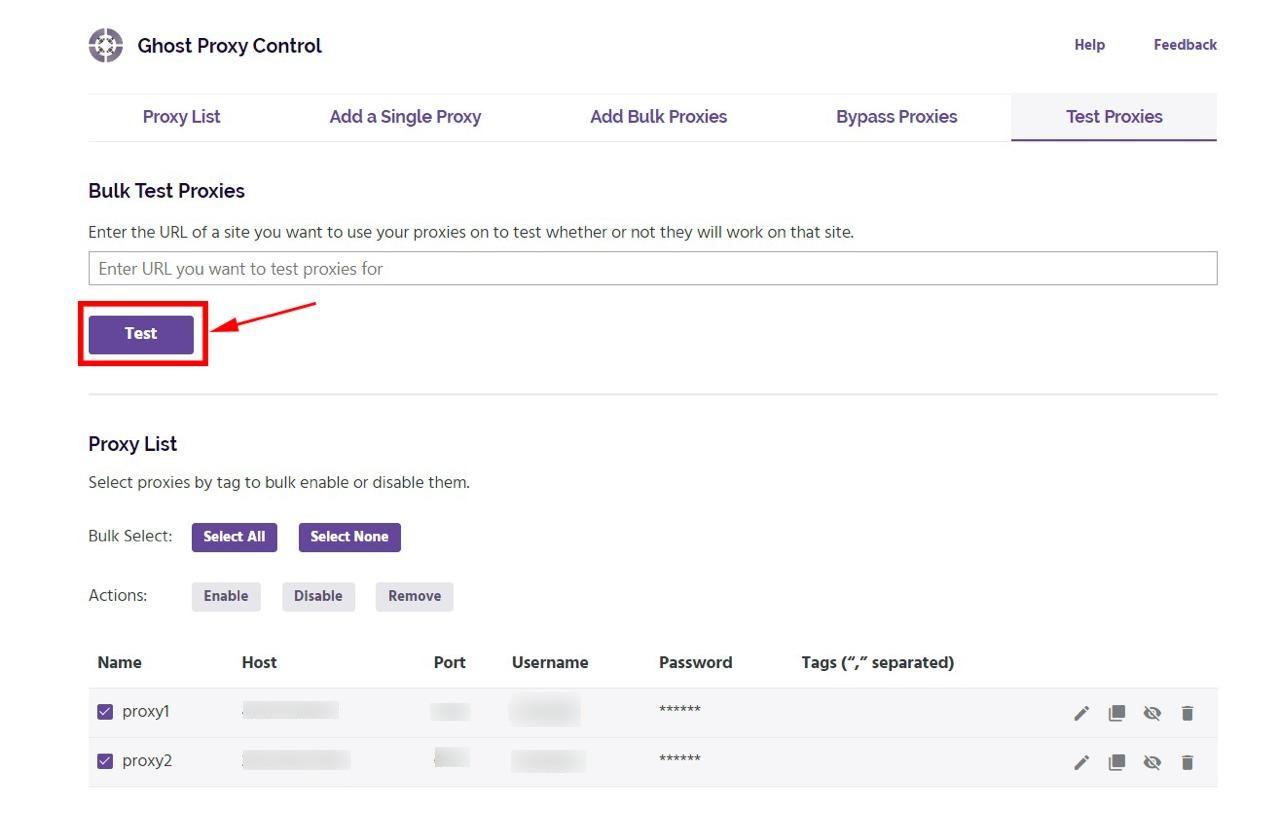
After importing, you can test your proxies in the "Test Proxies" section. Add a target URL and click "Test." The results will appear in a pop-up window, showing whether each proxy is set up successfully and ready to use. This process shows whether your proxies are correctly configured and functional.
And there you have it, all you need to know about setting up proxies in Ghost Browser. We hope this guide makes it easier for you to configure static, rotating, and batch proxies quite easily.
Here's a simple reminder to make sure you make the correct choice. You can create a free account on Webshare without needing a credit card and get access to 10 premium proxies at no cost. These proxies can help you use all of what Ghost Browser has to offer. Don't miss out on this great opportunity to improve your browsing experience!


