Get 10 Free Proxies For Hidemium
A crucial aspect of digital marketing involves managing multiple accounts while avoiding IP bans. Regular browsers often fail in this regard. However, premium browsers like Hidemium can simplify managing accounts effectively while hiding your actual IP address.
In this guide, we will examine Hidemium to understand its functionality and how it can enhance your workflow. Additionally, we will provide detailed instructions on how to set up single proxies for light use and batch proxies for more demanding tasks.
But first…
What Is Hidemium?
Hidemium is a specialized browser that allows users to bypass browser fingerprint detection by altering browser fingerprints. It also allows digital marketers to handle multiple accounts across platforms like Facebook, TikTok, eBay, Google, CoinList, and Amazon.
Additionally, Hidemium benefits users through its seamless proxy integration, user-friendly interface, and easy browser automation. Overall, its seamless proxy integration with various proxy types offers flexibility in hiding your real IP address.
Before Starting
Hidemium’s free plan allows only one team member to log in with a single device. Rest assured, you can create up to 10 cloud-stored profiles on its free trial. However, if you need additional features like creating multiple sessions and more profiles, consider exploring other plans and associated benefits.
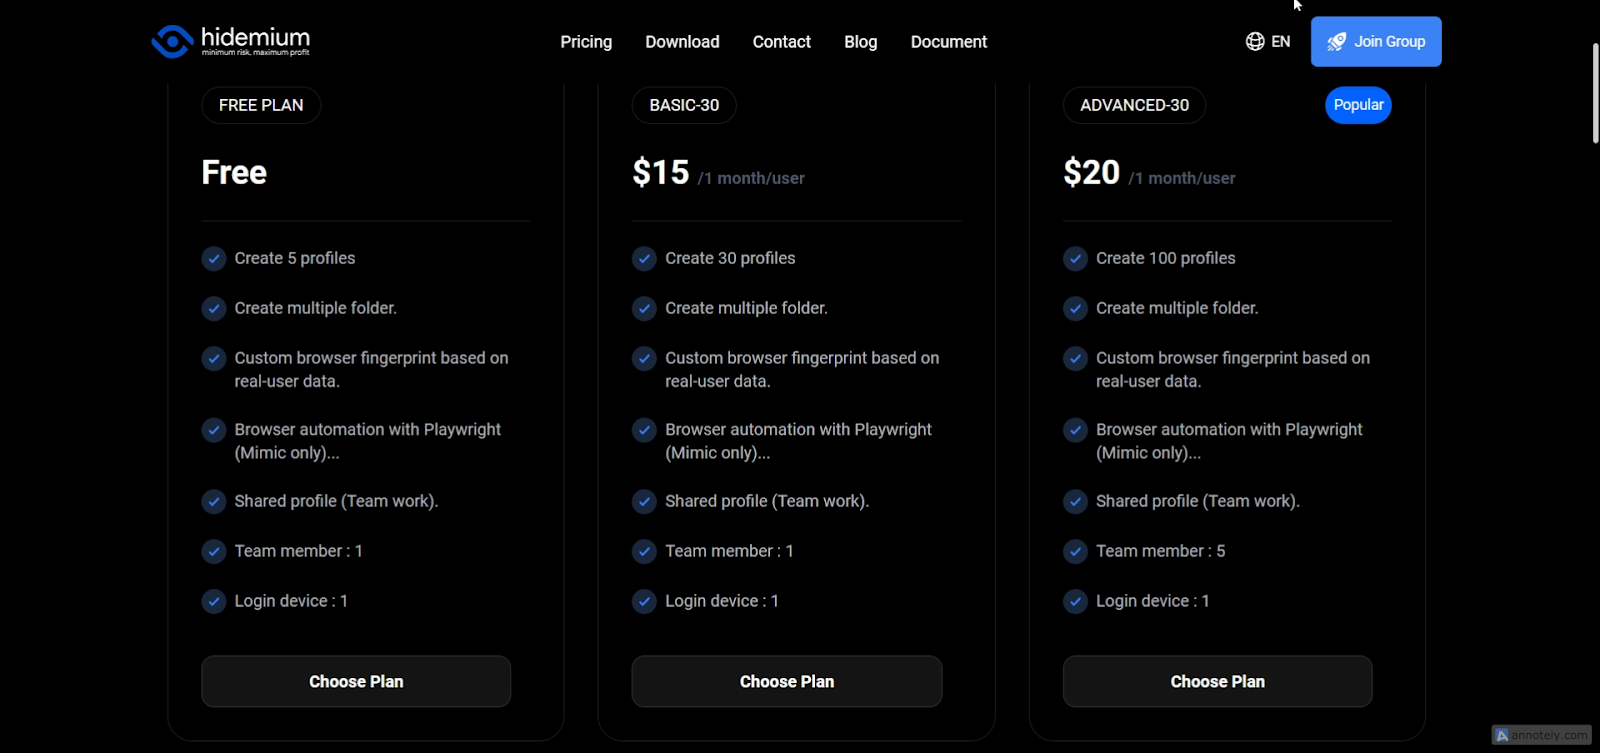
After deciding on a plan, you should consider setting up Webshare proxies to optimize your browsing experience fully. Doing this allows you to receive up to 10 premium proxies at no cost, making it easier to test Hidemium.
Notably, this exclusive offer is available for a limited time. So, why wait any longer? Sign up now to claim your free proxies and streamline your browsing activities!
How to set up a single proxy in Hidemium
Regardless of the plan you settle for, let’s start with the basics before gradually tackling more complex setups. Below is a step-by-step guide to configuring a single proxy server on Hidemium:
1. Download Hidemium
Visit the official Hidemium website and locate the Download option on the navigation bar. Hidemium supports Windows and MacOS (for M and Intel series).

Additionally, it offers two versions: V2 and V4. We recommend that Windows users download the latest V4 version, while Mac users should opt for V2. Notably, accounts for V2 and V4 are not interchangeable; you must register a separate account for each version.
2. Register your account
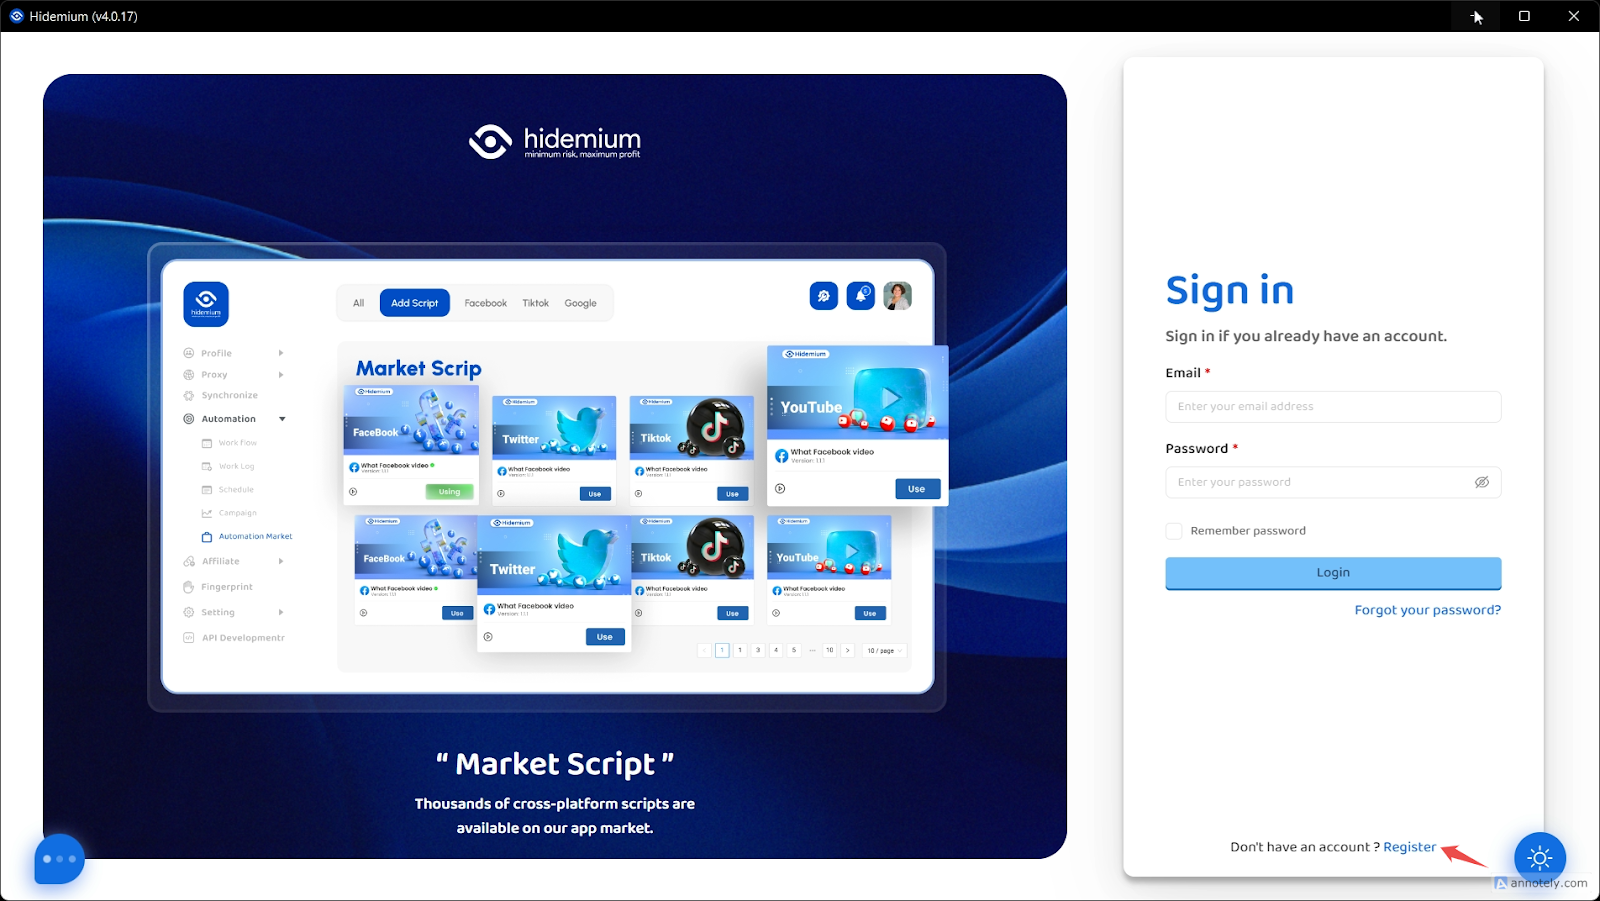
After completing the download and installation process, you either register as a new user or simply sign in if you already have an account.
3. Create a profile
In the main Hidemium window, click +Add Profile. Hidemium allows users to create and manage profiles and folders, which are crucial depending on your project requirements.
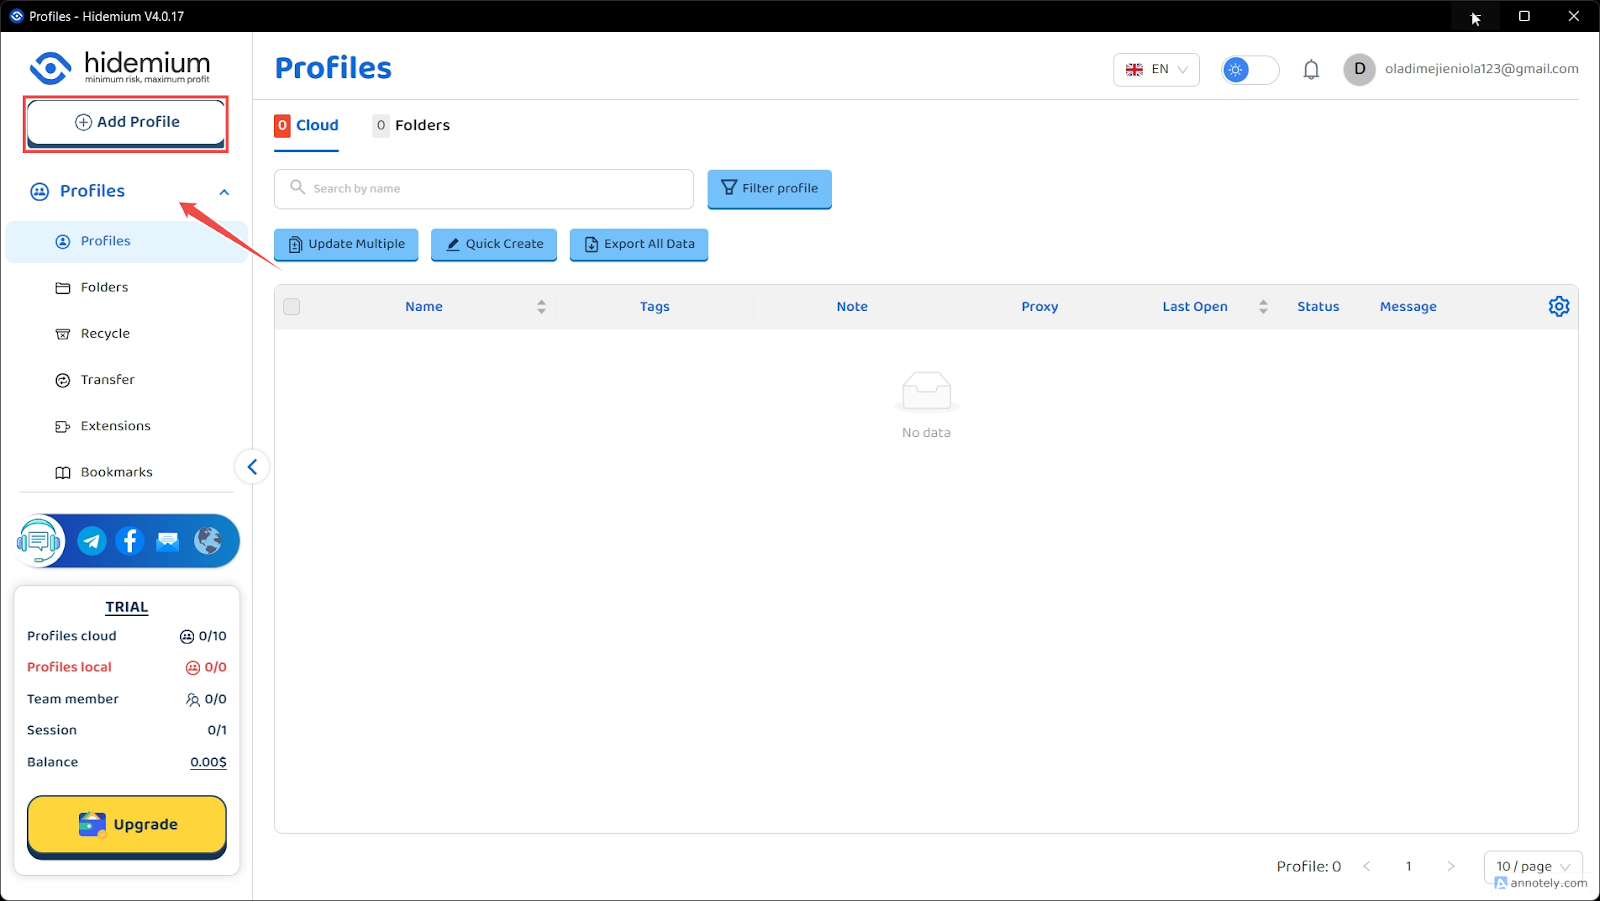
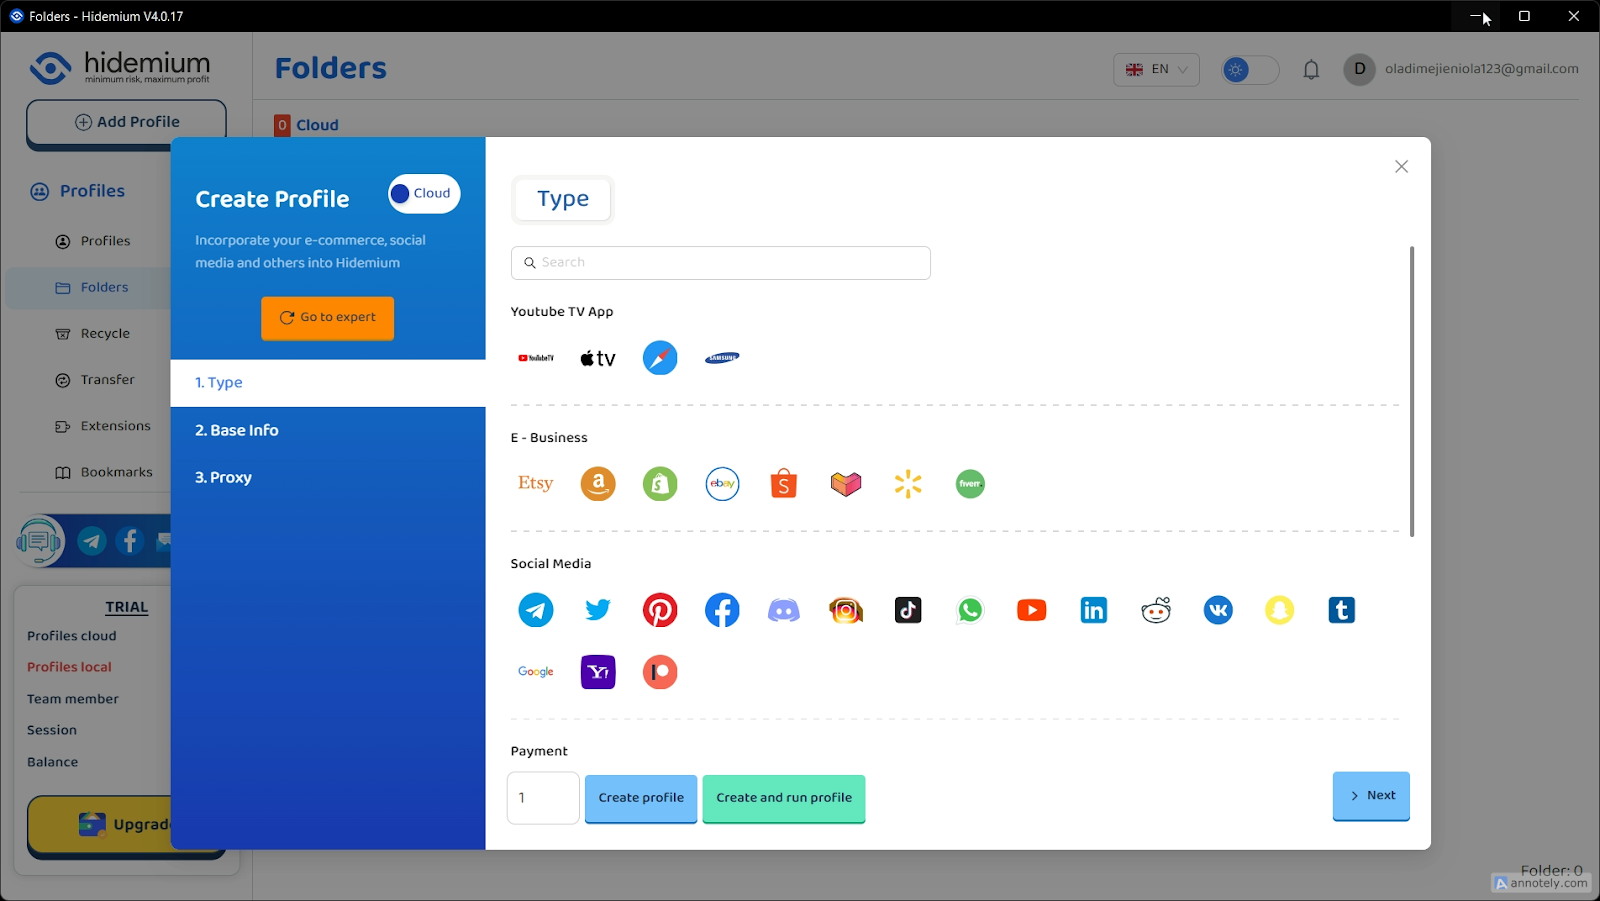
Clicking this button will adjust the window scale, and a setup page will appear. From here, you can choose your profile type and configure it by selecting Base Info. Then, you’re free to customize this to fit your project’s needs. Thankfully, Hidemium’s free trial allows you to create up to 10 cloud profiles, simplifying account management.
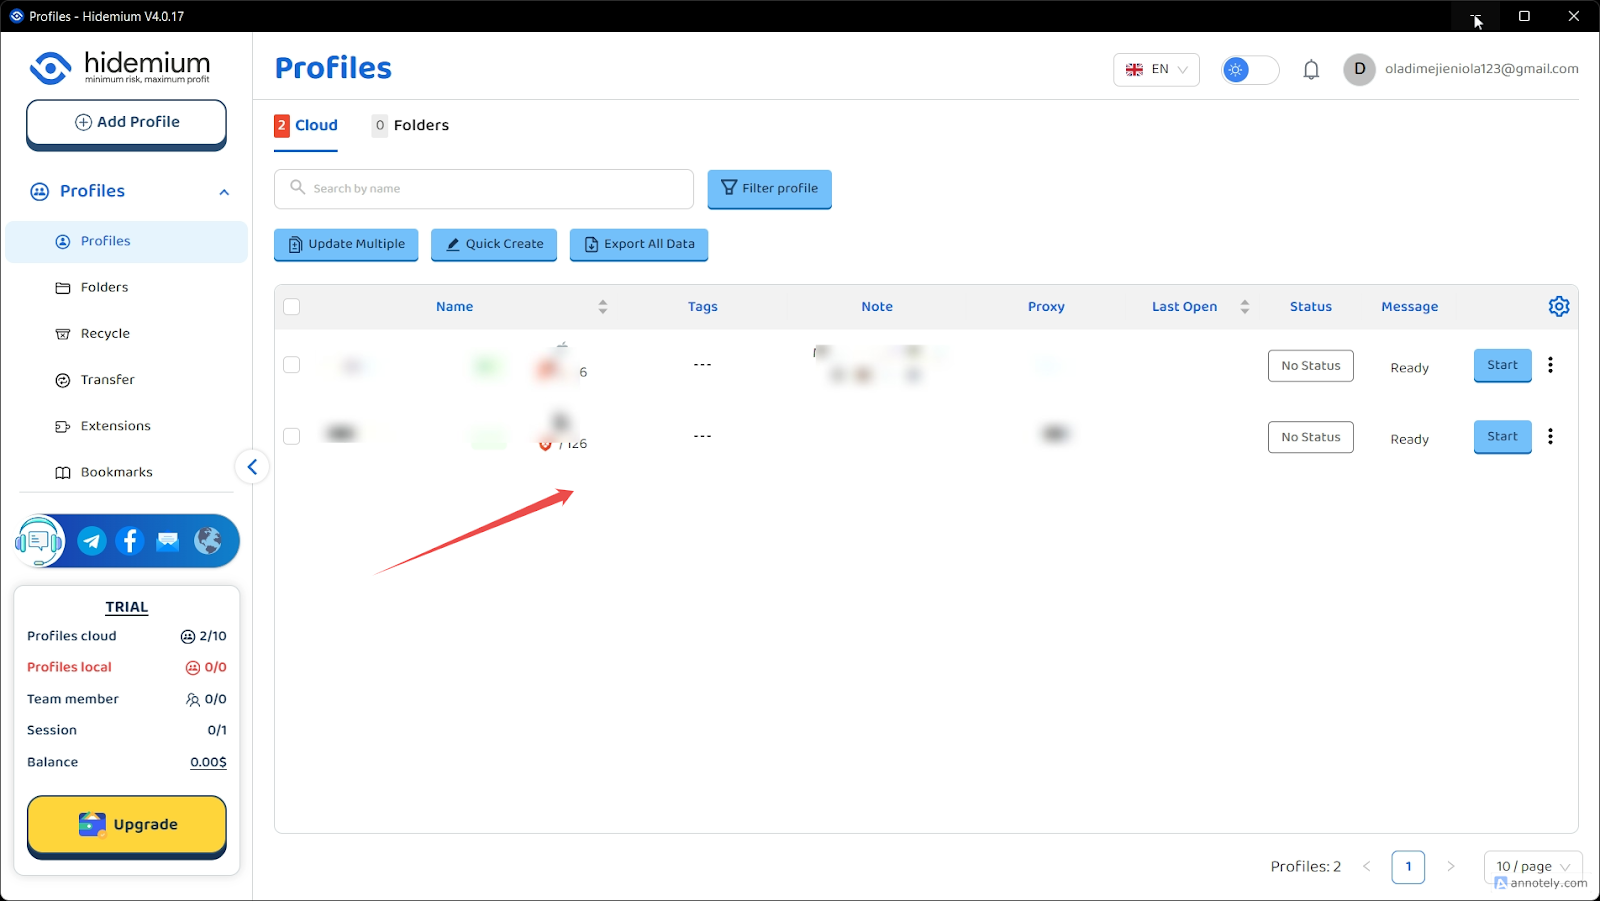
After a complete profile configuration, you will be directed to a page displaying the profiles you have created.
4. Configure your proxy settings
To configure your proxy, click on Proxy within the Profile Creation Window. Based on your preferences or the provider's instructions, choose the appropriate proxy type (HTTP, SOCKS4, SOCKS5, or SSH).
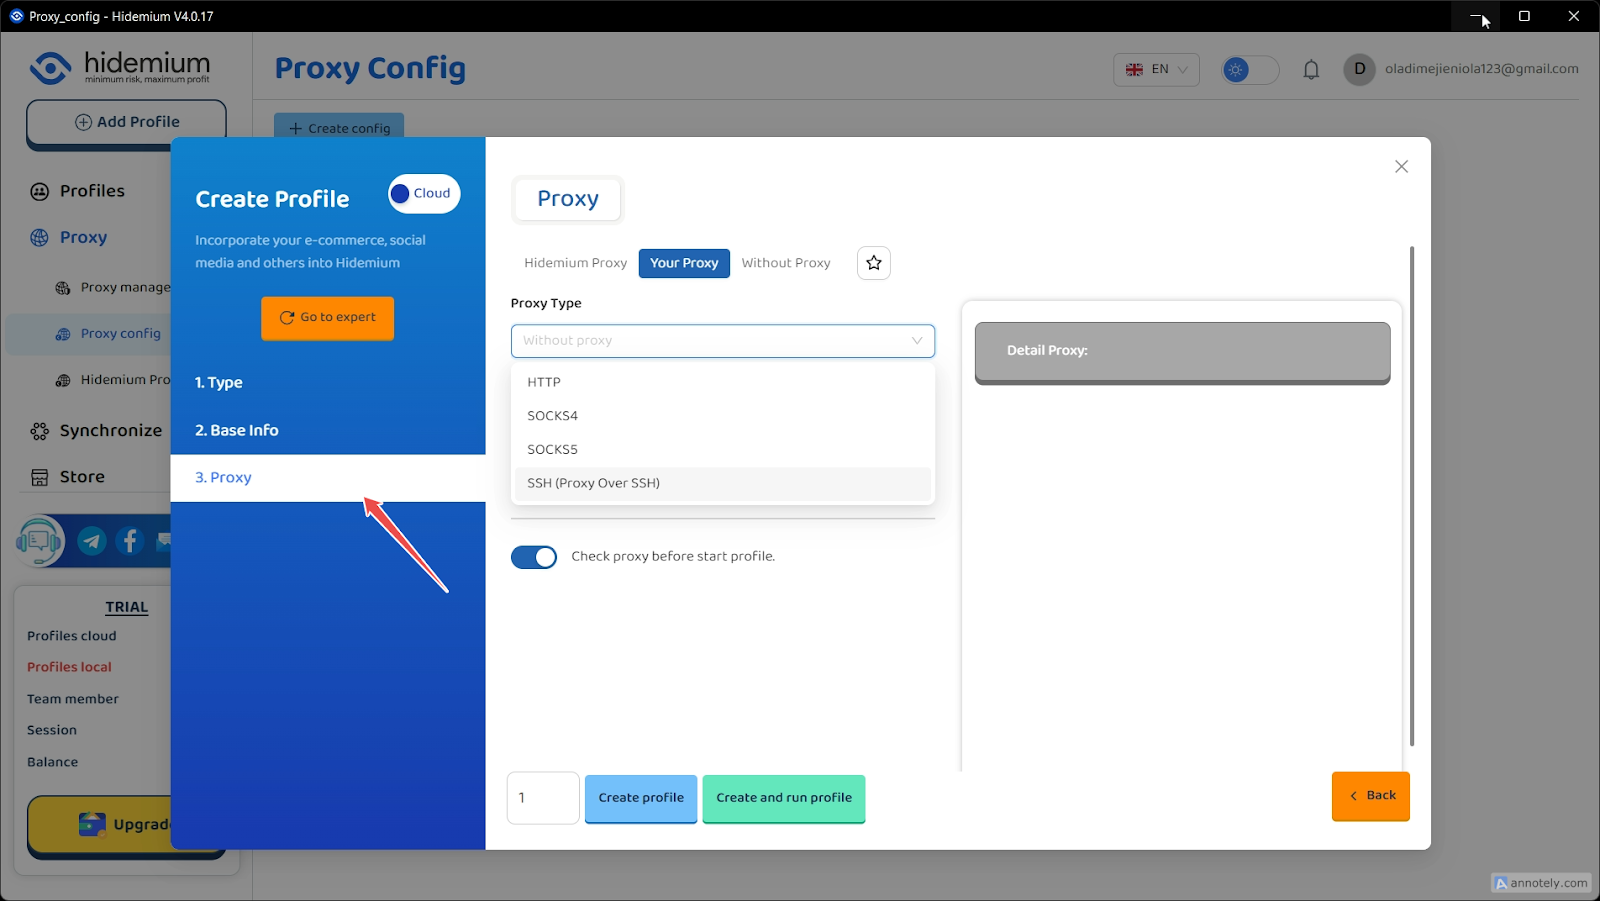
5. Fill in basic proxy details
On the same profile creation page, enter the IP address, port number, username, and password you obtained. Here is a quick format:
- Proxy type: HTTP or SSH
- Port: 8888
- Username: p.webshare.io

6. Verify your proxy connection
Click the Check Proxy button to verify a successful connection with the proxy server. Alternatively, enable Check Proxy before start profile for automatic proxy verification.
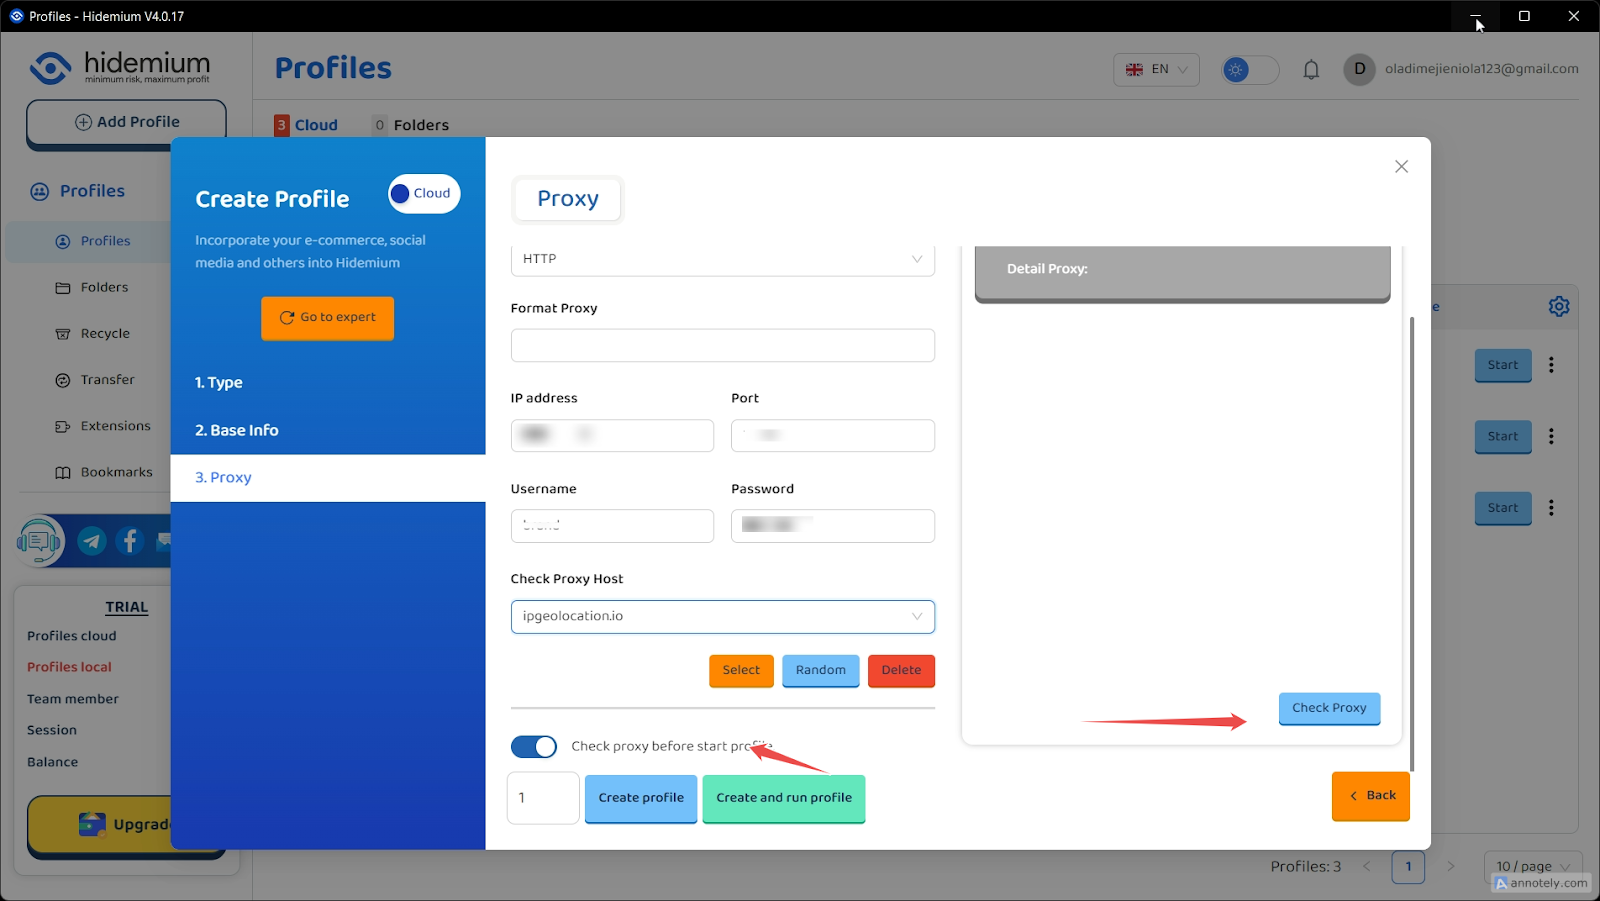
After confirming your proxy connection, you may wish to configure your proxies differently via the proxy dashboard on Hidemium. Notably, you can perform this configuration process using either the API or Rotation proxy setup.
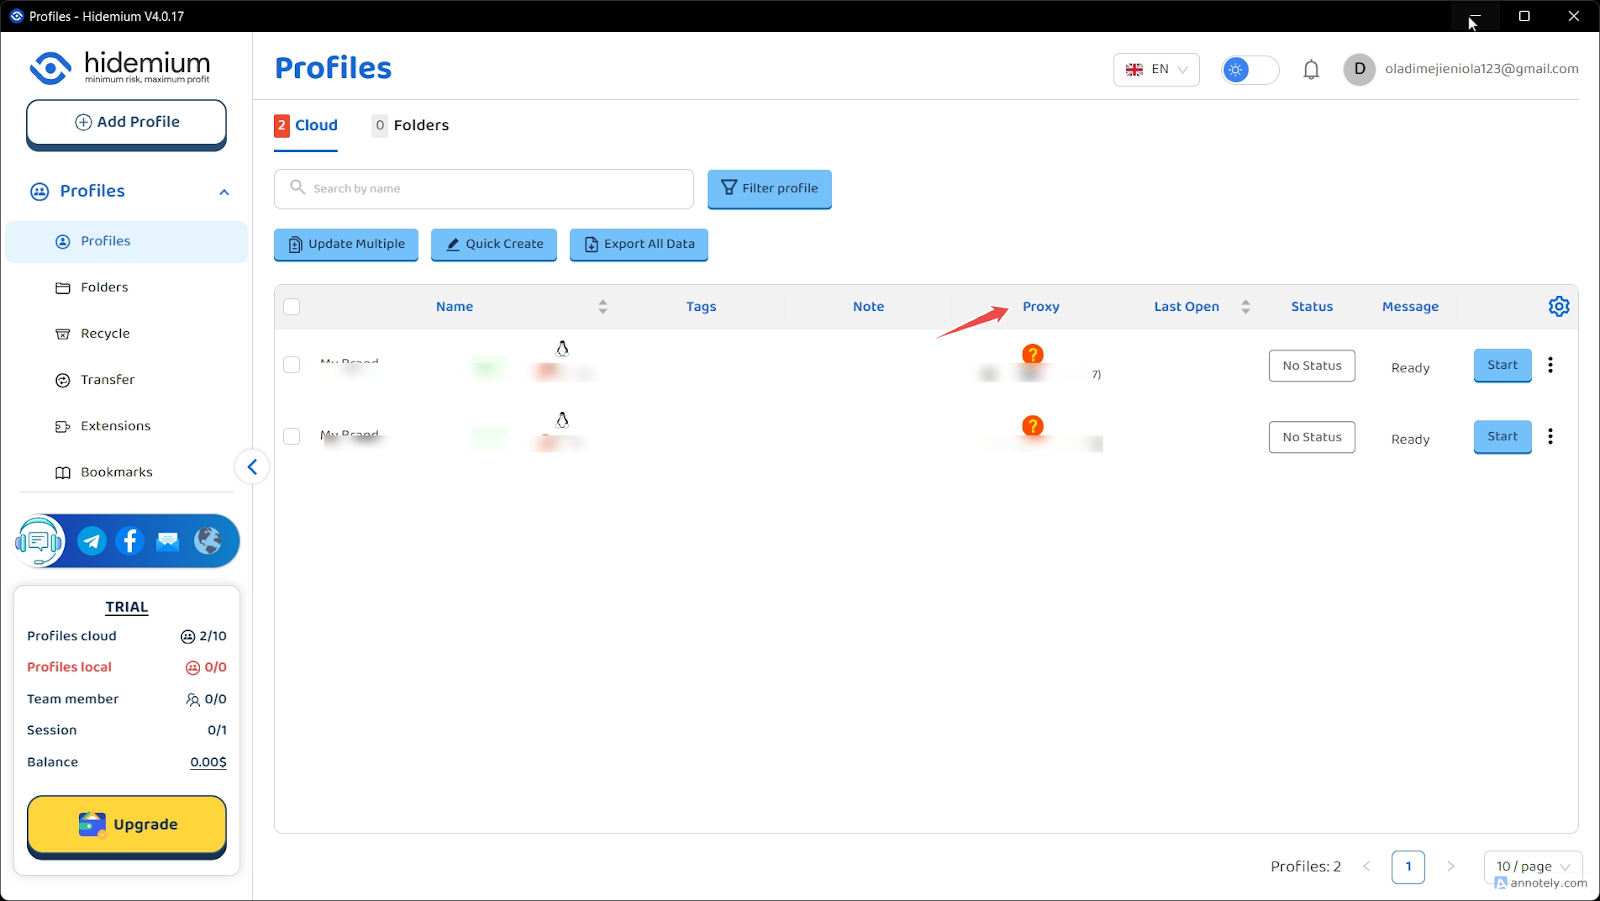
While the information for the two setups is entered into similar fields, the details are quite different.

7. (Optional) API IP address configuration
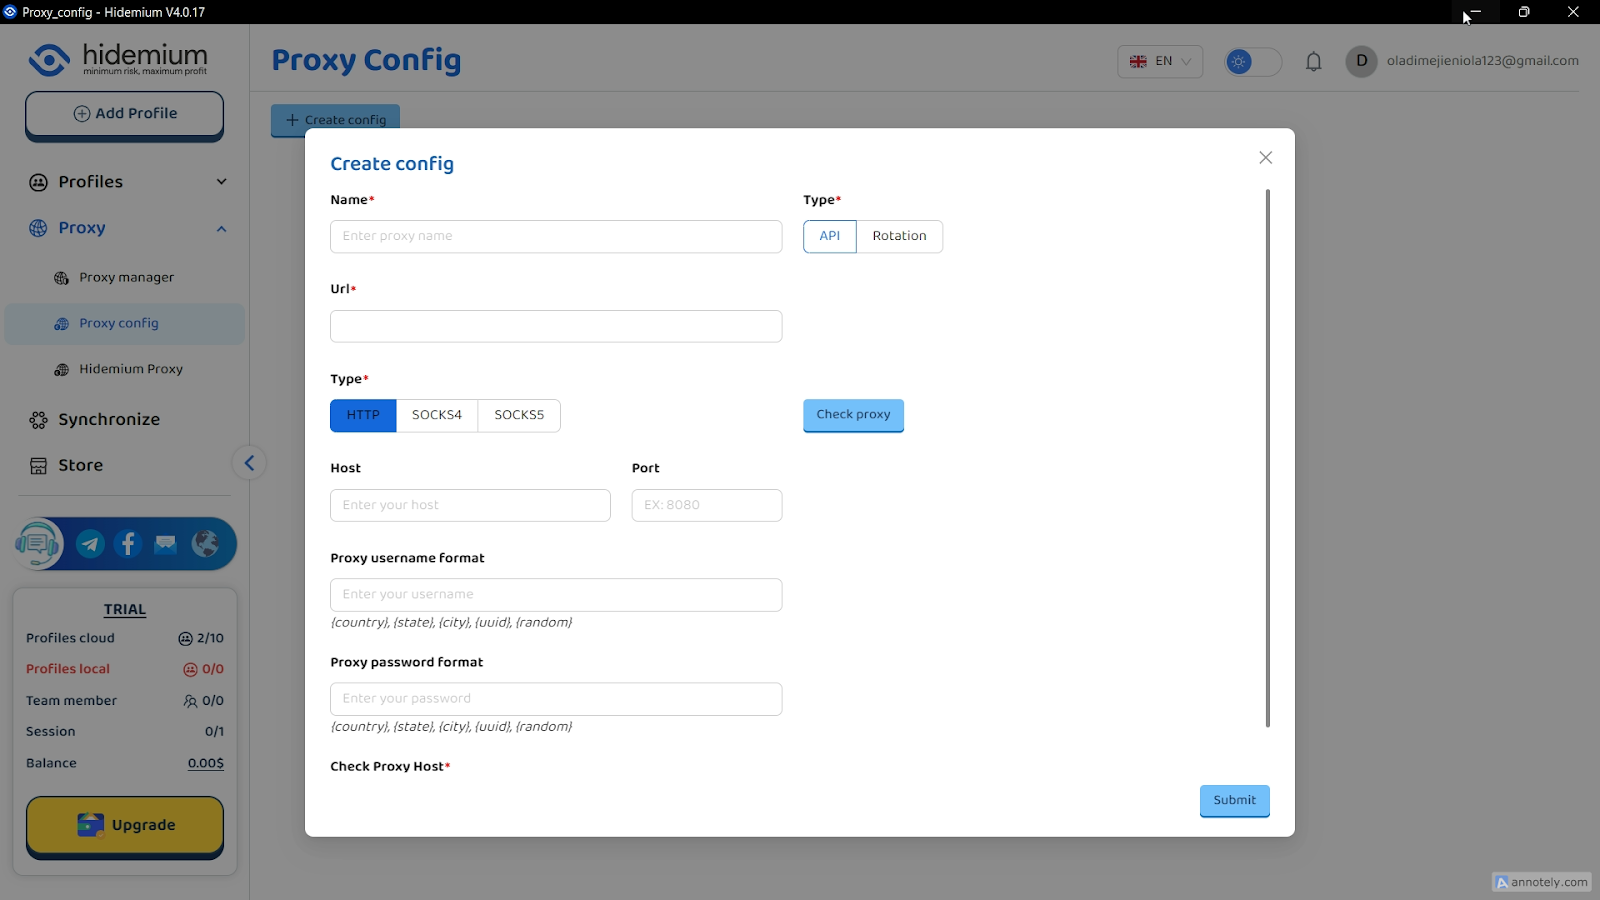
The API address refers to the endpoint URL through which Hidemium communicates with the proxy service to retrieve and manage proxy details. To configure proxies, you must input a URL along with other credentials like username, port, host, and password.
Here is a simple format:
Name: MyUsProxy
URL: https://api.proxyprovider.com/getproxy
Type: HTTP, SOCKS4, or SOCKS5
Host: US.proxyprovider.com
Port: 7777
Proxy Username Format: us,ca,losangeles,12345debca,randomuser
Proxy Password Format: us,ca,losangeles,67890fijkl,securepass
Rest assured, your information is readily available on the Proxy List Page of your service account. Before finalizing the setup, click on Check Proxy Host and select the Check Proxy button to ensure that your proxy details are correct and that the proxy is functioning properly.
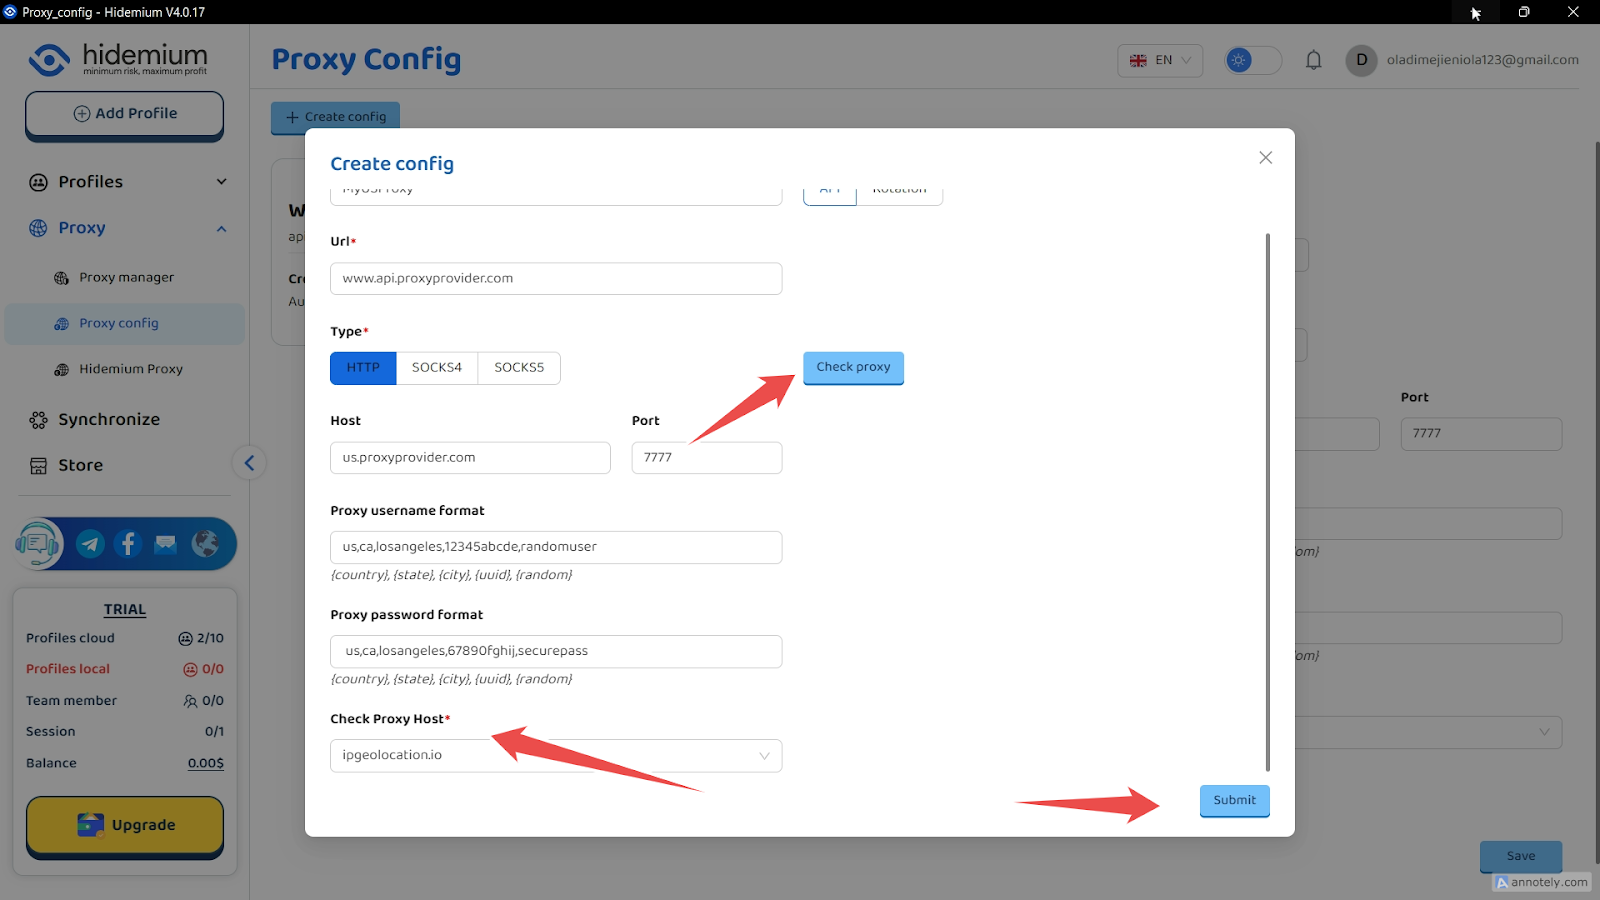
Once all the details are filled in and verified, click on the Save button to save and verify your API proxy configuration.
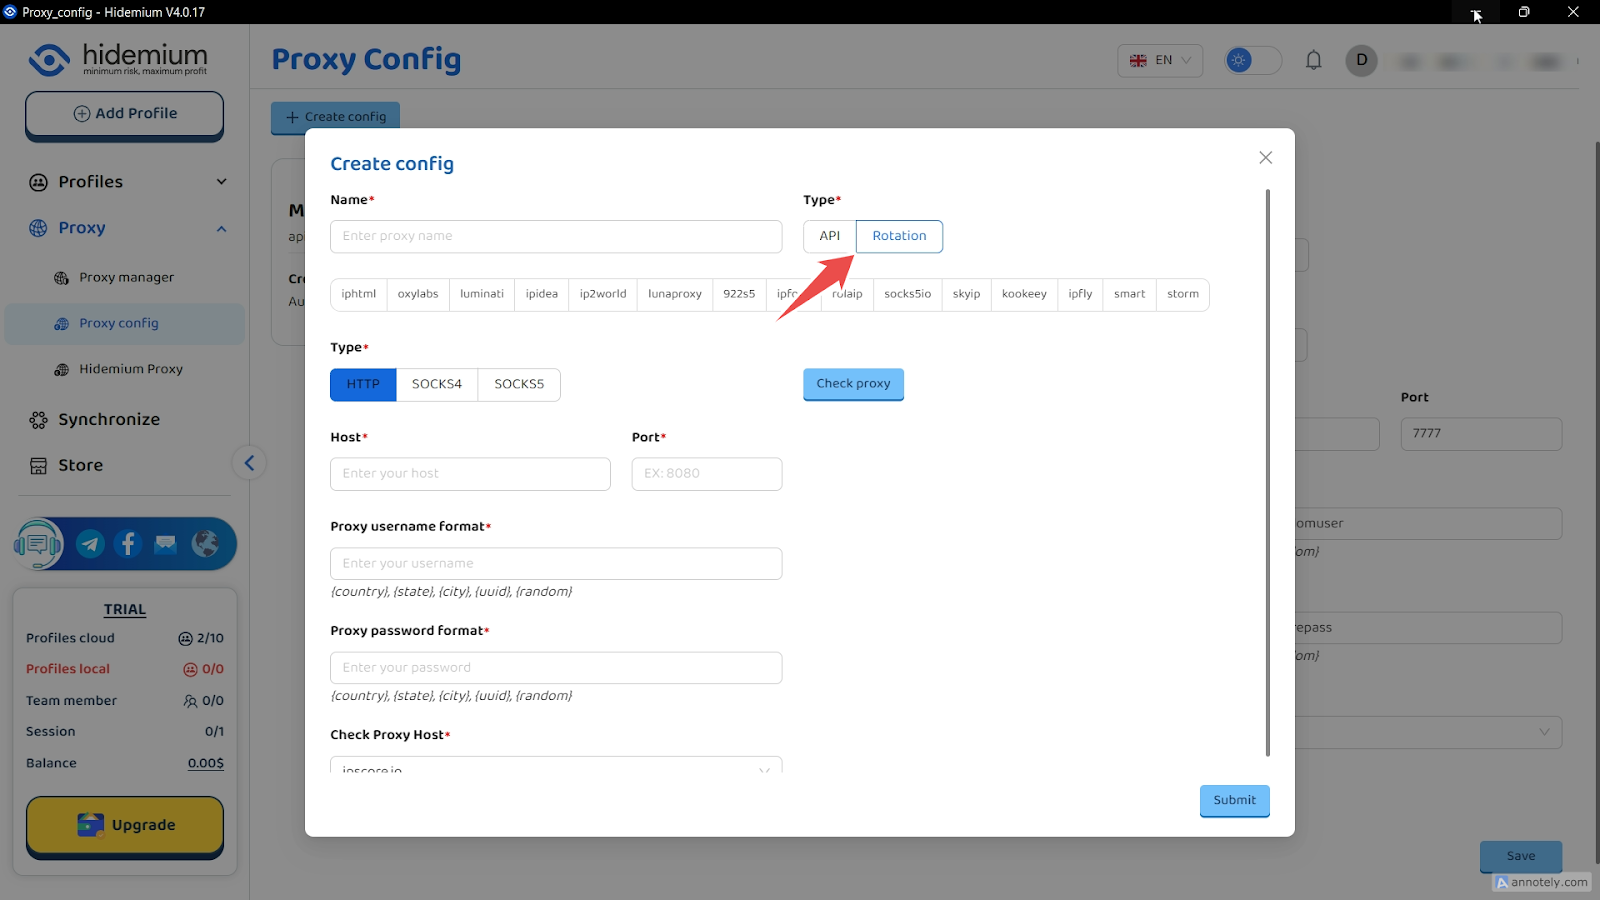
7. (Optional) Rotating IP address configuration
This rotating IP address configuration enhances anonymity and helps navigate websites with strict detection mechanisms. Fortunately, you can implement this on Hidemium with only a few adjustments from the API setup.

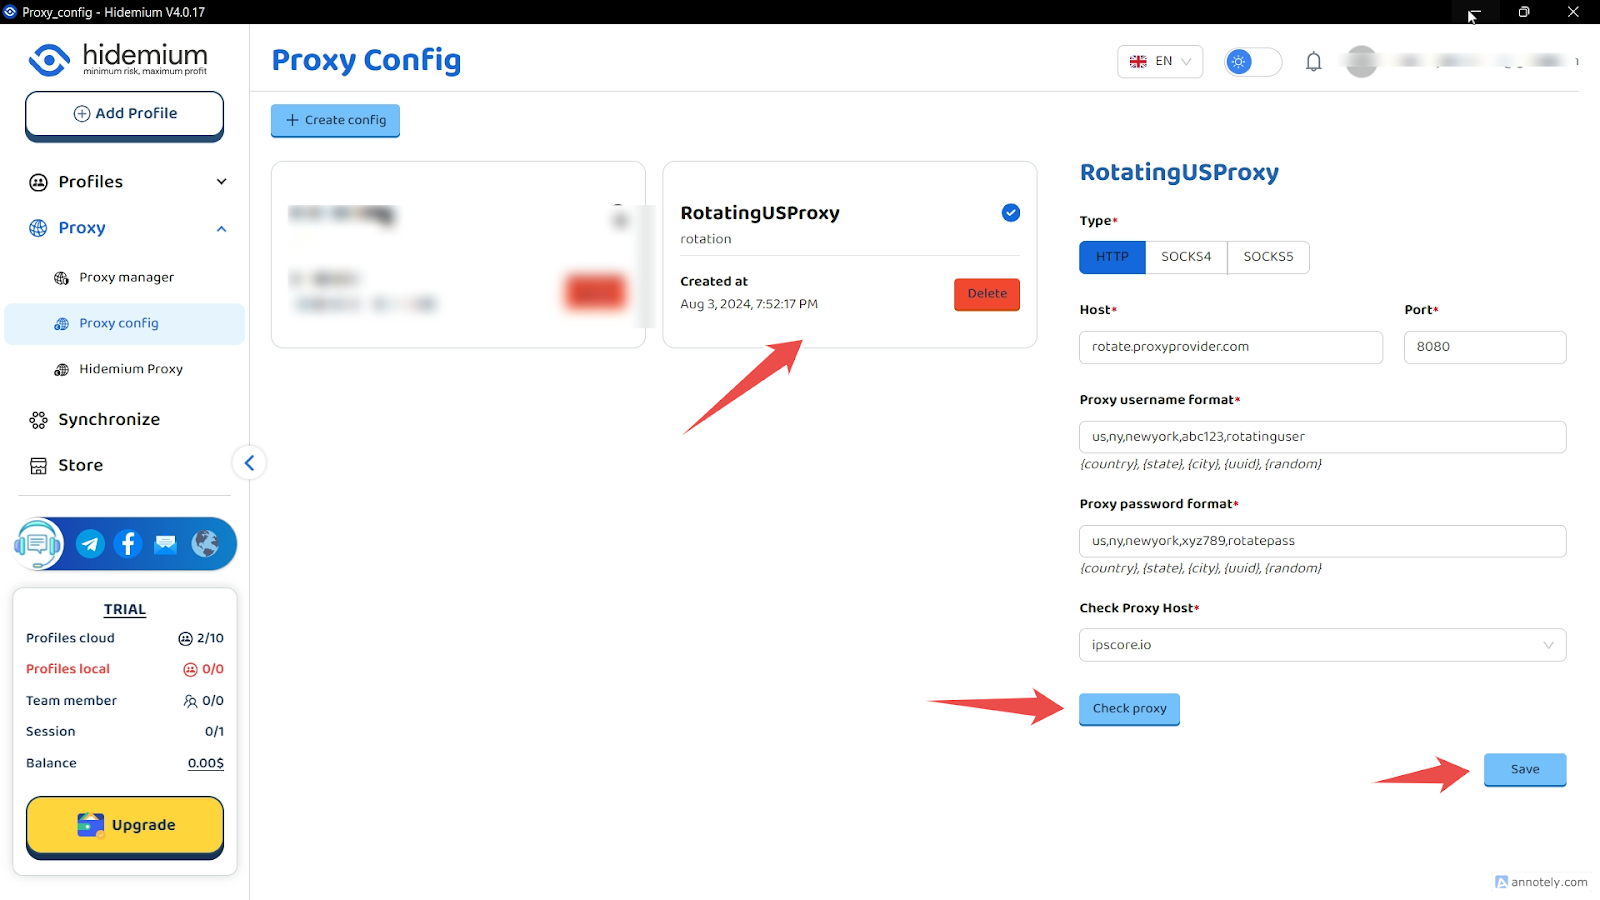
To begin, log into your proxy provider’s admin dashboard and go to the Rotating Proxy section. There, you will find the domain name, port, and username required to set up a rotating proxy configuration.

Once all details are filled in and verified, click on the Check Proxy and Save button to confirm your proxy configuration.
8. Activate Your Proxies and Start Browsing
After confirming your settings, click the appropriate button to save your configured profile and open a browser that adheres to your set parameters. At this point, you have all you need to browse securely and anonymously.
How to set up batch proxy list in Hidemium
Configuring batch proxies in Hidemium makes managing multiple profiles in different sessions easy. A batch or bulk proxy allows easy access to various profiles with just a few clicks.
To achieve this, locate and select the Import Proxy option within the Proxy Manager Menu.
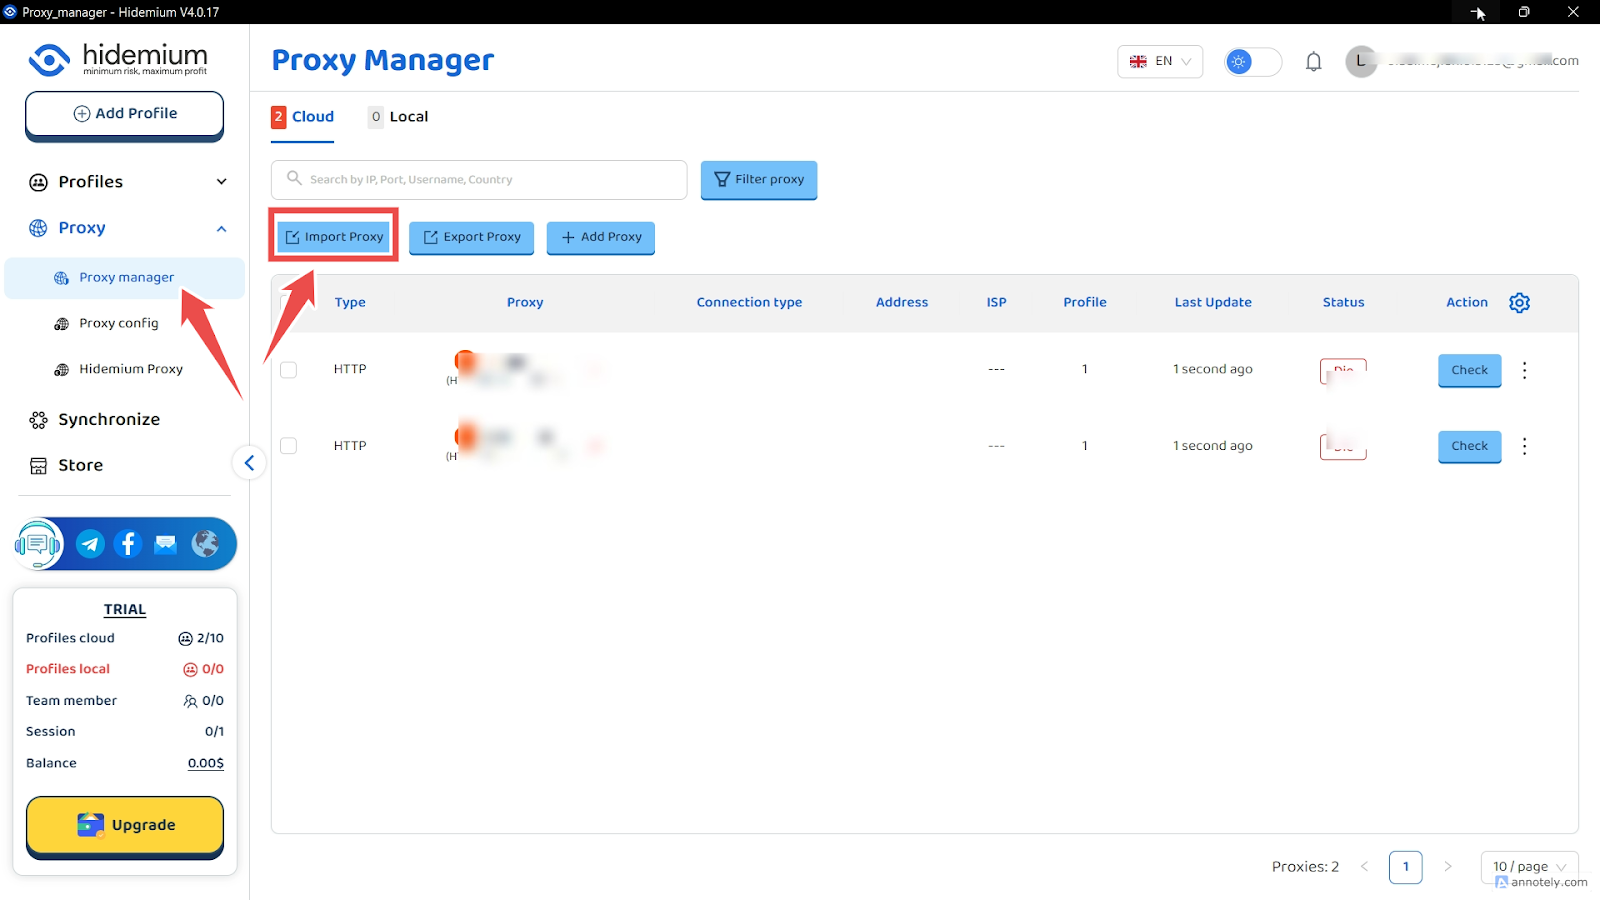
Before you click the Import Proxy button, ensure that you have created a list of proxies you intend to use. The list must be formatted correctly, typically in a CSV or TXT file, with each proxy’s details, such as type, IP address, port, username, and password. You can do this easily in Webshare by navigating to the Proxy List page.

Once this is in place, proceed to import your prepared proxy list file. Hidemium will process the file and add all the proxies to your proxy pool. In the profile settings, you can also assign each proxy to different profiles.
Voila! We’ve reached the end of this guide, and we hope you can now integrate single and batch proxies in Hidemium. Don’t miss out on Webshare’s current promotion—each new account comes with 10 complimentary proxies. Take advantage of this offer today to step up your online security!


