

In this guide, we will examine BitBrowser to understand better what it does and how it can benefit you, depending on the nature of your tasks. We’ll also shed some light on how to set up a single proxy and batch proxies for heavy and light use, respectively. Let’s go!
What is BitBrowser?
BitBrowser is a powerful anti-detect tool that allows users to manage multiple accounts without using different devices. It works around hardware bans by allowing users to customize and simulate different computer setups for their browser sessions.
Overall, it properly leverages proxy IPs and provides tools for custom browsing sessions, allowing for a deeper level of anti-detection.
Before starting
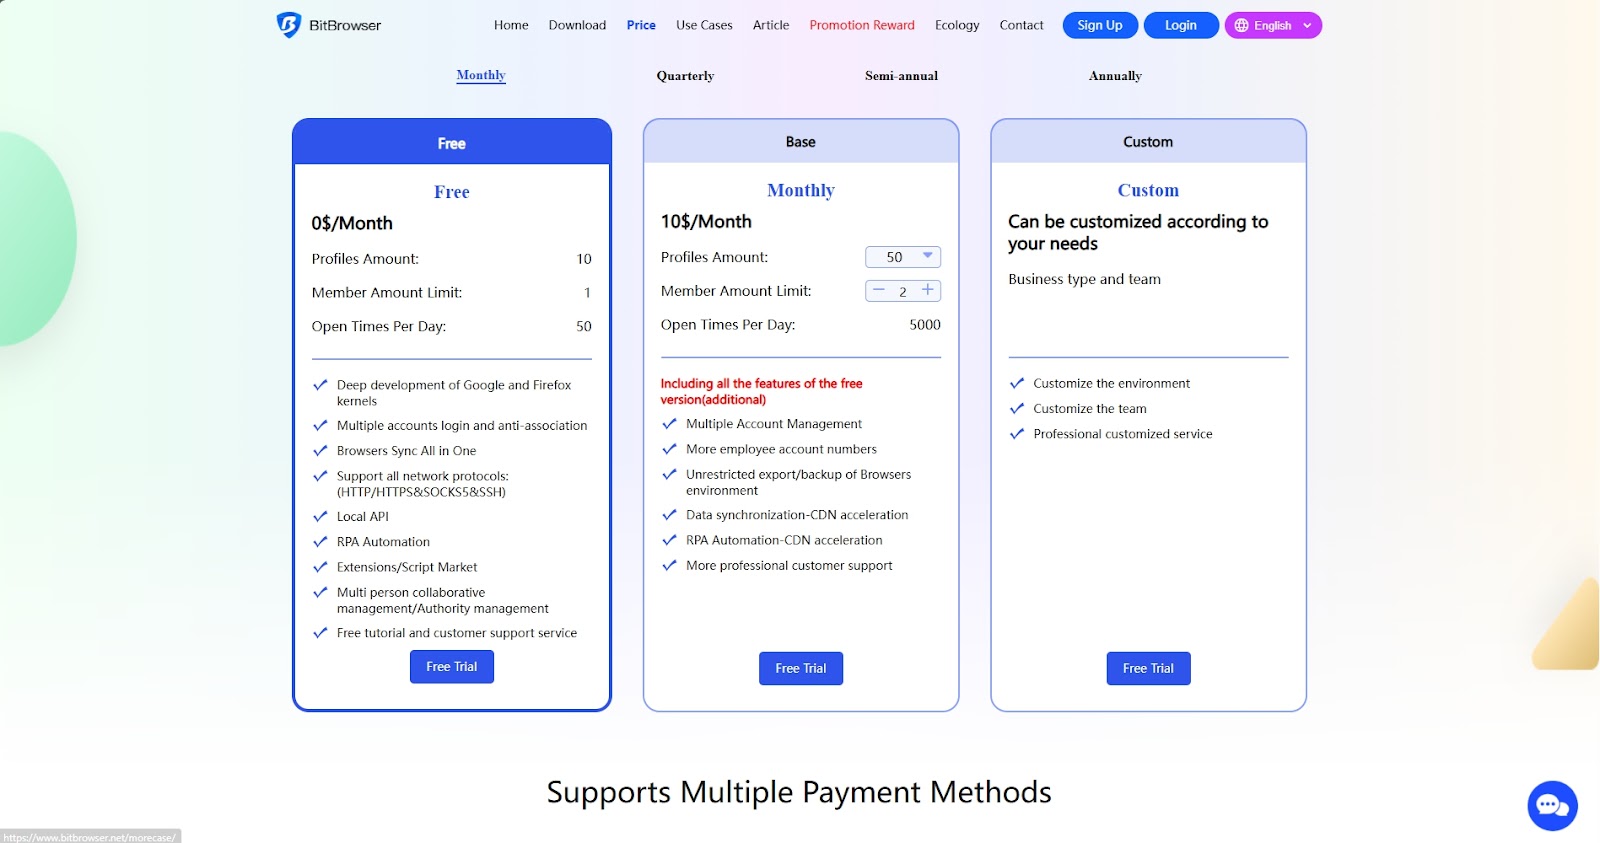
The free version of BitBrowser comes packed with a long list of handy features. But you could opt for one of the paid tiers if there is a feature you feel you’ll need. Before downloading, take a look at the pricing page and decide what you need.
In addition, you will also require secure proxies so you can fully utilize the browser’s features. Thankfully, Webshare offers 10 premium proxies for every completed account creation. Sign up now to claim your free proxies and use them to really test BitBrowser.
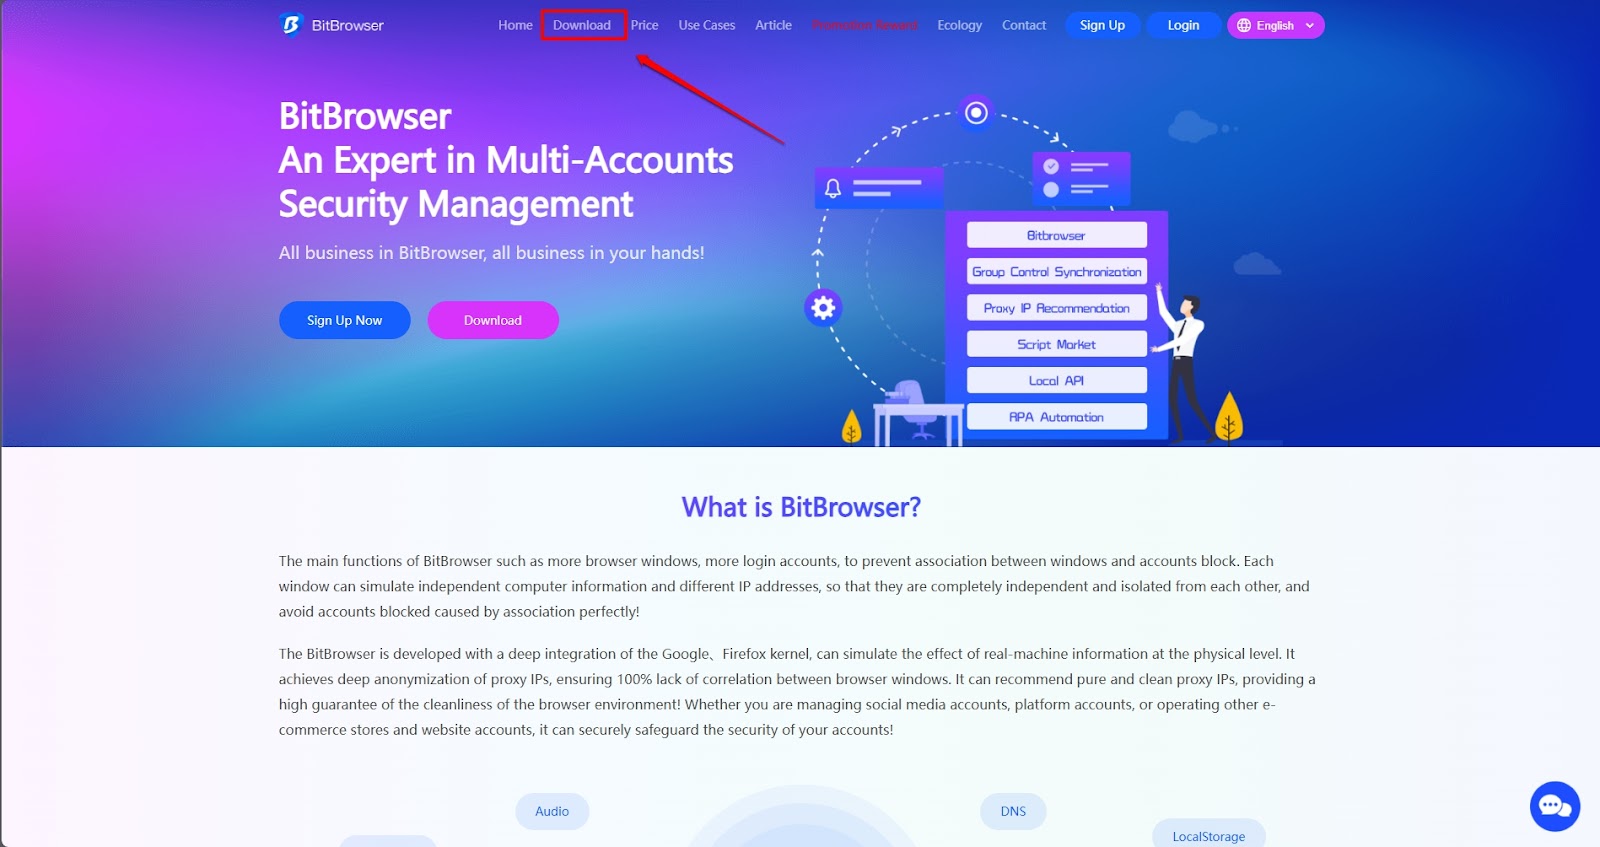
1. Download BitBrowser
You’ll want to download the BitBrowser client immediately, and you can do this in two ways. The first would be to click the Download button on the home page.
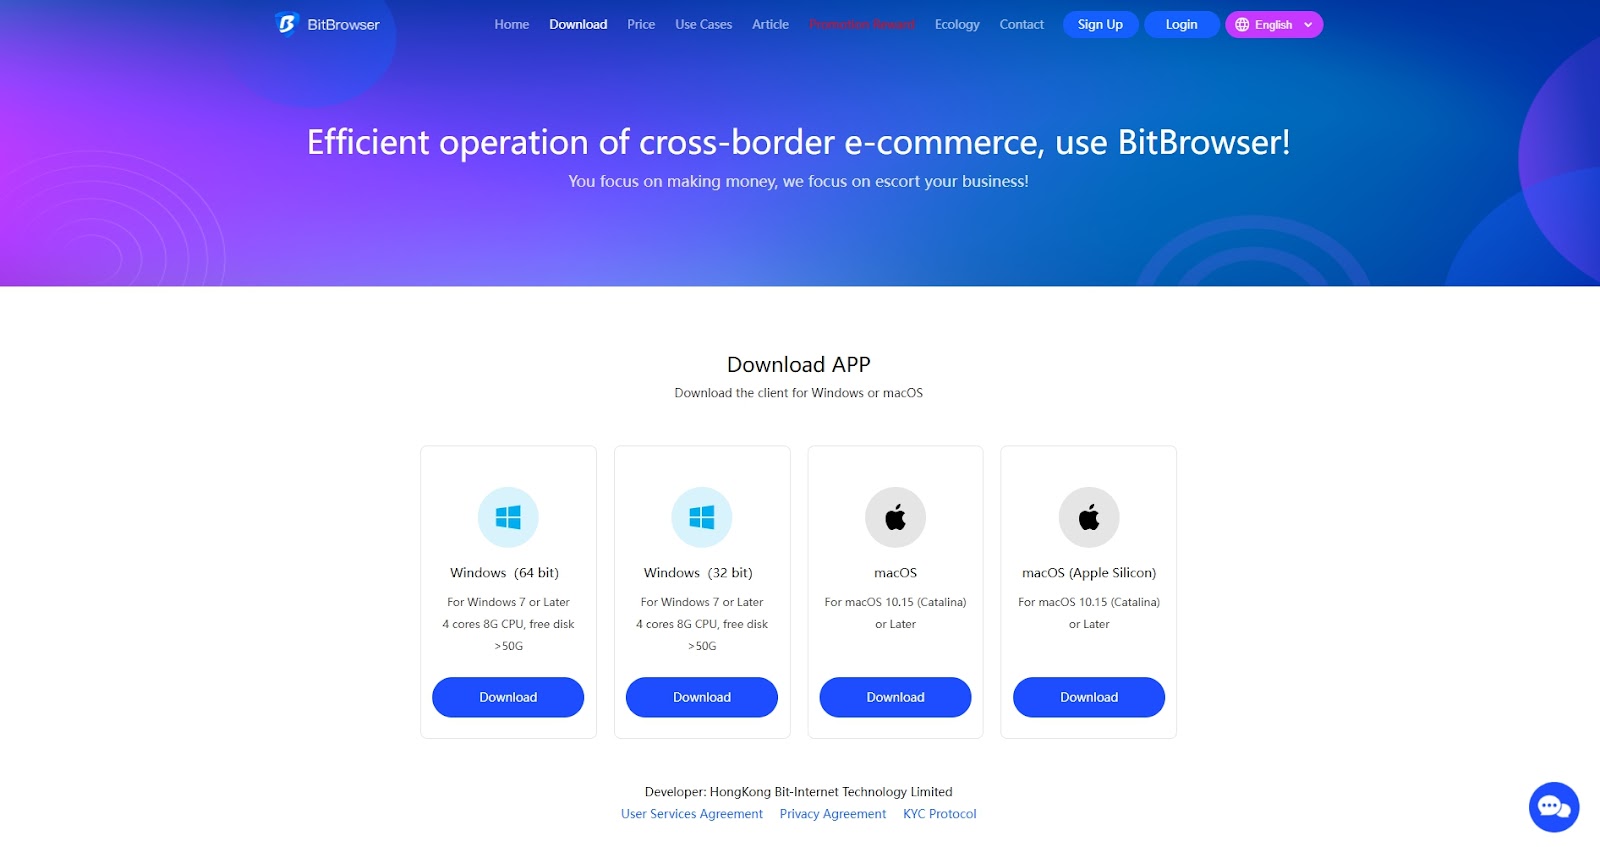
This will take you to the download page, which outlines the different browsers supported by the BitBrowser client. Confirm your platform and download the right installer to match it.
Alternatively, you can log into your BitBrowser account; this will automatically prompt you to download the desktop client.
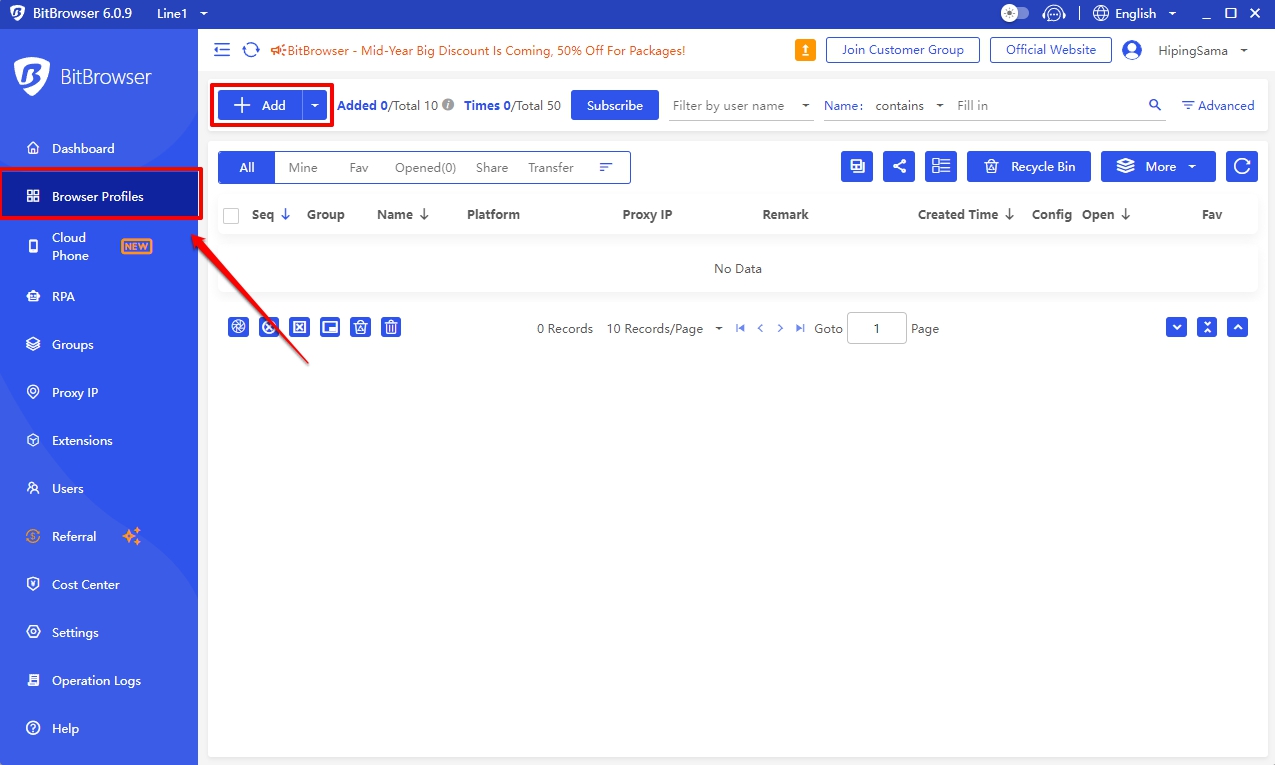
2. Create a New Profile
Upon successfully installing the BitBrowser client and logging in, you’ll be greeted with a small environment walkthrough. The next step would be to create a new browser profile. You can do this by navigating to the Browser Profile tab and clicking the Add button.
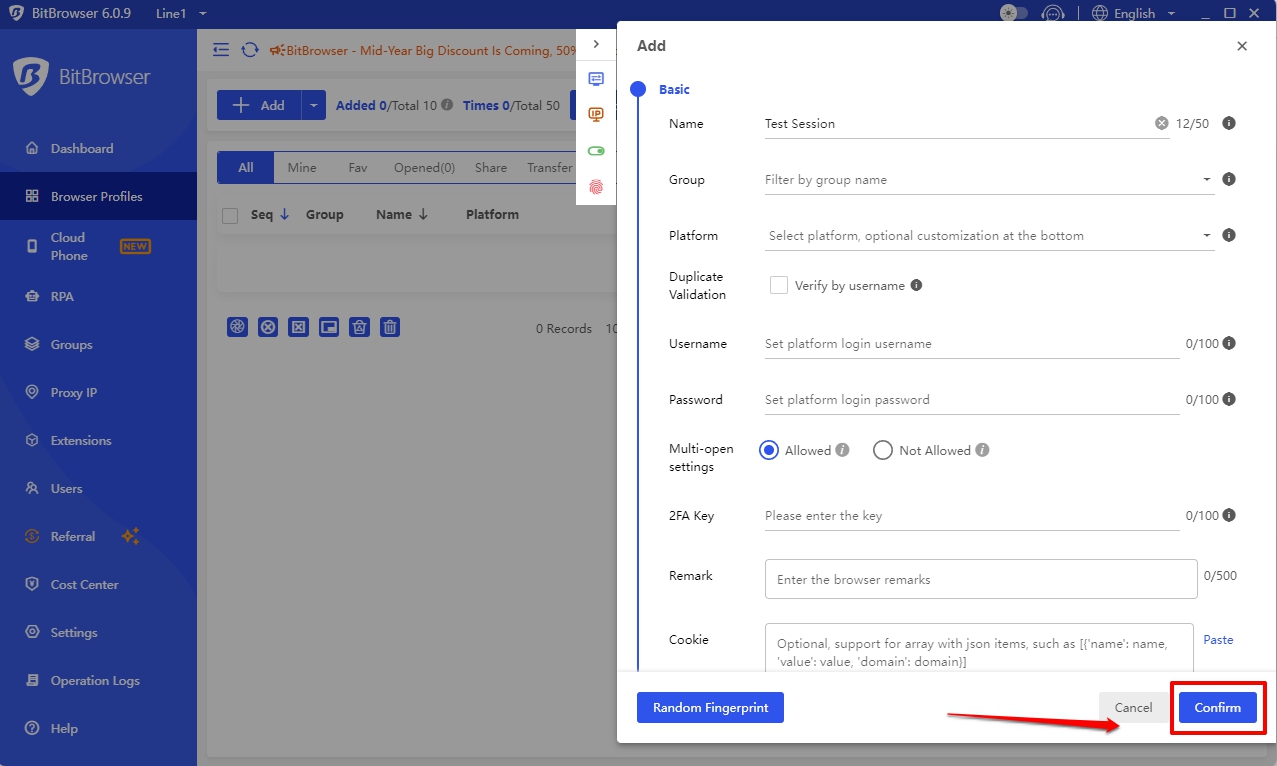
3. Basic Information
This is the first section of information regarding your new browser profile. It contains the name of your session and other rudimentary indicators, such as the group you’d like to save the profile in, what platform you’d like to run, and even a two-factor authentication key if you wish to use one.

You can also add custom cookies to your browser profile from this window. However, this is optional.
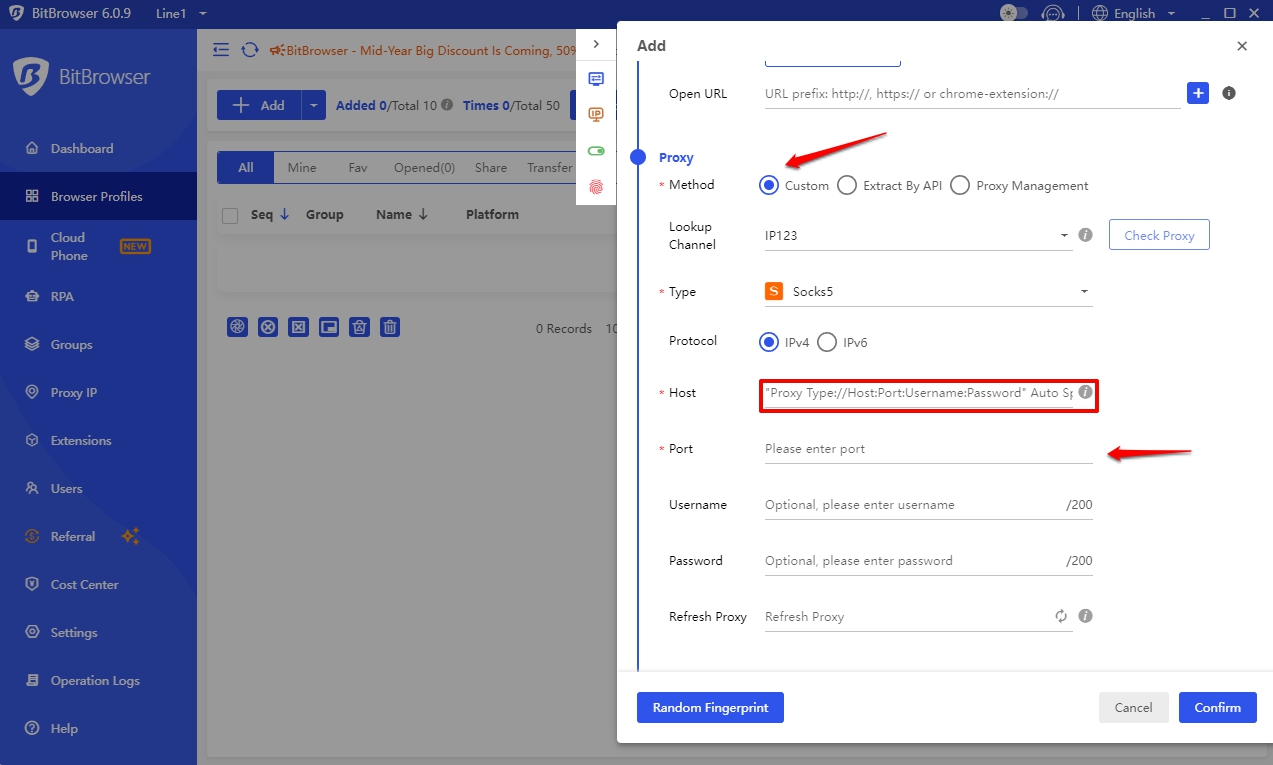
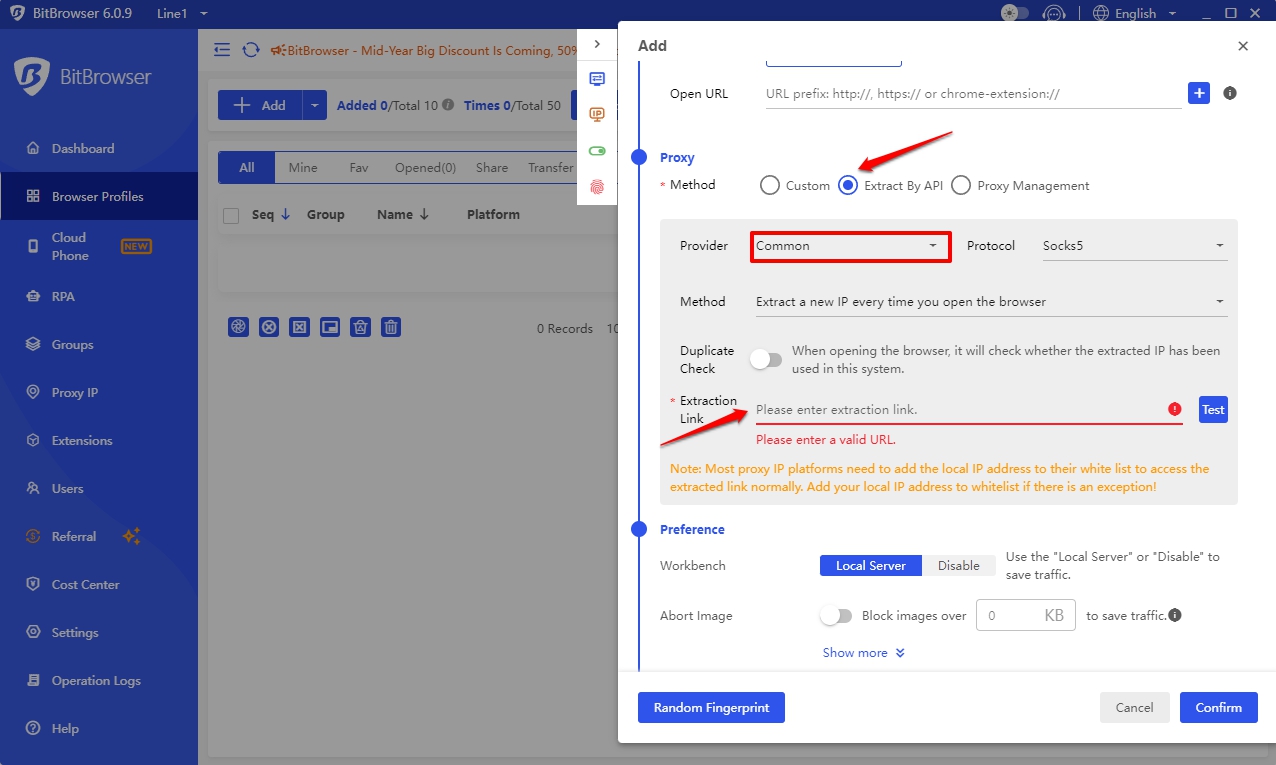
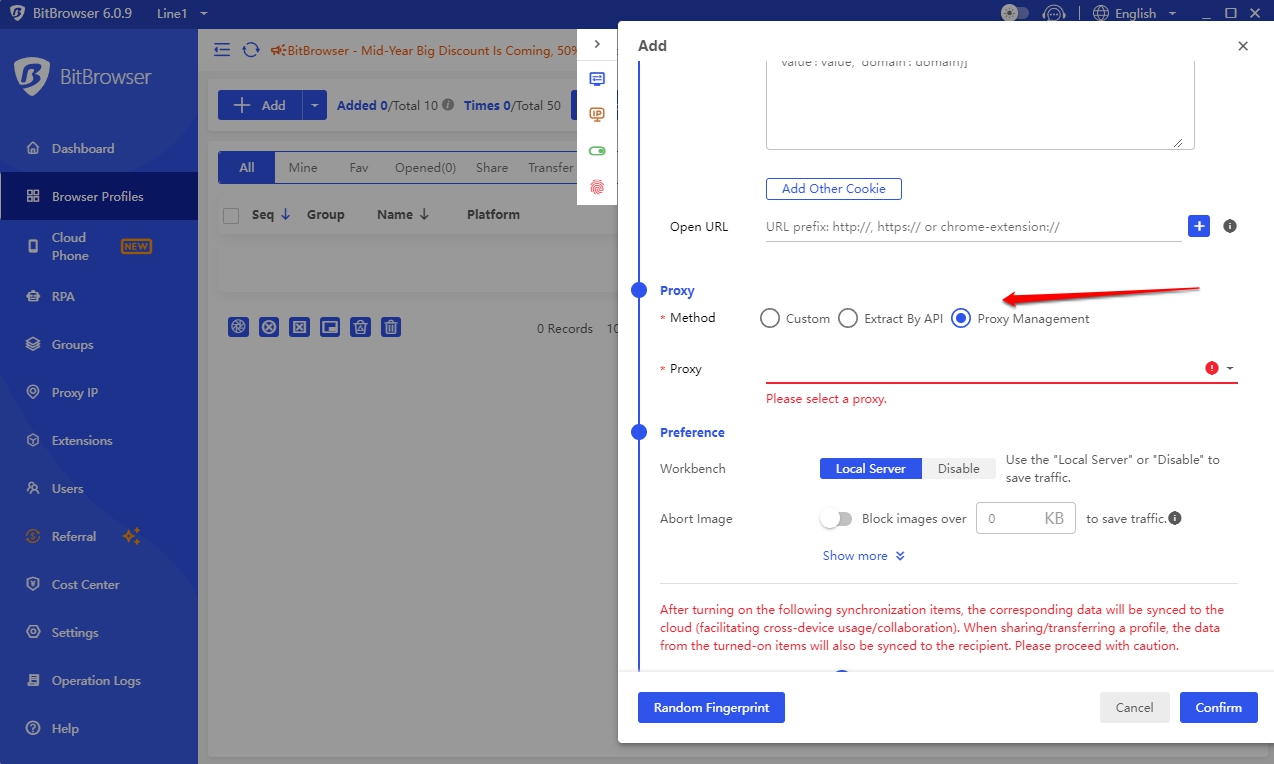
4. Proxy Setup
The next section details your proxy information. You can add a Custom proxy in three ways. First, you can enter the information in the provided field, as shown below.
Alternatively, you could also Extract By API, as shown in the section below.
The last method is to choose an already saved proxy from the Proxy Management list.
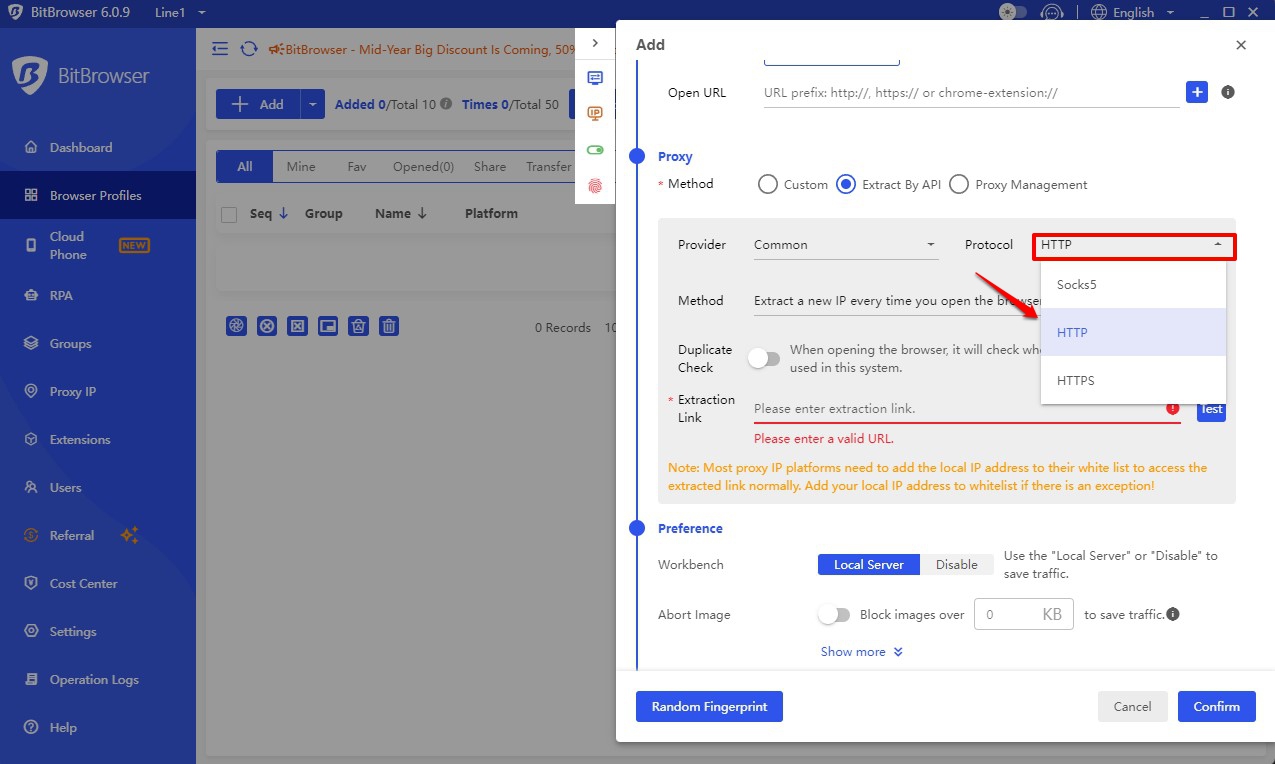
5. Choose Your Proxy Type
Regardless of what method you choose to use, you’ll need to choose a proxy type. BitBrowser supports an impressive list of proxy types, some from specific services. Webshare offers both HTTP and SOCKS5 network protocols, but we’ll be sticking with HTTP for the sake of this guide.
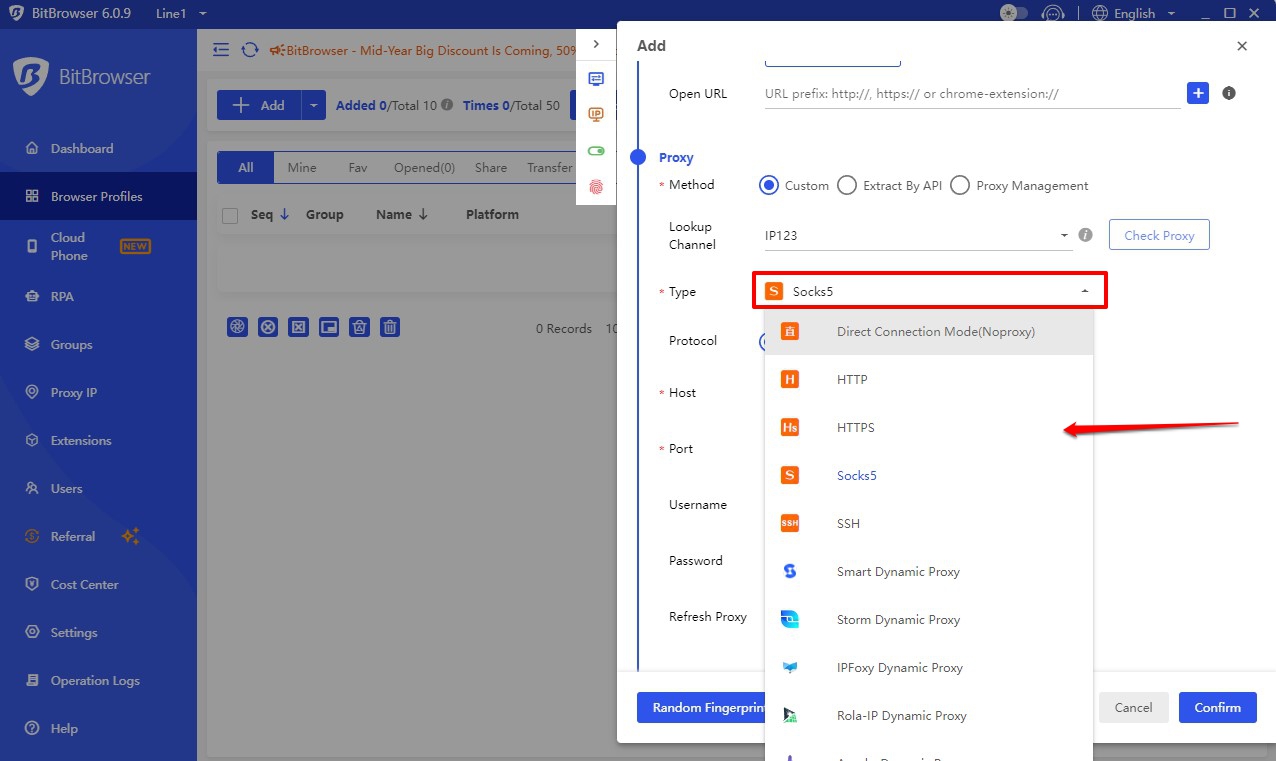
You can indicate the proxy type you wish to use either by selecting it in the Protocol drop-down on the Custom page or the Protocol dropdown on the Extract By API page. Either way, ensure you choose the right protocol to match your proxy.
6. Fill Out Your Proxy Settings
Once you’ve confirmed your proxy type, you’ll want to enter your proxy details and confirm your settings. You can choose to do this in a static or rotating proxy setup.
While the information for both setups is entered into the same fields, the details are different. You might also be unable to use a rotating proxy setup if your proxy provider doesn’t support it.
Static IP address configuration
You could use three general methods to add a proxy to BitBrowse. For the sake of this guide, we will focus on the Custom method. There are two ways you can enter information in this section. You could copy your proxy details as a single link in the format “IP:Port:Username:Password,” and paste it into the Host field.
BitBrowser will automatically process the information and separate it into relevant fields.
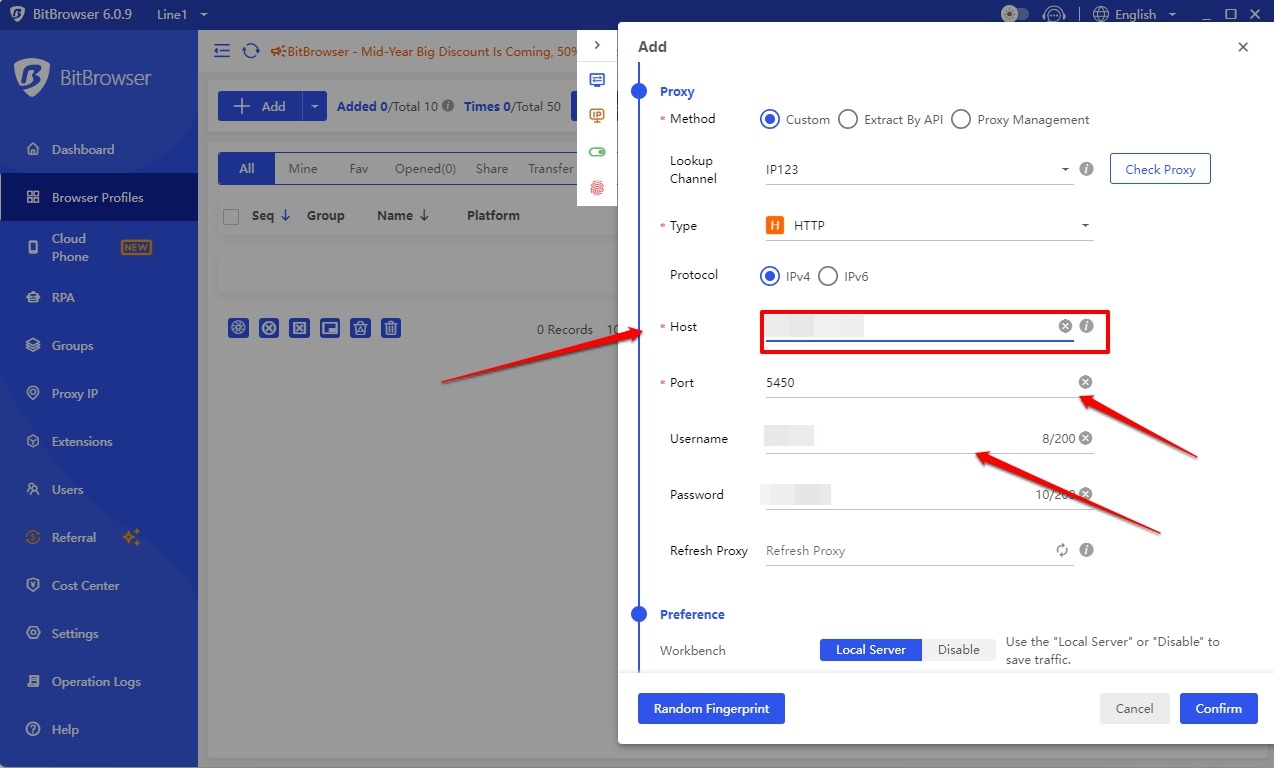
You can also choose to enter these details separately. Regardless of how you choose to do it, you’ll need to retrieve the proxy information from your proxy provider. You can find this information by visiting the proxy list page on your account.
Proxy Type: HTTP or SOCKS5
IP/Port/Username/Password: It is bundled together using colons. (e.g 12.234.230.177:5450:cccttti:password123)
IP: e.g 12.234.230.177
Port: e.g 5450
Username: e.g cccttti
Password: e.g password123
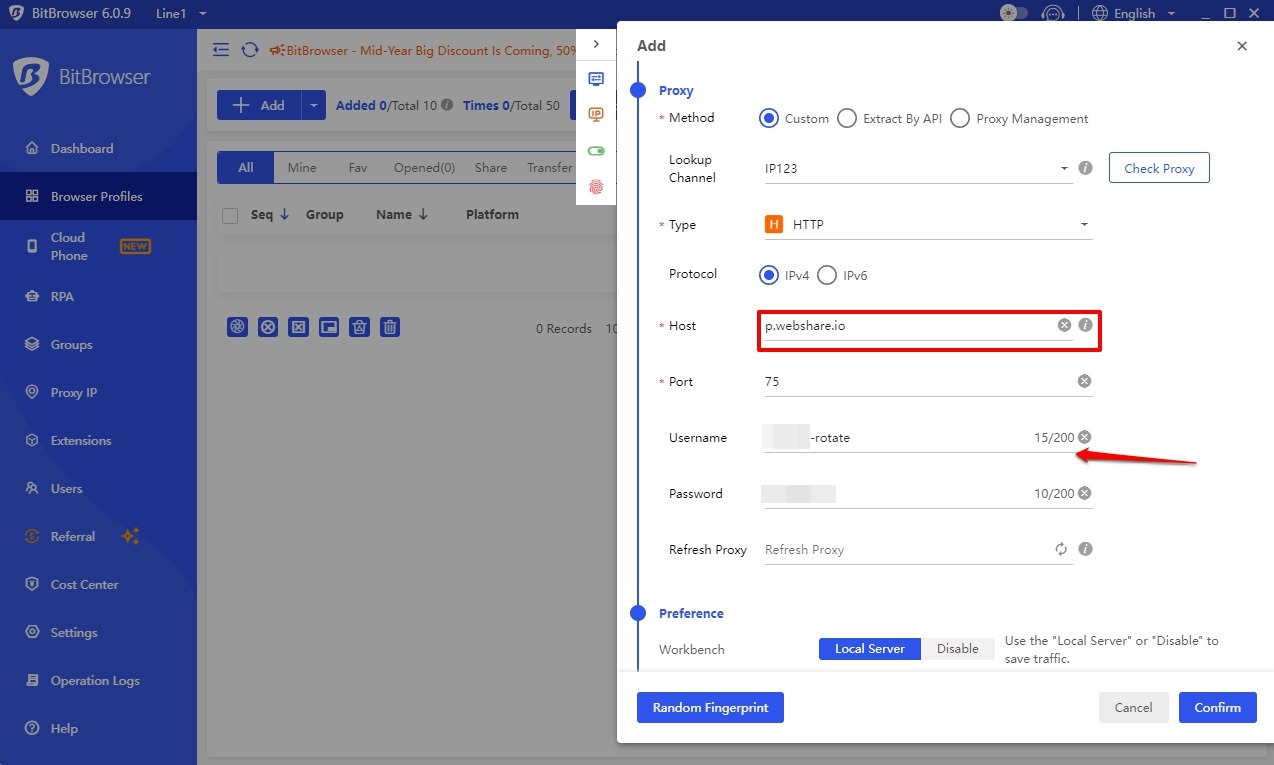
Rotating IP address configuration
A rotating proxy configuration enhances your browser's anti-detect features. As mentioned, you will enter the proxy information into the same field. However, the information will differ slightly from that of a static proxy. You can find the relevant details by visiting the Rotating Proxy page in your proxy provider setup.
Proxy Type: HTTP or SOCKS5
IP/Username/Password: It is bundled together using colons. (e.g p.webshare.io:75:cccttti-rotate:password123) In this format.
Domain: e.g p.webshare.io
Port: e.g 75
Username: e.g cccttti-rotate
Password: e.g password123
You could either enter the bundled information as a link into the Host field or enter each detail manually.
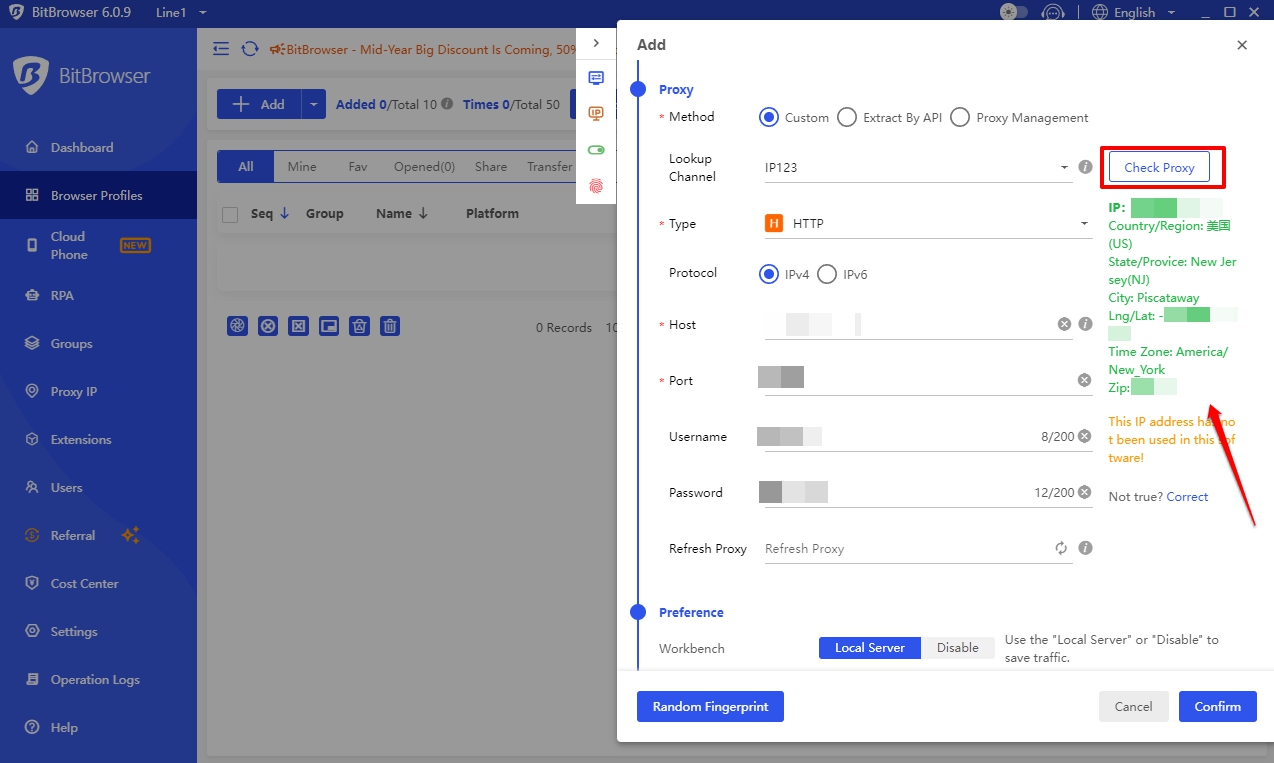
7. Check Proxy
It’s important to confirm your proxy details. You can do this in BitBrowser by clicking the Check Proxy button at the top right corner. Once the connection has been made and confirmed, basic details regarding the IP will appear on the right.
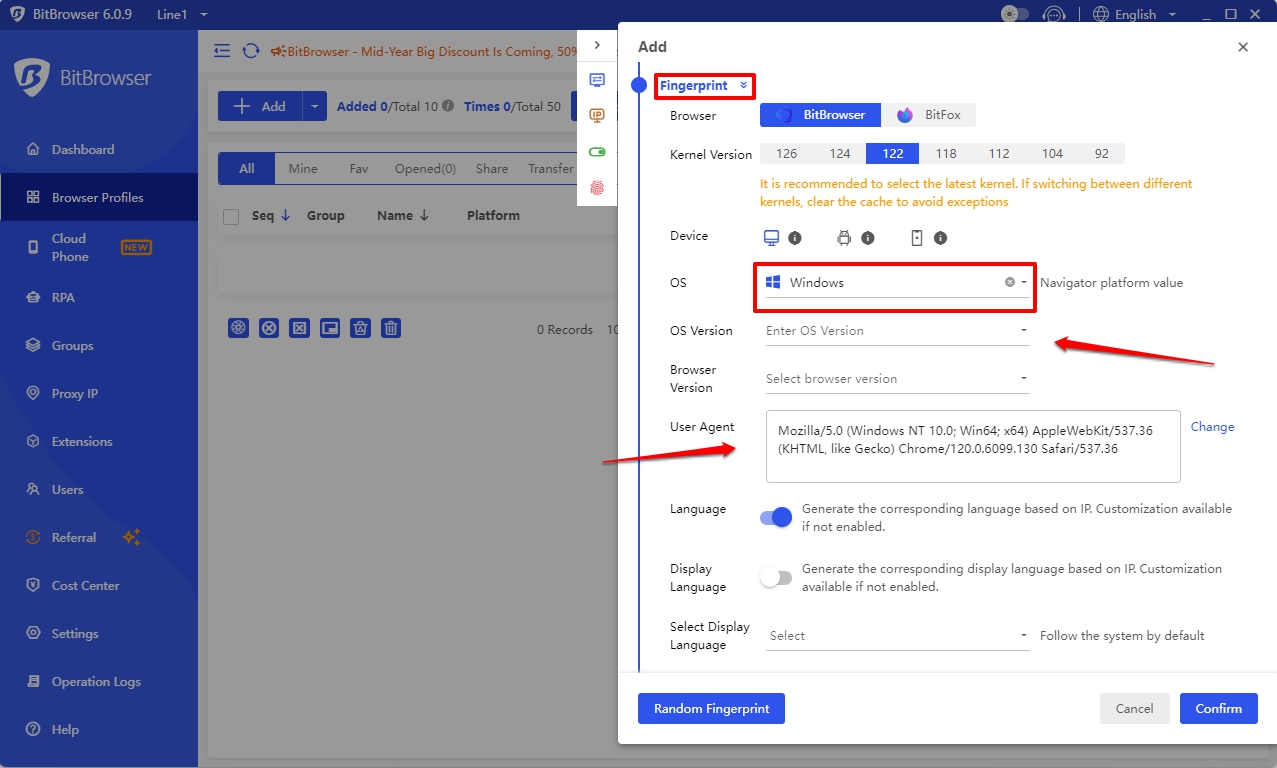
8. Edit Preferences and Fingerprint
You can fully edit additional information for your browsing session or choose whether or not cookies and account information are saved.
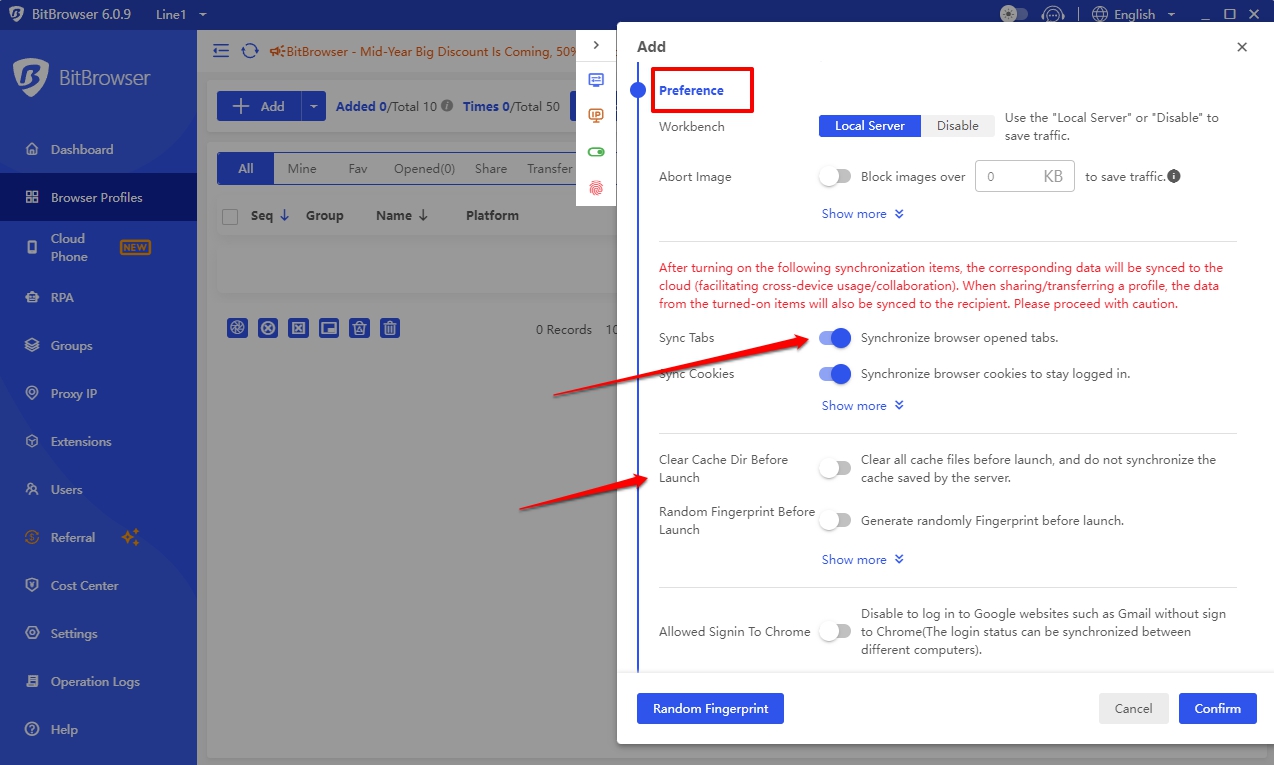
BitBrowser also allows you to tailor your hardware information so you remain anonymous on different platforms.
9. Start Browsing
Take your time customizing the different settings for your browsing session. Once you’re ready, click the Confirm button to save your new browser profile.
This will take you back to the Browsing Profile window and show you the new profile you’ve created. You can start browsing by selecting the Open button next to your profile.
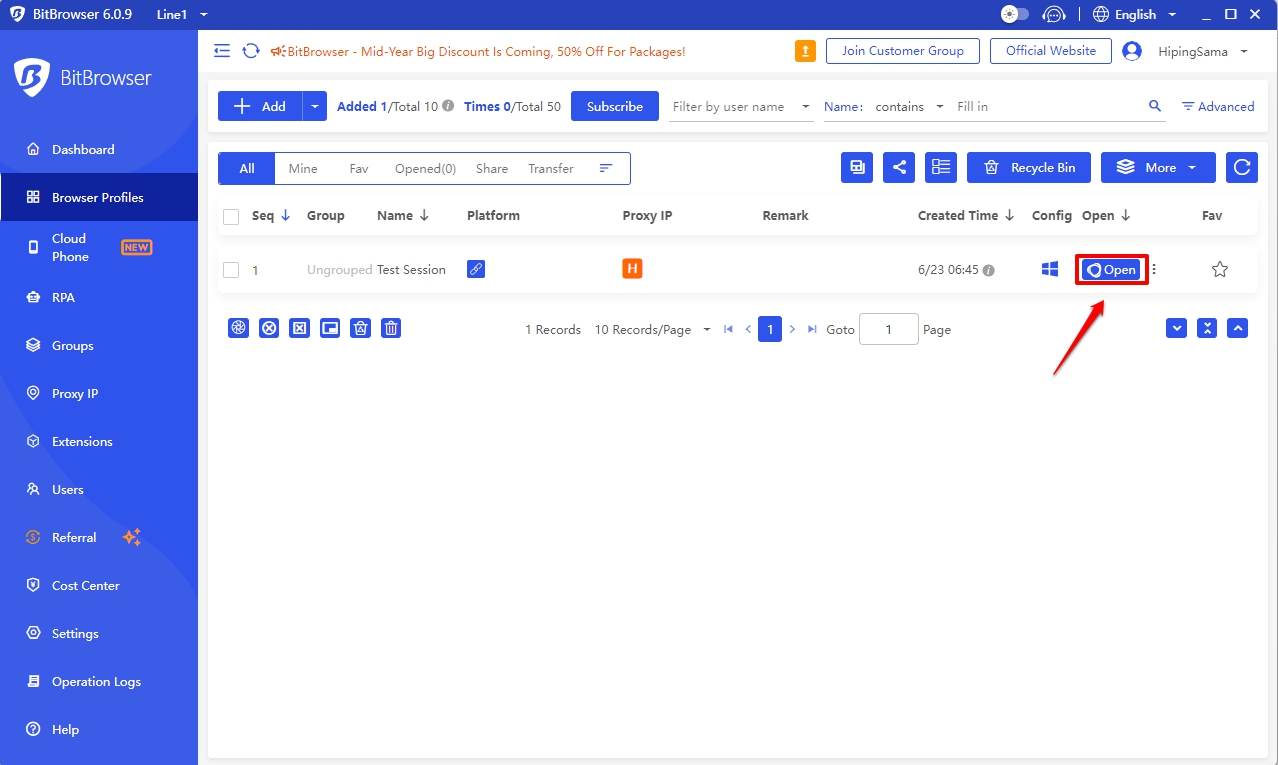
BitBrowser will take a moment to load your settings before launching a browser that obeys these parameters and uses your custom proxy address settings. Then, you can finally browse undetected.
How to Set Up Batch Proxies in BitBrowser
If you’ve prepared a list of proxies you wish to use in BitBrowser, importing them one after the other might be a hassle. Thankfully, with Batch importing, you don’t have to.
Here’s how you can batch-import proxies in BitBrowser:
1. Setup a Proxy List: First, you’ll need to create a text file containing the proxy details you wish to import. Each row should be in the format “IP Address:Port:Username: Password.” You can get this list on Webshare from the Proxy List page.
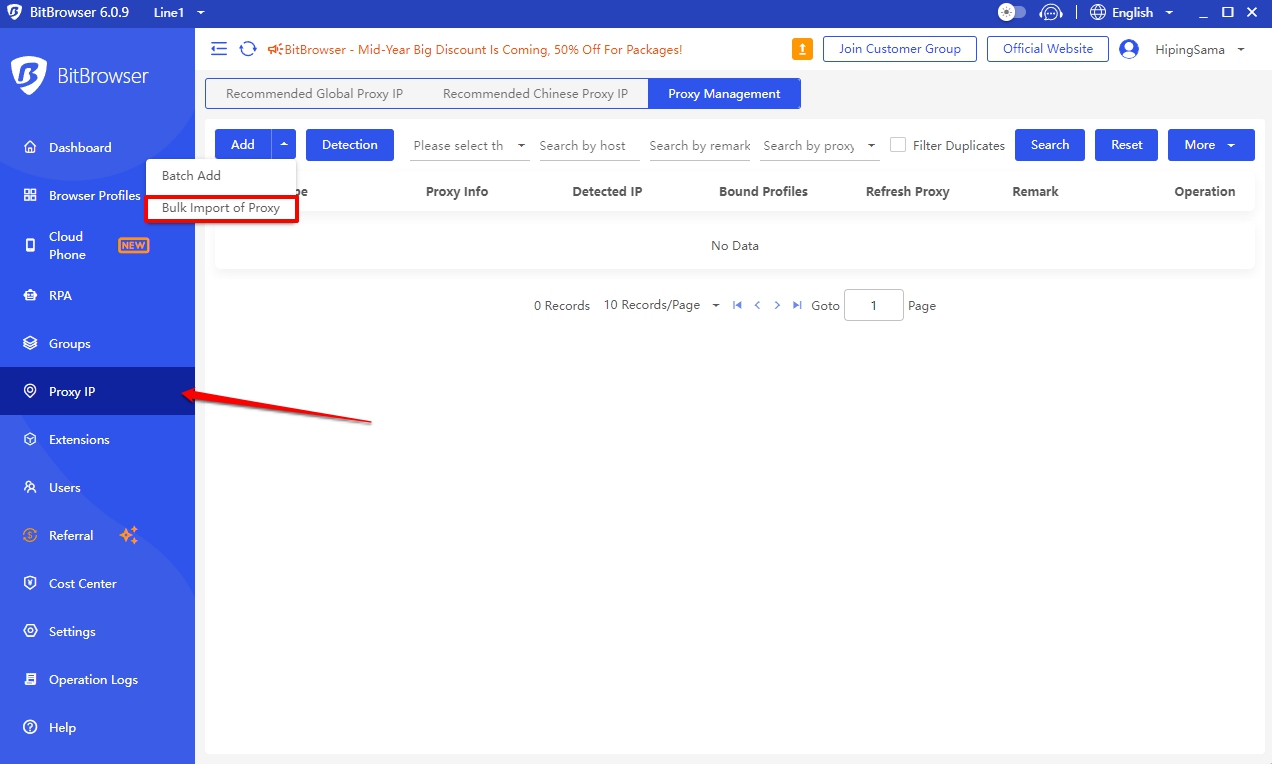
2. Batch Import: There are two ways you can batch import proxies on BitBrowser. You can navigate to the Proxy IP page, go to the Proxy Management tab, and select Batch Add. This will trigger a pop-up menu that will allow you to paste your list of proxies.
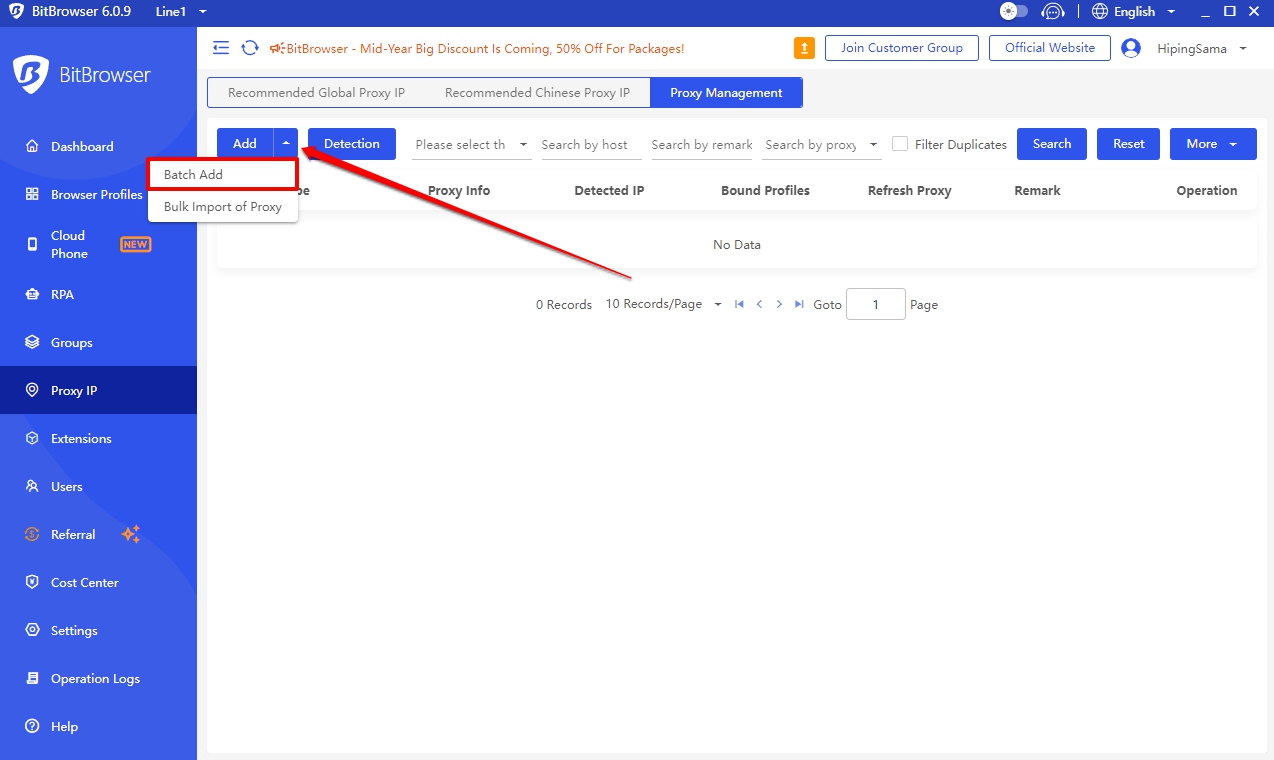
If you save your proxy list to an Excel file, you could also click the Batch Import of Proxy button to import the file.
3. Batch Testing: BitBrowser allows you to confirm all the proxies in your list at once. Do not skip this step, as it would save you a lot of trouble down the line.
And that’s all you need to know! Overall, BitBrowser is a powerful tool that can be effective in the right hands and with the right information. Hopefully, you now have that information.
Remember, Webshare premium proxy offer is still valid if you wish to use it. Don’t forget to try it out while the offer still lasts.


