

In this quick guide, we’ll learn all we can about ClonBrowser and how it can pair well with a proxy to produce a seamless anti-detect browsing session. We will also highlight some tips you should note when setting up your browsing session, depending on the nature of your projects - a single proxy for light use or a batch proxy for heavy use. Here we go!
What is ClonBrowser?
ClonBrowser is a professional anti-detect environment that allows users to manage multiple social media accounts seamlessly. It allows users to customize their browser environment and control their digital footprint by determining what aspects of their browsing session are saved.
ClonBrowser also supports task automation, allowing users to streamline their sessions. One major positive of this platform is that it offers all features on the free tier. On the flip side, the subscription tiers allow businesses to scale the browser’s operations to suit their needs.
Before starting
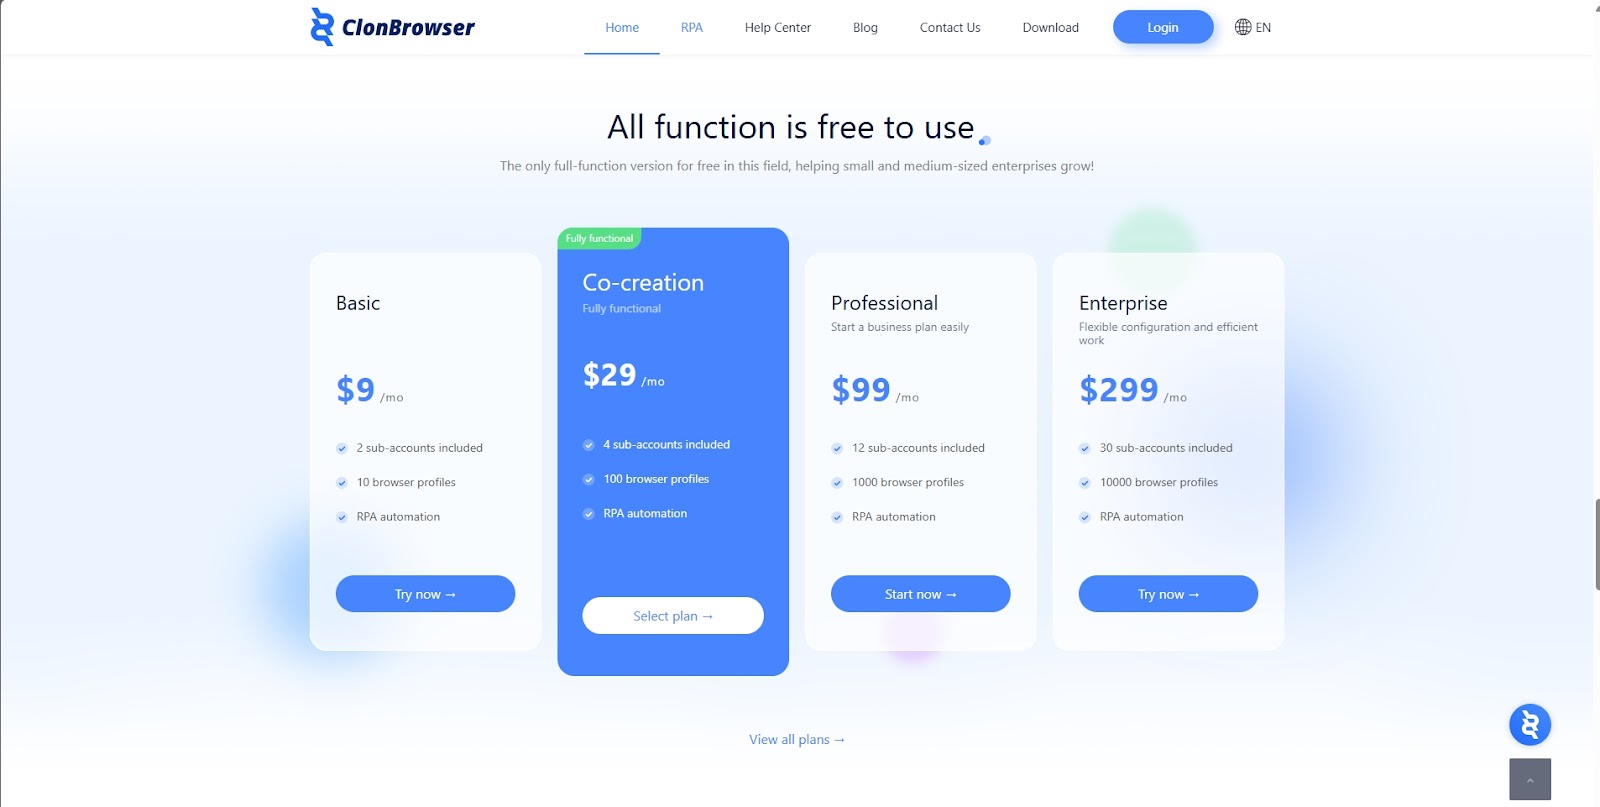
Thankfully, all of ClonBrowser’s features are available at all tiers. However, you might still want to look at the pricing list and decide what plan matches the load or nature of the projects you plan to undertake soon.
You’ll also need a proxy or a collection of proxies for the best session experience. Webshare currently offers 10 premium proxies; all you have to do is create an account. Sign up now to claim your free proxies and really test the limits of ClonBrowser!
How to set up a single proxy in ClonBrowser
Once you’ve prepared everything you need, we can work on a single proxy setup in ClonBrowser. Follow these 9 steps to get this done.
1. Download ClonBrowser
You can set up ClonBrowser in one of two ways. The first way is to log in to your account using your browser of choice.
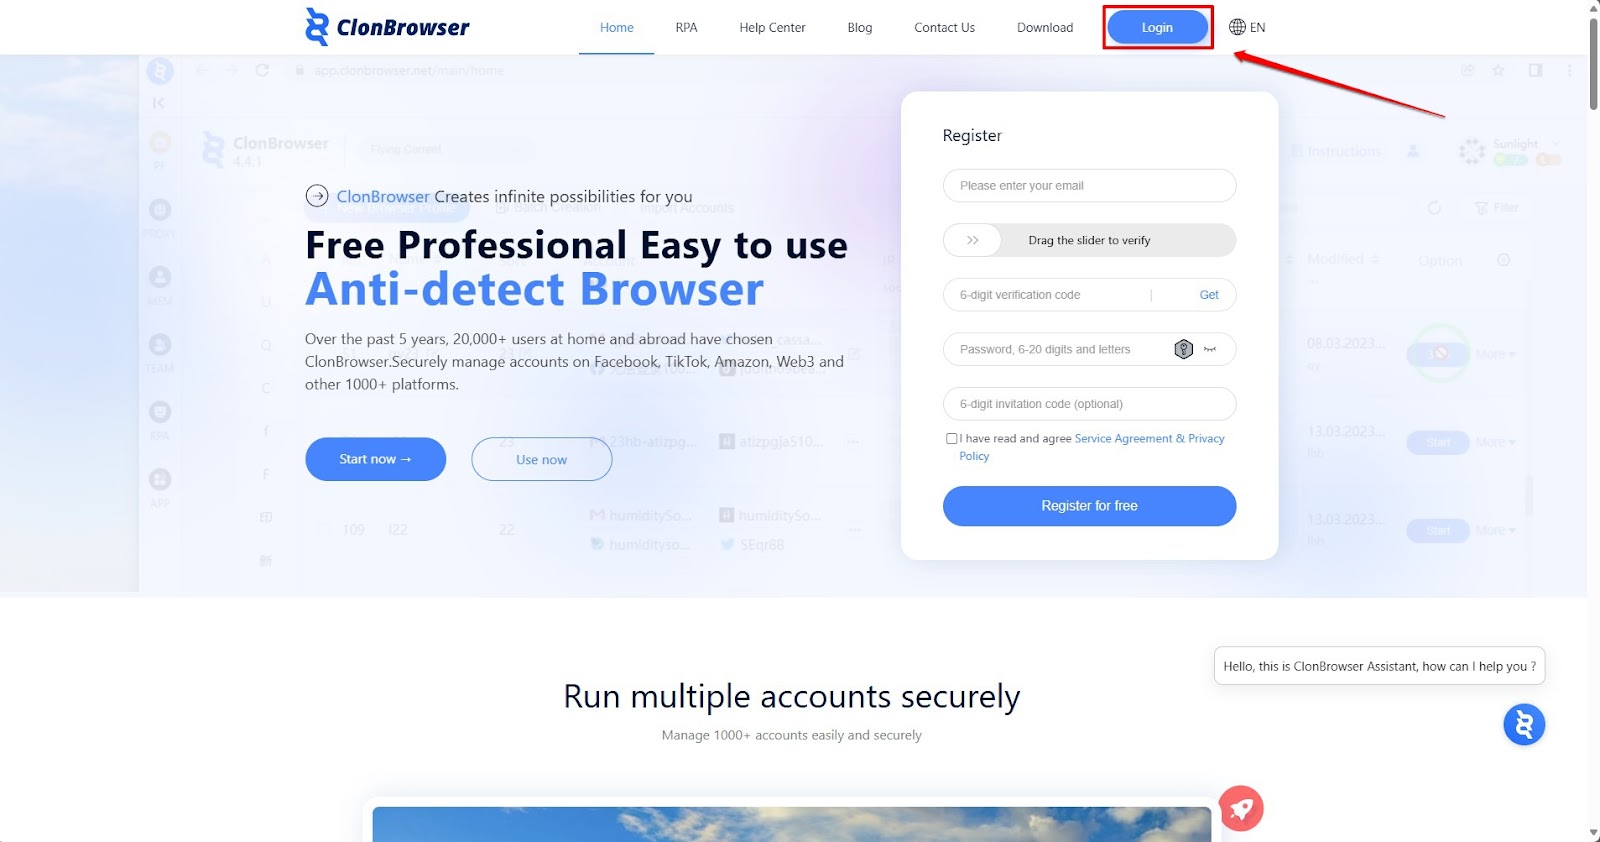
You’ll be able to run the ClonBrowser dashboard from here and customize your browsing session as you would from the desktop client. However, you’ll be prompted to download the client when you attempt to start a session.
Alternatively, you can download the client from the landing page.
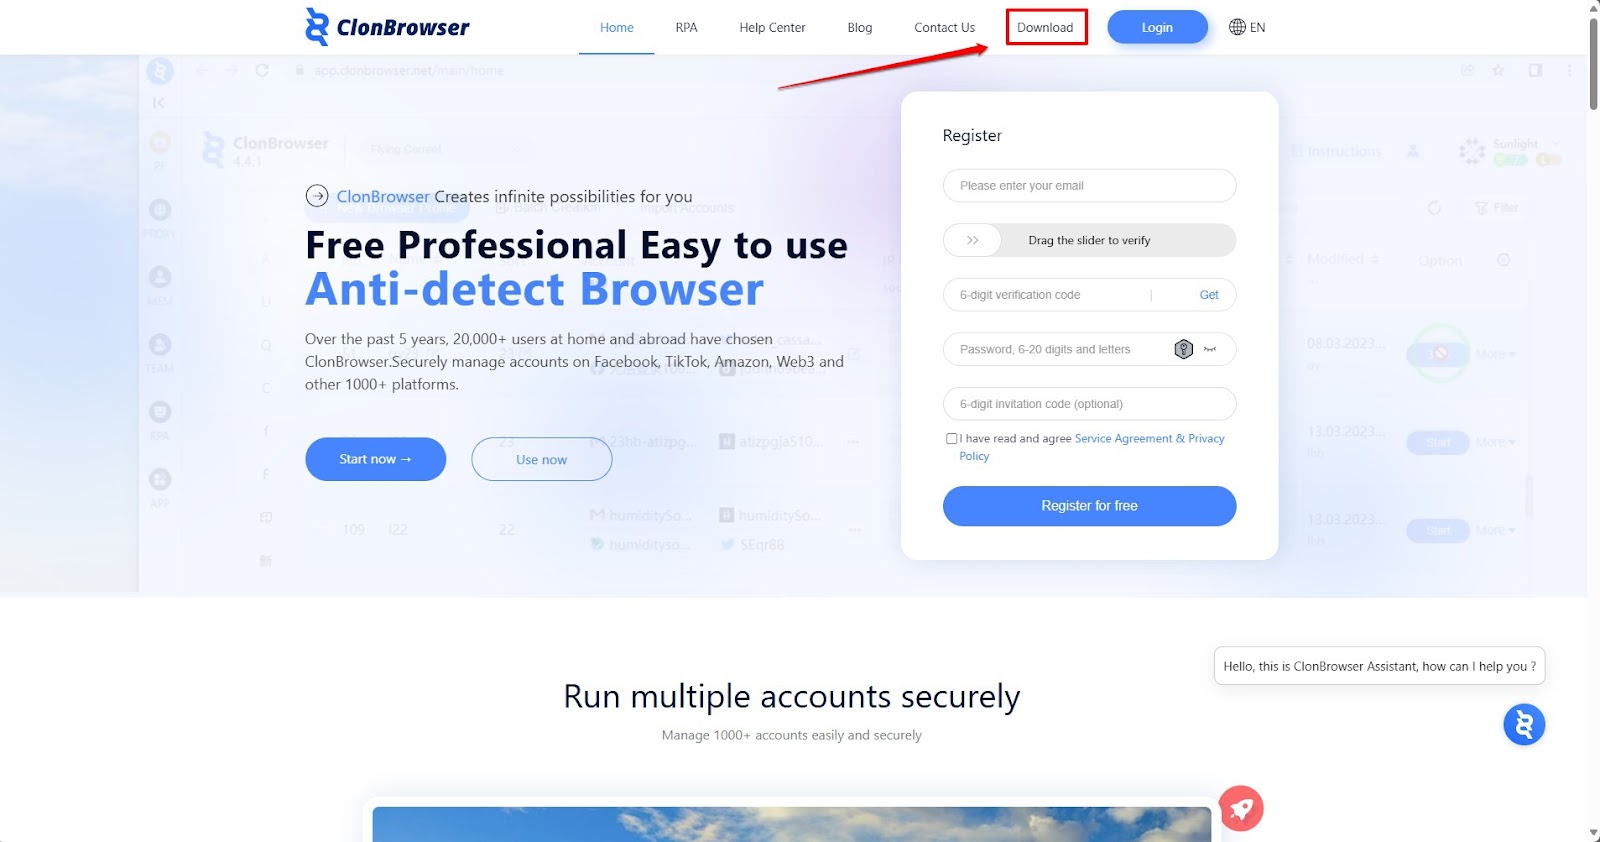
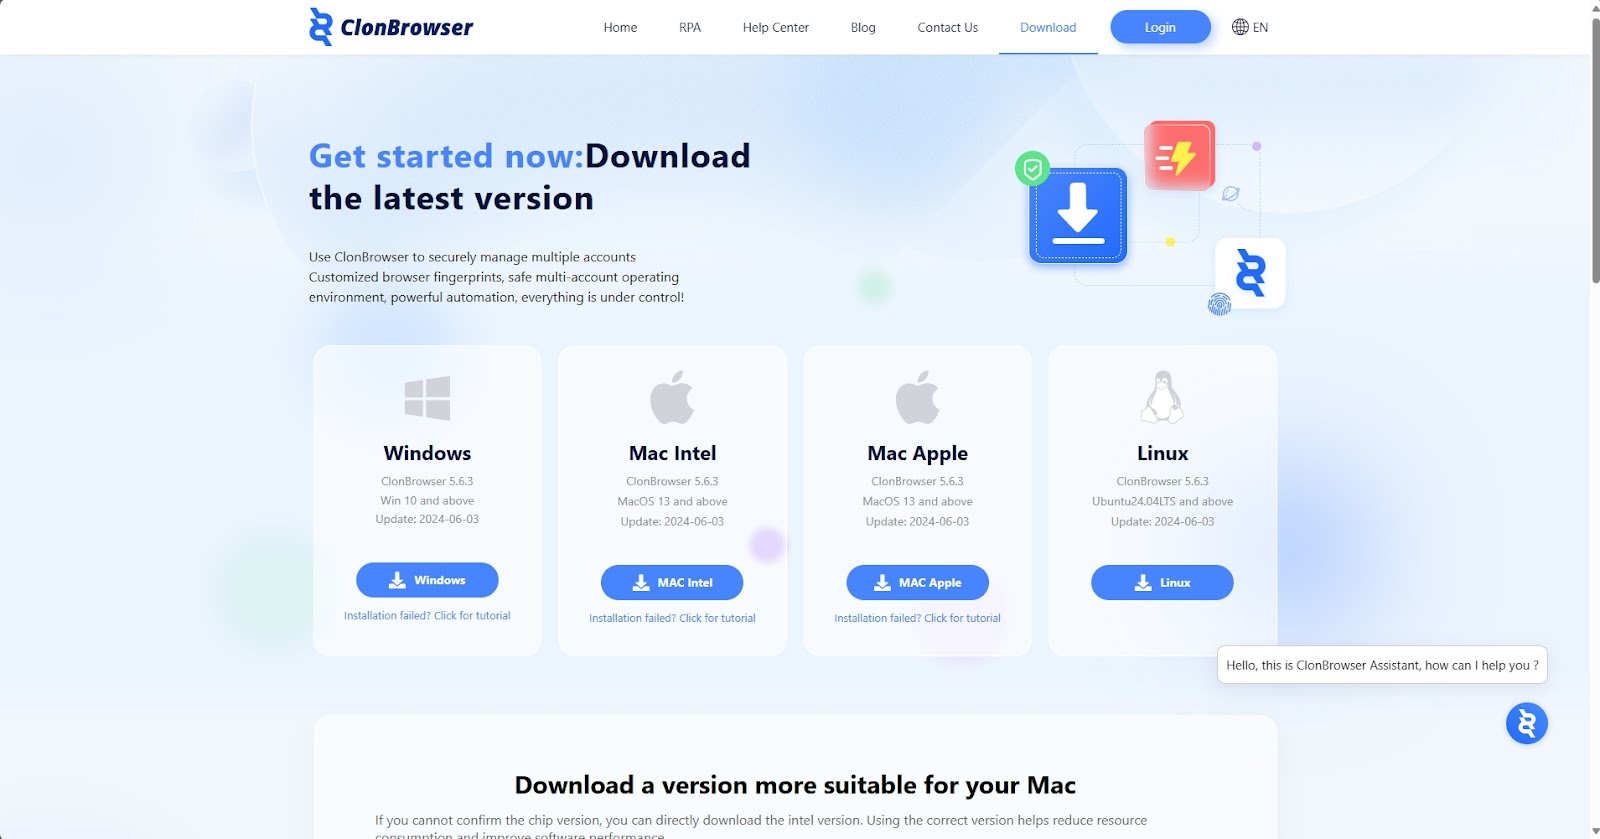
Upon clicking the Download button, you’ll be prompted to choose the file to download. Select the option that matches your setup.
2. Create a New Profile
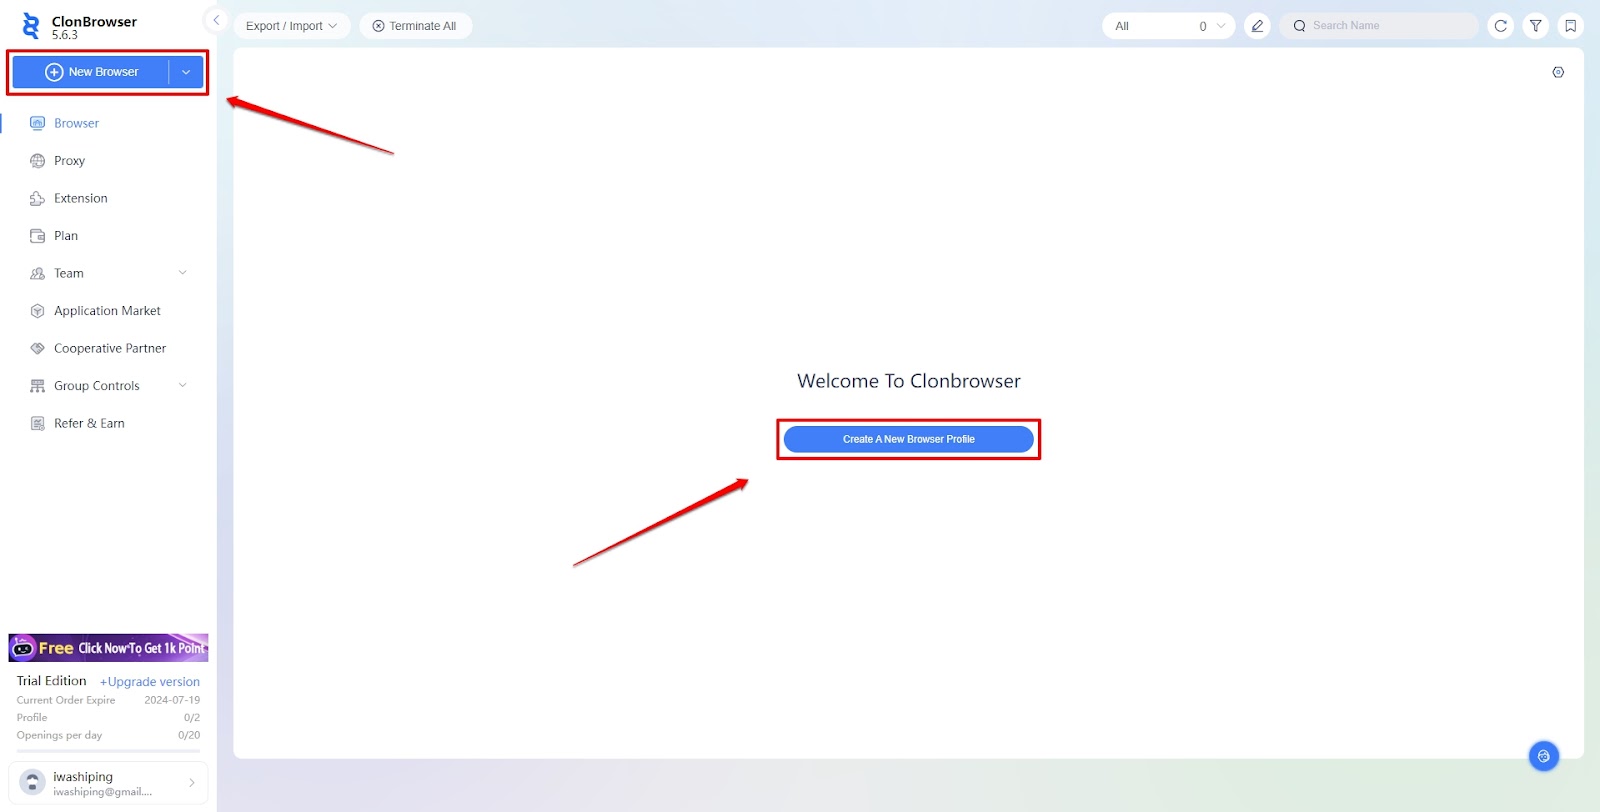
The environment will look the same whether running the ClonBrowser desktop or web client. After creating your account, you can immediately create a profile by either clicking the New Browser button on the left tab or the Create a New Browser Profile.
3. Overview Information
The overview information in ClonBrowser comprises descriptors and basic information that don’t directly affect your profile. In the Overview section, you can enter a name for your session and choose a displayed region for your session.
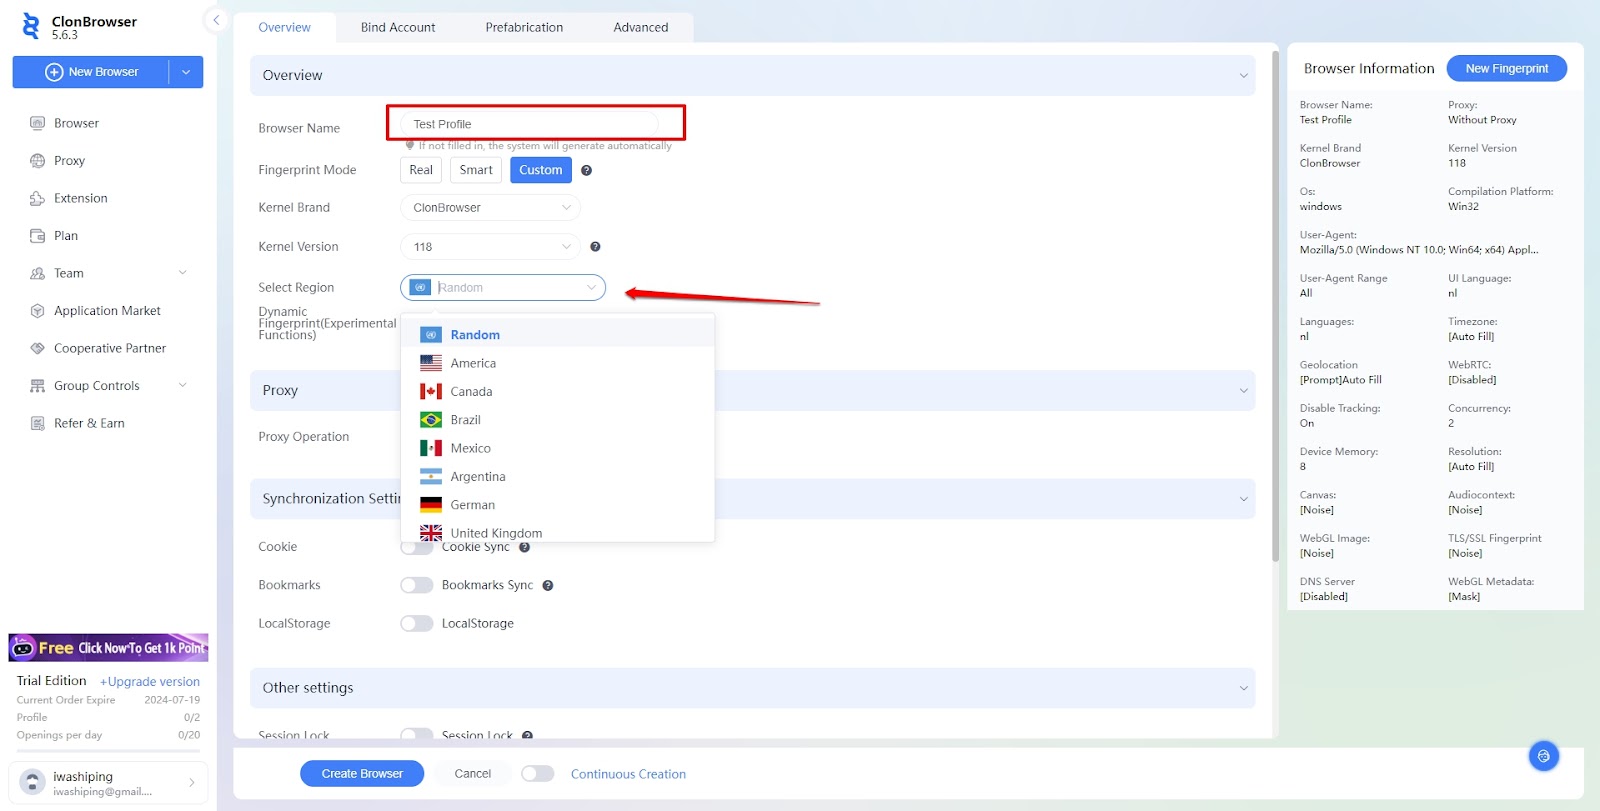
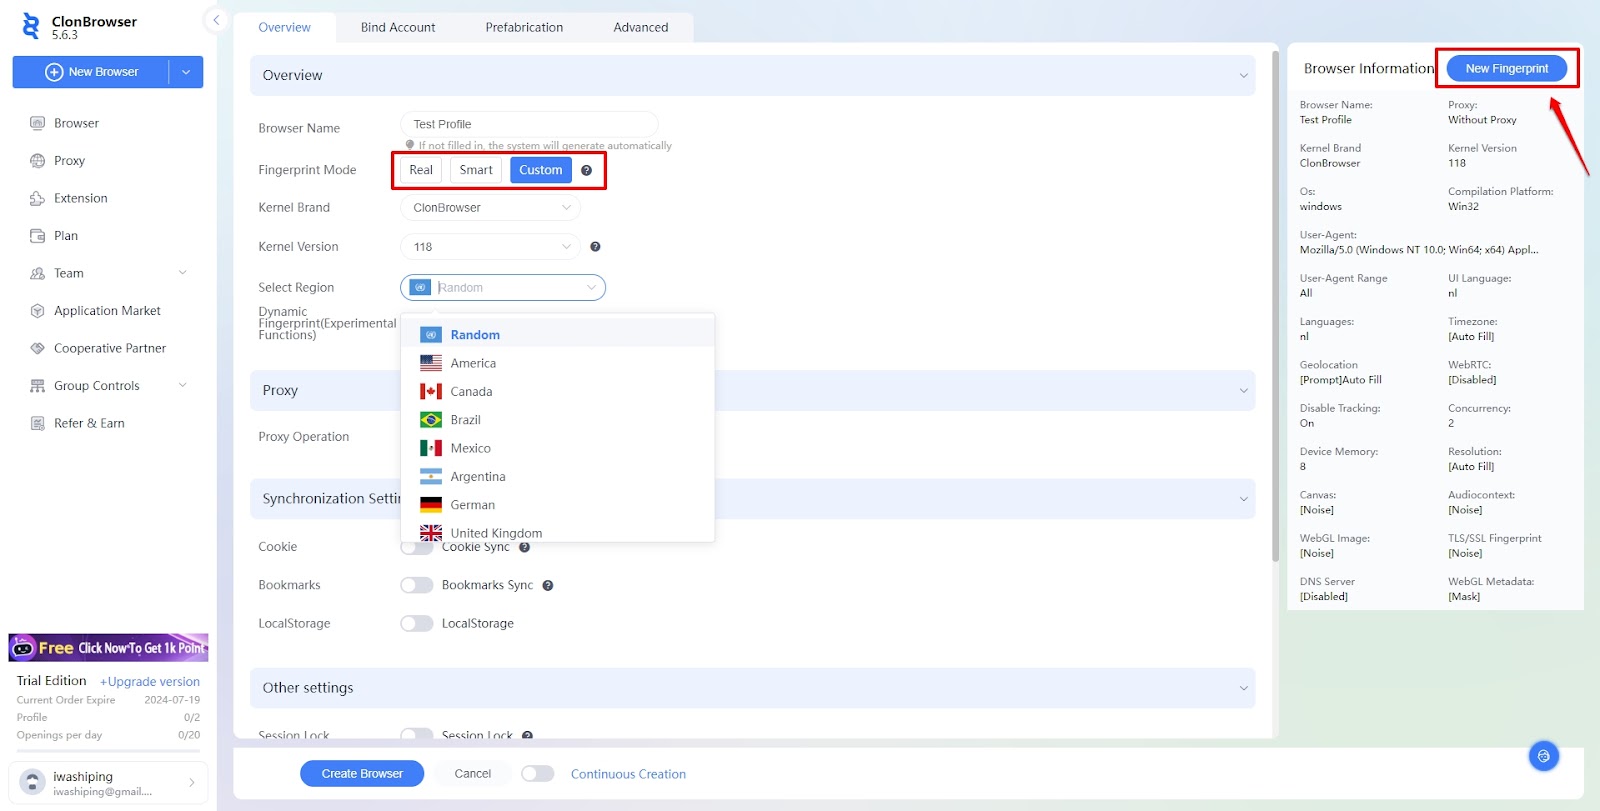
Here, you can also choose the nature of your web fingerprint, which is a collection of device information. Create a custom fingerprint or refresh the automatically generated fingerprint by clicking the New Fingerprint button.
4. Input a New Proxy
Once you confirm your overview settings, you'll want to set up your proxy. There are two viable ways you can tune your proxy settings in ClonBrowser. First, you can add an IP to your proxy list by navigating to the Proxy tab.
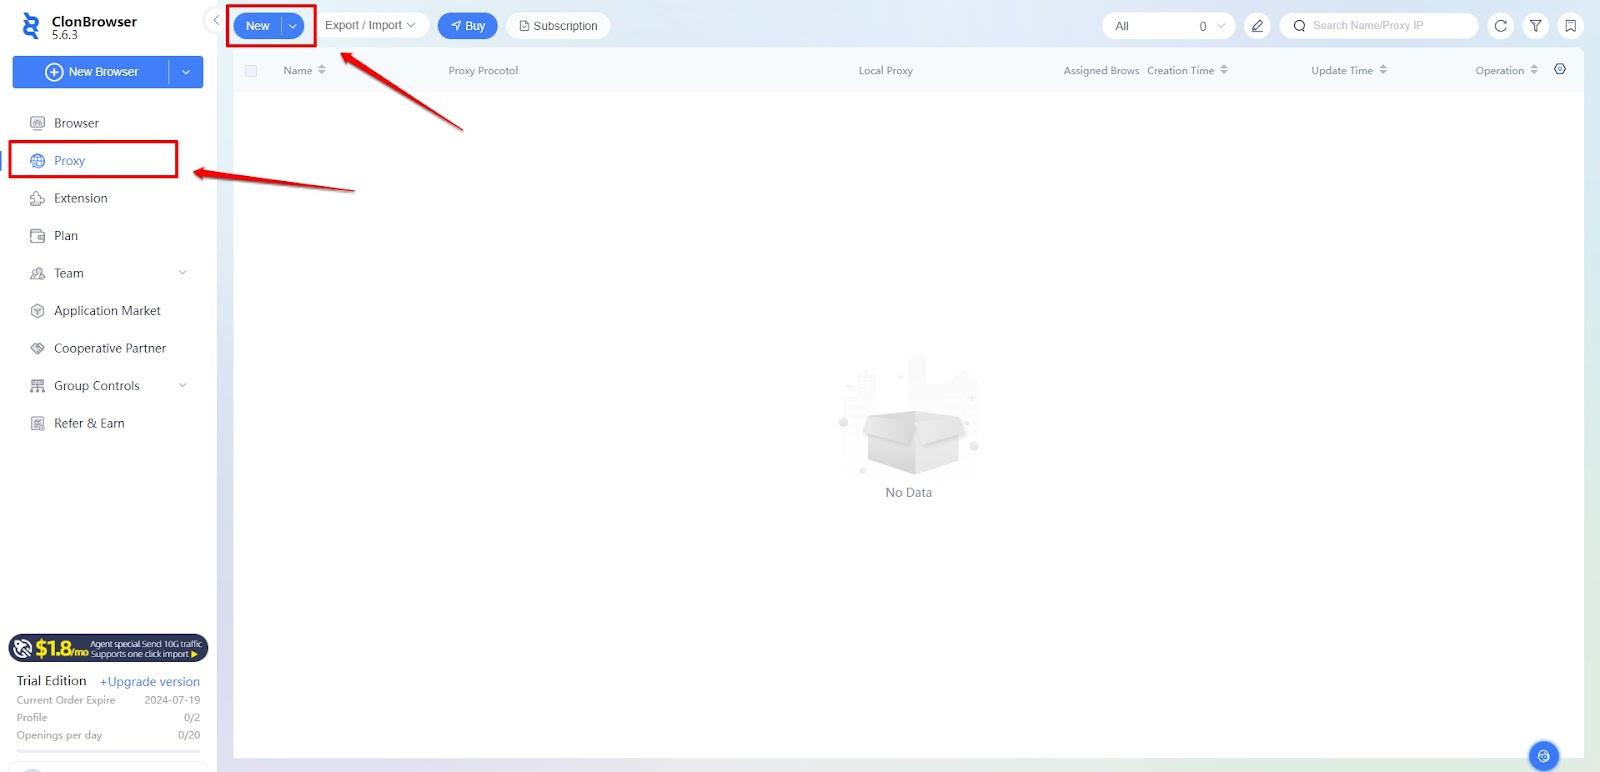
On the other hand, you could select the New button in the Proxy section when creating a new profile.

5. Choose Your Proxy Type
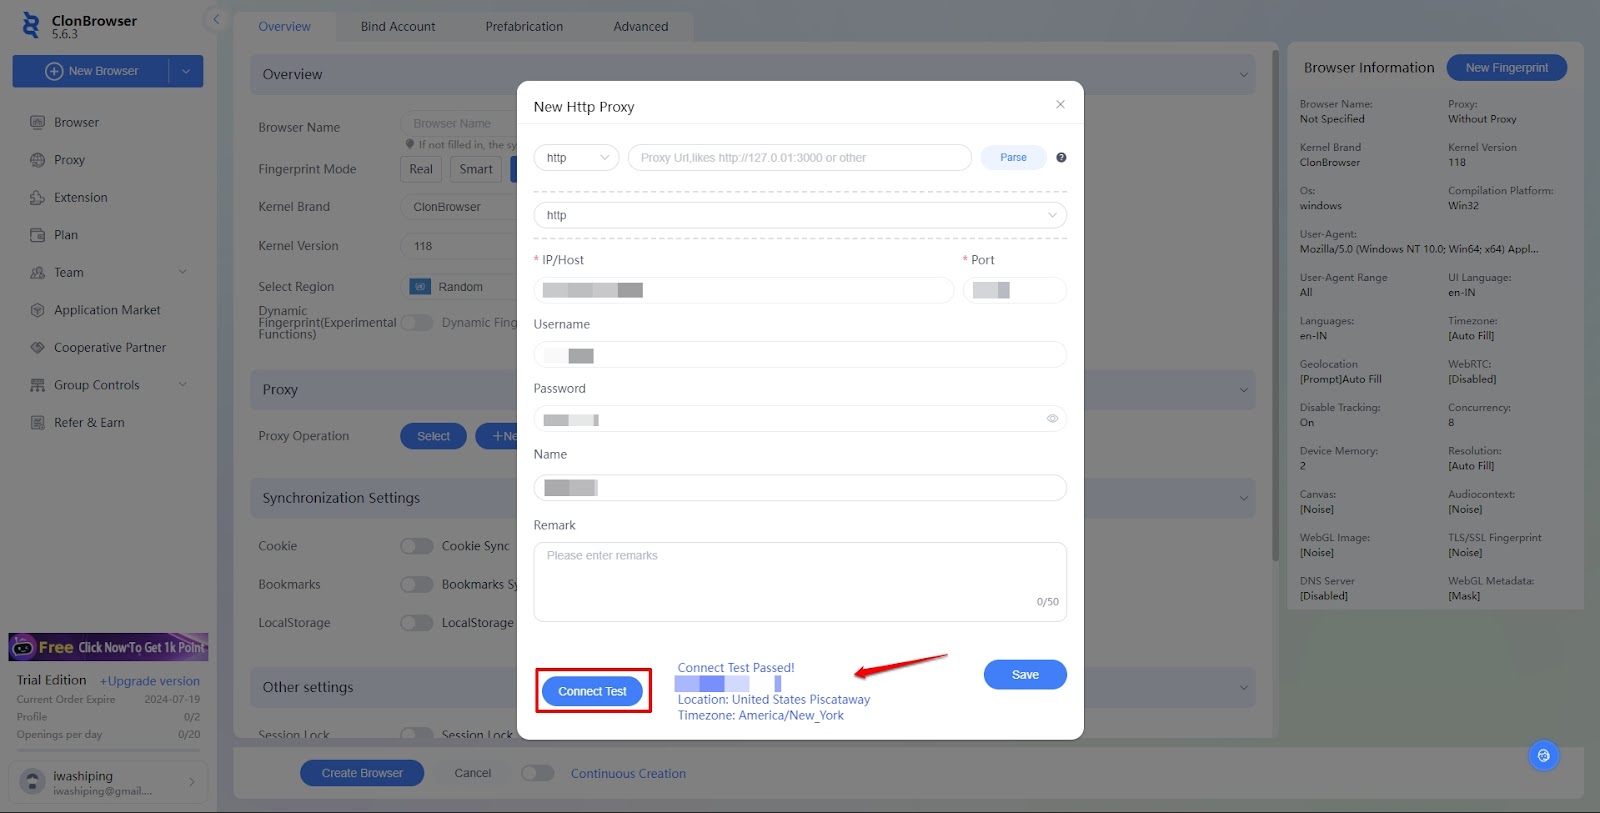
Once you’ve chosen to add a proxy to ClonBrowser, a pop-up presents itself with fields that take the details of your proxy. First, you’ll need to choose the proxy type. Webshare provides both HTTP and SOCKS5 proxies, and ClonBrowser supports both types.
You can add your proxy in two ways, each with a proxy-type drop-down menu. Select the appropriate proxy type in this menu before filling out the other details.
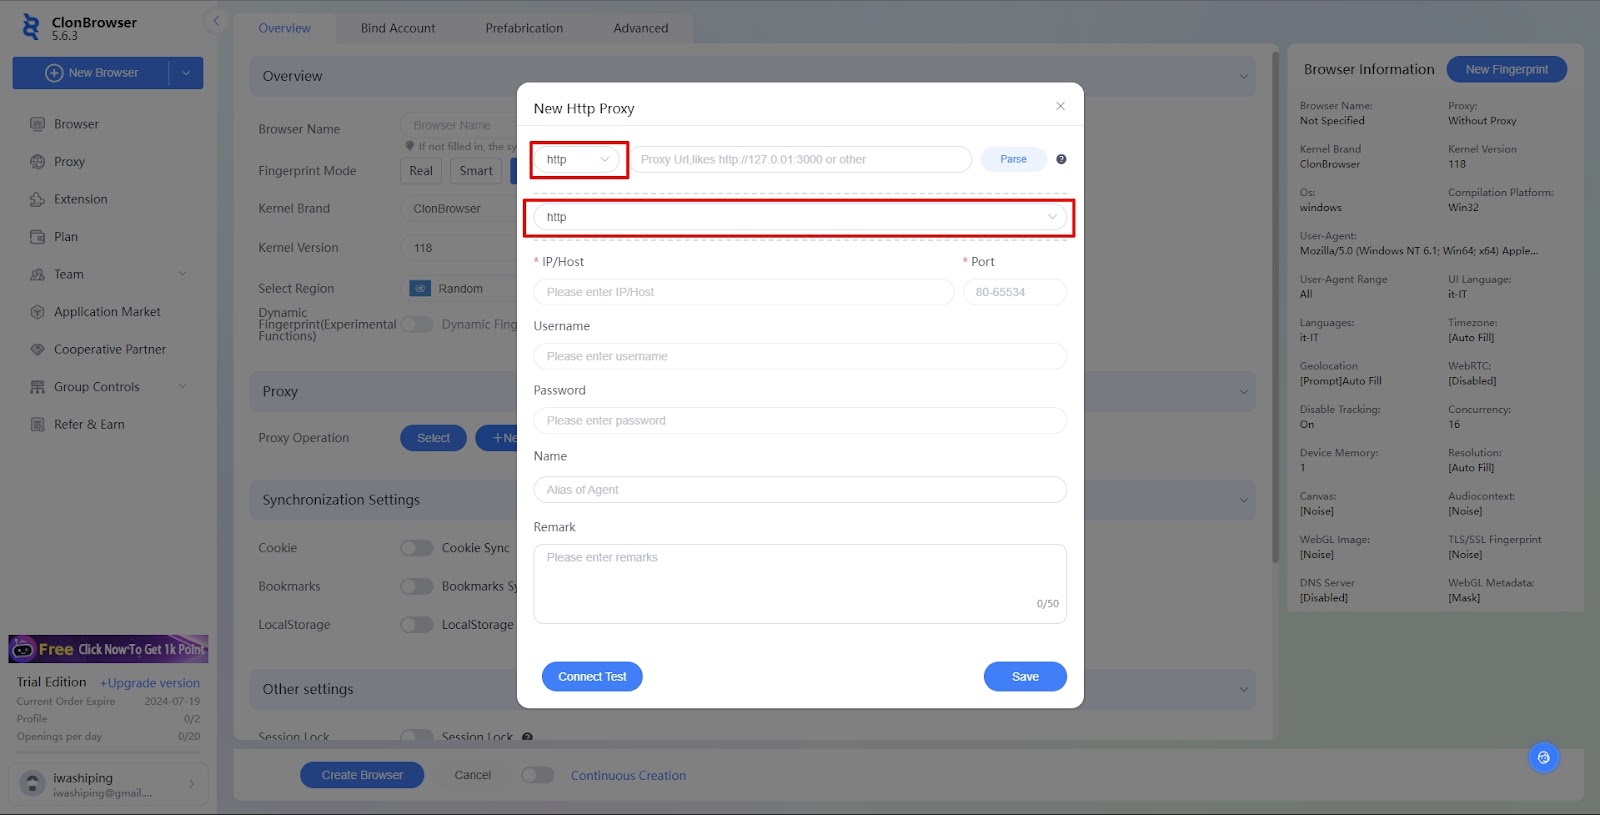
6. Fill Out Your Proxy Settings
The information field needs to be filled out correctly, or you won’t be able to connect to your proxy successfully, so pay close attention to this section. You can use a static or rotating proxy setup.
The rotating setup makes it harder for you to be detected but consumes more resources. So, if you intend to work with a rotating proxy setup, ensure that your proxy provider supports it.
Static IP address configuration
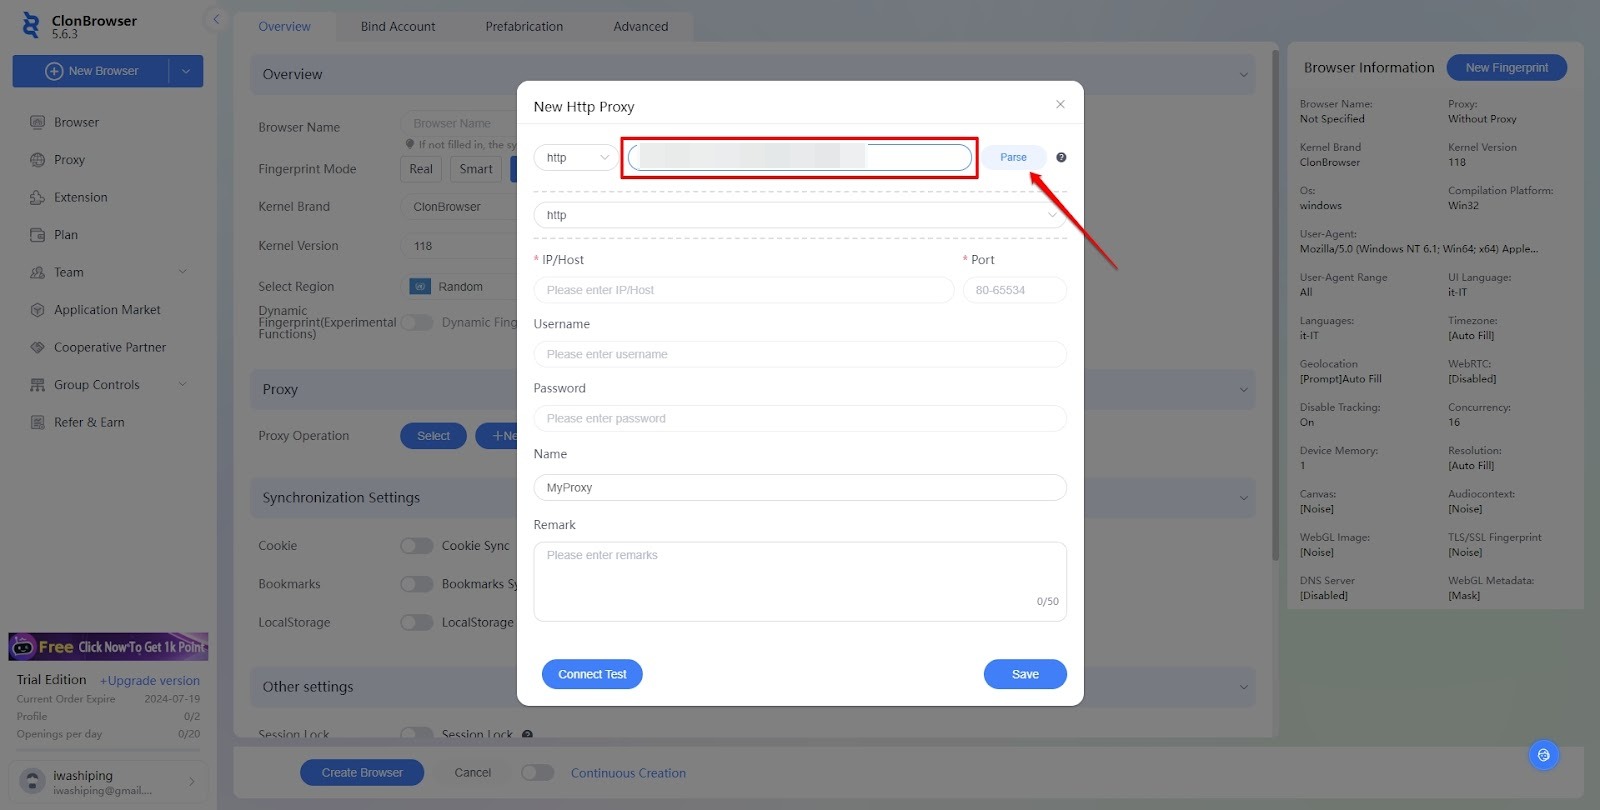
There are two ways to set up a static proxy in ClonBrowser. First, you could get your proxy link, presented in the format “IP:Port:Username:Password,” and enter it into the top address bar in the proxy form, as indicated below.
Once you’ve confirmed the details, press the Parse button, and the link will be broken down into its required components.
You could also manually enter the required information into the specified fields.
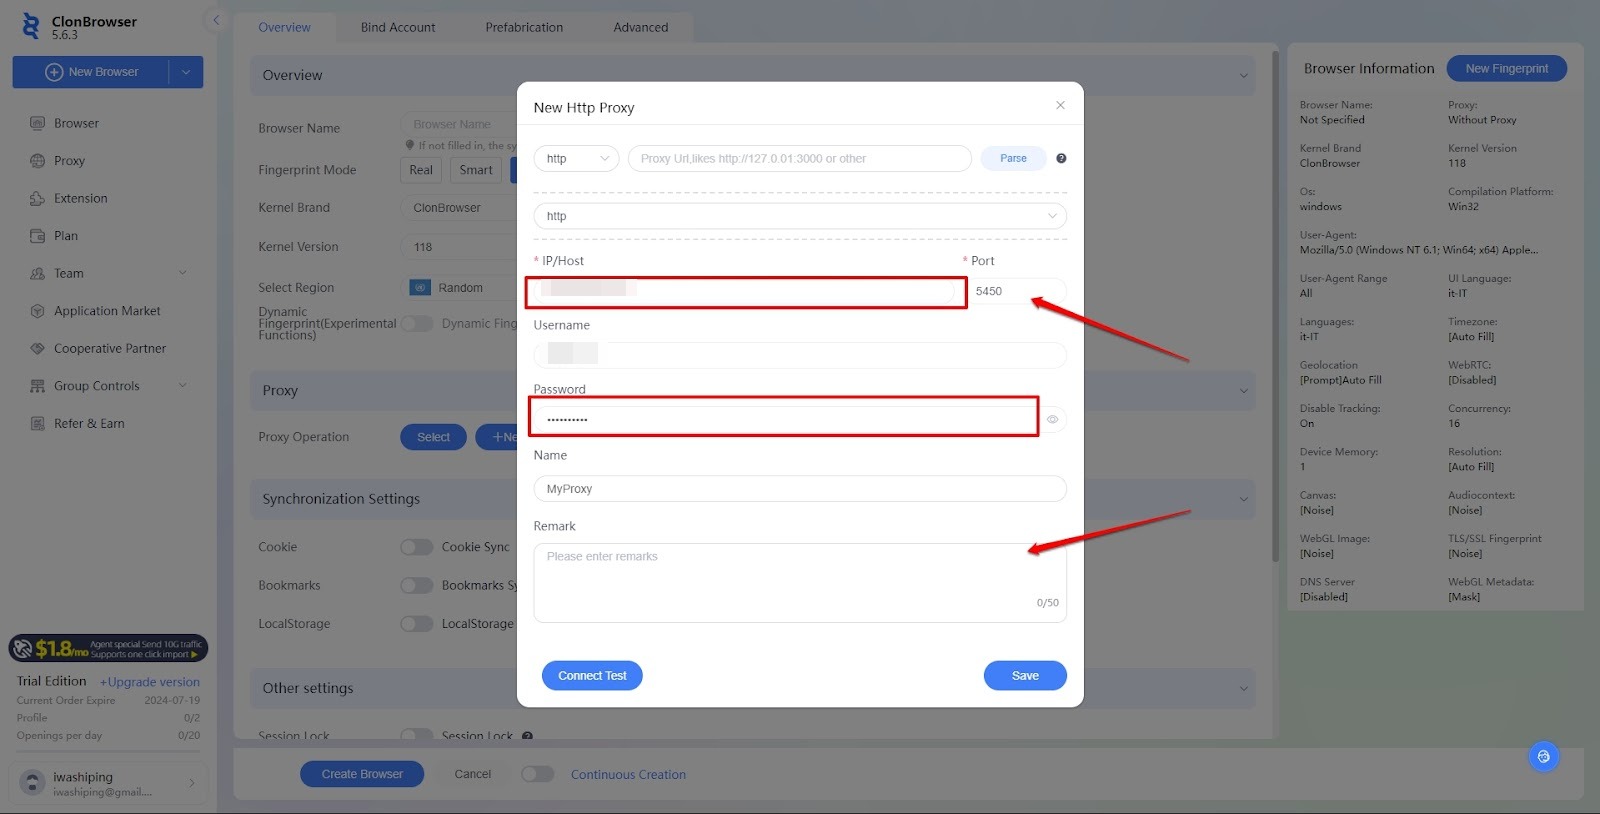
Either way, you’ll need to retrieve the proxy details specified by your provider or service. You can get all the information you need by visiting the proxy list page on your account.
Proxy Type: HTTP or SOCKS5
IP/Port/Username/Password: It is bundled together using colons. (e.g 24.123.231.144:5450:username:password)
IP: e.g 24.123.231.144
Port: e.g 5450
Username: e.g username
Password: e.g password
If you’d like the single link, select the proxy you wish to use and download the information. You’ll be able to retrieve the link from the downloaded text.
Rotating IP address configuration
A rotating IP address setup makes you harder to detect. Thankfully, ClonBrowser supports this proxy form, and while the setup is similar to that of a static one, there are some key differences.
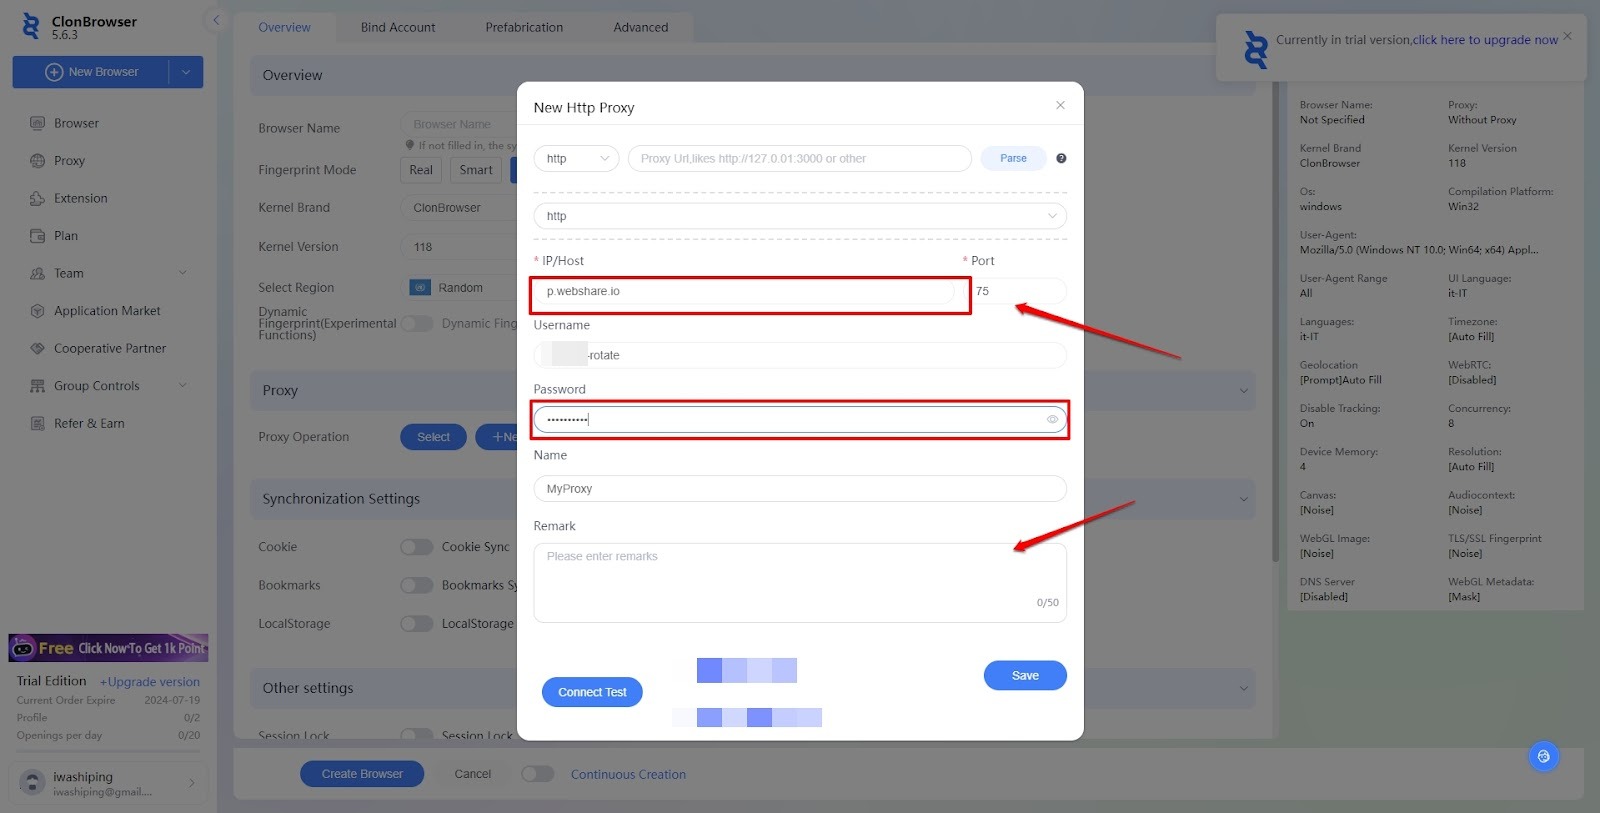
You’ll need a domain name in addition to the usual information, and you can get this from the Rotating Proxy page in your proxy provider setup. Keep in mind that the IP, Port, and Username will change when you switch from a static IP setup to a rotating one. So, effect this change in the appropriate fields or in the proxy address.
Proxy Type: HTTP or SOCKS5
IP/Username/Password: It is bundled together using colons. (e.g p.webshare.io:75:username-rotate:password) In this format.
Domain: e.g p.webshare.io
Port: e.g 75
Username: e.g username-rotate
Password: e.g password
Next, either copy your new proxy address into the given Address field and parse it. Or, enter the individual details into their specified fields.
7. Test IP Settings
Once you have entered all of the required proxy information, hit the Connect Test button to verify the connection. Once confirmed, the location details and a verification message should appear beside the button.
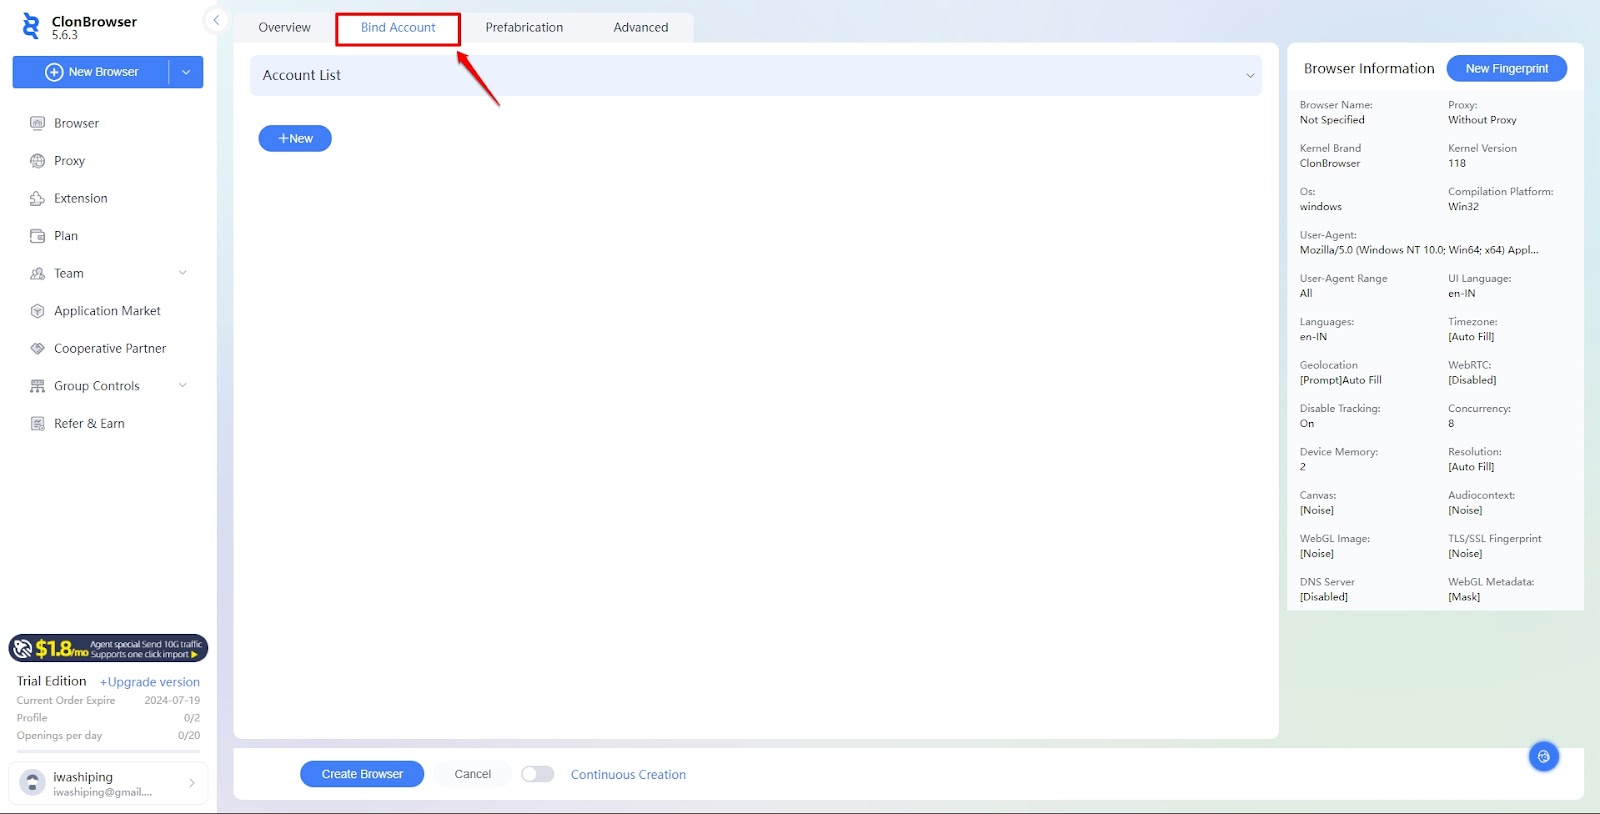
8. Add Cookies and Saved Accounts
You can add cookies and accounts saved from browsing sessions by navigating to the Bind Account and Prefabrication tabs.
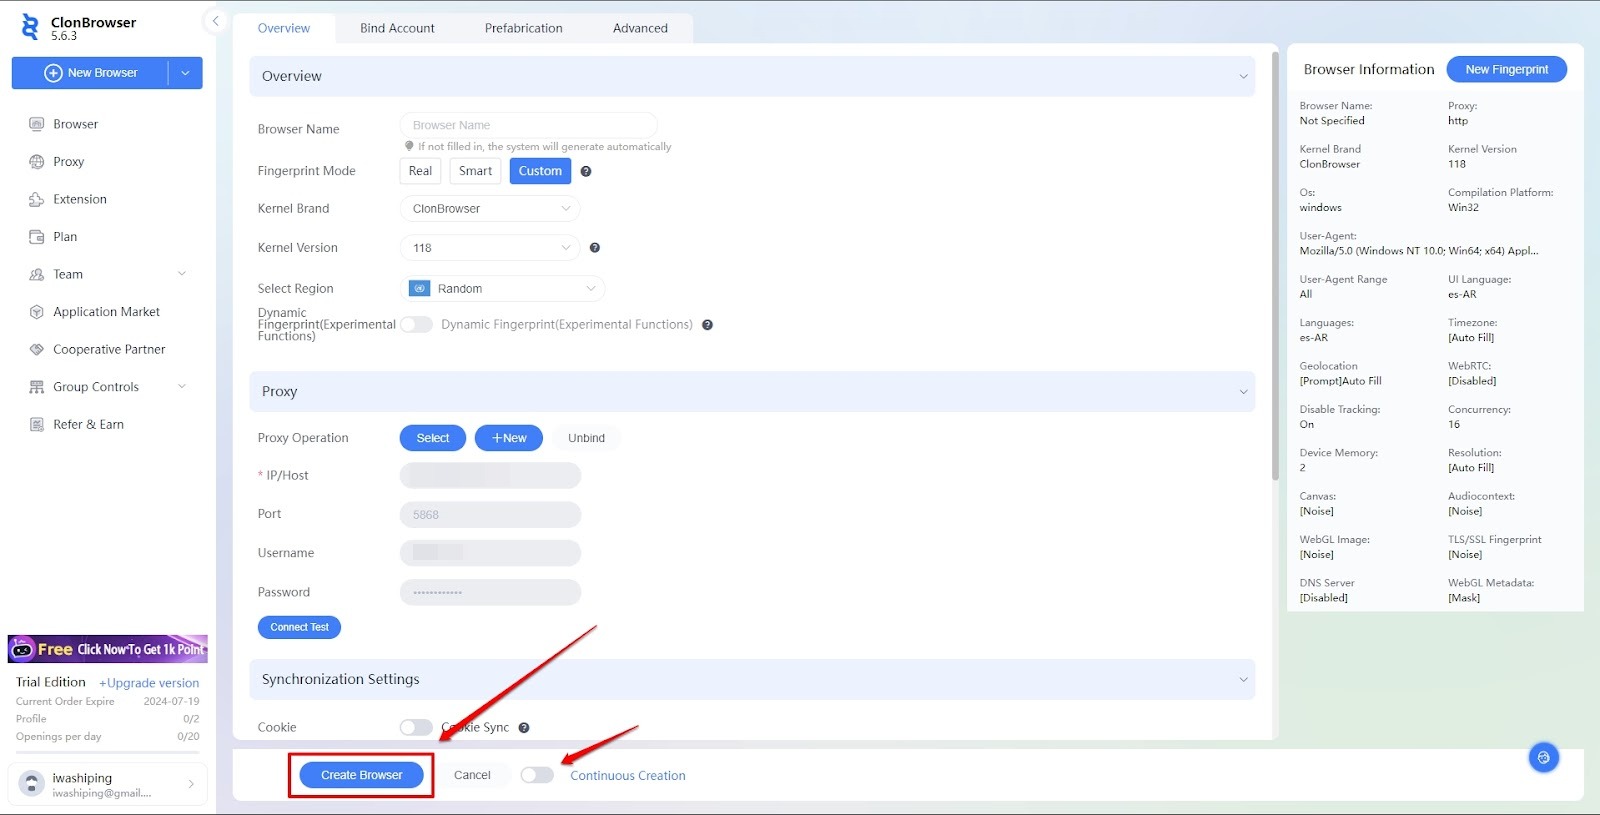
9. Start Browsing
Once you have specified all the parameters needed for your session, click the Create Browser button on the bottom left of the screen.
You can launch the browser by selecting the Launch button on the Browser tab.
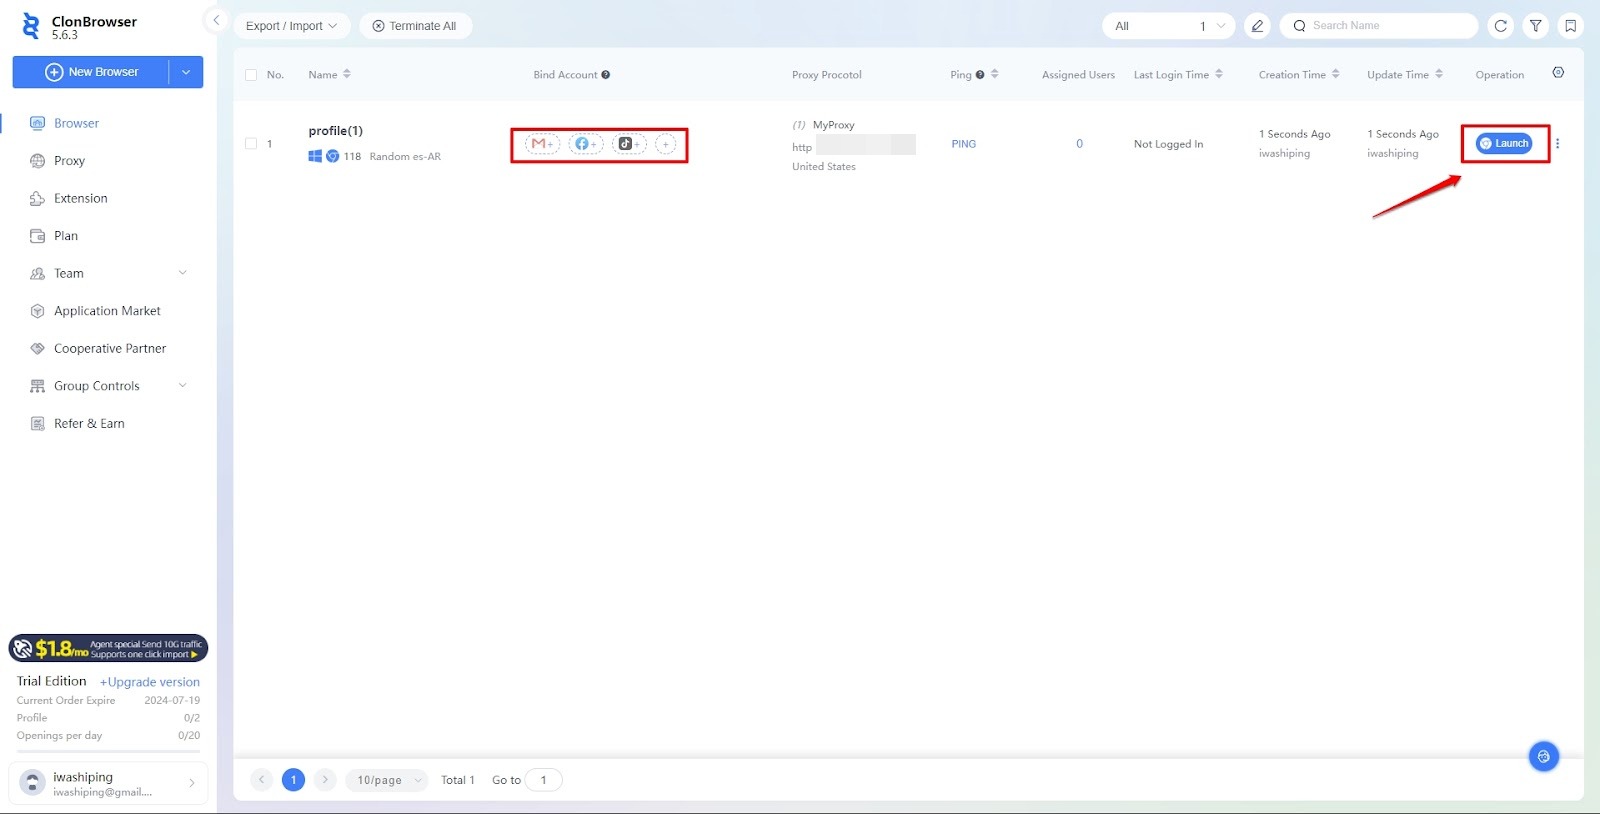
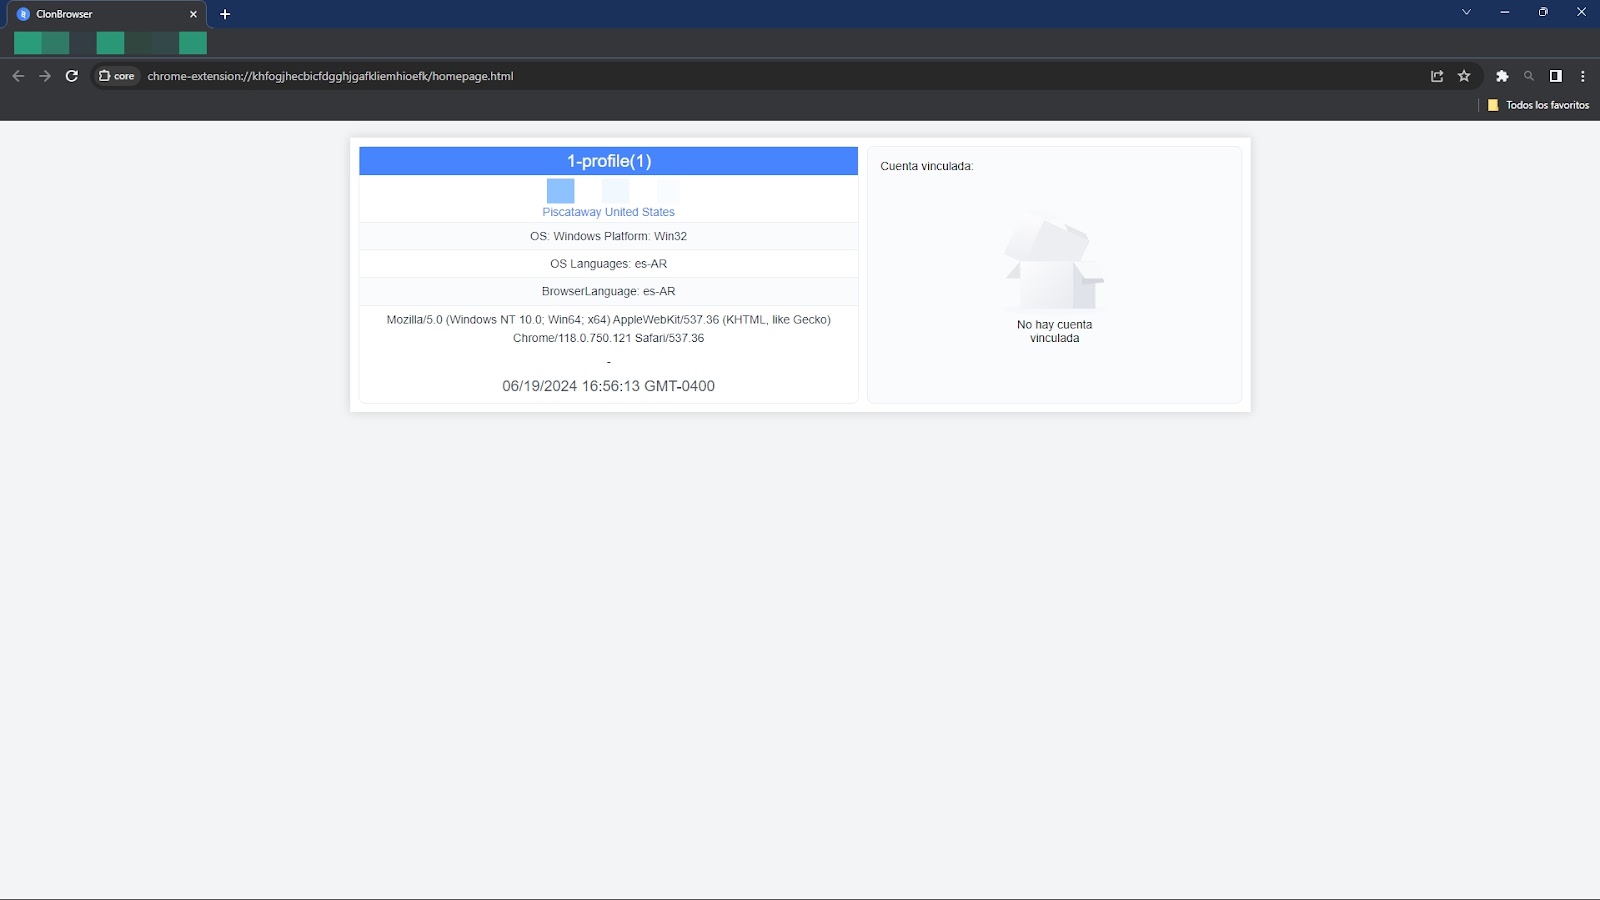
After a quick download, a Chromium-based browser will launch, and you can finally get to work.
How to set up batch proxies in ClonBrowser
This method of proxy importing saves you time, especially when you intend to use multiple proxies across different sessions. Thankfully, ClonBrowser supports batch imports.
Here are the steps you can follow to batch import in ClonBrowser:
1. Setup a Proxy List: Retrieve a list of the proxies you intend to use in the format: “IP Address:Port:Username: Password” from your proxy provider. You can retrieve this list on WebShare from the Proxy List page.
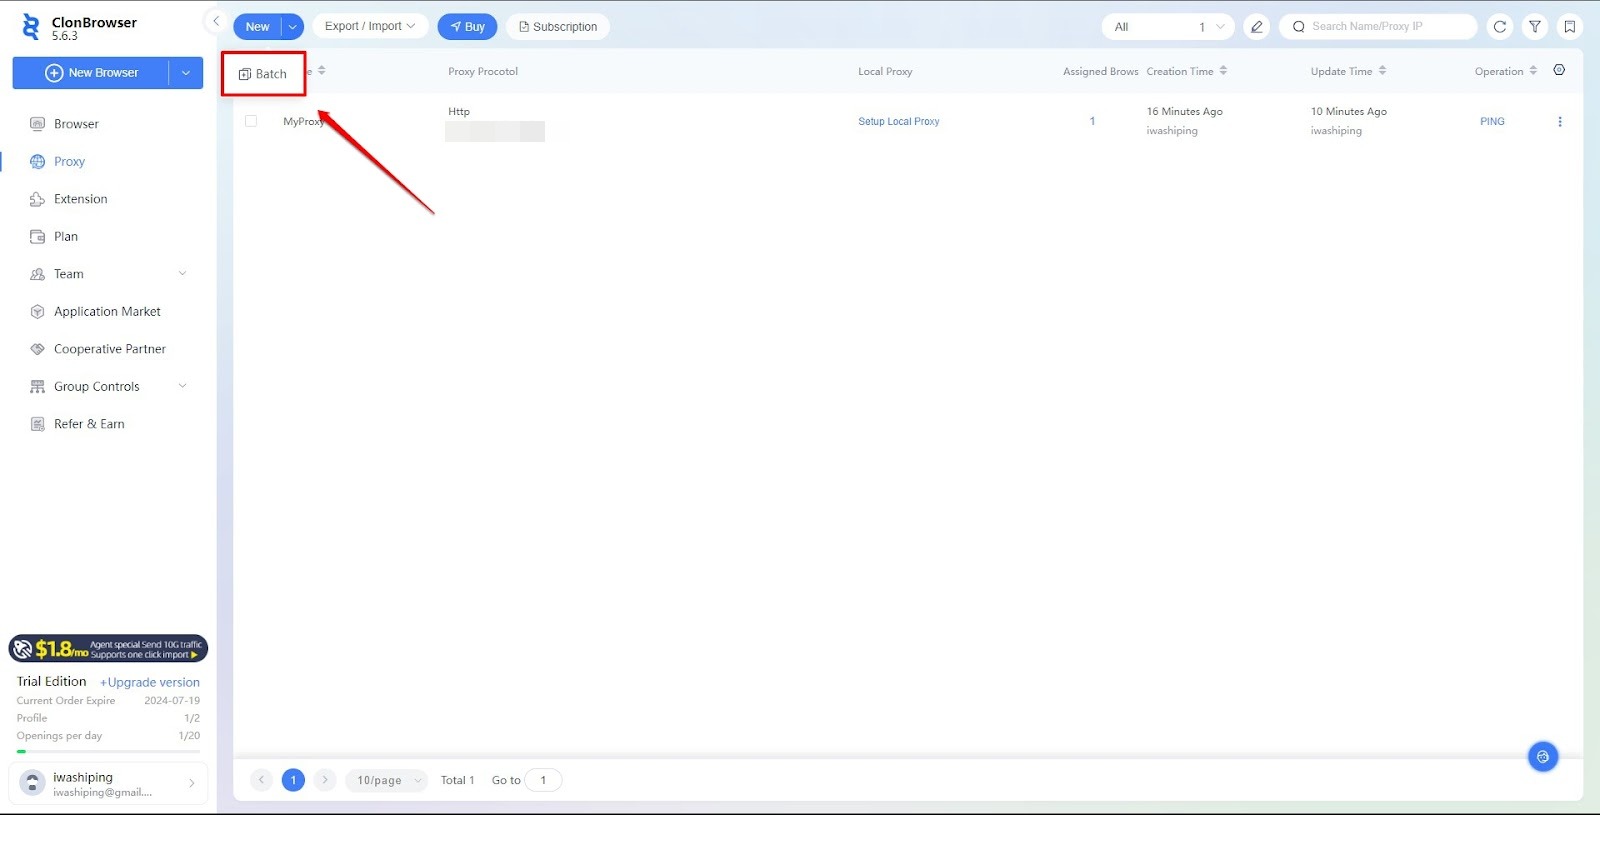
2. Batch Import: Once you have your proxy list, return to ClonBrowser and navigate to the Proxy page. Select the Batch button.
Then, copy and paste all of your proxies into the given field.
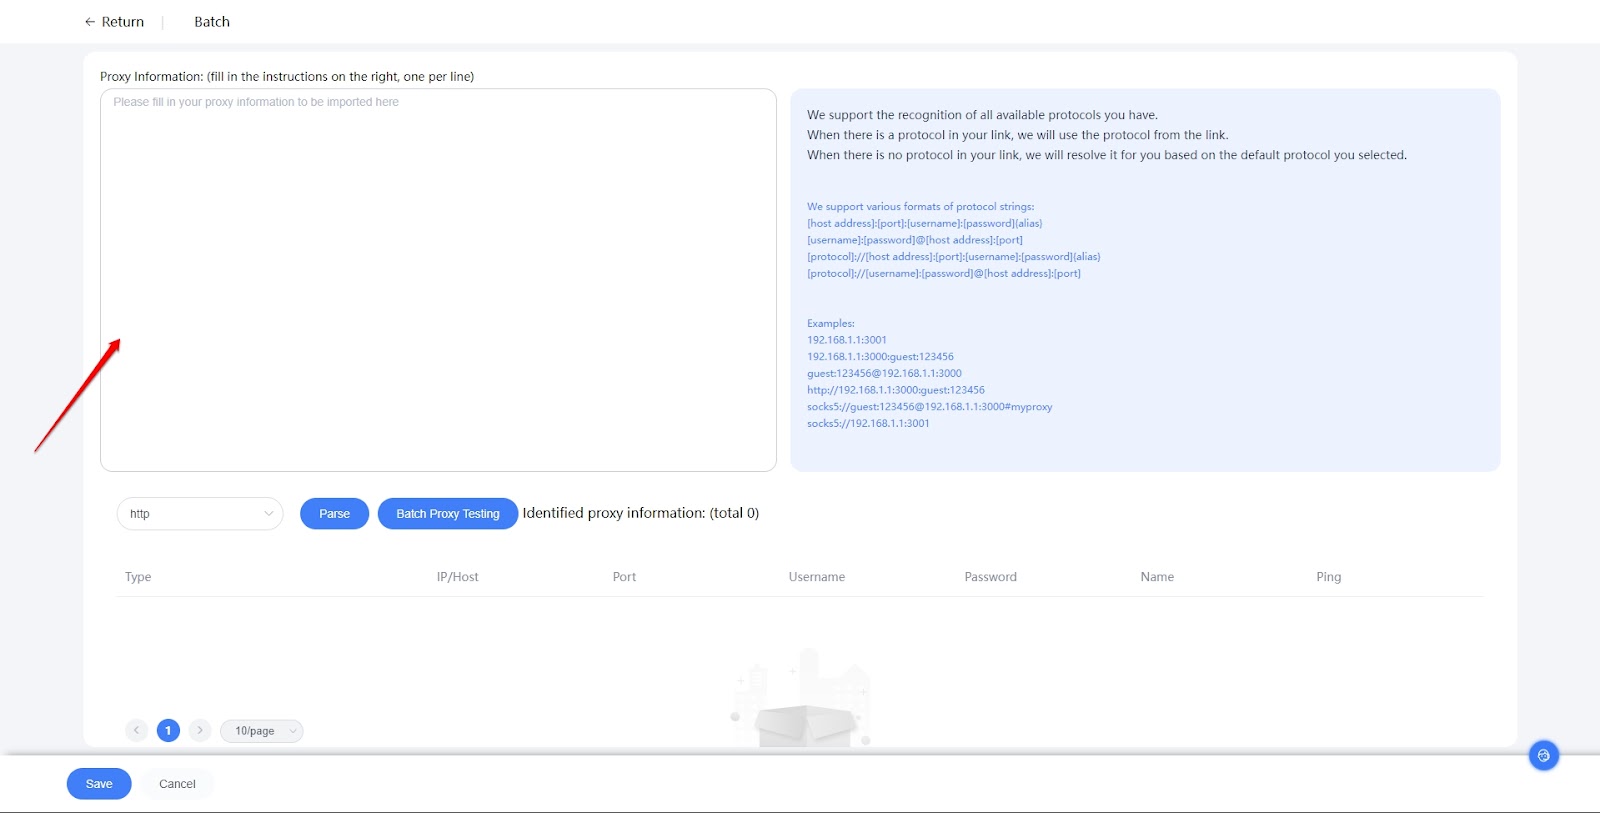
3. Batch Testing: ClonBrowser allows you to batch-test your proxy connections before adding them to your proxy list. This could save you a lot of stress down the road.
And that’s all the information you need to set up proxies in ClonBrowser. Hopefully, you now understand how to create static and rotating proxies. You should also now understand how to batch-import your proxies.
Don’t forget to take advantage of the 10 free premium proxies Webshare offers with every account created. It’s a pretty great way to test the capabilities of ClonBrowser. So, jump on the opportunity while it still lasts!


