


Get 10 Free Proxies For Genlogin
When it comes to anti-detection techniques, using proxy servers is a must, particularly to evade IP tracking and restrictions. Thankfully, this guide comprehensively explores Genlogin, a strong anti-detect browser, and how to harness its capabilities effectively.
We will also discuss two distinct methods for configuring proxies using Genlogin. Let’s get started!
What is Genlogin?
Genlogin is a robust anti-detect browser that automates browser tasks and manages multiple browser profiles on a single device. With a greater focus on security, Genlogin offers control over browser fingerprints, such as IP addresses, cookies, and browser settings, thereby enhancing online privacy.
Genlogin also simplifies various web activities, such as multi-account advertising, social media marketing, web scraping, and more. Key features of this tool include synchronized actions, a Titan browser, no-code automation, and a built-in app store.
Before starting
While Genlogin offers a free version, it restricts users to five profiles per account. Switching between accounts is manageable, but you must end one session to start another. We strongly suggest upgrading your plan to access more profiles to avoid this hassle.
Upgrading your experience on the Genlogin plan is quite easy. To do this, you need an active Webshare account and a new user. Upon registration, you can harness the introductory offer of 10 premium proxies. Thankfully, this doesn’t require your credit card information or even a coupon.
These 10 free proxies are automatically added to your account, allowing you to begin immediately!
How to set up a single proxy on Genlogin
Using a paid proxy server is generally recommended over a free proxy. However, the choice ultimately depends on your preference. The following steps will teach you how to configure proxies using Genlogin regardless of your choice.
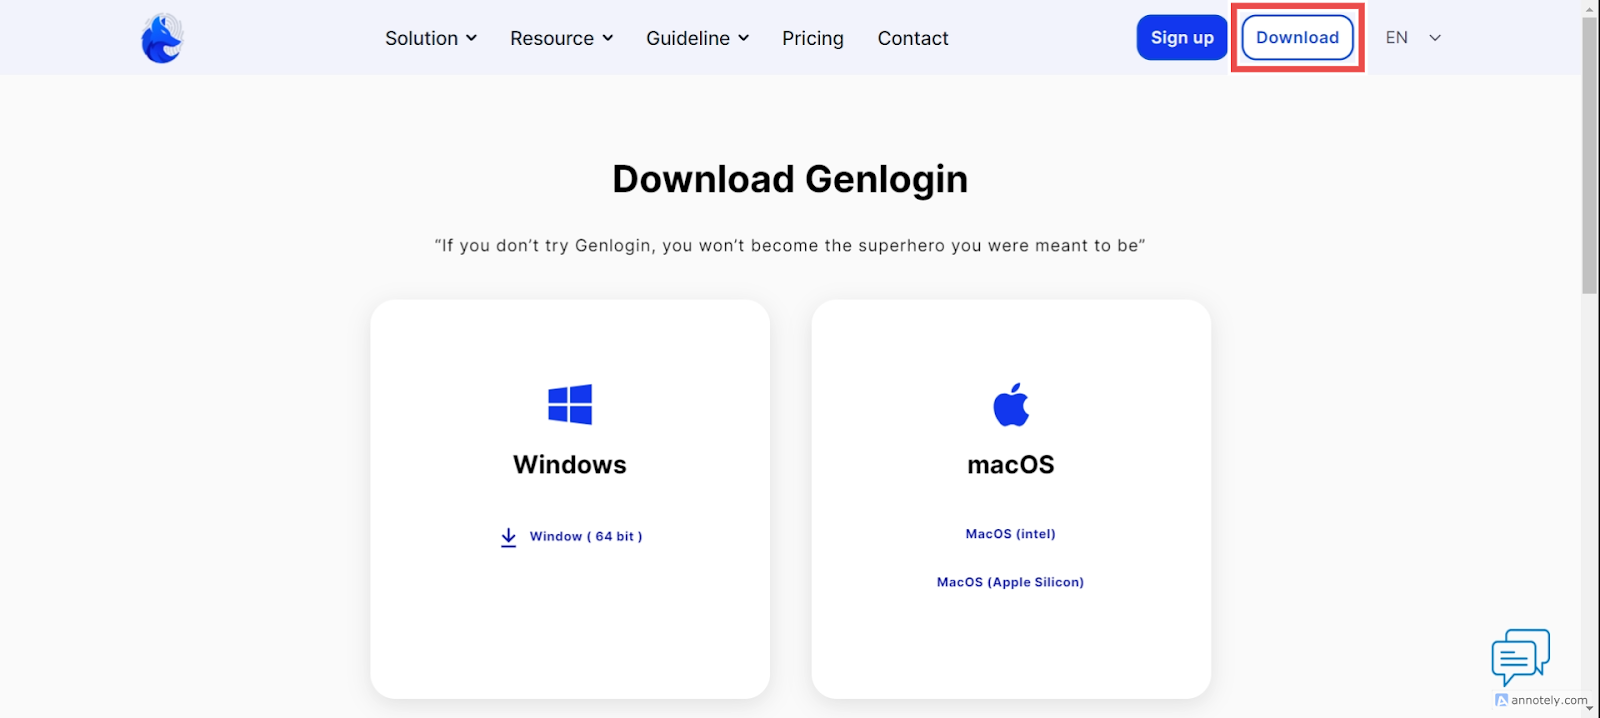
1. Download Genlogin from the Official Website
Visit the official website to download and install the app on your Windows or macOS device.
2. Create a New Profile
After a successful installation, create a free account. You can do this by clicking Create Profile at the top-left corner of the app’s homepage.

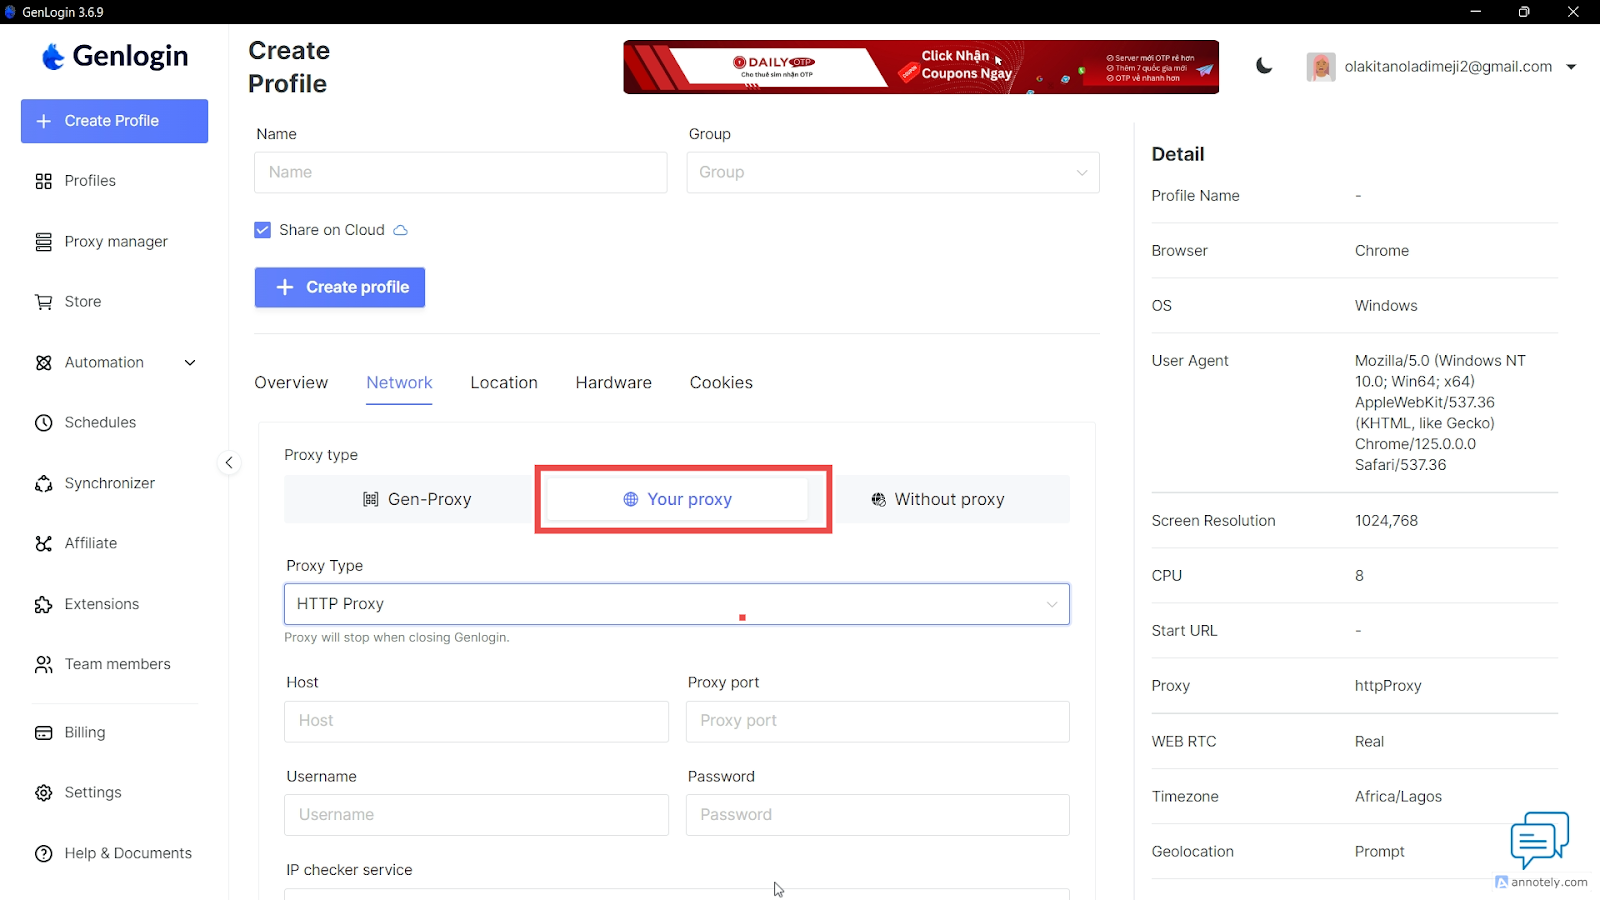
3. Choose Your Proxy Option
After creating a profile, enter your profile name and select Your Proxy option. A new tab will appear where you can enter your proxy details.
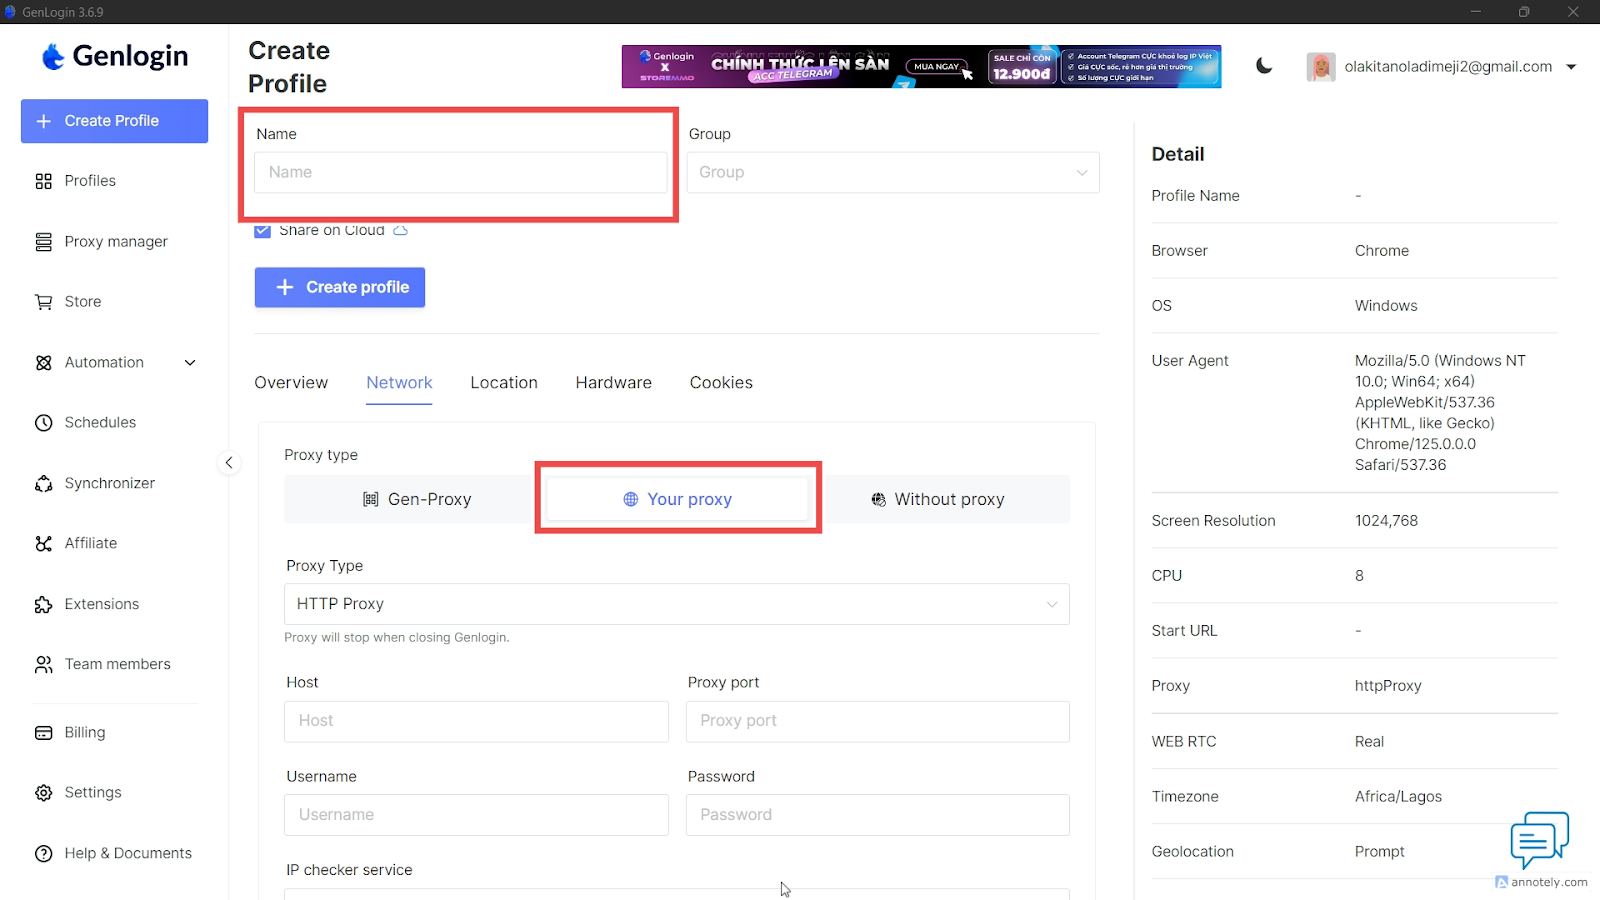
Use the toggle button to navigate through various proxy options. Genlogin offers 6 types of proxies.
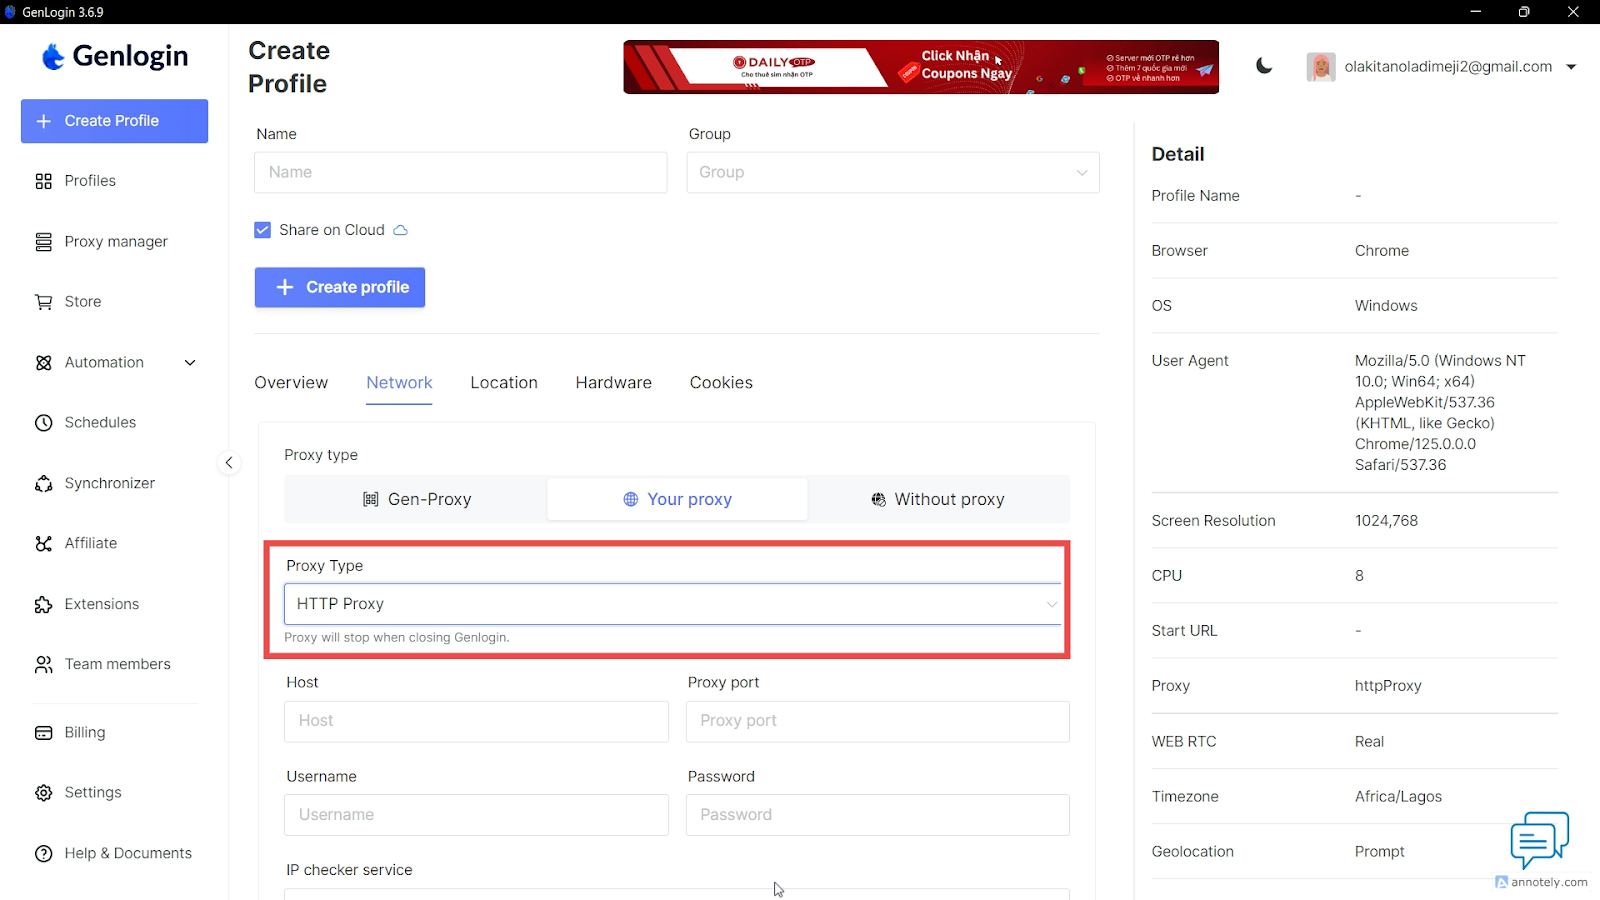
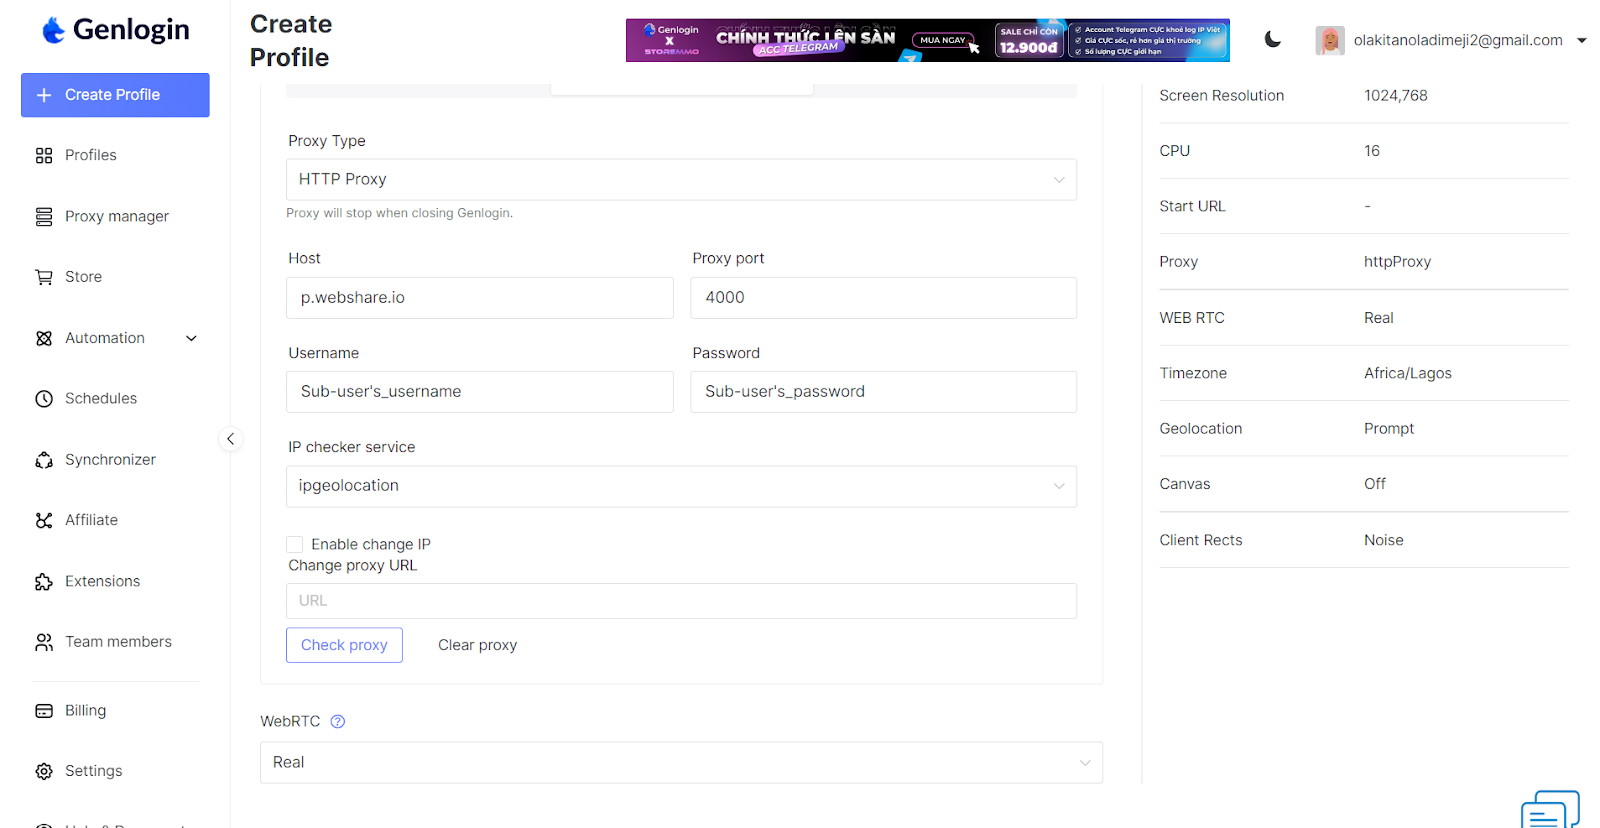
4. Configure Your Proxy Settings
This is the most important part of this tutorial because it will determine how your session will behave regarding your chosen proxy provider. You can configure your proxy settings in two ways–static or rotating.
Static IP address configuration
Static IP address proxies include data center proxies, which are of two kinds: self-dedicated and enterprise-dedicated. Pro tip: you will need the following information from your account’s proxy list to proceed.
- Proxy type: HTTP or SOCKS5.
- IP/Host: Proxy address number (e.g., 185.123.229.156)
- Port: Specific number (e.g. 1234)
Rotating/Residential IP address configuration
Rotating IP address proxies include Residential proxies. You can connect to country-specific nodes using this illustration to get an exit node:
- Proxy type (Internet protocol): HTTP or SOCKS5
- IP/Host: Domain Name field (e.g. p.webshare.io)
- Port: Proxy Port field (e.g., 80)
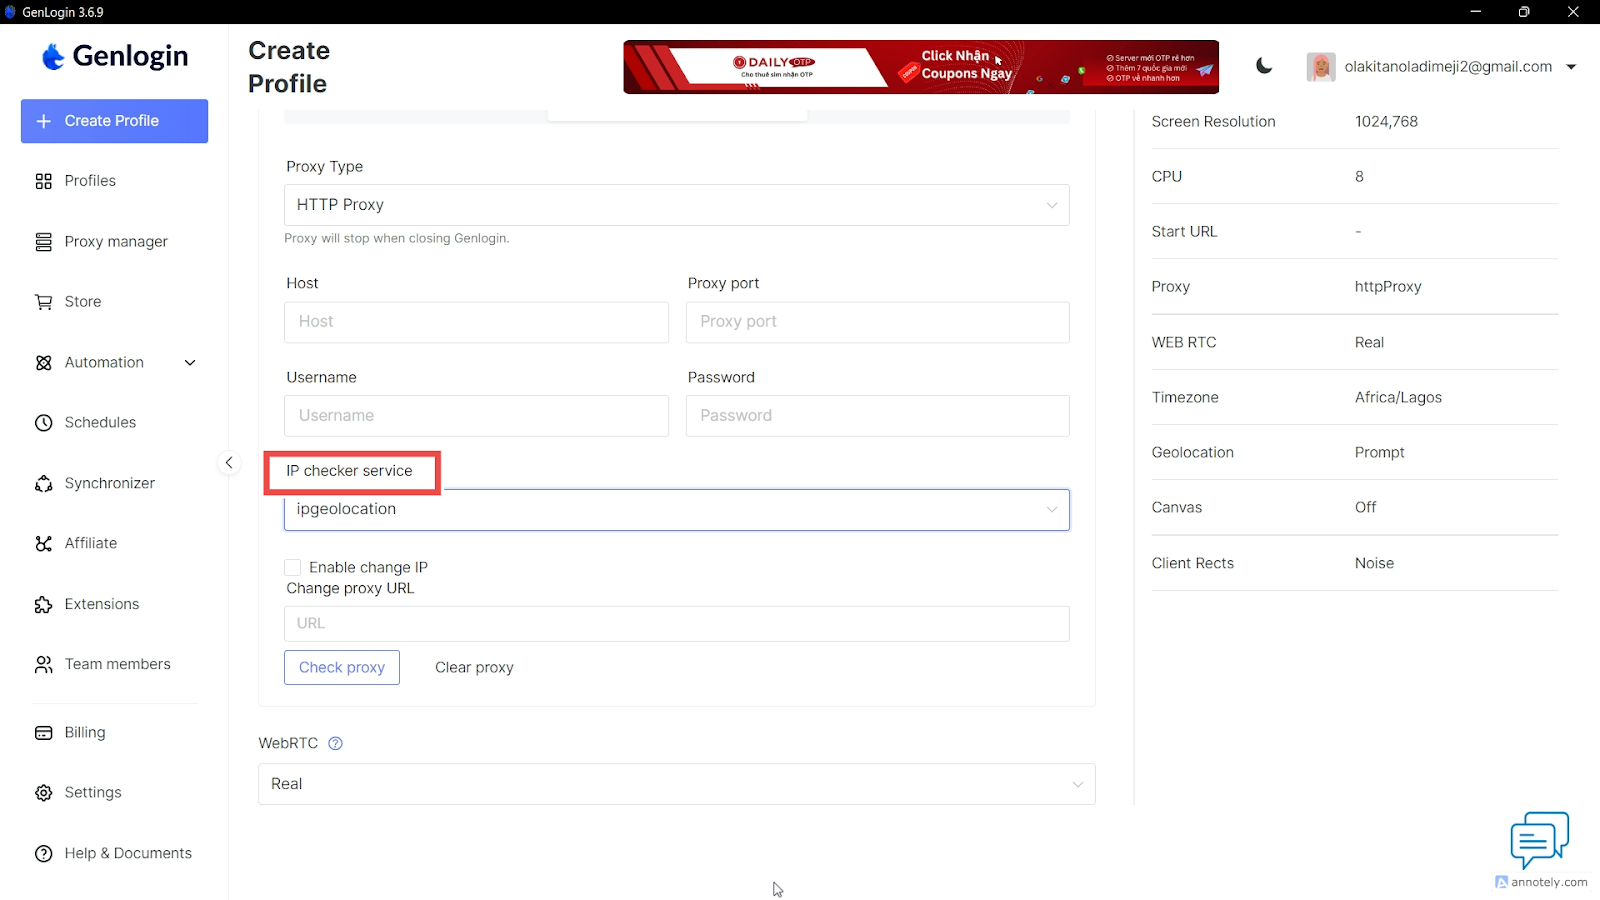
5. Test Your Proxy
Test your proxy configuration by clicking Check Proxy.

If you receive an error, such as “Cannot check this proxy…,” do not fret. Genlogin offers a way to change the IP checker service to a new one.
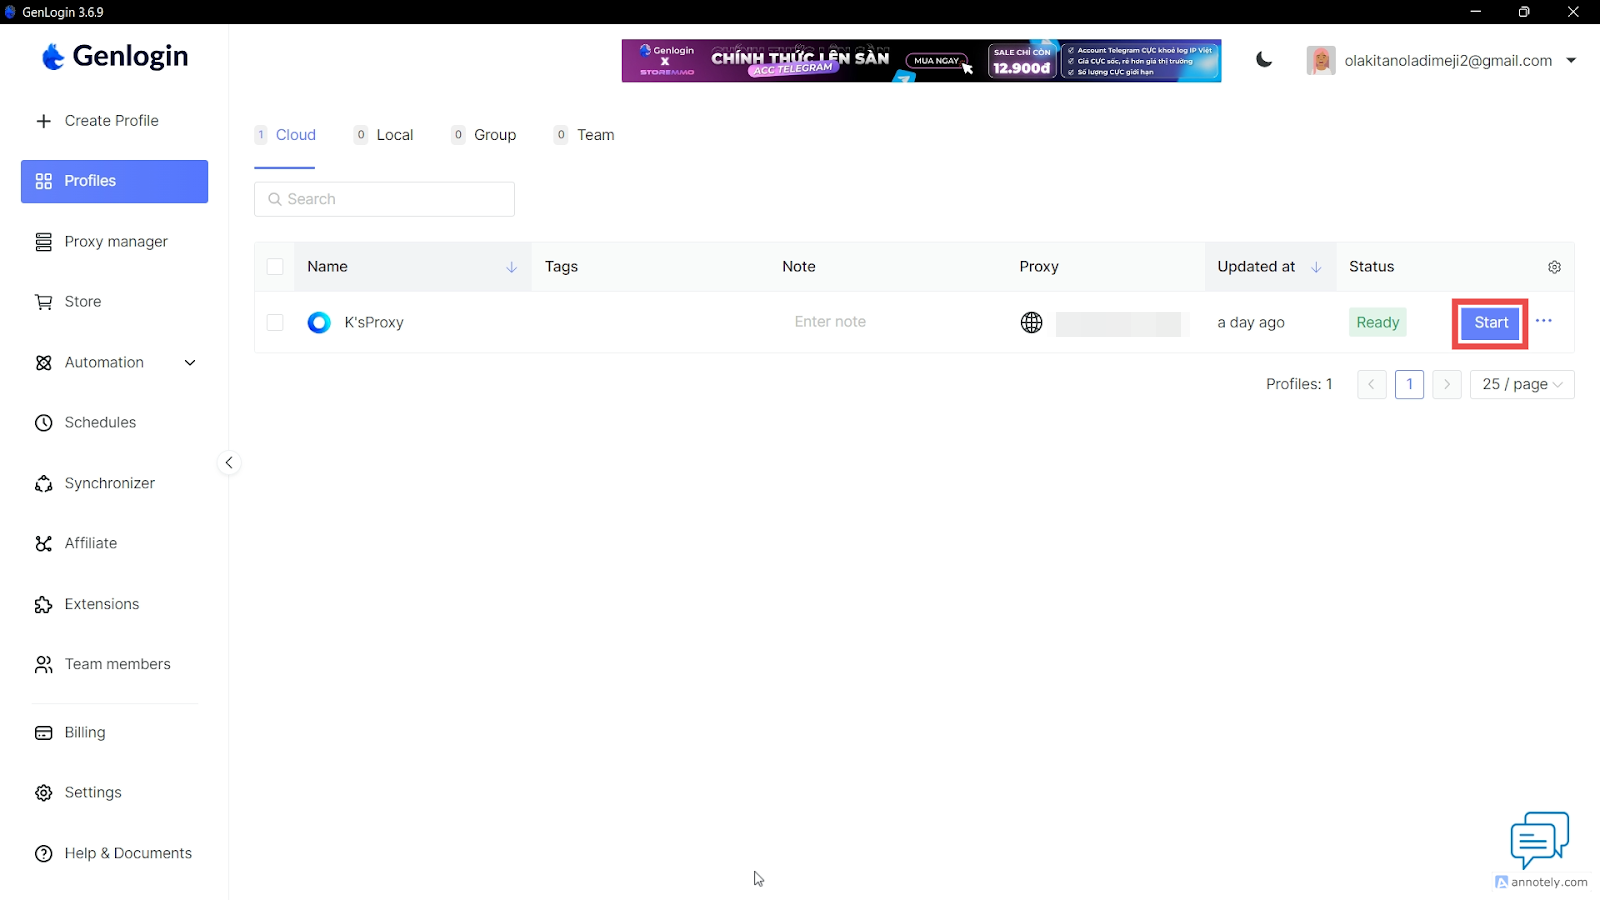
6. Start Browsing
If everything works fine, save your proxy settings and finalize the browser profile by pressing Create profile. Ultimately, you should see your newly created profile in the Profiles tab.
How to set up batch proxies in Genlogin
After learning to add a single proxy in Genlogin, you can optionally import multiple proxies using Proxy Manager. Here, you can add proxy lists without creating first a browser profile. All you need to do is set up proxies and add or remove them from your browser profiles.
Notably, batch addition can significantly streamline this process, saving time and effort. Before you begin, keep the following tips in mind:
- If the proxy type is not specified, the default is HTTP.
- Bulk proxies can be HTTP, HTTPS, SSH, and SOCKS5.
- Enter one proxy per line, with a maximum of 100 proxies at a time.
- Proxy information fields must not contain "@" or ":" symbols, as these will cause parsing errors. If your data includes these symbols, use the [Add Proxy-Single Add] function instead.
For your batch proxy setup:
1. Get Your Proxies List: Ensure your proxies are listed in a .csv or .txt file. As a Webshare user, you can easily download your configuration by visiting your account’s Proxy list page and clicking the Download button. Open the text file, copy its content, and proceed to the following step.
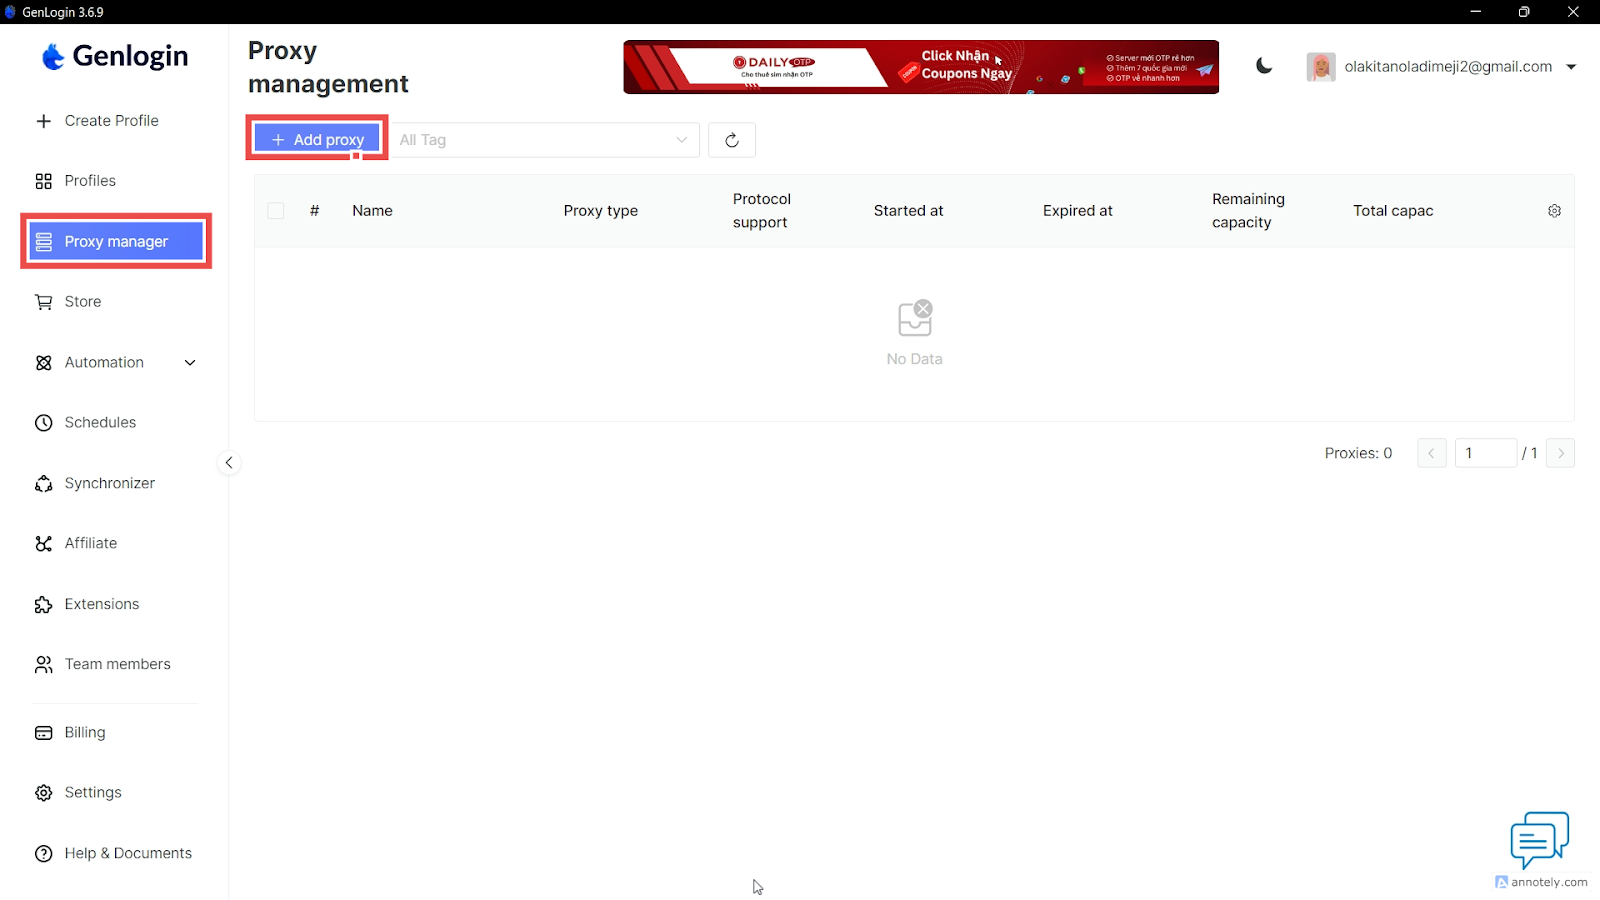
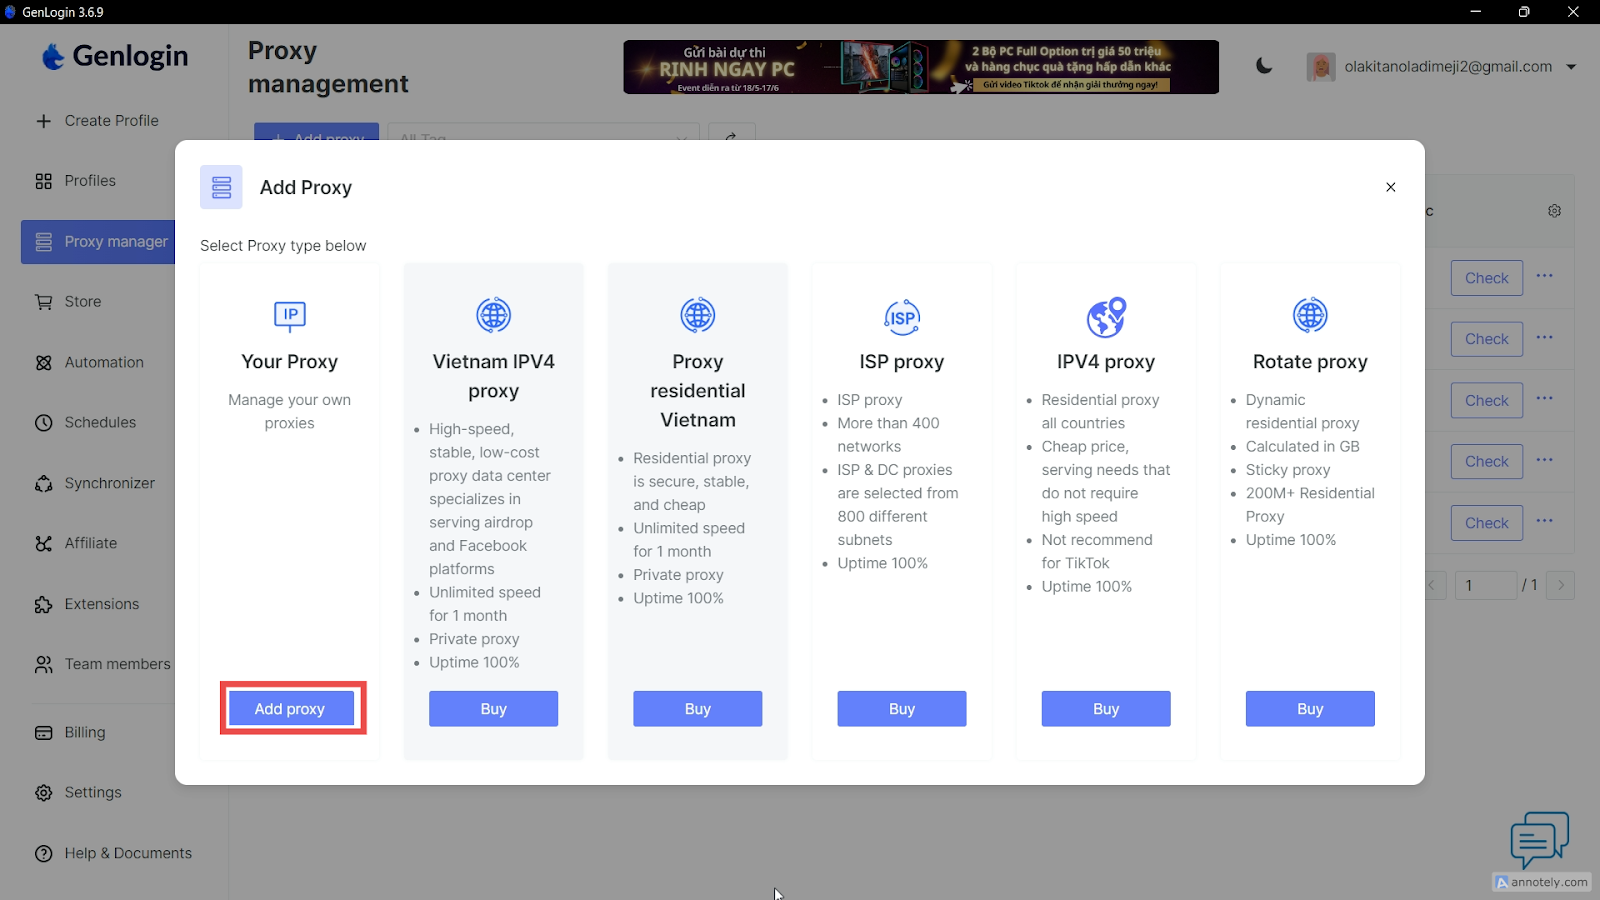
2. Proceed to Proxy Service: On your Genlogin dashboard, expand the left sidebar, click on Proxy Manager, and then click on Add Proxy. Ensure you find and click the Add proxy button, then select the batch and add from the drop-down menu.
3. Choose Your Proxy Option: We chose Your Proxy for this tutorial.
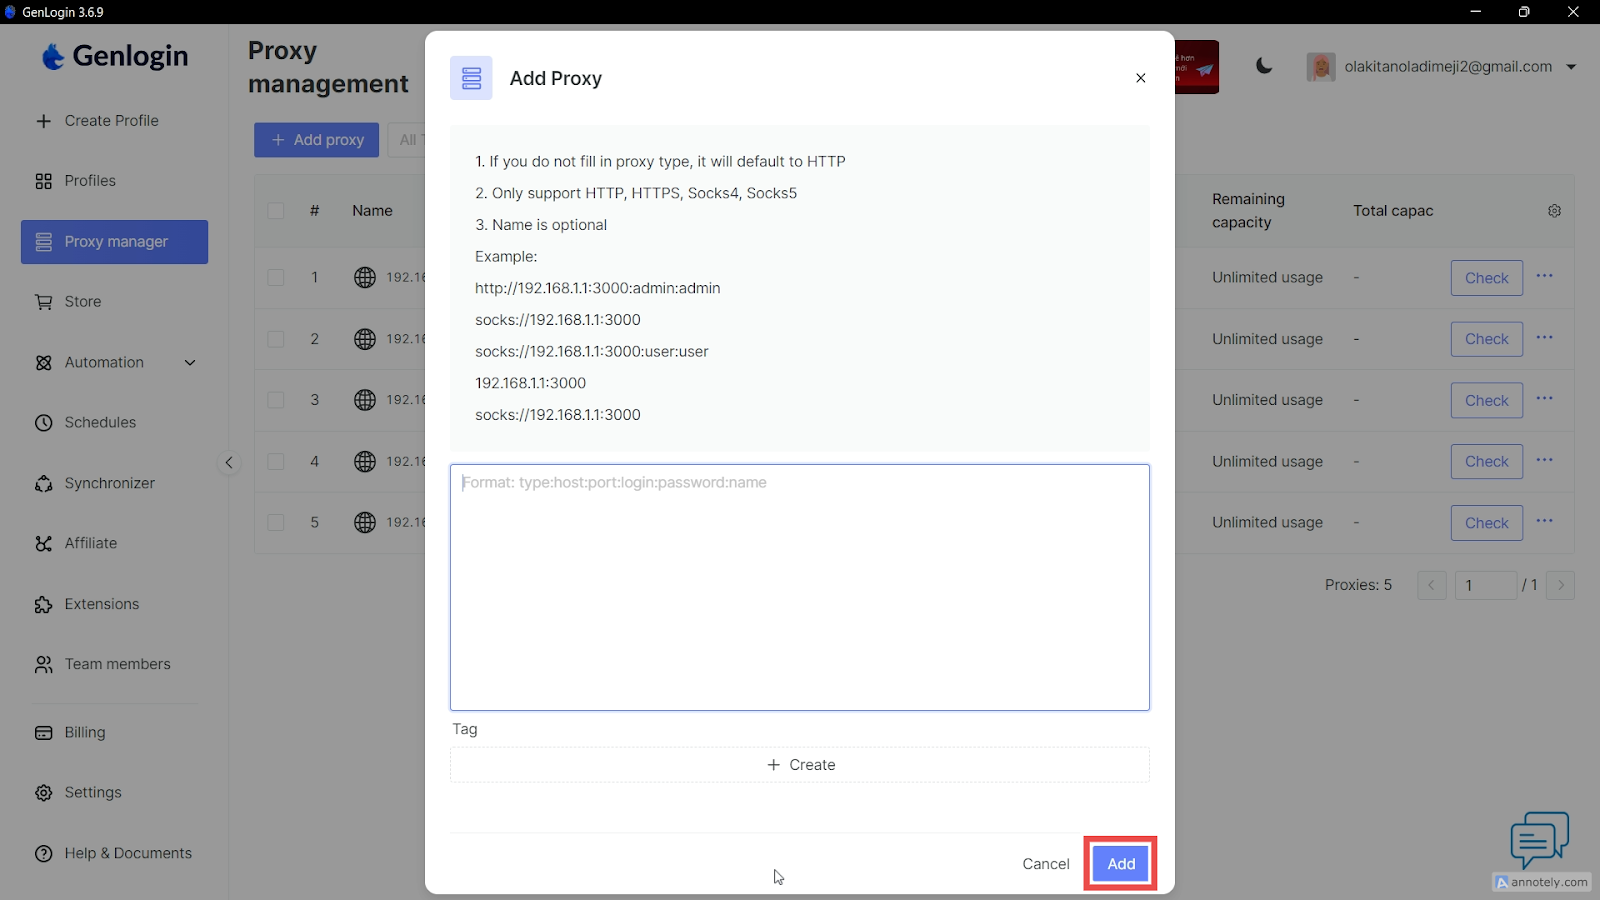
4. Add Proxy Details: Paste the copied text file contents directly into the textbox in Genlogin. The proxy table below should populate with your proxies, resembling this format if you use a basic setup:
http:192.168.1.1:8080:admin:admin or socks://192.168.1.1:3000.
Notably, not including a proxy type automatically sets your connection to HTTP. Thankfully, Genlogin supports four major proxy types, as indicated in the image below.
Alt Text: The Add Proxy Button on Genlogin’s Proxy Manager Page
5. Test Proxies: After uploading, you must test your proxies. Click on the Check button to confirm the configuration. Genlogin will alert you if there are any issues with the proxies.
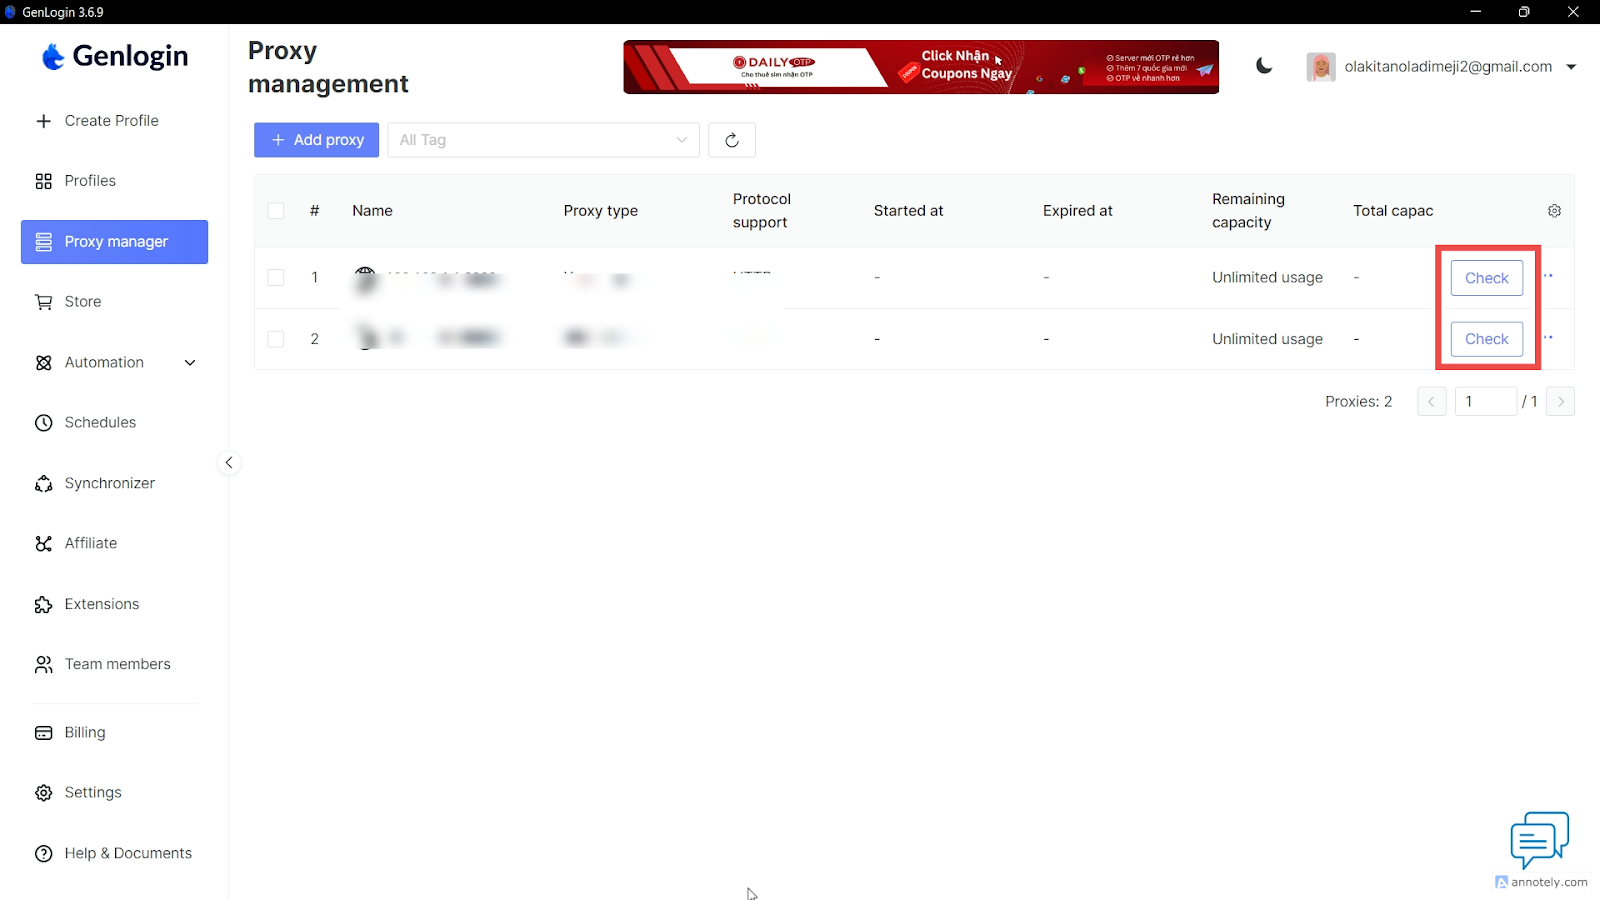
Congratulations! You have successfully integrated proxies with Genlogin. The next step is customizing your browser settings for optimal anonymity based on your project requirements. Explore other integration options if you need to explore similar tools or configure proxies across various operating systems.
Don’t forget that Webshare allows you to set up a free account without using your credit card. This free account automatically awards you 10 free premium proxies, which you can use to push the limits of Genlogin. Why wait longer? Be a part of this incredible offer!


