

Get 10 Free Proxies For Linken Sphere
In this guide, we’ll examine Linken Sphere, quickly explaining what it is and how you can use it to your advantage. We will also discuss two methods for setting up a proxy with Linken Sphere: a single proxy for light usage and a batch proxy for heavy usage. Let’s get started.
What is Linken Sphere?
Linken Sphere is an antidetection browser that provides solutions for fingerprint-free web surfing. This can be handy for users who require control over what information they leave online. Linken Sphere allows users to create quick sessions with their normal proxies and custom sessions with proxies acquired from other services. It also allows you to control the background information of your browser sessions, such as cookies, history, and saved passwords.
In addition, Linken Sphere can be used in fields that profit from anonymity, such as affiliate marketing, crypto trading, e-commerce, ticketing, managing multiple online accounts, and more.
Before Starting
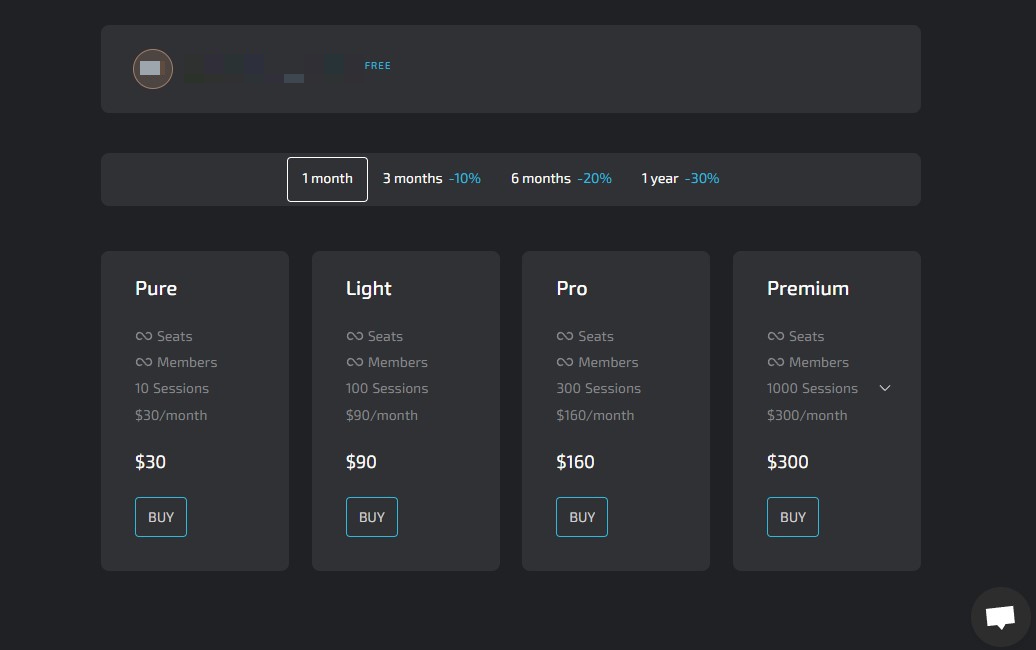
Linken Sphere's free plan limits you to one session per desktop. You can switch between desktops, but that would end your browsing session. If you intend to use multiple sessions, you must review their packages and decide which works best for you.
You can use Webshare proxies on Linken Sphere when you open an account. The account creation process is seamless, and you get access to 10 free proxies as soon as you're done - no coupons required! Take advantage of this offer while it’s available and create a Webshare account.
How to set up a single proxy in Linken Sphere
You can easily set up a single proxy server on Linken Sphere by following 9 straightforward steps.
1. Download Linken Sphere
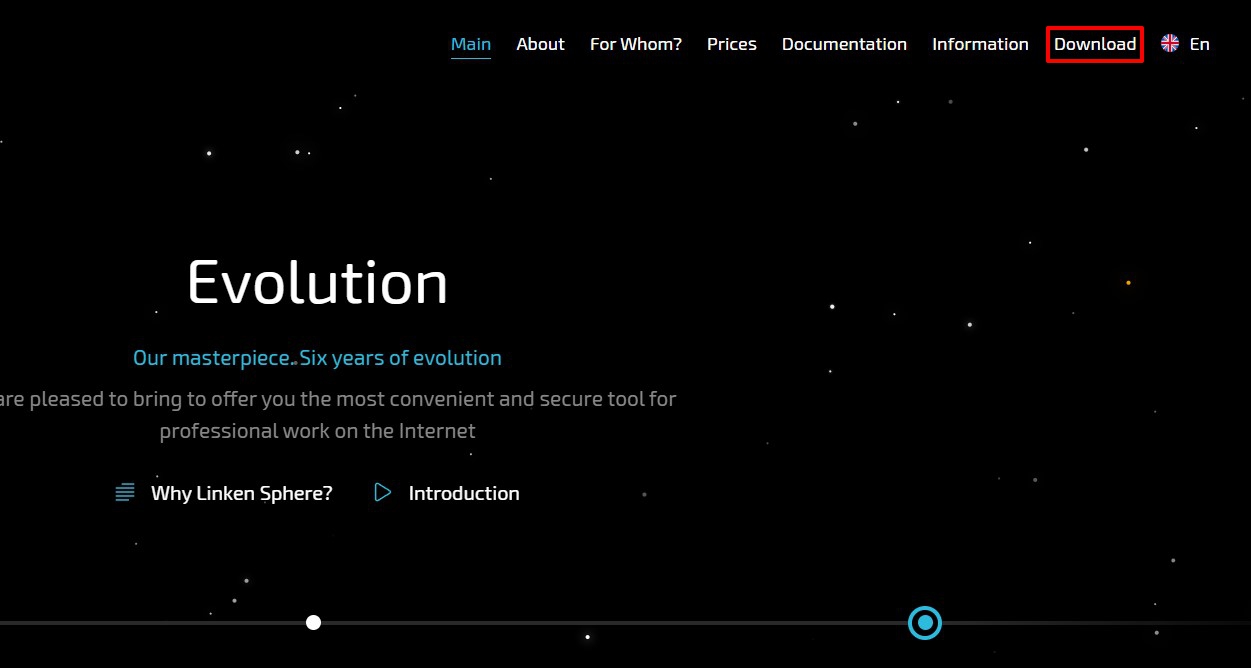
When you navigate to the Linken Sphere landing page, you can download the app by selecting the button in the top right corner.
2. Start a New Session
After registering a Linken Sphere account, you’ll be taken through a quick tutorial on how to use the browser. Upon completion of this tutorial, you can now create a new session. Before clicking the New Session button, ensure that Quick is toggled off.

If you leave it toggled on, a session will quickly be created with the default proxy provider tied to the Linken Sphere browser.
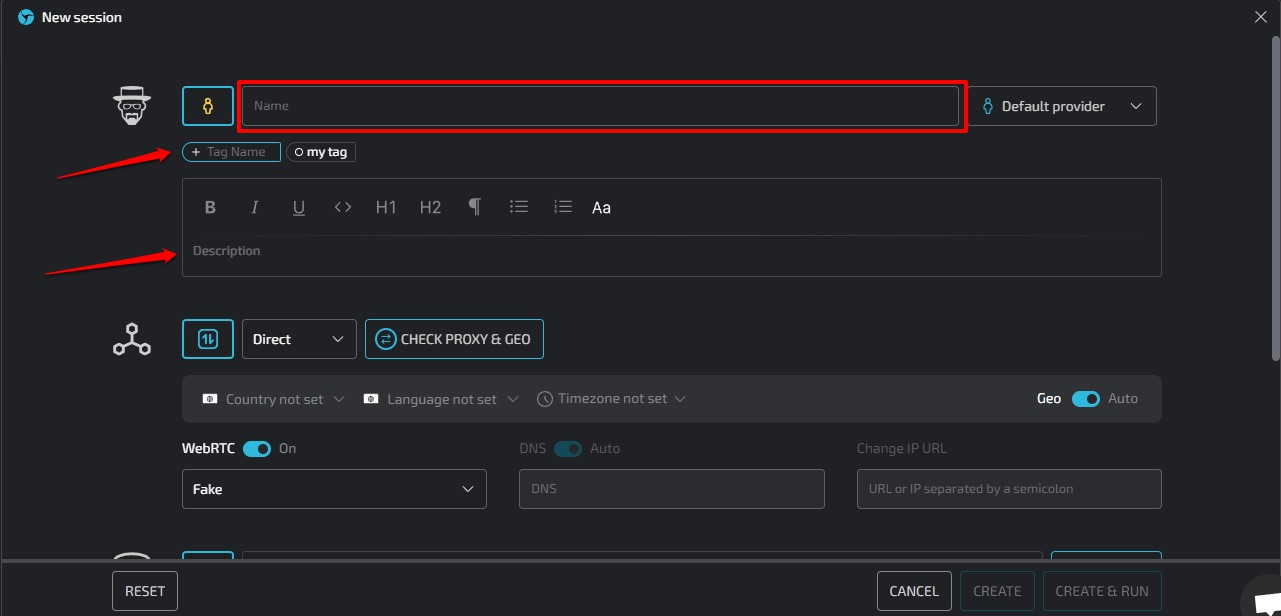
3. Customize Your Session
After choosing to create a new session, a window will pop up that allows you to customize it. First, name it. You could name your session based on the proxy provider you’d like to use. If you’d like more details for future reference, you could also fill out a description or add tags.
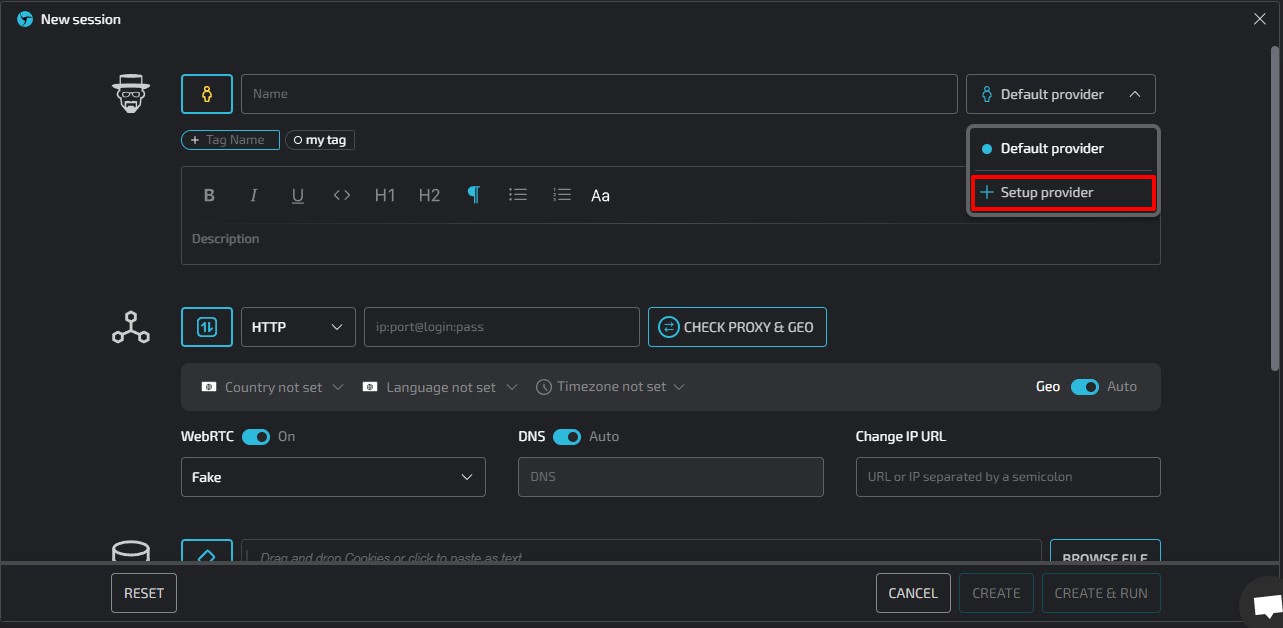
4. Setup Your Proxy Provider
Linken Sphere gives you two options for setting up a proxy provider. You could click the Default Provider drop-down menu and select Setup Provider. This method saves the information more permanently, so you can select that provider in a different session if you wish.
Alternatively, you can fill in the proxy settings in the section on the same page. The information filled in here is unique to your session, and you’ll have to set it up manually in a different section if you wish.
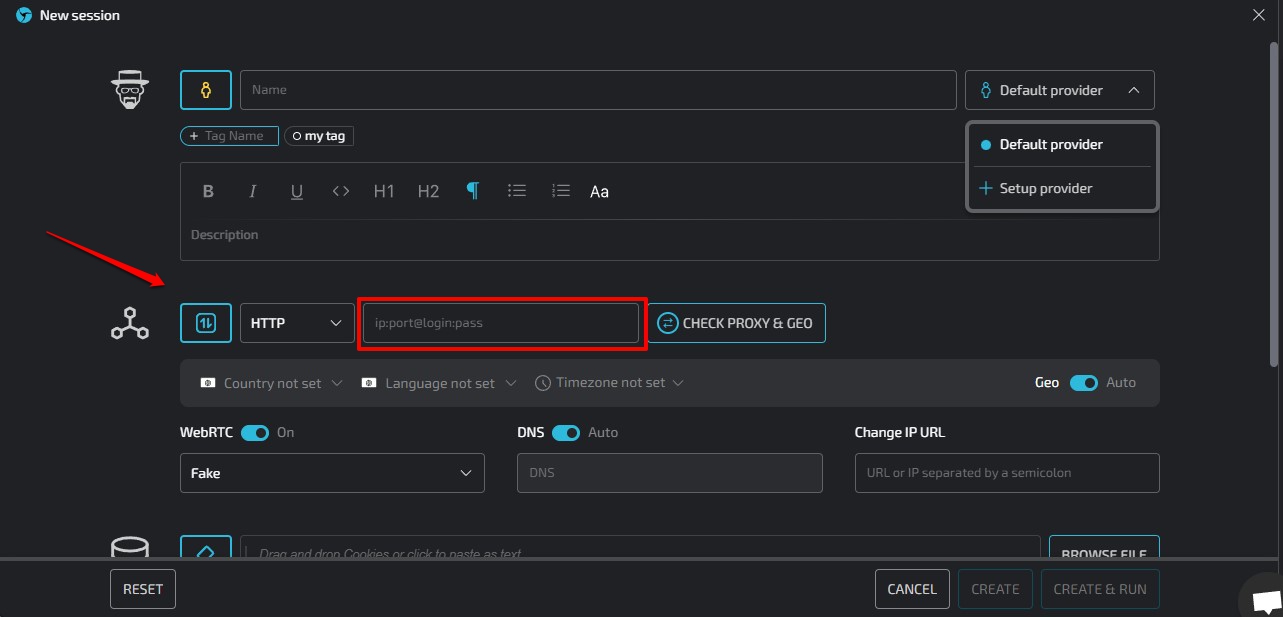
5. Choose Your Proxy Type
Webshare gives you options, providing both HTTP and SOCKS5 protocols. In this guide, we will work with HTTP protocols, as they can handle both HTTP and HTTPS requests. You can choose your proxy type from the drop-down menu below.

6. Fill Out Your Proxy Settings
The next section is arguably the most important section of the session setup process. This will determine how your session will behave in relation to the proxy provider you intend to use. You can set up this field in two major ways - static or rotating proxies.
A static proxy should work just fine for most, but you could benefit from a rotating proxy if you encounter websites that restrict your access based on your IP. If you encounter this frequently, you should consider buying more proxies for IP rotation.
Static IP address configuration
Linken Sphere makes static IP integration pretty straightforward. You don’t need to gather the information for the IP you intend to use separately. The field provided requires the IP address, port, username, and password to be bundled together.
You can get all the information you need by visiting the proxy list page on your account. You can select the IP you want to use and download the information. Then, copy the information from your downloaded text file and paste it into the Adress Field in Linken Sphere.
Proxy Type: HTTP or SOCKS5
IP/Port/Username/Password: It is bundled together using colons. (e.g 24.111.222.555:5450:username:password)

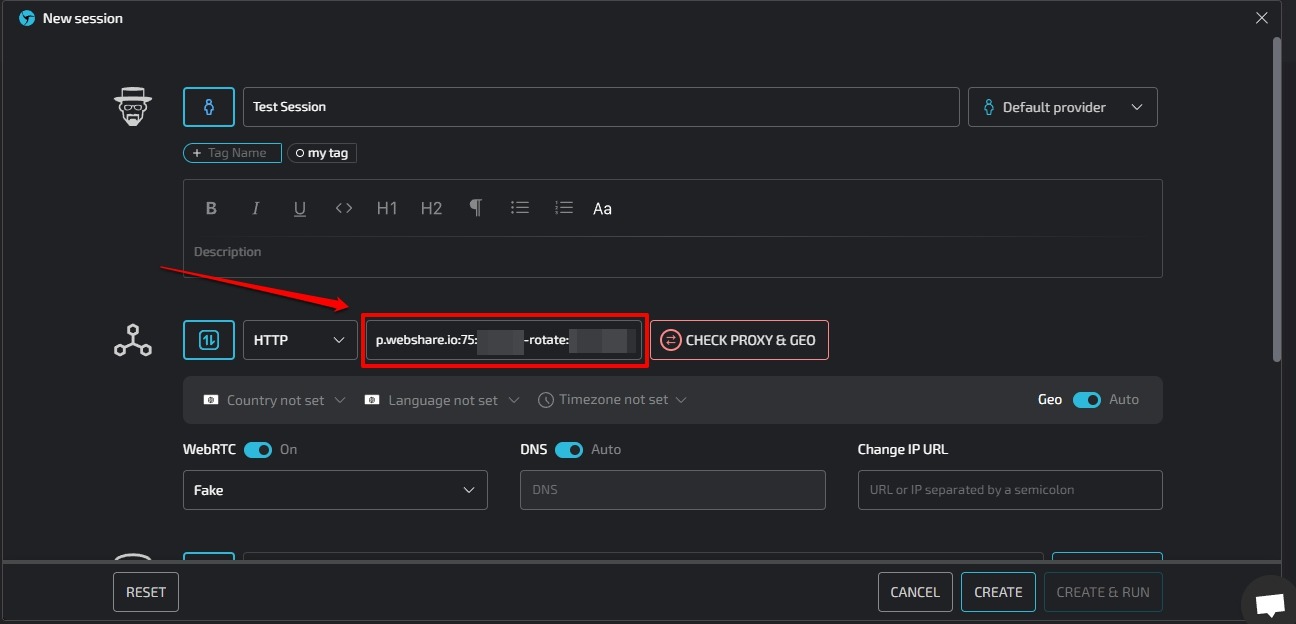
Rotating IP address configuration
Linken Sphere also supports rotating IP Address configurations. The setup is similar to a static address, with one key difference. You will need a Domain Name, which you can obtain by visiting the Rotating Proxy page in your proxy provider setup.
Note that affecting this rotating setup will likely change the IP, username, and port. Be sure to effect this change in your proxy address.
Proxy Type: HTTP or SOCKS5
IP/Username/Password: It is bundled together using colons. (e.g p.webshare.io:75:username-rotate:password) In this format.
The beauty of a rotating proxy lies in improved anti-detection. You could make your rotating addresses region-specific and specify the proxy type you want. All of this should be configured in your proxy provider’s control center.
Copy and paste the new domain name setup into the Address Field in Linken Sphere. When you’re done, your setup should look like this:
7. Test IP Settings
Double-check your proxy information, then click the Check Proxy & Geo button. Once the connection has been verified, the button will turn green, and a region will appear in the section directly below.
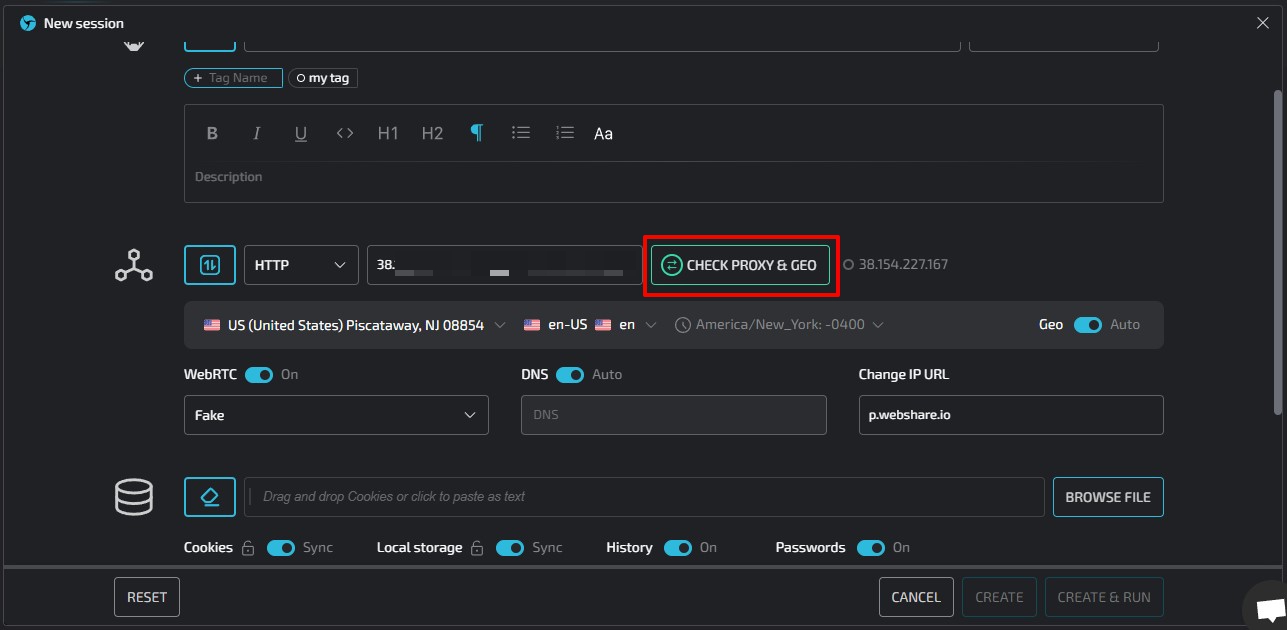
8. Customize Your Browser Settings and Dependencies
Linken Sphere allows you to control the information your browsing session depends on. You can paste cookies from a session in your other browser and even sync your cookies across sessions. Linken Sphere also allows you to choose whether or not your browsing history or passwords are saved from a section.
9. Start Browsing
Once you have confirmed all the data entered, you can begin browsing by clicking Create & Run in the bottom right corner of your screen.
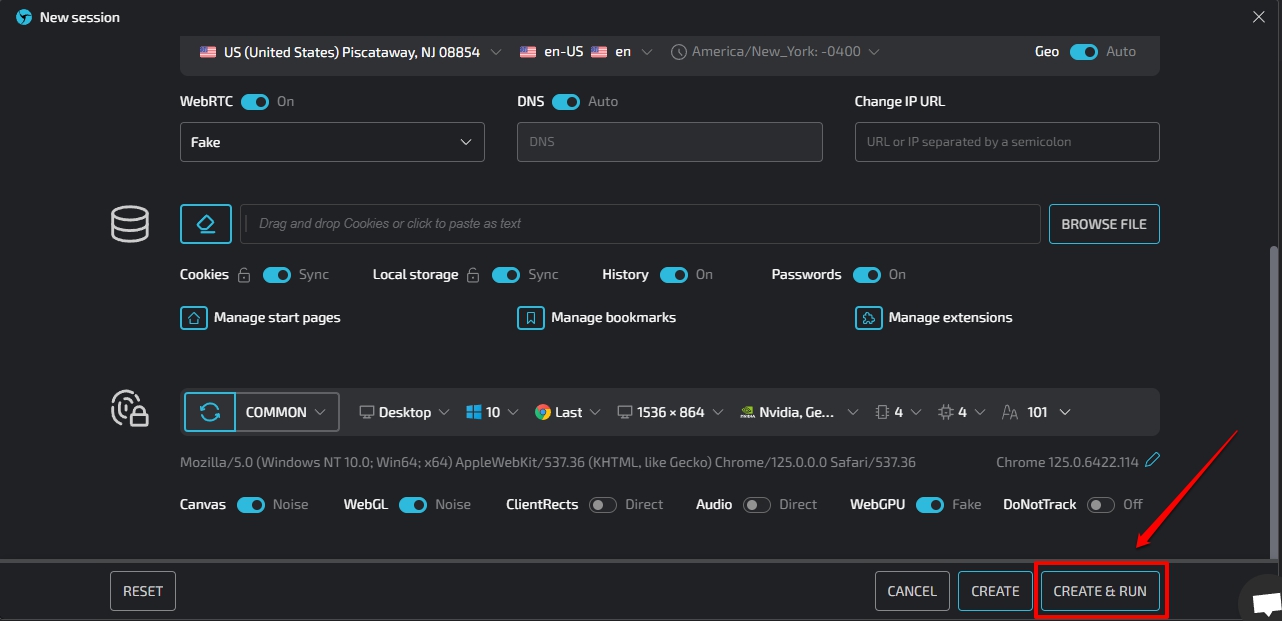
This will launch a chromium-based browsing session that keeps you safe and truly undetected.

How to Set Up Batch Proxies in Linken Sphere
A batch proxy setup could save you a lot of time and be very convenient when handling projects requiring different IP addresses. It’s very quick and straightforward when you follow the steps listed below.
1. Setup a Proxy List: You’ll need to list your proxies one line at a time in the format of “IP Address:Port:Username: Password.” Proxy providers make this process easy by allowing you to select all your IPs and export them as text documents. You can do this in Webshare by navigating to the Proxy List page.
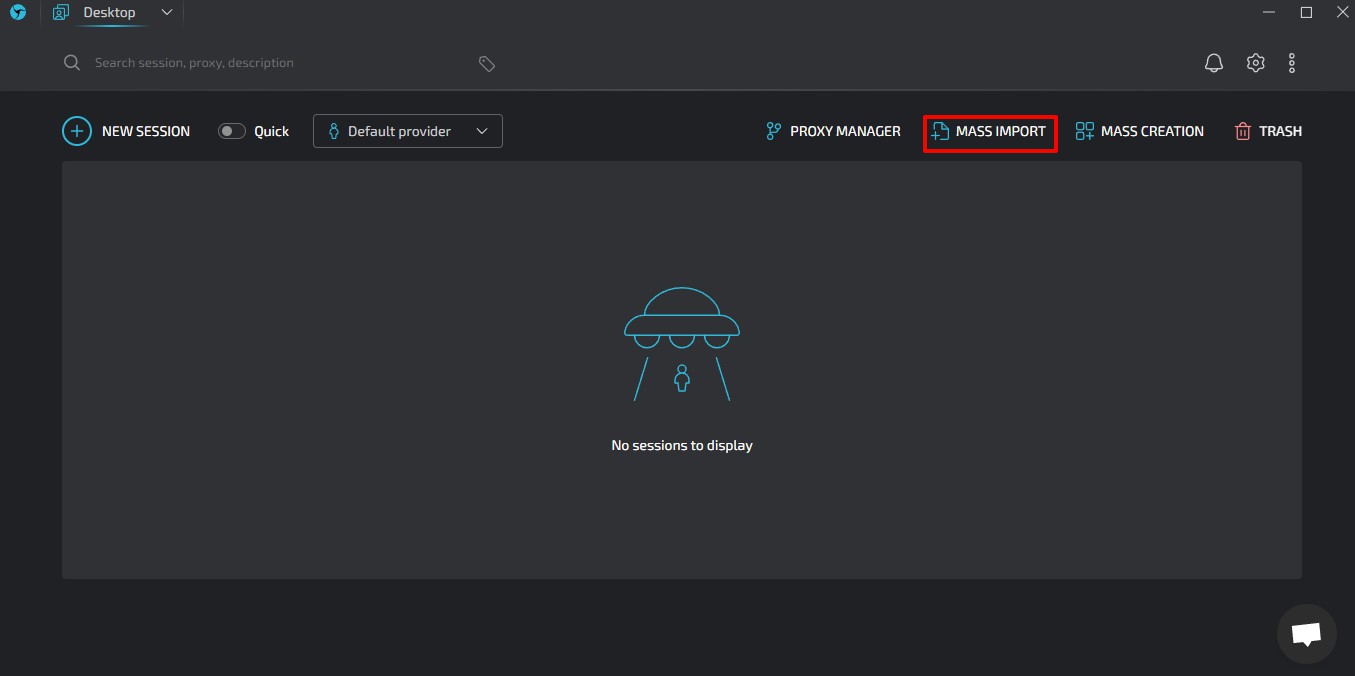
2. Mass Import: Return to the Linken Sphere app once you have your proxy text file. You’ll notice the ‘mass import’ button on the top right corner of the main page. Click this button and select the file you’d like to import.
3. Test Your IPs: Once the import is successful, test your IPs before you begin browsing. This great habit could help you sort out problems before you begin your session.
And that’s all you need to know about setting up proxies in Linken Sphere. Hopefully you find this information super helpful and it helps you better understand how to set up static, rotating and batch proxies in Linken Sphere.
Remember that you can set up a free account on Webshare without a credit card and use 10 premium proxies for free. You can use these proxies to push the limits of Linken Sphere. Take advantage of the offer while it lasts!


