

Get 10 Free Proxies For Undetectable.io
In this tutorial, we’ll learn about Undetectable.io and how it could be useful in your web projects. We will also address some best practices you can use to set up a proxy on Undetectable.io, depending greatly on the project load—a single proxy for light usage and a batch proxy for heavy usage. Let’s begin.
What is Undetectable.io?
As the name would suggest, Undetectable.io is an anti-detect browser that gives you control over the information available during your browsing sessions. It is marketed as a browser that allows you to conveniently manage multiple social media accounts. This service can work with a proxy service to hide your computer’s information and give you control over your digital footprint.
It could be incredibly useful for managing multiple social media accounts, hiding or modifying information during market research, and protecting oneself while trading crypto.
Before Starting
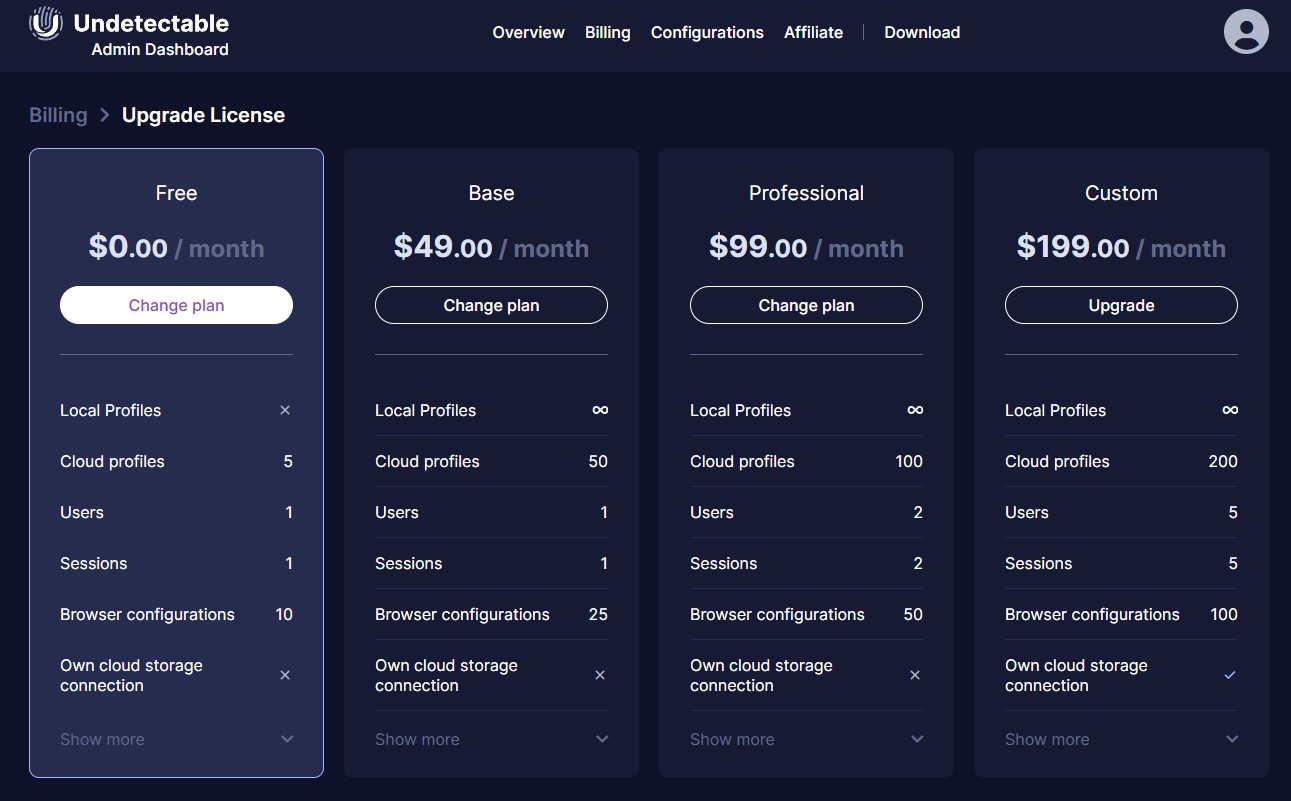
Undetectable.io limits you to one session and 5 cloud stored profiles on the free plan. If you’d like to use multiple sessions and more profiles than this, you’ll need to take a look at the plans they offer and the perks that come with each tier. This information can help you decide the best plan for you.
To unlock the full potential of your browsing, you’ll need to set up Webshare proxies on Undetectable. Create a Webshare account today and enjoy up to 10 premium proxies absolutely free. Don’t miss out—this exclusive offer may not last long. Sign up now to claim your free proxies and elevate your online experience!
How to Set a Single Proxy in Undetectable.io
Let’s work our way up in difficulty and discuss how you can set up a single proxy server in Undetectable.io. You can accomplish this by following these 9 steps.
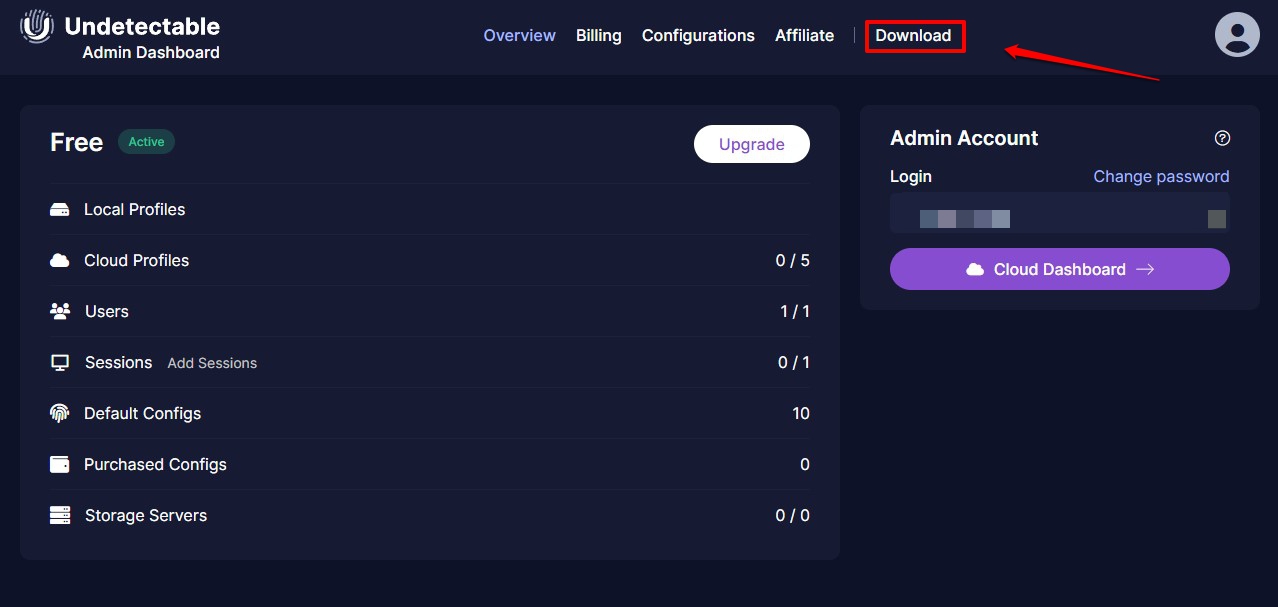
1. Download Undetectable.io
You can download Undetectable.io from the homepage.

You must create an account to access the admin dashboard.
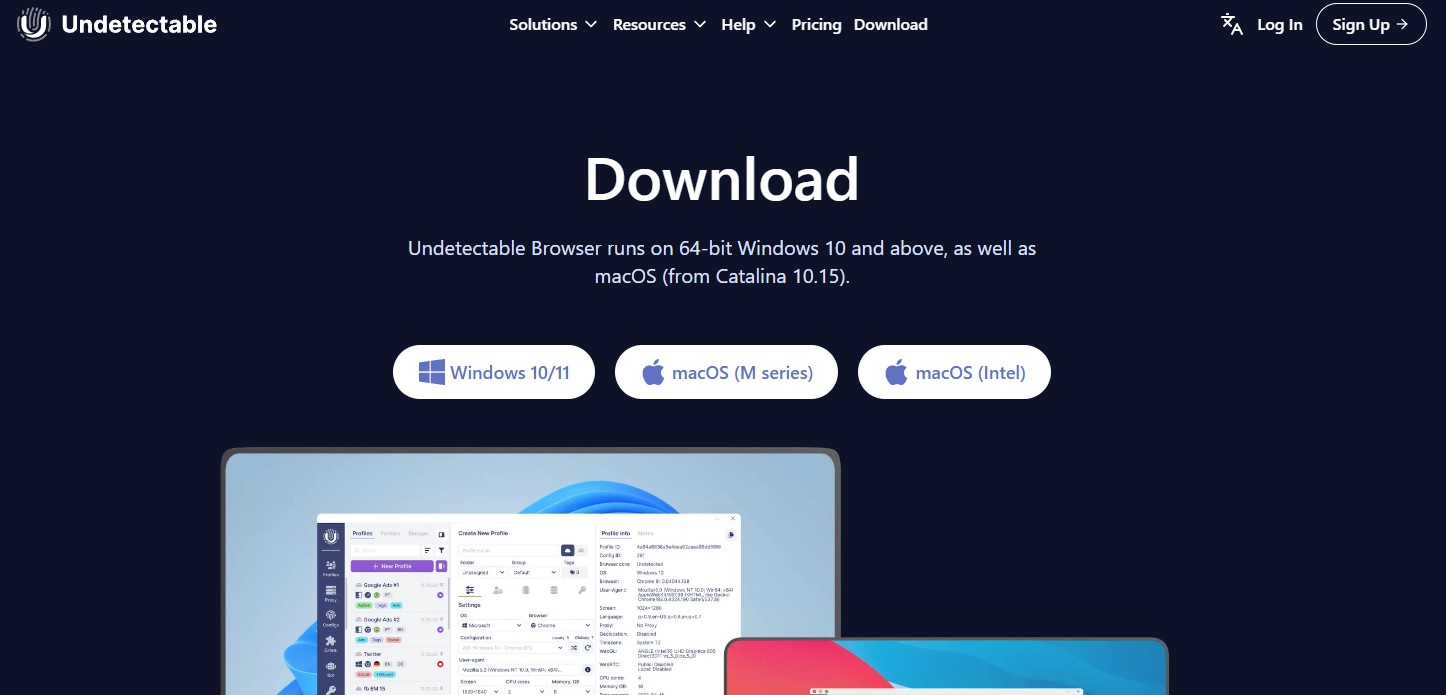
You’ll be prompted to choose your hardware upon clicking the Download button. This app has a Windows version and two versions for MacOS. Choose the app version that will fit your setup.
Upgrading to premium
Whenever you feel like the free version doesn't match your needs, feel free to use a special offer by Undecetable.io to Webshare users and get 15% off on your first purchase on any license!
In order to upgrade, head over to the Billing section of your account, on the official website. Then, click on the Upgrade button, select any plan you want and apply the 'WEBSHARE' code in the Promocode field.
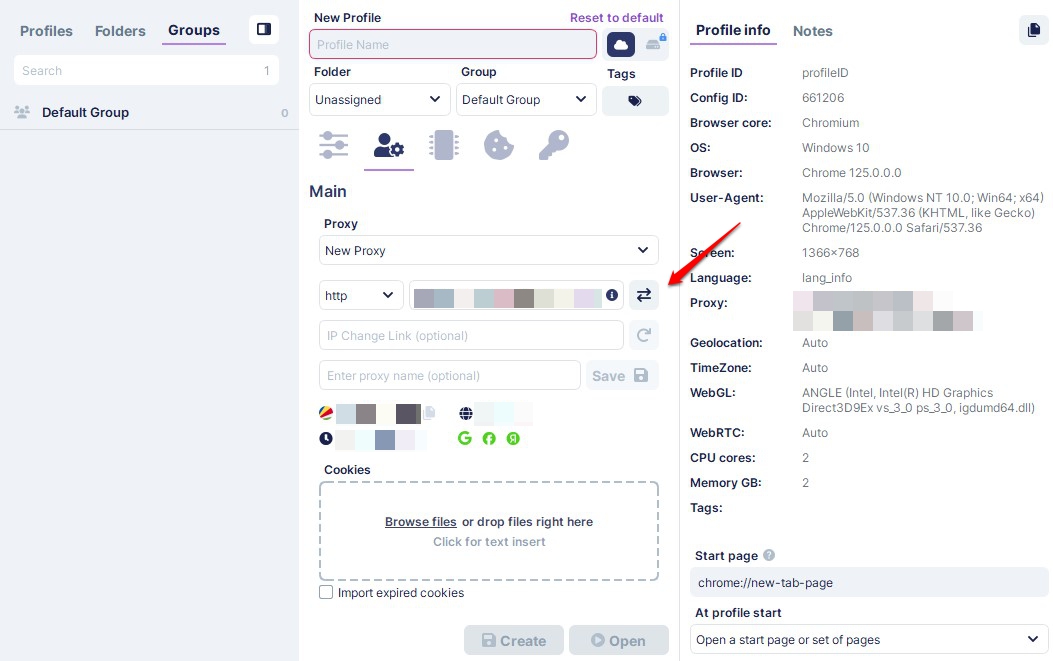
2. Create a New Profile
Undetectable.io allows you to create and manage profiles, folders, and groups, all of which are very useful depending on the nature of your project. For the sake of this guide, we’ll want to create a profile.
After launching the Undetectable.io app, you should be greeted by the profile tab as your default screen. Click the New Profile button to create a new profile. It should change the window scale.
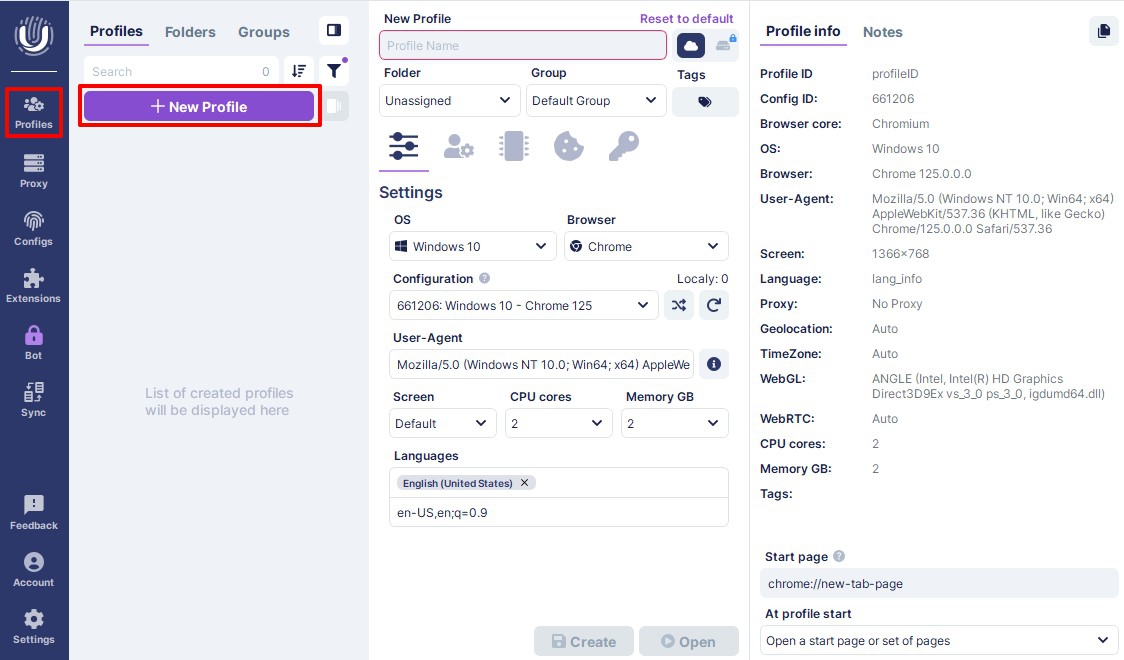
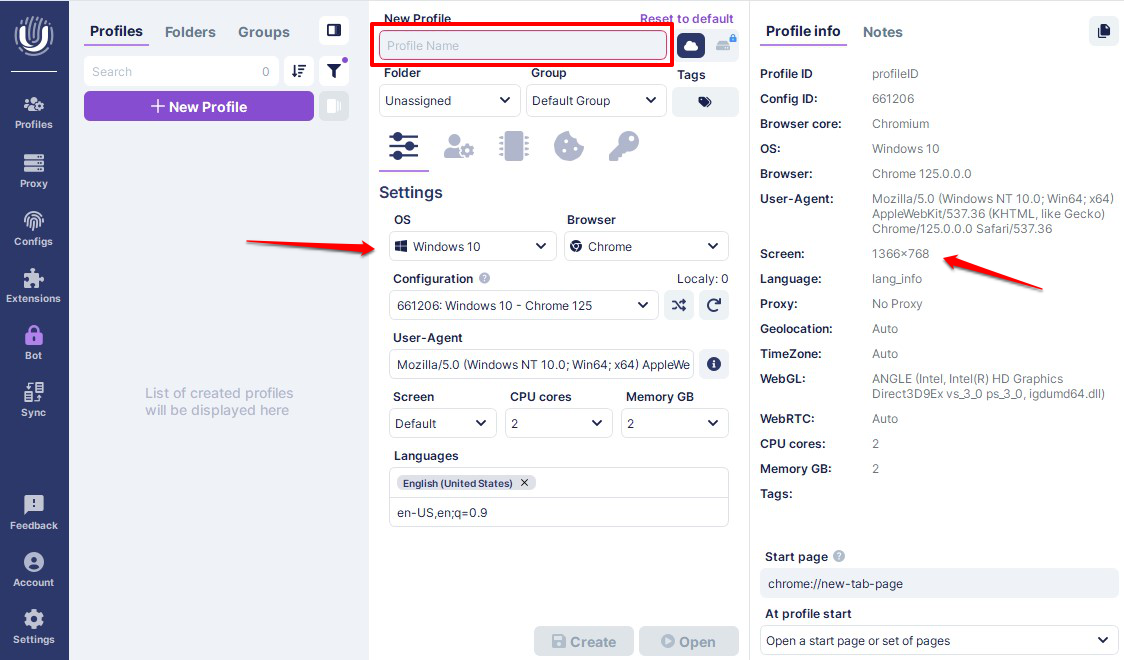
3. Fill the Basic Settings
These settings will not directly affect your proxy setup. They are mostly descriptors, like the name of your session and what folder or group you would like it to go into. You can customize your browser’s look and feel on the basic settings page. In addition, you can decide what operating system it runs on, what browser you will use, and its configuration.
You can even enter the screen size, number of cores, and memory it uses. Feel free to play around with these settings until they feel right. The profile info tab provides a summary of your profile.
4. Main Settings and Proxy Provider
Once you’ve double-checked your basic settings, you’ll need to set up your custom IP and proxy. You can do this by navigating to the Main sub-menu. The options you’ll need for your single proxy setup will not be visible unless the Proxy dropdown is set to New Proxy.
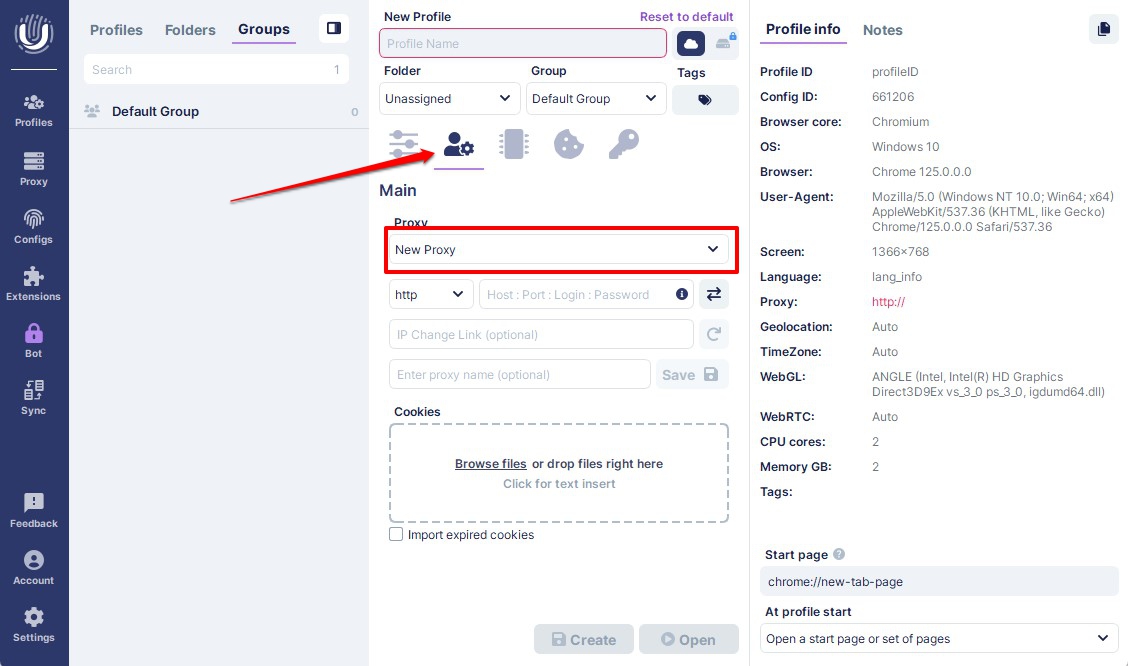
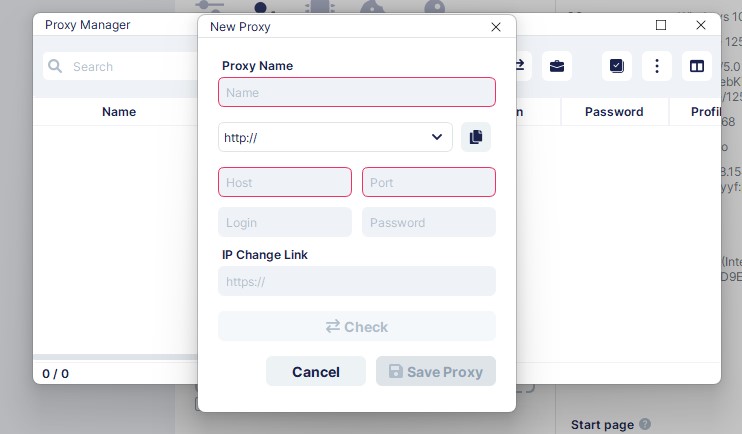
You can still create the profile without choosing a proxy, but you won’t get the full advantage of using an anti-detect browser. Undetectable.io also allows you to set up a proxy using the proxy manager. Using this method, the settings will be saved for use in future profiles.
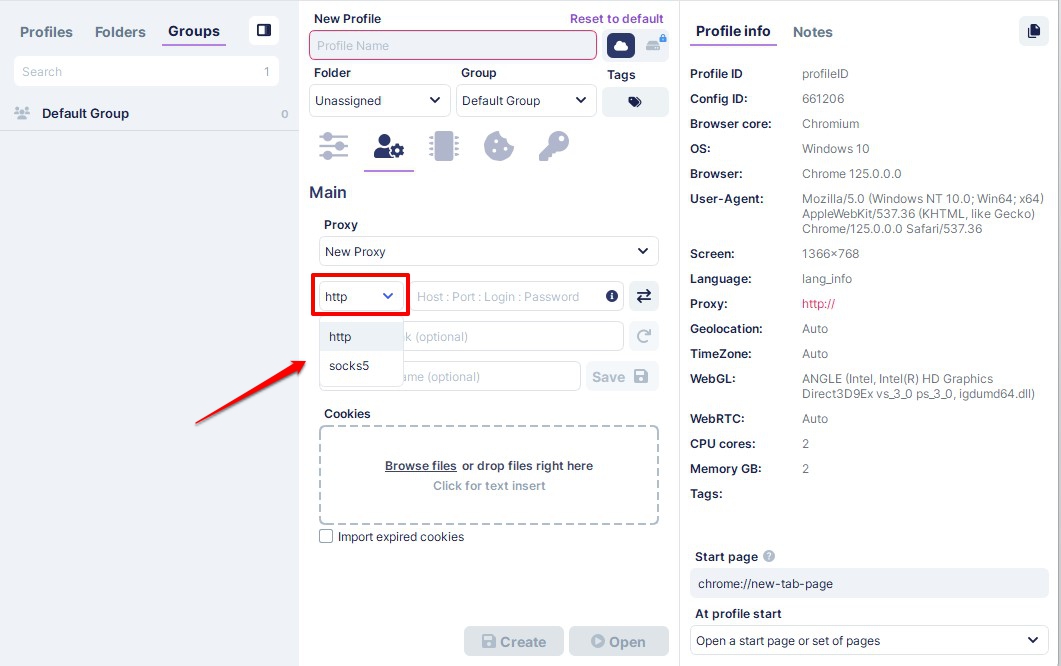
5. Choose Your Proxy Type
Webshare can provide both HTTP and SOCKS5 proxies. Fortunately, Undetectable.io supports both proxy types, and you can conveniently choose one from a drop-down menu. Ensure you select the right type to match your proxy link before continuing.
6. Fill Out Your Proxy Settings
This next section is crucial in determining how your profile will behave and whether it works. Pay close attention to the two common ways to set up your proxy settings. You could either use static or rotating proxies.
You could use a rotating proxy if you’d like to beef up your anonymity. However, it won’t be easy unless you choose a proxy provider supporting this setup.
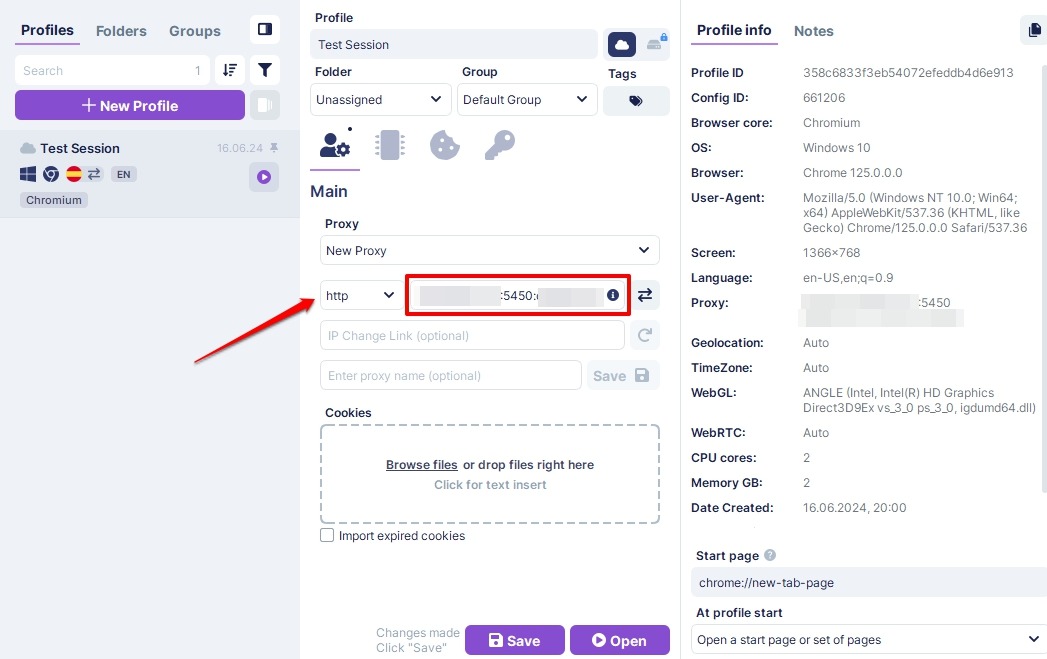
Static IP address configuration
To set up a static IP in Undetectable.io, you’ll need a proxy address and its corresponding username and password bundled in the format “address: port: username: password.” This order is indicated in Undetectable.io as “Host:Port:Login:Password.”
This information is readily available on the Proxy List page of your service account. As shown, you could enter it individually and separate the information with a colon. You can also select the proxy you wish to use, download it as a text file, and copy the information directly into the indicated field.
Proxy Type: HTTP or SOCKS5
IP/Port/Username/Password: It is bundled together using colons. (e.g 24.111.234.144:5450:username-rotate:password)
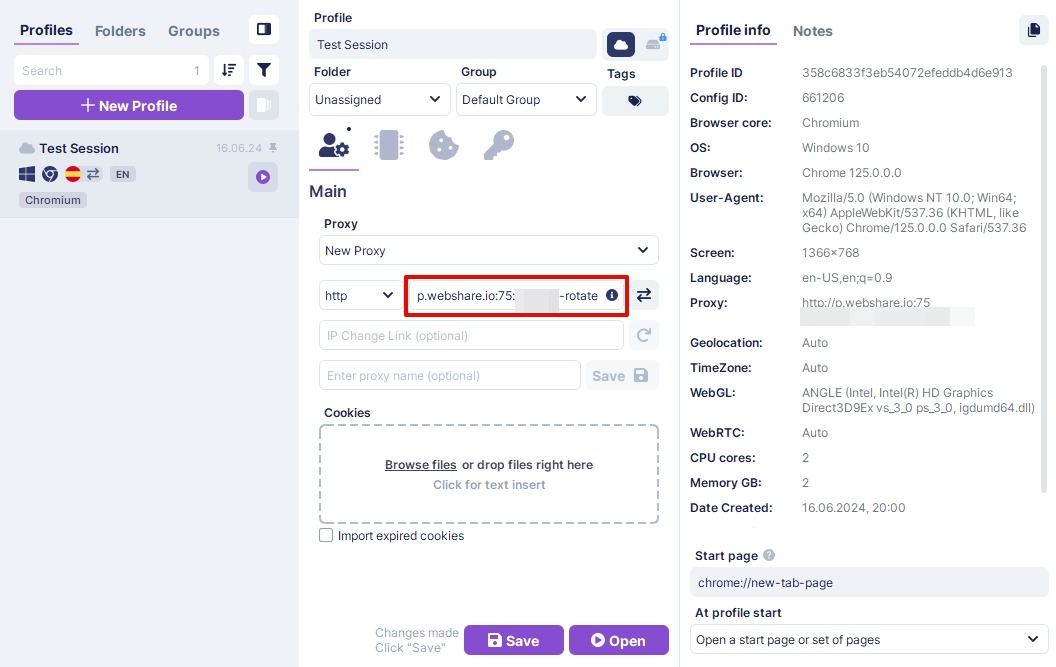
Rotating IP address configuration
This method of IP address configuration helps you maximize your anonymity and combat websites with strong detection measures. Thankfully, you can set this up on Undetectable.io. The steps are pretty similar to the static setup, with a few key differences.
First, you must access the Rotating Proxy page in your proxy provider’s admin dashboard. This will give you access to the domain name, port, and username you’ll need to set up a rotating configuration.
Once you have this information, you can enter it as indicated on the Main tab in Undetectable.io. Note that the rotating proxy setup has a different proxy domain name, username, and port. Change these details in the IP link as necessary.
Proxy Type: HTTP or SOCKS5
IP/Username/Password: It is bundled together using colons. (e.g p.webshare.io:75:username-rotate:password)
7. Test Your IP Setup
Please double-check your details to ensure everything is correct. Once done, you can test your connection by pressing the double arrows below. Once your proxy has been confirmed, you’ll notice the details retrieved underneath.
8. Add Custom Cookies and Saved Accounts
Undetectable.io allows you to work with custom cookies and previously saved accounts if you don’t want to create them again.

Navigate to the Cookies and Accounts tabs as needed.

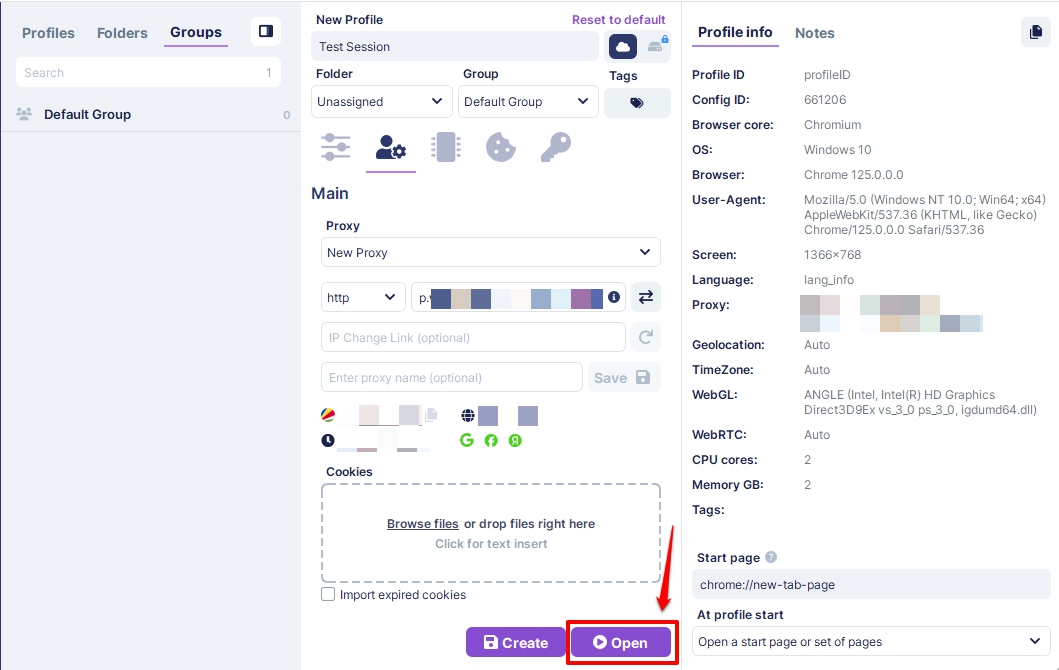
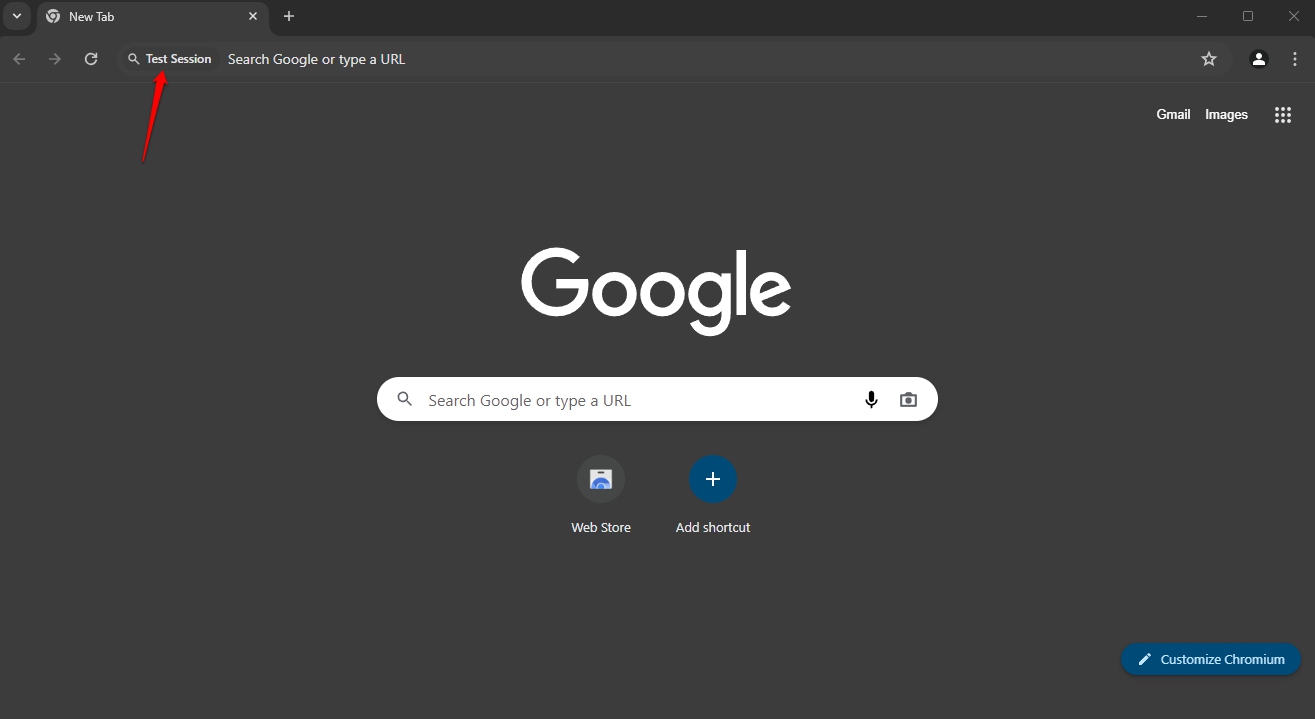
9. Start Browsing
Once you’re confident with your settings, you can browse by clicking the Open button at the bottom center of your screen. This will save your profile and launch a browser that matches your specified parameters.
How to Set Up Batch Proxies in Undetectable.io
Undetectable.io supports batch proxy setups but not on the free version. You’ll need to upgrade to one of the premium tiers to access this feature.
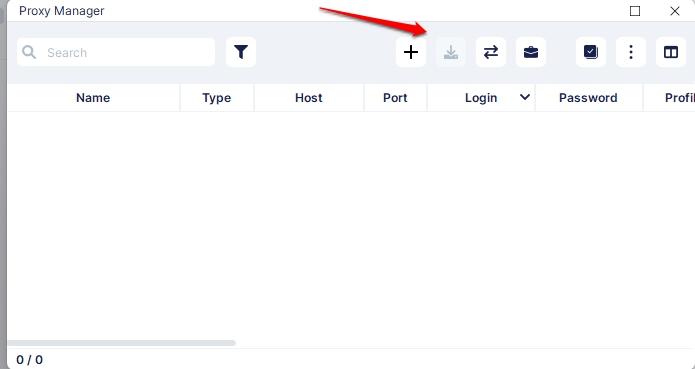
To pull this off, you’ll need to find the Import option in the Proxy Manager menu.
If you decide to purchase the premium version of Undetectable.io for this reason, you’ll need a list of proxies you intend to import. Each proxy should have its own line in the format “IP:Port:Username:Password.” You can do this in Webshare by navigating to the Proxy List page.
And there you have it! You should now have all the information you need to work with Undetectable.io. Proxies are very handy, and with the steps listed above, you can properly use them in conjunction with Undetectable.io for a satisfactory and safe browsing experience.
Remember that you need a proxy provider like Webshare for the best experience. Be sure to take advantage of the 10 premium proxies per free account offer while it lasts!


