Get 10 Free Proxies For MuLogin
Anti-detect browsers are especially useful for maintaining privacy and security while using multiple browser profiles. More importantly, having access to a trusted anti-detect browser that guarantees your safety and security is an absolute delight. And this is where MuLogin comes in.
In this article, we will discuss Mulogin, its capabilities, and how to configure proxies using MuLogin.
What is MuLogin?
MuLogin is an anti-detect browser that allows its users to manage multiple online accounts. This browser allows users to open and manage multiple accounts on the same interface without compromising their security and privacy.
The browser is especially useful for digital marketers, affiliate marketers, and other small business owners who need to manage multiple online accounts and control the digital traces they leave behind. MuLogin utilizes a virtual browser technology to allow its users to create unique digital footprints.
While using MuLogin, each profile created will have distinct cookies, cache files, and IP addresses despite being managed on one device. It also has the sub-account feature, which allows for creating and managing teams to handle the profiles.
Before starting
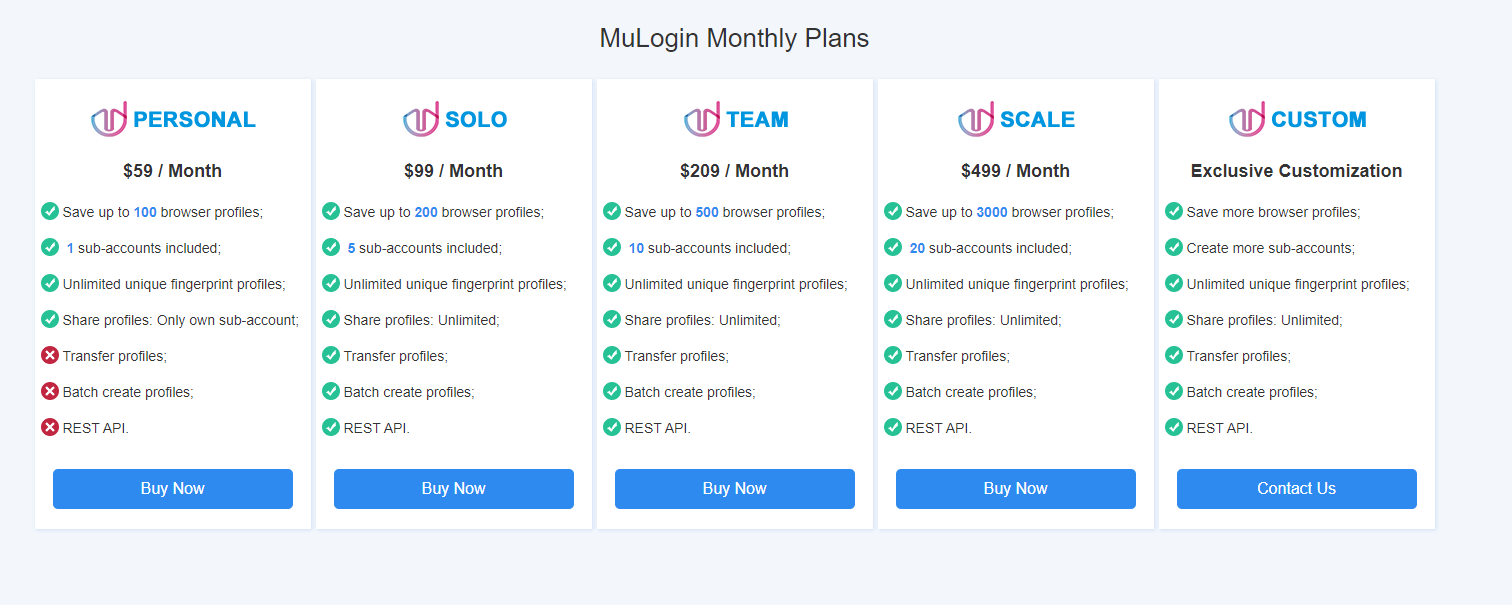
MuLogin offers a three-day free trial period to test its features. The free plan allows you to create up to five unique browser profiles and unlimited fingerprint profiles.
Reliable proxy providers such as Webshare are needed to ensure your optimum security and privacy while using the MuLogin platform. Webshare proxy provider can easily be integrated into the MuLogin software and works seamlessly with this software to ensure that each profile’s browser environment and cookies are isolated to avoid detection.
The proxy provider also offers new users ten free proxies without requesting coupons or credit card details. However, you must create a Webshare account to access these proxies.
How to set up a single proxy in MuLogin
You can set up proxies in MuLogin by following these five simple steps:
1. Download MuLogin from the Official Website
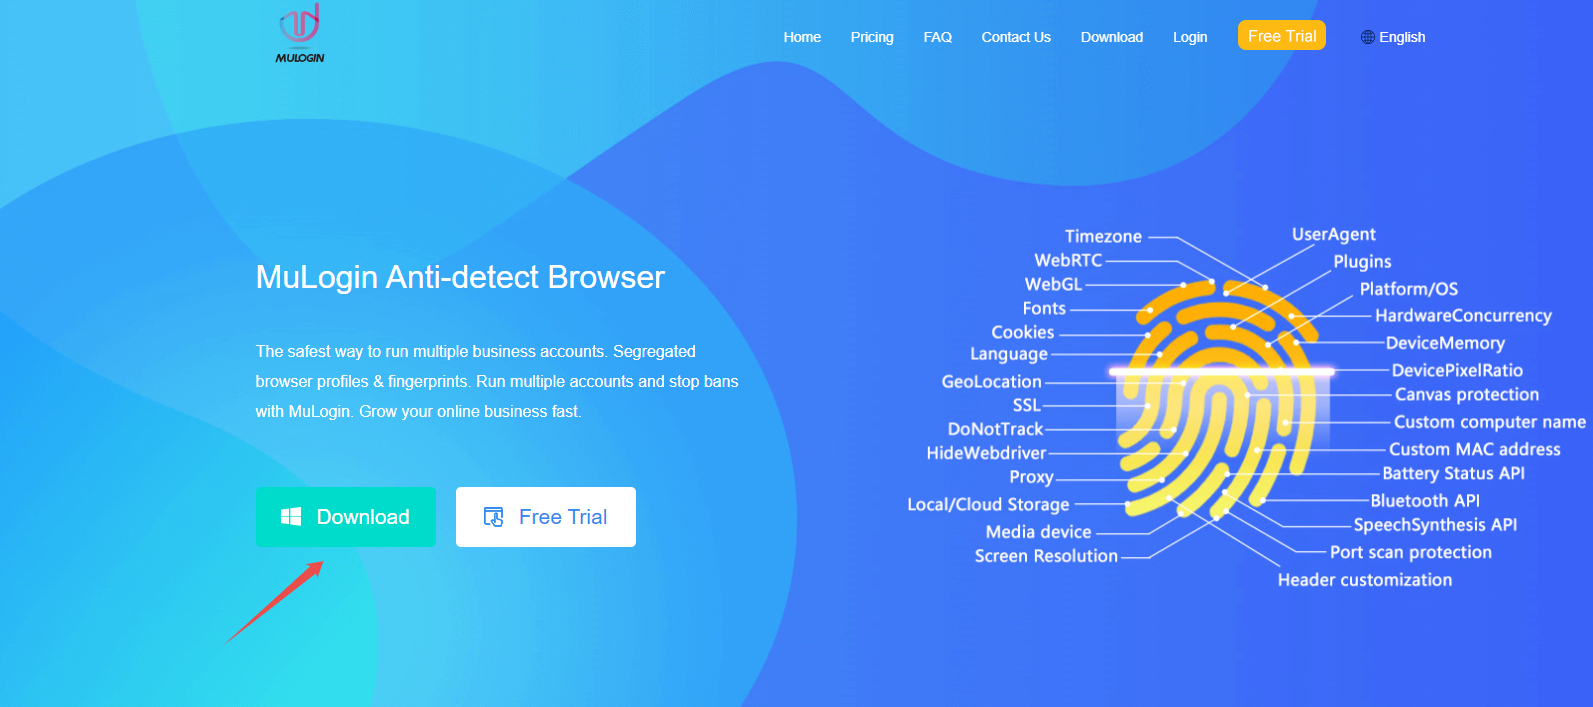
Visit MuLogin’s official website and click on the Download icon to download the program.
2. Log in or Sign on MuLogin
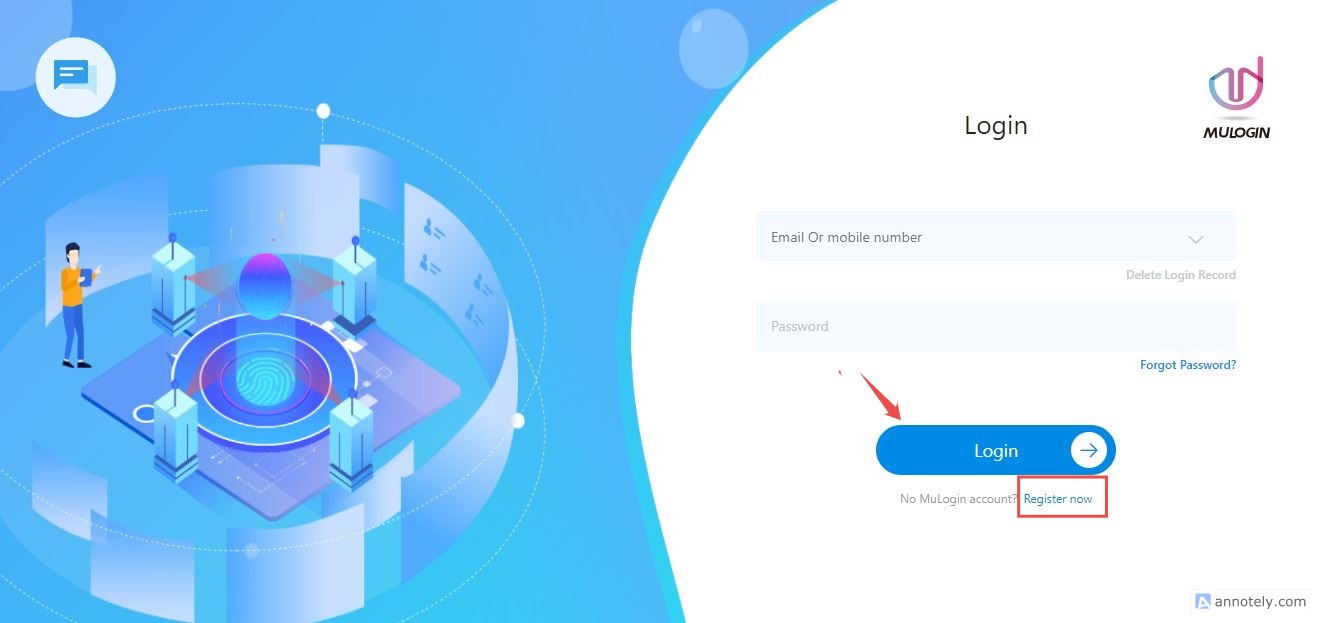
After downloading and launching the program, log in to your MuLogin account or create an account if you don’t have one yet.
3. Create a new profile
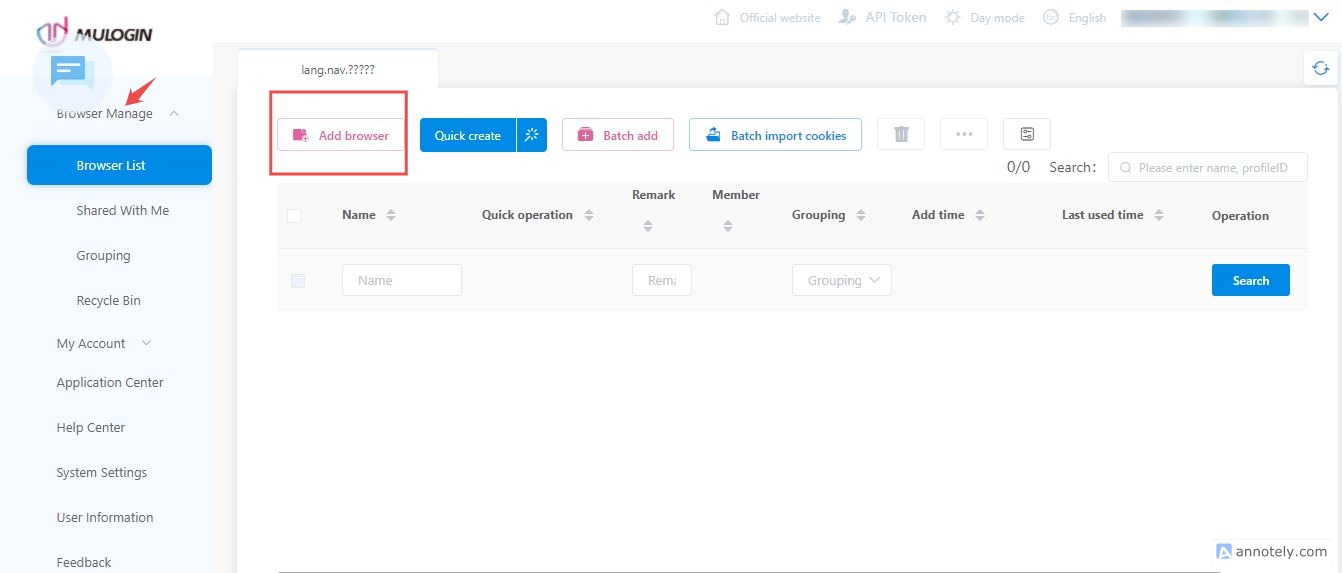
After creating and logging in to your account, navigate to the Browser Manage section, and click on Add browser.
4. Customize browser settings
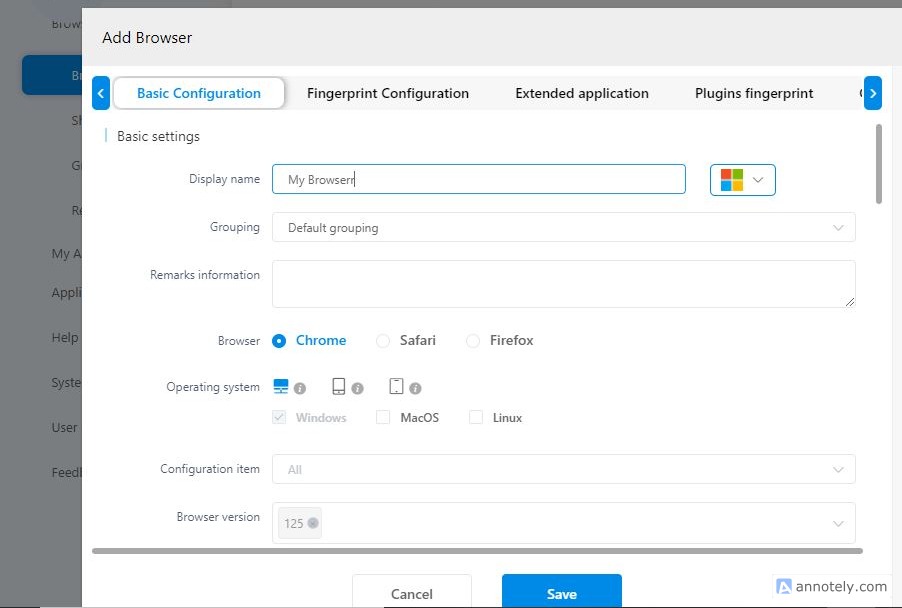
Customize the browser settings to reflect your preferences using the dialog box that appears after clicking Add browser.
6. Check the proxy
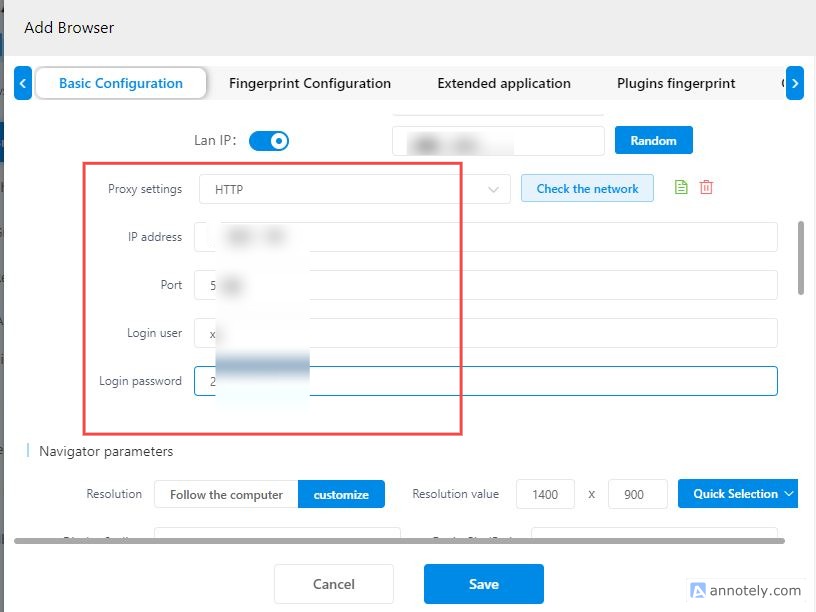
After inputting the proxy’s details, click Check the network to verify that the proxy is up and running, and accurately mimics real digital footprints. If all is in order, you should see the message below:

7. Save the profile, and run it
After confirming the validity of the proxy, you can further customize your digital footprints using other settings such as Fingerprint Configuration, Extended Application, and Plugins Fingerprint.
Once you are satisfied with all the settings, click on Save and start browsing with MuLogin. This would create a new browser profile with a unique fingerprint that cannot be traced back to you.

How to set up batch proxies in MuLogin
MuLogin also supports the creation of more than one proxy. To set up batch proxies in MuLogin:
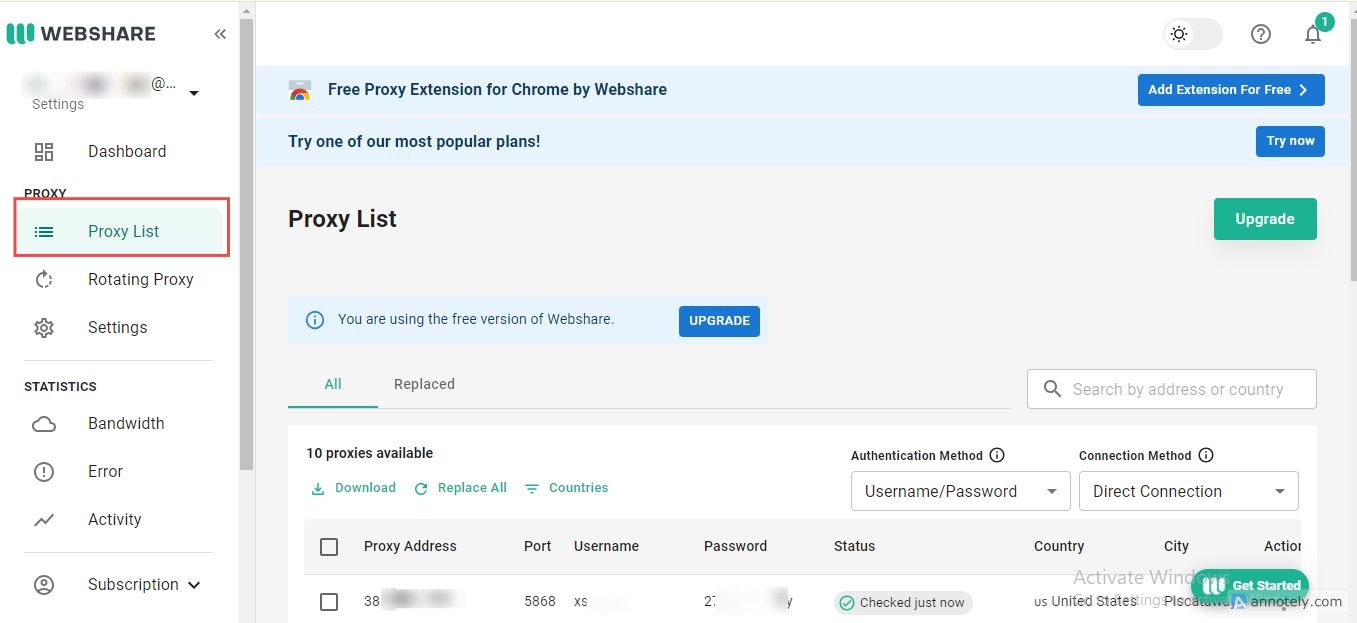
1. Login to Webshare: Login to your Webshare account, and select Proxy List in the left corner. If you do not have a Webshare account yet, you can create one in under five minutes.
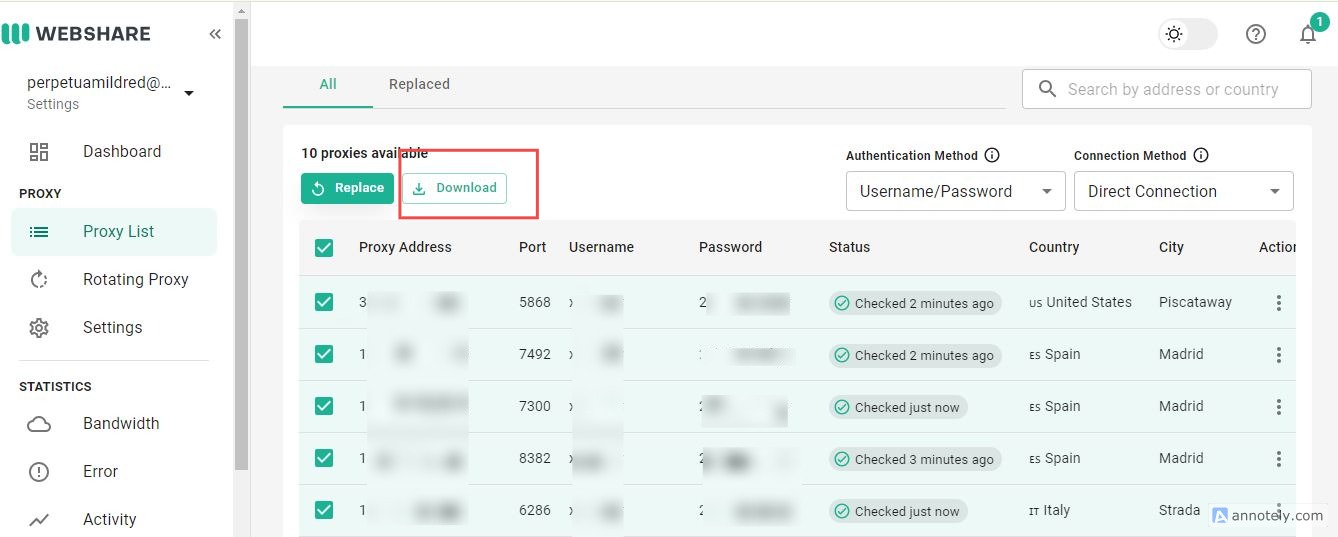
2. Choose preferred proxies: Select the desired proxies and click download to export them. Webshare exports its proxies in the .txt format, which makes them easier to use in MuLogin.
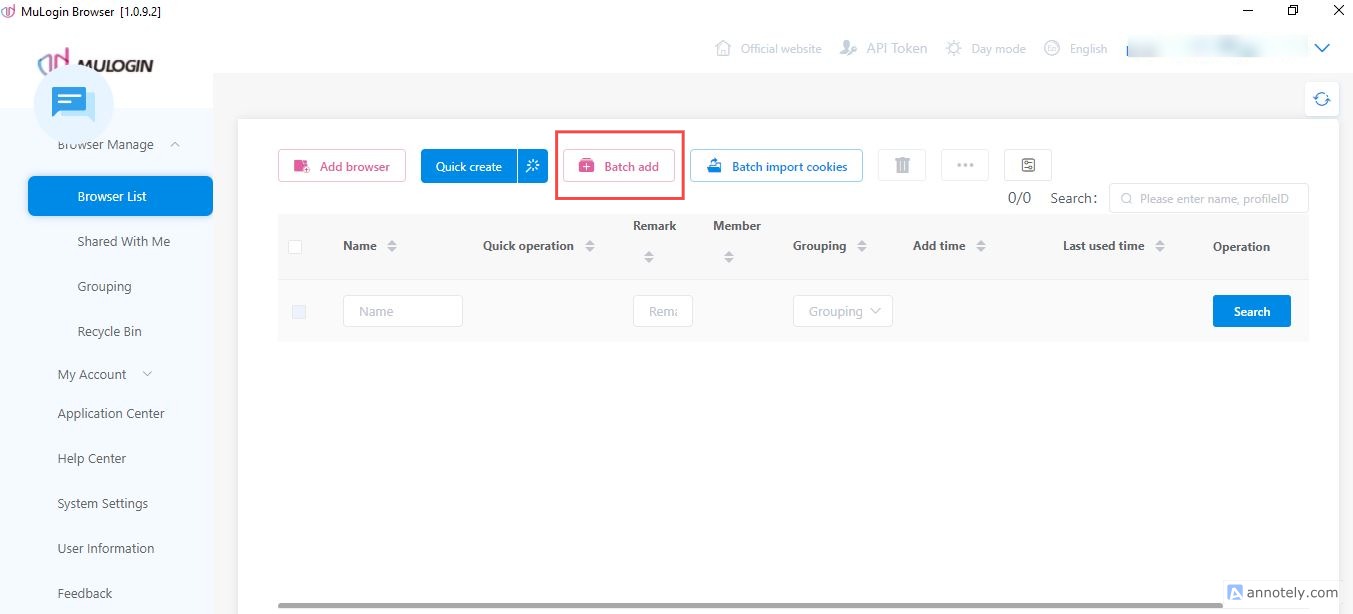
3. Add multiple proxies at once: Return to the MuLogin interface, navigate to the Browser Manage tab, and click Batch add.
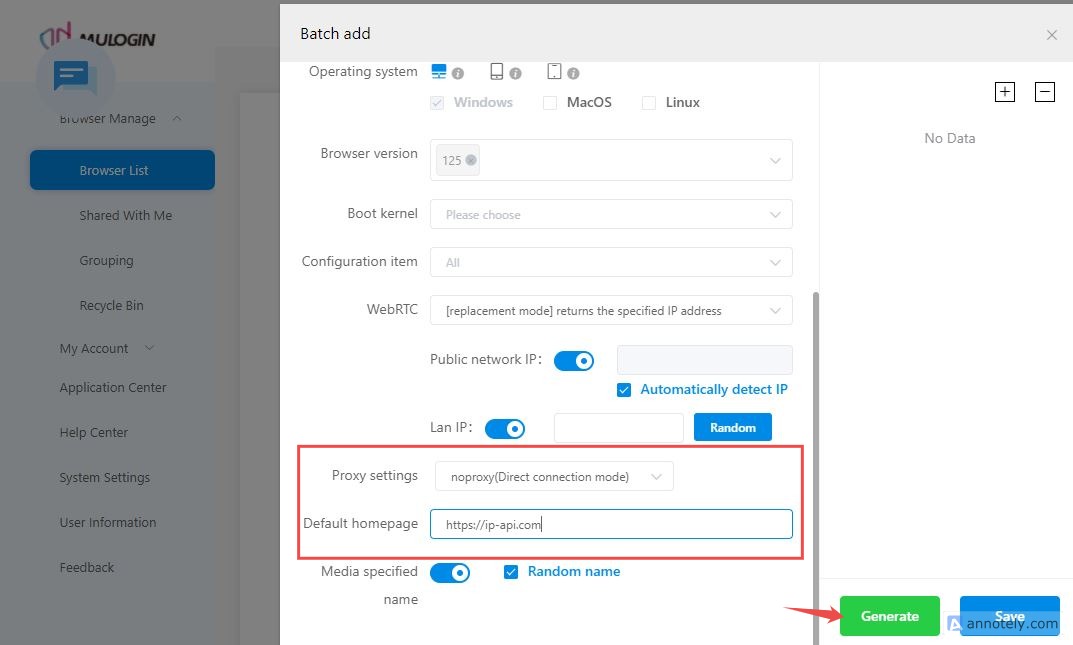
4. Modify settings to batch create proxies: After clicking Batch add, the following dialog box appears. Modify the settings according to your preference.

5. Choose proxy type: Navigate to the Proxy settings section, and choose your preferred proxy type. Most proxies use the HTTP or SOCKS5. Choose either one of them, and fill in the following details from your proxy provider.

6. Use APIs to generate different IP addresses: To generate different IP addresses for each profile in the batch, choose the following setting, then click Generate
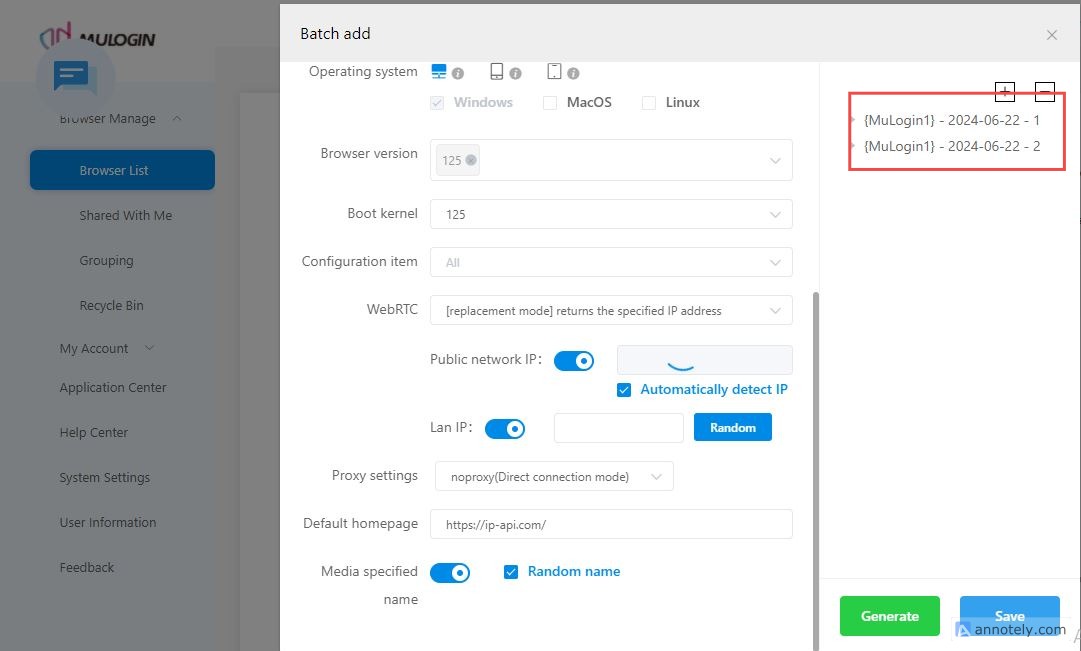
7. Generate Profiles: After clicking Generate, you should see the generated profiles to the right of the display. With the free trial, you can create up to five separate profiles.
8. Save and Run the Profiles: Click on save to batch create the profiles, and run them.
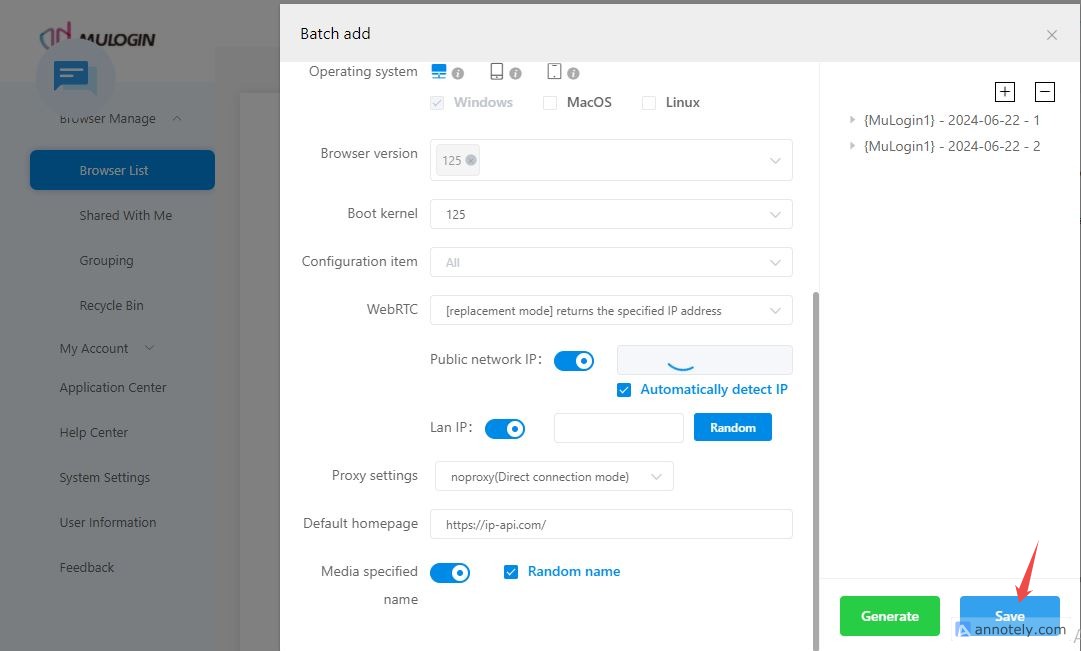
That’s it! You have successfully integrated Webshare proxy provider with MuLogin to batch create browser profiles. To create profiles that require even more security and anonymity, you can explore more settings in the MuLogin interface.
Webshare is currently offering its users ten free proxies without inputting their credit card details. Take advantage of this opportunity to increase your productivity, and explore the limits of MuLogin.


