

Get 10 Free Proxies For Myspace
Myspace is where it all started, and it continues to function today. It allows users to post about their interests on their profiles, connect with others, and keep up with what they’re doing. As much as this is a blast from the past, Myspace is still protected by guidelines to maintain the quality of interactions.
Overstepping could lead to a ban, which would make it almost impossible to access your Myspace page. Fortunately, there is a simple workaround that involves using a proxy. Here’s all you need to know about using a proxy with Myspace.
Before starting: Get free proxies for Myspace
Eager as you might be to dive into this solution, there are some requirements we need to sort out first. The underlying requirement for this fix is a proxy. A proxy service can provide a long list of addresses and a way to manage your connections.
If you don’t have the money to spend on a premium account, you might also want to consider using Webshare. If you create an account right now, you get access to 10 free proxies without even having to use a credit card.
Easiest method: Myspace proxy for Chrome
Using a proxy helps alleviate the difficulty you will face trying to connect to Myspace when your IP is banned. It is a tried and tested method with a few common approaches, the simplest of which involves setting up a proxy on Chrome.
Step 1: Setup the Proxy
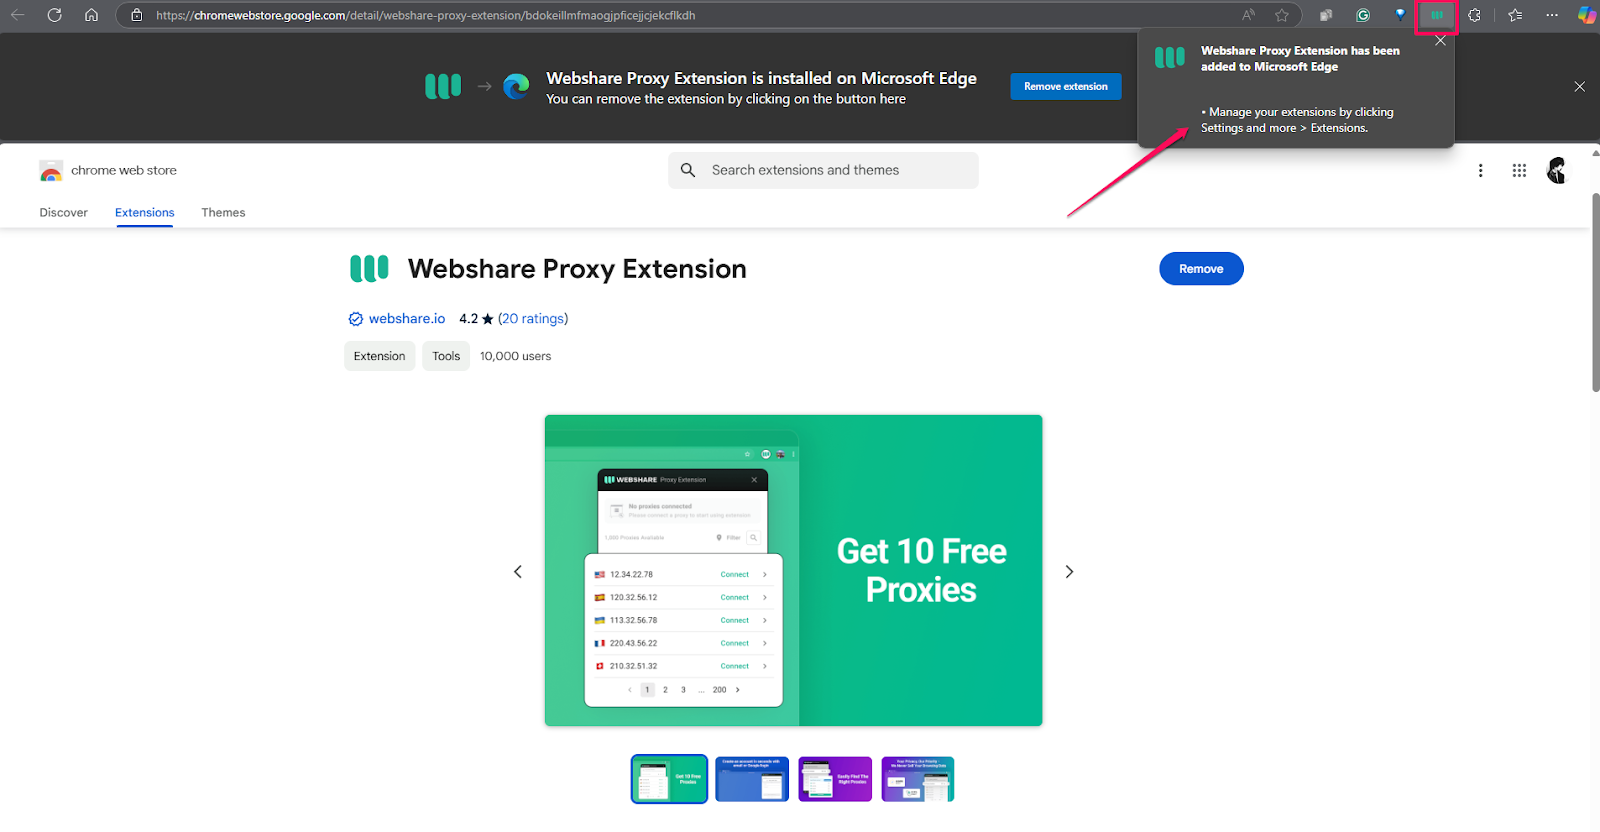
Chrome is a fairly common browser across PC platforms, and it helps that Webshare has solid integration with the platform. The first thing you need to do is find your way to the Chrome extension page on the Webshare website.
Once on this page, you should immediately notice the Add extension for free button. If not, look just beneath the Webshare Chrome Extension logo on the left side of the page. Go ahead and click this button.

Clicking this button quickly brings you to the Webshare extension's home page on the Chrome web store. However, it might be more convenient for you to navigate to the Chrome web store and search for Webshare instead.
You might see various options to your search, but the right page is published by webshare.io. Once you’ve confirmed this, look for and press the blue Get button in the top right corner of the page.

An easy-to-follow process will ensue, starting with a widget appearing within your browser. This includes a list of the permissions Webshare requires to run effectively.
You can click the Add extension button after reading through and confirming the permissions on the page.

Pressing this button will trigger a download that should only last a few seconds. This download will include all of the files needed to install the Webshare extension on your Chrome browser. Once the installation is complete, you should notice the flashing Webshare icon on your address bar.
Step 2: Connect to Proxy
Select the Webshare icon on your address bar. If you don’t immediately spot it next to your other extensions, it might be in your extensions or plugins list. Access that, and click on the little icon.
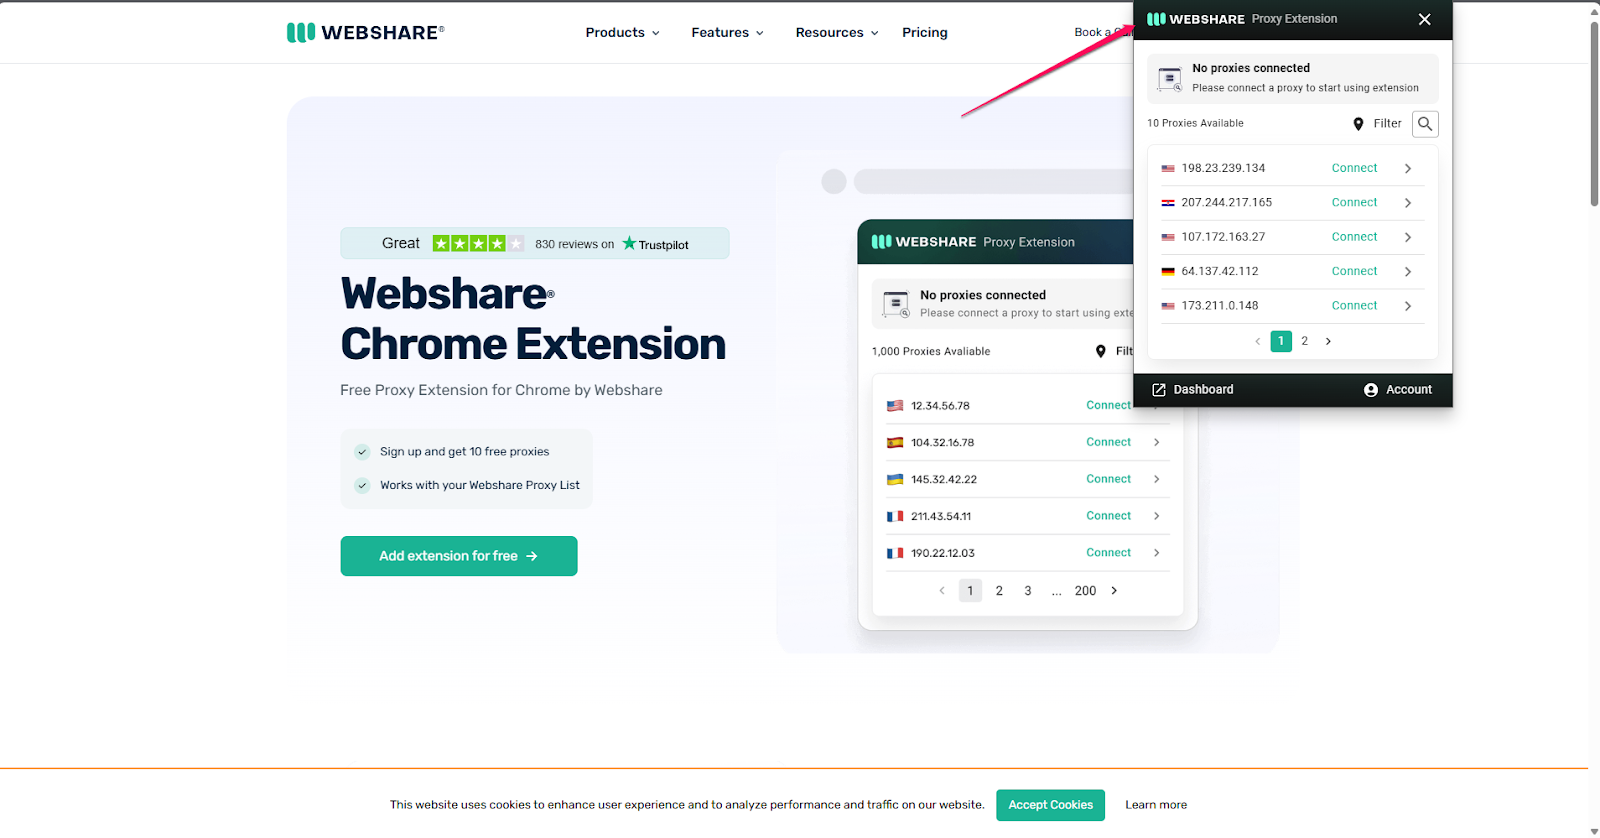
If you decided to take advantage of Webshare’s current offer, your widget should already come preloaded with a few free proxies for this solution. There’s also some diversity in the selection of free addresses you’re provided, covering a long list of locations worldwide.
To avoid getting overwhelmed by the choices, it might be practical to choose a proxy address within or close to your current region. However, there’s nothing wrong with trying other locations if you’d like to do something different with Myspace.
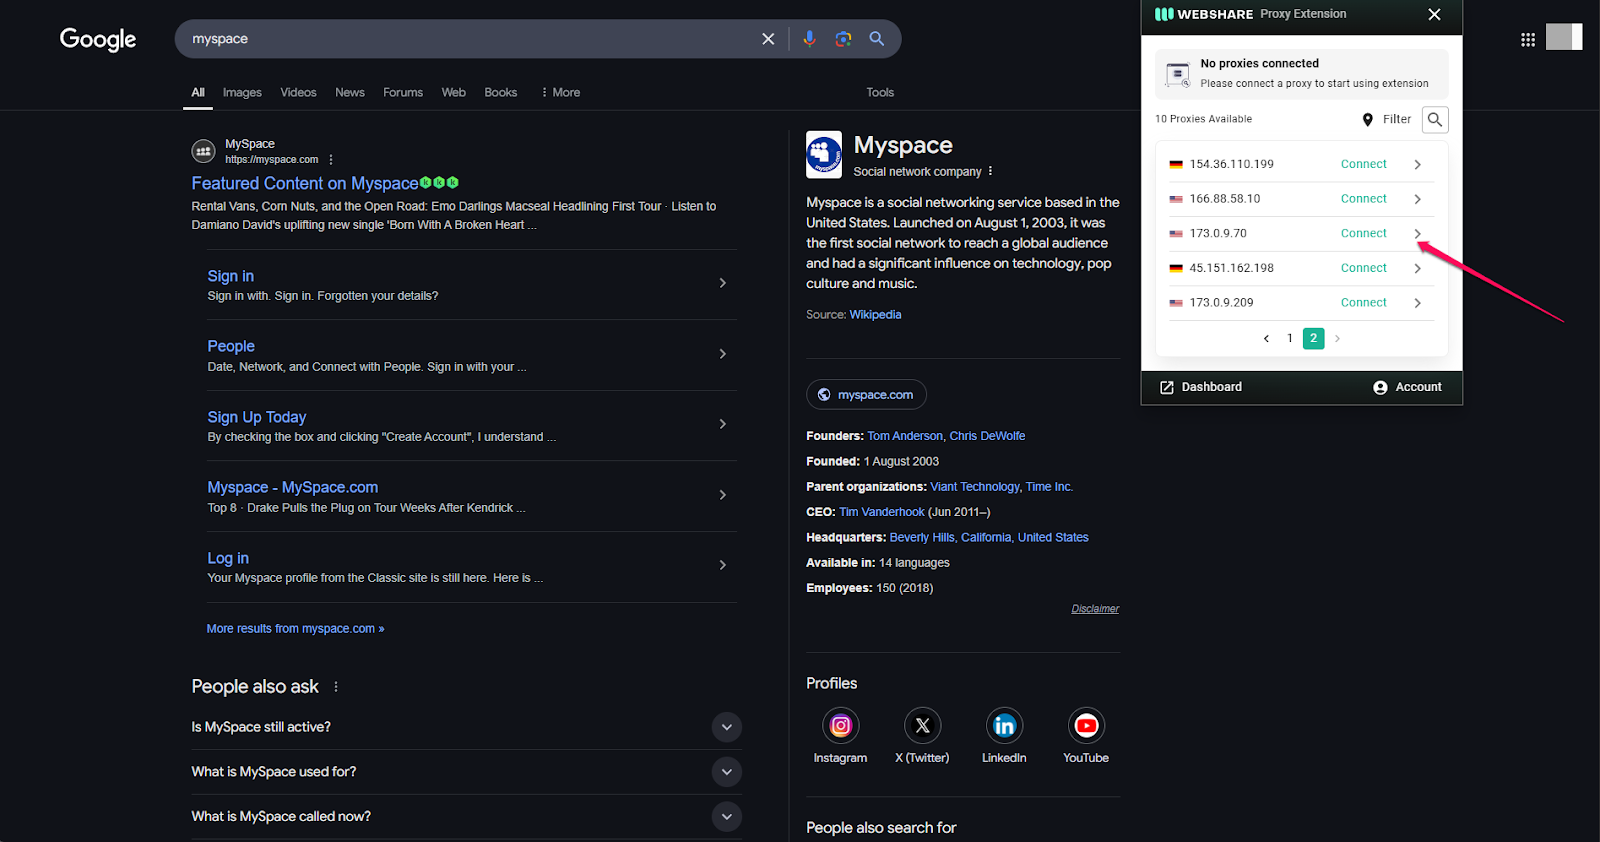
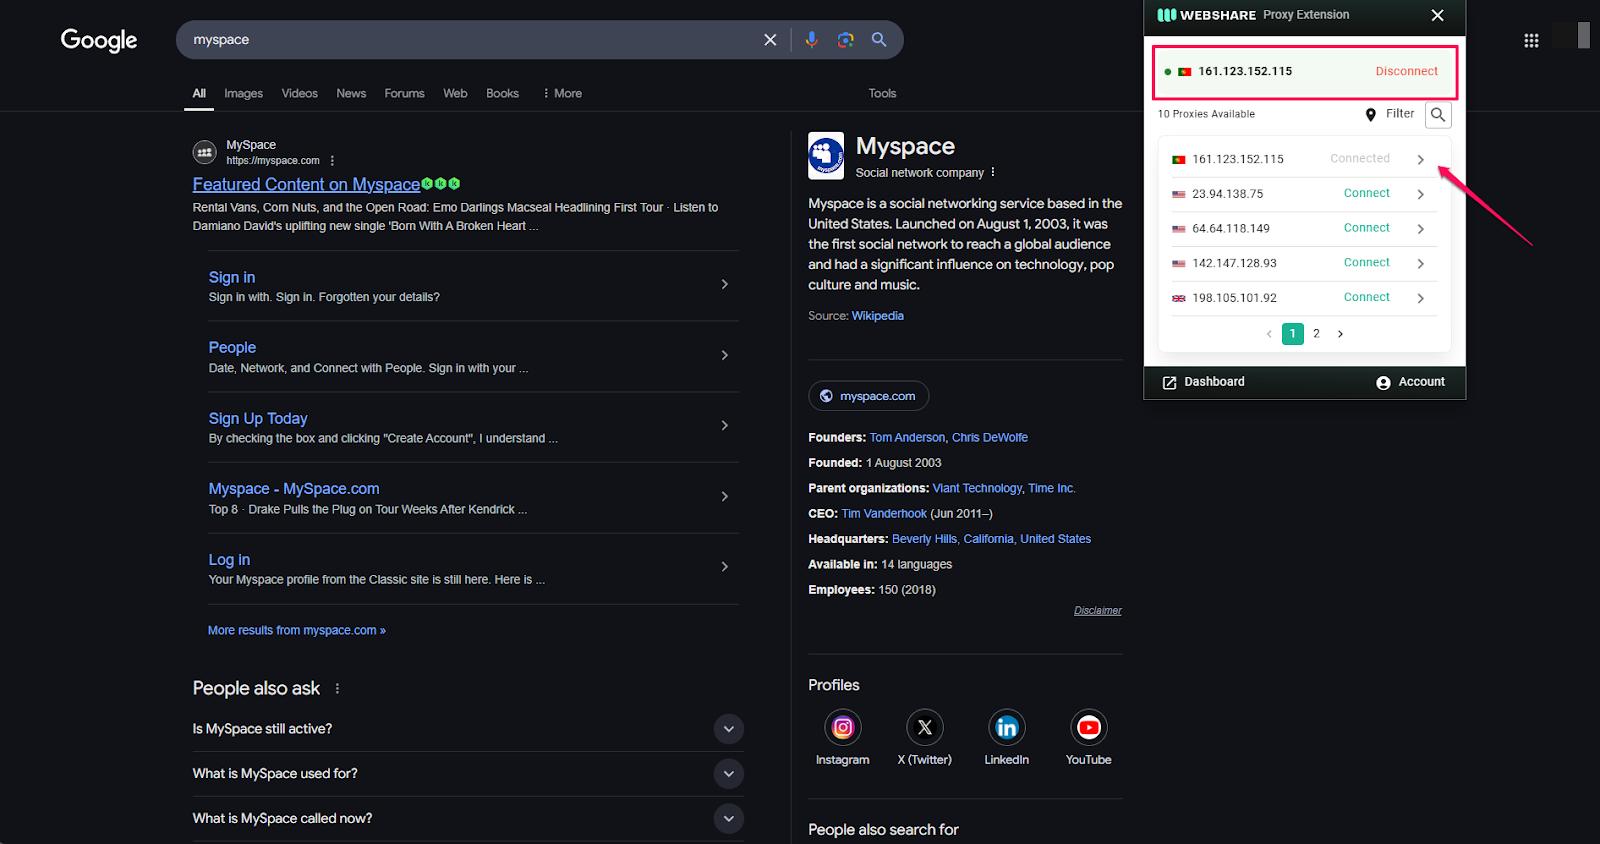
Once you’ve chosen a proxy address, select the green Connect button next to it. After doing so, the connect button should gray out and you might also notice your chosen address at the top of the widget. A green indicator should also appear next to it.
Step 3: Go to Myspace Website
The first two steps were just the beginning. Now that you have a live proxy server connection, the next logical step would be to try opening the Myspace website.

Barring any mistakes in the setup, you should be good to go. Just check that you are connected to one of the proxies on your list. You should now be able to access Myspace successfully.
You’re free to either make a new account and reestablish old connections or just browse anonymously and see what people are up to.

Myspace Proxy for Windows
The previous solution was fairly straightforward, but using Chrome with a proxy isn’t your only option. You can replicate this process slightly differently on a Windows computer, and here’s how.
Step 1: Secure Your Proxy Details
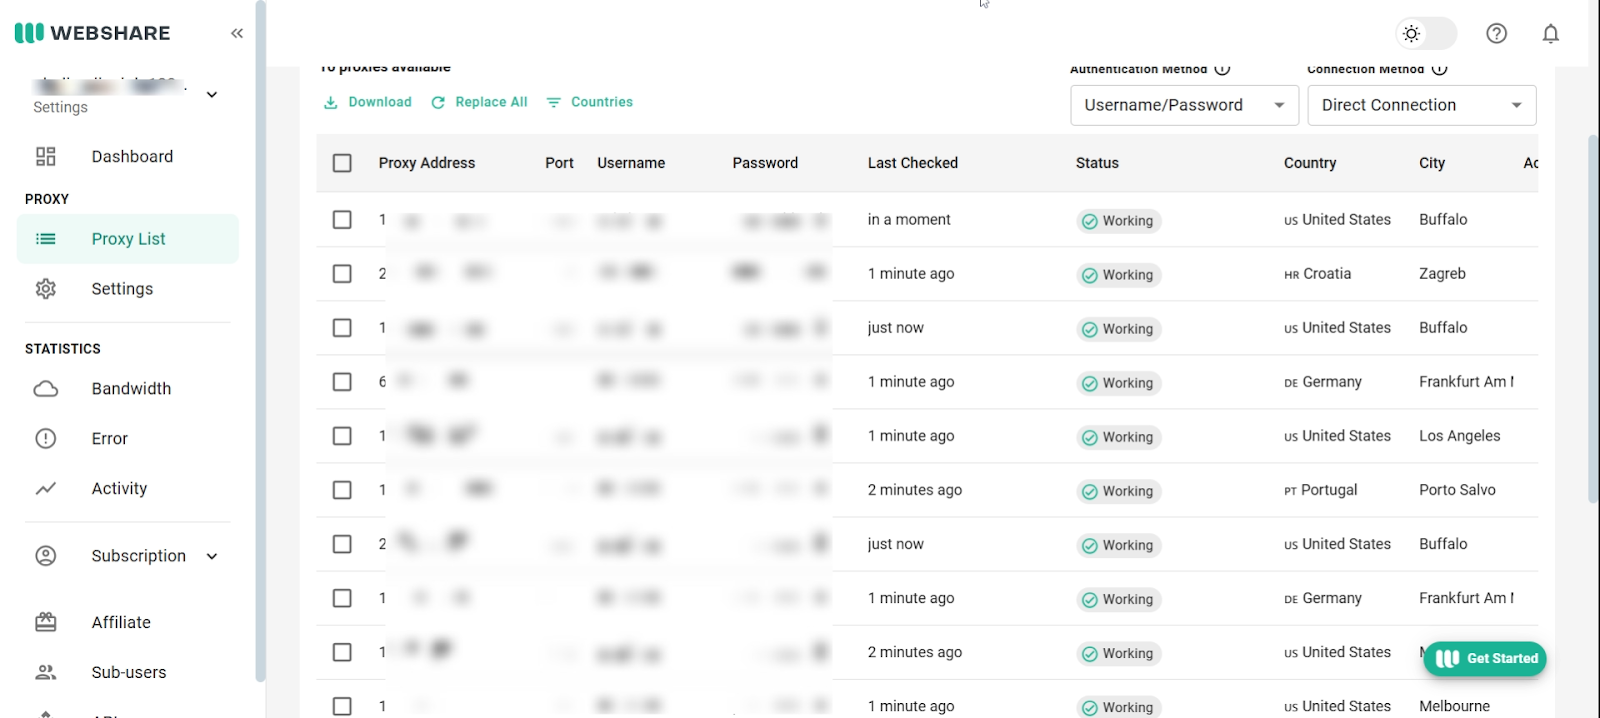
The first step in the Windows solution is to head over to your Webshare dashboard. Here, you can conveniently gather all the details related to the free proxies on your accounts, which are important for the next step.
Step 2: Manually Connect to Proxy
Manual implies you’ll need to get your hands dirty, but it isn’t that difficult. First, open your Windows settings and search for Proxy. Clicking on the top response will take you to the Proxy settings page, where you should see a Manual proxy setup section.
The details you saved from your Webshare dashboard are needed here. Click the Setup button in the Use a proxy server tab.
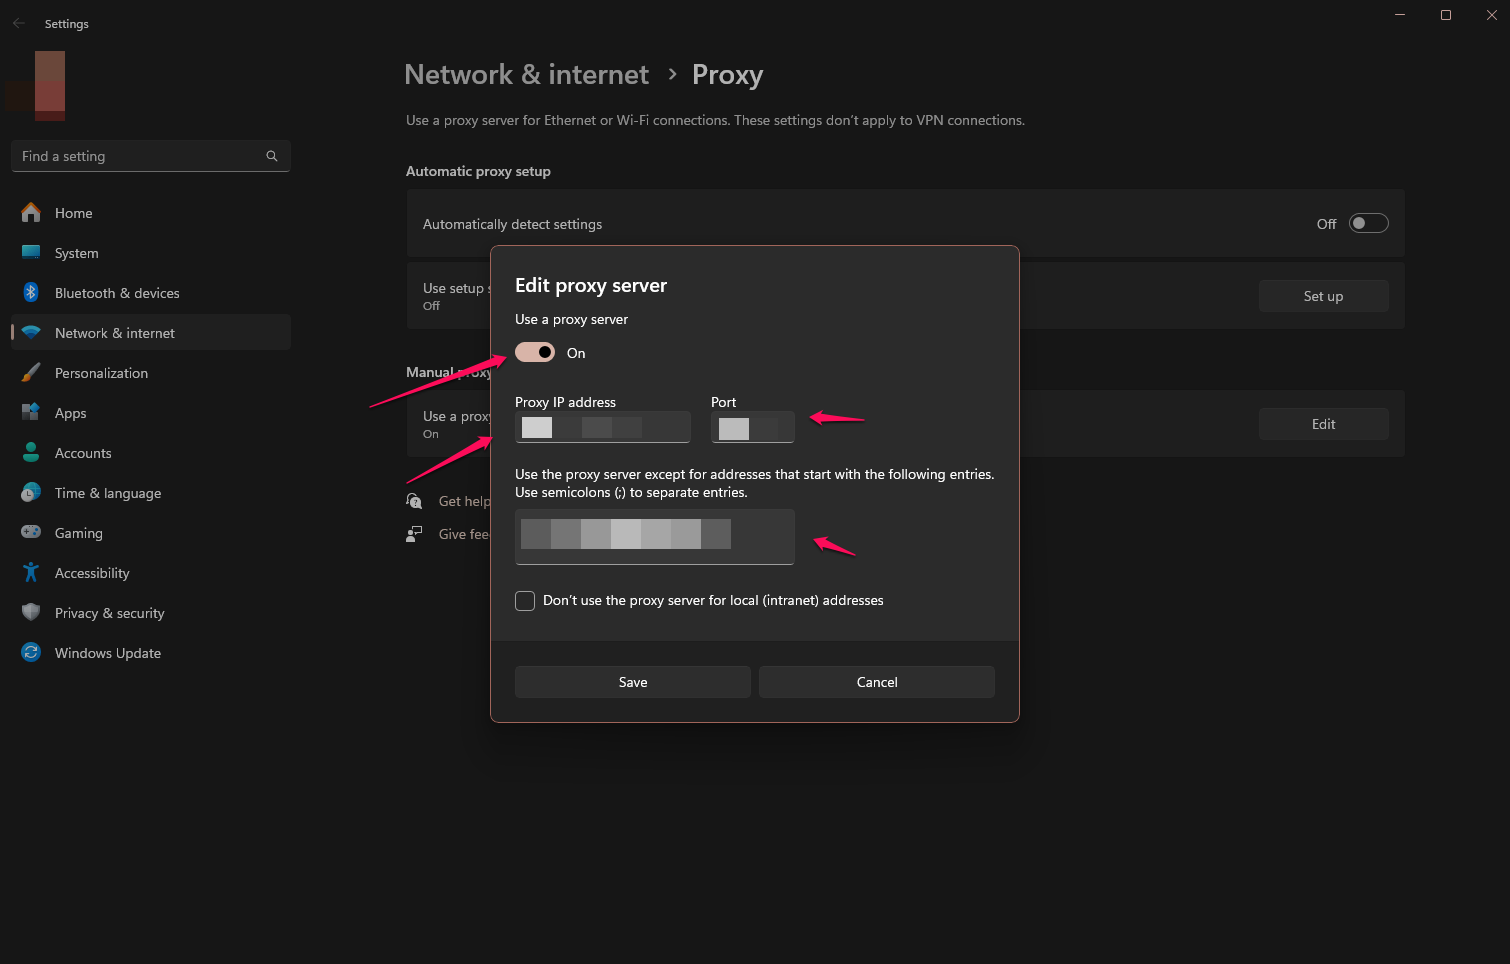
The little pop-up menu that appears will have the right fields for the proxy you have chosen for this Windows version of the fix. Be careful when entering these details, as the smallest mistake will invalidate the process.
Once done, click the Save button to initiate the connection, and you can connect to Myspace.
Myspace Proxy for Android
Mobile users aren’t left out of this either. If you use an Android phone, then you’re in luck. Most modern devices allow users to customize their connection settings to a great degree. Here’s how you can achieve the same result on an Android device.
Step 1: Head Over To Your Wi-Fi Settings
Go to your settings and locate the Network or Wi-Fi settings. You can speed this up by searching for or looking under a Connections menu if your device has one.
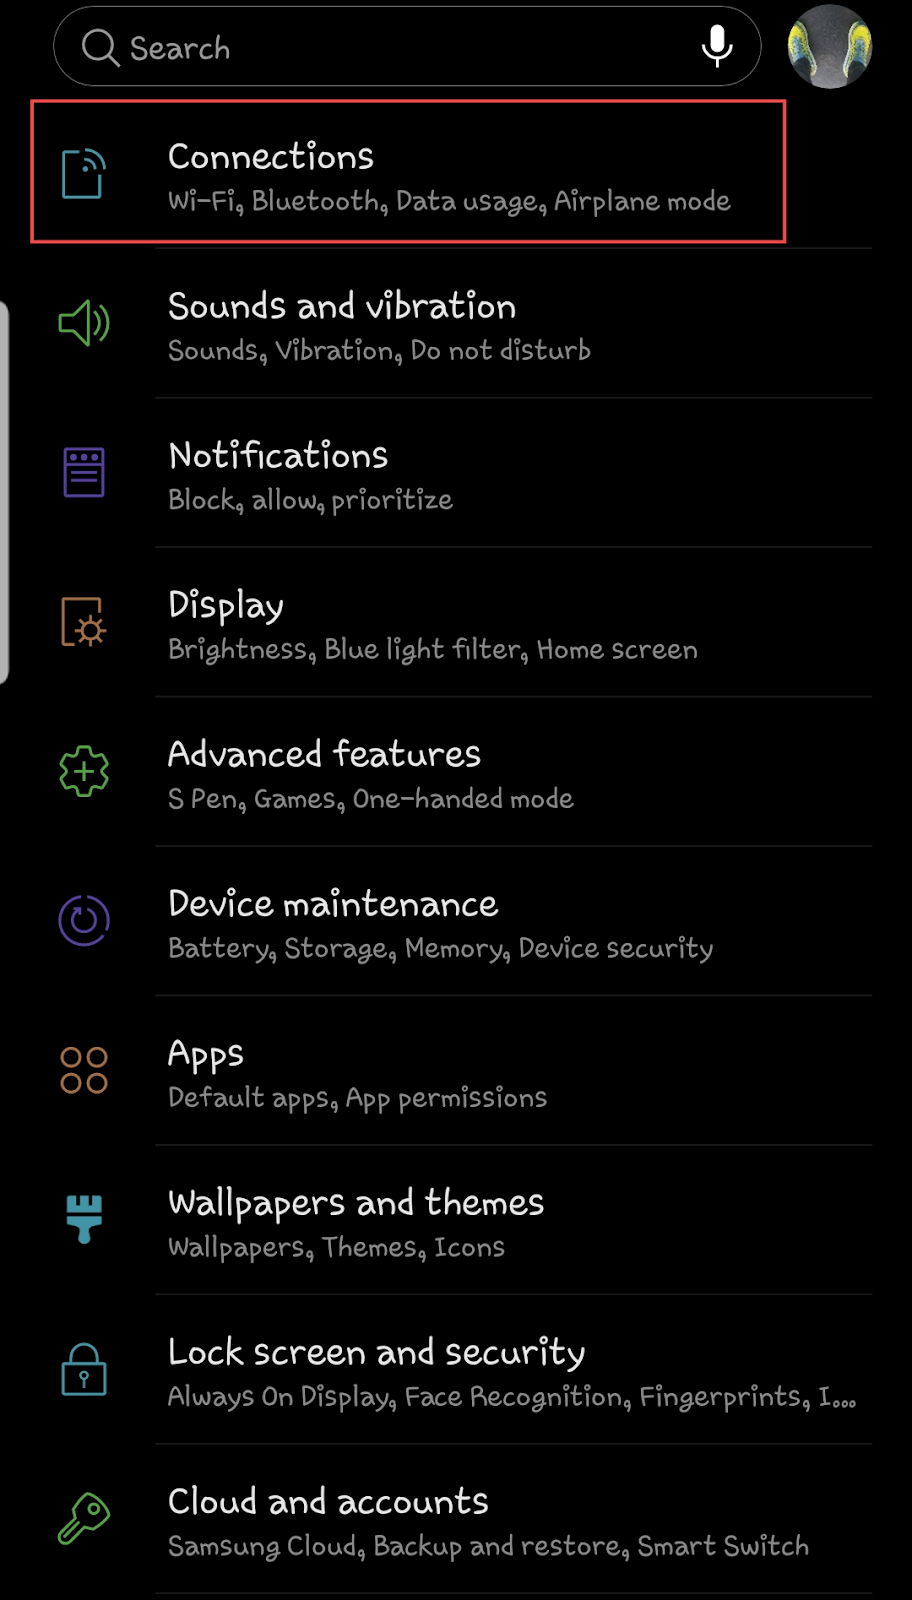
If you don’t immediately notice a section for proxy setting, don’t panic. This option is usually hidden under advanced network settings (appears as “more network settings” on some devices).

Step 2: Configure Your Proxy
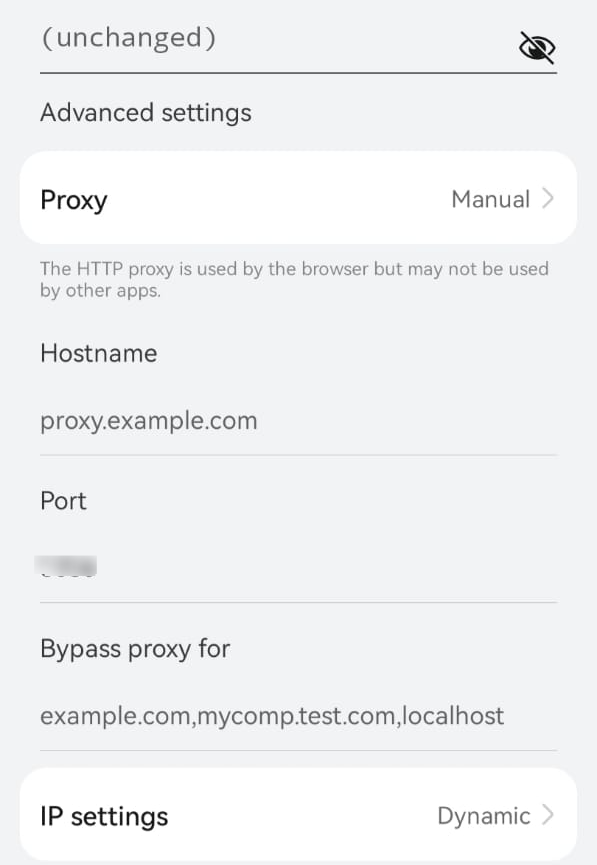
Selecting the proxy option should trigger an options dialog with three different setup types. Go ahead and select the Manual setup option so you can use the details saved from the Webshare dashboard.

Going with Manual will open up a different settings page with fields that accept the information related to your chosen Proxy. Double-check the information while entering it.
Step 3: Verify Your Proxy
Next, you must enter the username and password granting access to your chosen proxy address. This extra step helps confirm that you truly own the proxy you’re trying to connect to.
You can find both the username and password tied to a proxy on the Webshare dashboard. After connecting, you should be able to access Myspace again on your phone.
How to Test a Myspace Proxy
There is no one size fits all solution for testing your proxy connection. You might have noticed some testing done while working through the different solutions explained above. Typically, you’ll know your proxy is working when you can successfully connect to Myspace.
However, you can check if the proxy works by opening region-unique sites like Google. If you notice a location header that matches the proxy location you’ve connected to, then your proxy is working as intended.
How to Turn Off a Myspace Proxy
This guide has highlighted three unique ways to connect to a proxy. We’ve also seen how to set up a proxy on Chrome, Android, and Windows. Each platform has simple ways of disconnecting. This short section will walk you through safely disconnecting from a proxy.
For Chrome
The Chrome extension makes disconnecting and connecting to any of the proxies on your list as easy as clicking a button. If you pay attention to the top of the Webshare widget, you’ll notice your currently active connection.
You should also see a Disconnect button to the right of it in a red font. You can safely disengage your proxy connection by pressing this button.
For Windows
There is no immediately apparent button in the Windows proxy settings for disconnecting. However, this doesn’t mean that you can’t. To break your proxy connection, you must go back into the Manual setup settings and clear all the information entered into the fields.
The connection will be severed once you click the save button.
You can easily identify a successful disconnection from the proxy menu. If you look under Use a proxy server, it will read off.
For Android
You can turn a proxy off on your Android device from the primary network settings menu. Select none when you’re given an option of proxy types, and the proxy connection will be broken.
Conclusion
Myspace is a great platform for people who are easily overwhelmed by social media. This vintage space keeps it simple, and friendly for new and existing users. If you’ve come to rely on Myspace, suddenly being blocked from the platform might be hard to accept.
Thankfully, you don’t need to lose touch with your friends and family. With a proxy address from Webshare, you can regain access to Myspace and post to your heart’s content.


