Get 10 Free Proxies For Octo Browser
In this article, we will explore two essential methods for integrating proxies with Octo Browser. First, we will discuss how to set up a single proxy, providing step-by-step instructions to ensure seamless configuration and connectivity. Next, we will delve into the process of setting up batch proxies, allowing you to efficiently manage multiple proxies within Octo Browser.
What is Octo Browser?
Octo Browser is a powerful anti-detection browser designed for users who require anonymity and privacy while browsing the internet. It allows for the creation of multiple isolated browser profiles, each with its own unique fingerprints and settings, making it an invaluable tool for activities such as web scraping, ad verification, and managing multiple social media accounts.
Additionally, Octo Browser excels in proxy management. It supports various proxy types, including HTTP, HTTPS, SOCKS5, and residential proxies, enabling users to route their traffic through different IP addresses seamlessly. This feature is particularly useful for bypassing geo-restrictions, automating tasks across multiple accounts, and enhancing privacy.
How to set up a single proxy in Octo Browser?
Setting up a single proxy in Octo Browser will take certain simple steps:
1. Download Octo Browser
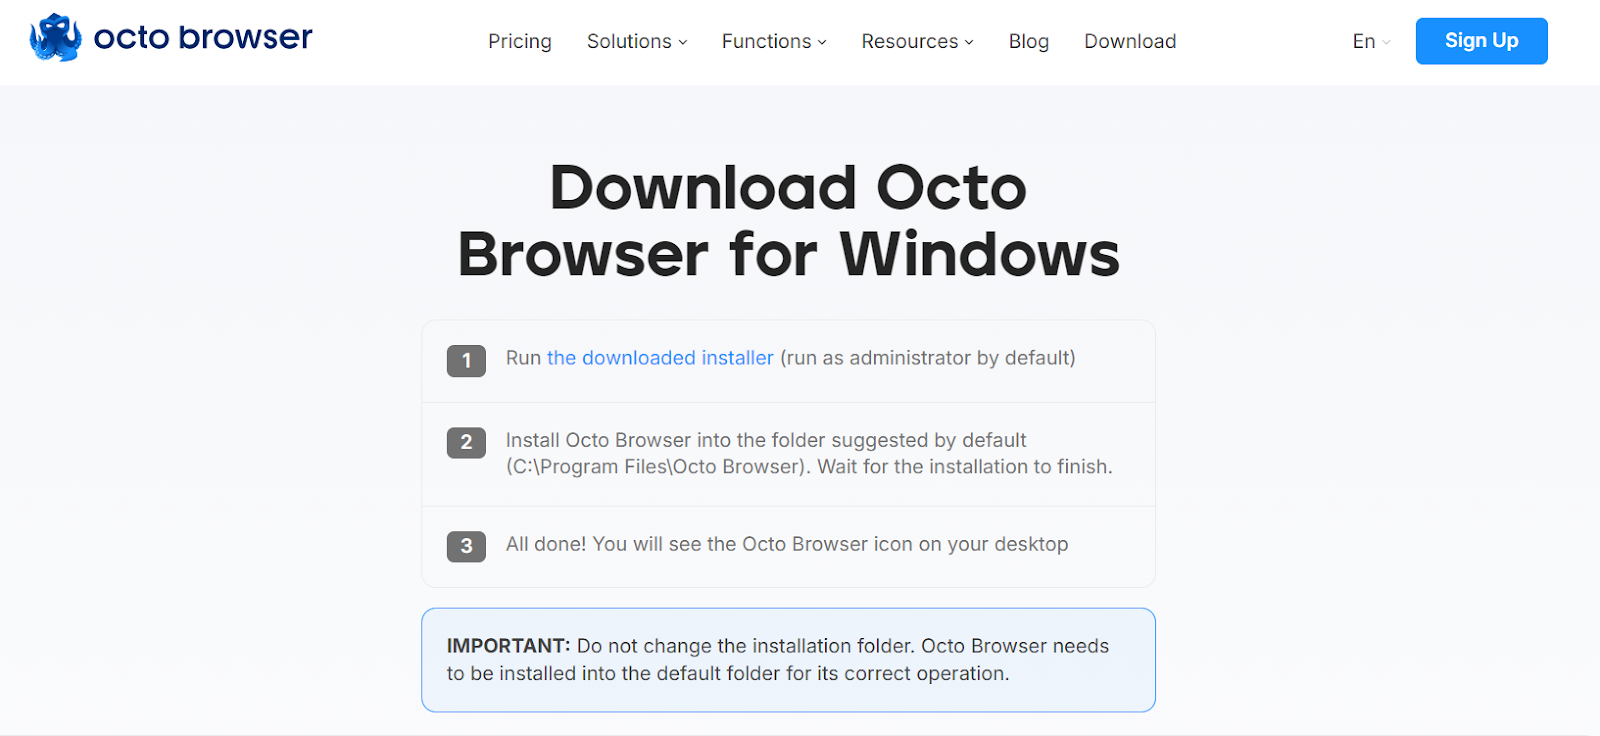
To begin setting up a single proxy in Octo Browser, the first step is to download and install the browser. Visit the Octo Browser website and navigate to the download section. Choose the appropriate version for your operating system (Windows, macOS, or Linux) and follow the on-screen instructions to complete the installation.
Please note that Octo Browser does not offer a free trial. To use it, you’ll need to purchase a subscription.
2. Access the "Proxies" section
Once you have Octo Browser installed and running, direct your attention to the top menu bar and locate the "Proxies" section. This is where you will manage and configure your proxy settings.

4. Select the type of proxy server
Next, you'll need to specify the type of proxy server you are using. Octo Browser supports various proxy types, such as HTTP, HTTPS, and SOCKS5. Choose the type that corresponds to the proxy you have acquired. Selecting the correct type is crucial for ensuring proper connectivity and functionality.
5. Enter proxy details
In the fields provided, enter the necessary details for your proxy server. This includes:
- IP Address: Input the proxy server's IP address.
- Port: Enter the port number used by the proxy server.
- Username: If your proxy requires authentication, provide the username.
- Password: Input the corresponding password for authentication.
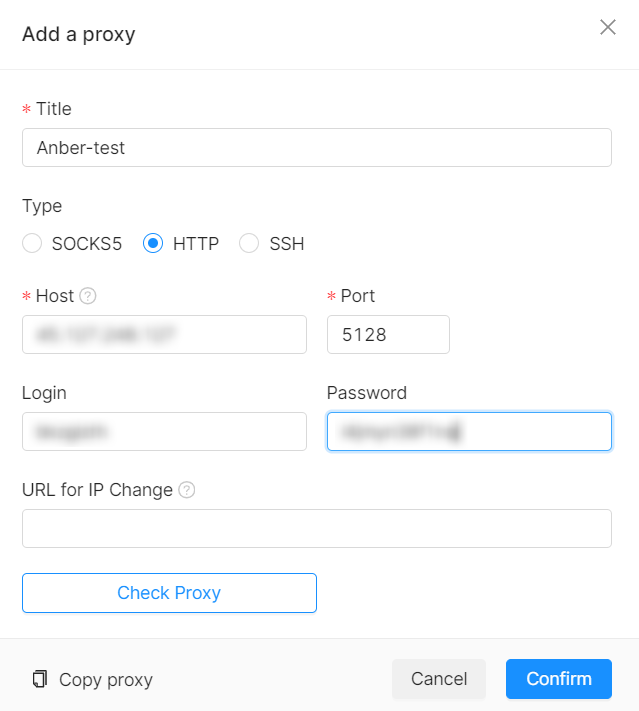
Double-check these details for accuracy to ensure a successful connection.
6. Static IP Address Configuration
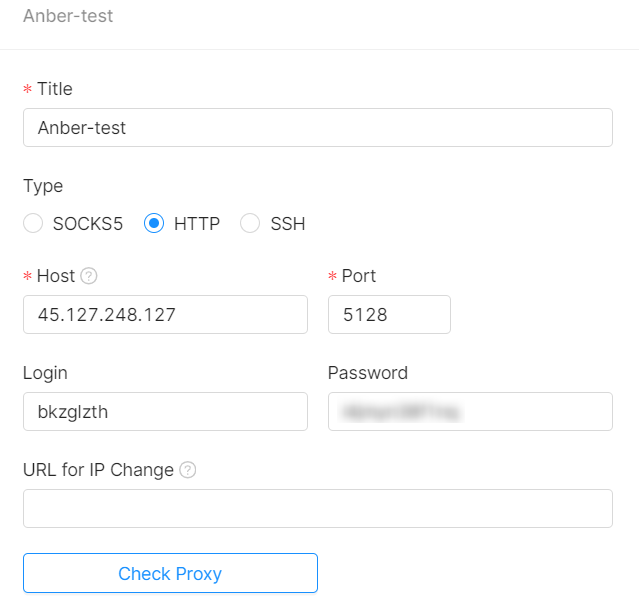
Static IP address proxies include Datacenter proxies and Static residential proxies. To set up a proxy connection, you will need specific information found on your account’s proxy list page.
- Proxy Type (Internet protocol): Select HTTP or SOCKS5.
- IP/Host: Enter the Proxy Address number provided in your account’s proxy list (e.g., 185.199.229.156).
- Port: Use the specific port number listed (e.g., 7492).
Example configuration for a static IP address proxy is as:
7. (Optional) Rotating IP Address Configuration
Rotating IP address proxies include Datacenter proxies and Residential proxies. These can be configured using the Rotating Proxy Endpoint available to all users.
- Proxy Type (Internet protocol): Select HTTP or SOCKS5.
- IP/Host: Use the domain name provided (e.g., p.webshare.io).
- Port: Enter the proxy port number (e.g., 80).
To use country-specific rotating IP addresses, configure the country settings on your Rotating Proxy Endpoint configuration page. Select your preferred countries by clicking the ‘Filter by Country’ button under Proxy Country.
Please note that changing your Proxy country will update your Proxy username field, which you will need to update in your settings.
Example configuration for a rotating IP address proxy is as:

8. Verify the proxy server
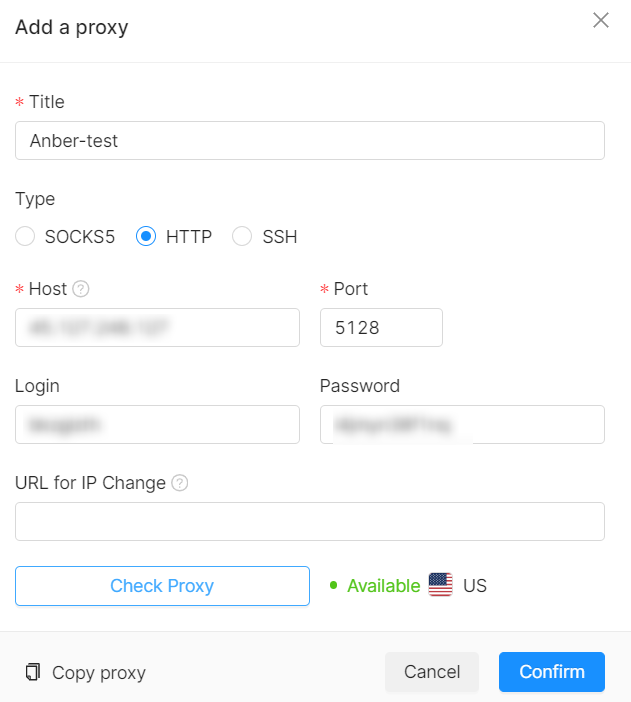
To ensure that the proxy server is functioning correctly, click the "Check Proxy" button. This action will prompt Octo Browser to test the connection and verify that the proxy server is active and operational. If the proxy passes the verification process, you will receive a confirmation message indicating that the proxy is working properly.
9. Save and exit the proxy manager
After the proxy has been successfully verified, proceed to save the configuration. Click the "Confirm" button to store your proxy settings. Once saved, you can exit the proxy manager. Your proxy is now configured and ready for use within Octo Browser.

Now, let’s see how to add a proxy from a specific account in Octo Browser:
- Start by going to the "Profiles" section of Octo Browser. This is where you manage individual browser profiles, each of which can have its own unique settings and proxy configurations. Find and click on the "Profiles" tab in the main menu.
- In the "Profiles" section, locate the "Create Profile" button and click on it. This will open a new window or form where you can configure the details for a new browser profile, including proxy settings.

- You have two options for adding a proxy:some text
- Select from Proxy Manager: A dropdown menu or list will appear, allowing you to choose one of the proxies you set up earlier.
- Set a New Proxy: This option allows you to input details for a proxy that hasn't been previously configured.
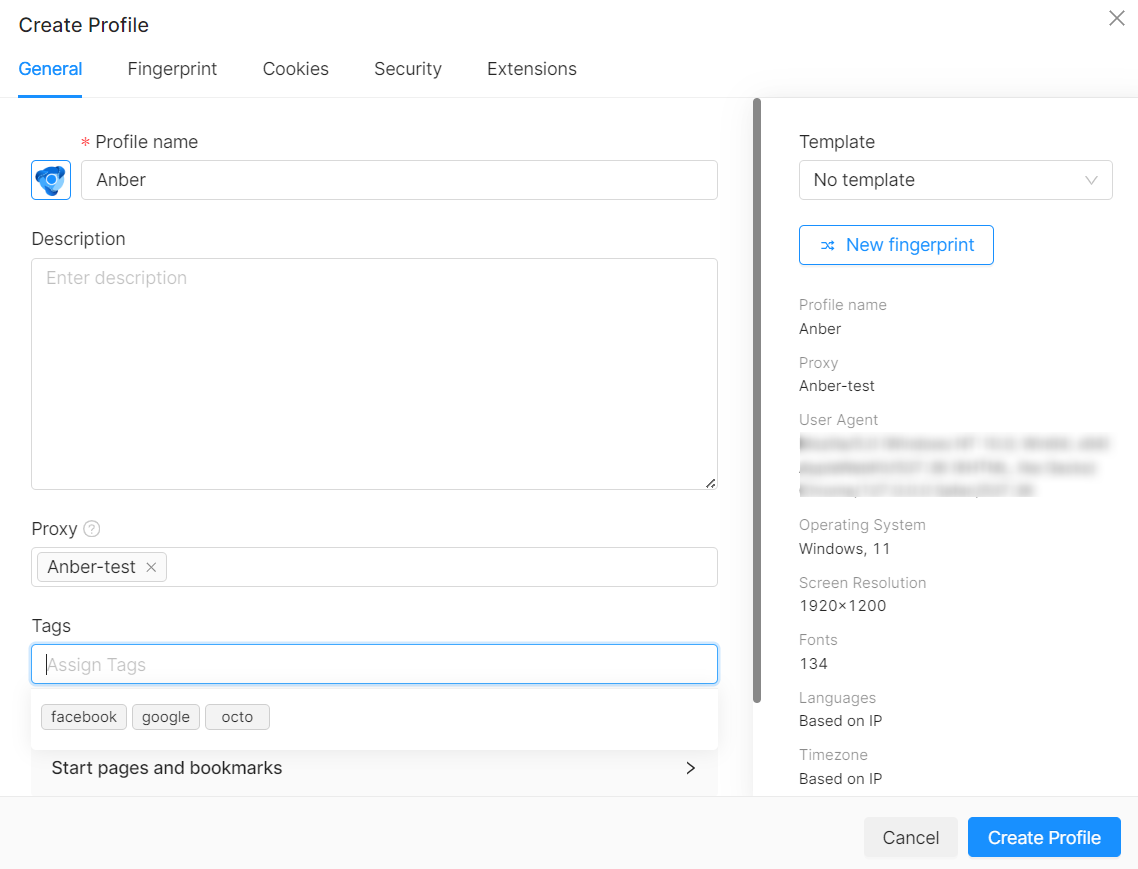
- Click on the "Create Profile" button to save and activate the new profile with the configured proxy settings.

How to set up batch proxy list in Octo Browser?
Below are the steps to configure and upload a proxy list in Octo Browser:
2. Click on "Bulk Add"
Once you are in the "Proxies" section, locate the "Bulk Add" button. This feature enables you to upload or input multiple proxies at once, streamlining the process of adding several proxies simultaneously. Click on "Bulk Add" to open the bulk import options.


3. Drop the file or add as plain text
You will have two options for adding proxies in bulk:
- Drop the File: If you have a file containing your proxy list (typically in CSV or TXT format), you can drag and drop the file into the designated area. Ensure that the file follows the correct format for proxies.
- Add as Plain Text: Alternatively, you can paste a list of proxies directly into the text box provided. The list should be formatted correctly, with each proxy entry on a new line and including details like IP address, port, and optional authentication credentials.
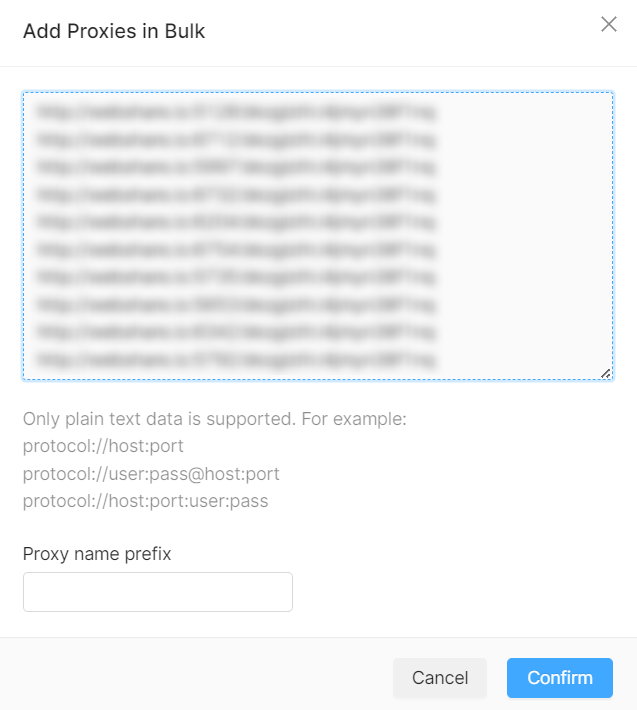
4. Click "Confirm" to save
After uploading the file or pasting the proxies as plain text, review the entries to ensure they are correct. Once verified, click the "Confirm" button to save the batch of proxies. Octo Browser will process the information and add the proxies to your list, making them available for use in your profiles.
Wrapping up: proxy setup in Octo Browser
The single proxy setup in Octo Browser allows for detailed customization of individual profiles, while batch proxy setup streamlines adding multiple proxies at once, saving time for large-scale operations. Mastering these methods enhances your anonymity, security, and efficiency in online activities.
Also, make sure to take advantage of Octo Browser's special 30% off deal for first 3 purchases with code WEBSHARE!


