

Get 10 Free Proxies For Omegle
Omegle is an online platform launched in 2009. It allows users to talk to strangers from different locations without registering. This means you can have text and video conversations while remaining anonymous. It is this anonymity and ability to connect with strangers that makes Omegle stand out from other online chat platforms. Its tagline, ‘Talk to strangers!’, captures the essence of the service: a place where users can make unexpected connections with other users from all over the world.
However, while Omegle’s no-strings-attached policy is great, it also makes it difficult to regulate users’ activities on the platform. Omegle has faced challenges with inappropriate content. As a result, the platform has strict policies, and users who violate these policies can be easily banned. It uses a combination of automated systems and user reports to ensure that all users stay in line.
If you’ve been blocked from Omegle, a good proxy can help you gain access. Find out how it works in this guide.
Get Free Proxy for Omegle
The first step to using a proxy with Omegle is to first get that proxy. There are many proxy services you can get proxies from. For example, Webshare is a reliable proxy provider that gives users access to 10 free proxies. These proxies are from different locations, and you can access them without having to connect your credit card. In addition, Webshare also lets you use some premium features without asking you to upgrade your account.
To start enjoying the benefits of Webshare proxies, all you need to do is create an account on their free proxy page. They’ll ask for some details, after which you’ll have to set up a username and password. Once this is successful, you’ll have access to your dashboard, where you can find the free proxies.
Easiest Method: Omegle Proxy for Chrome
The easiest way to use a proxy with Omegle is through your Chrome browser. To do this, you’ll need to install a proxy extension for that purpose. Here are the steps involved:
Step 1: Install Proxy Extension
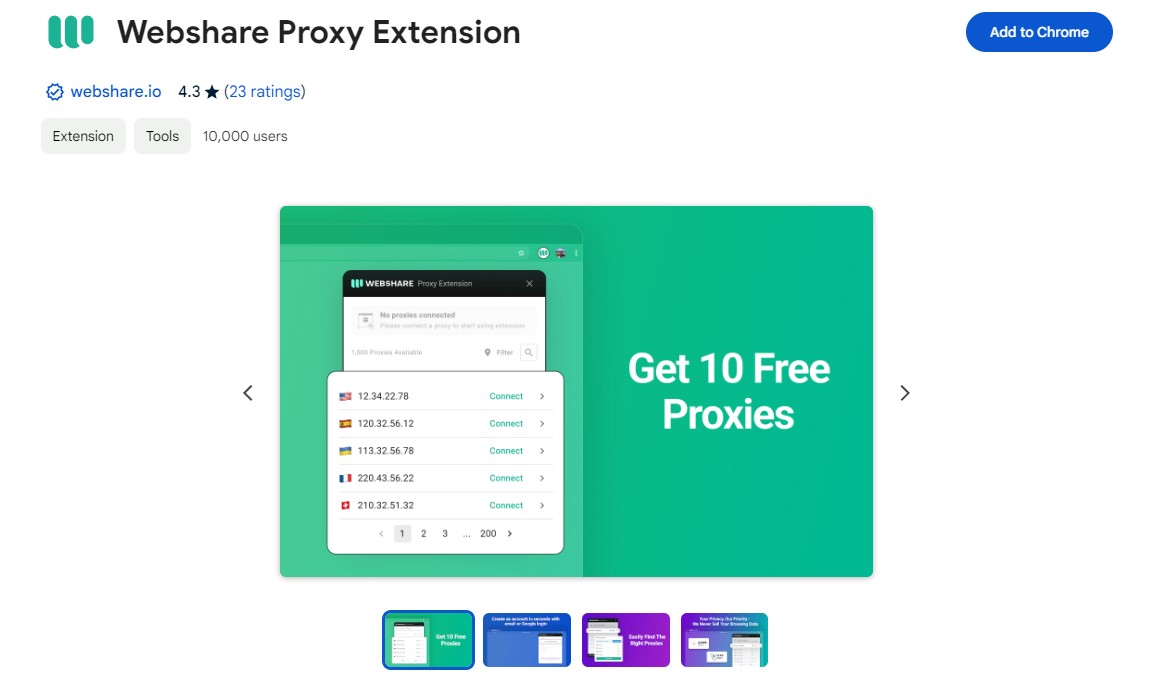
You can install the Webshare Chrome extension to access Webshare’s free proxies directly when visiting Omegle on your Chrome browser. Simply search for ‘Webshare Proxy Manager; in your Chrome Web Store and click the ‘Add’ button beside it.
Step 2: Configure Extension
Next, you need to configure your proxy. To do this, select Webshare on your Chrome extension tray and log into your dashboard. There, you can access your 10 free proxies from different.
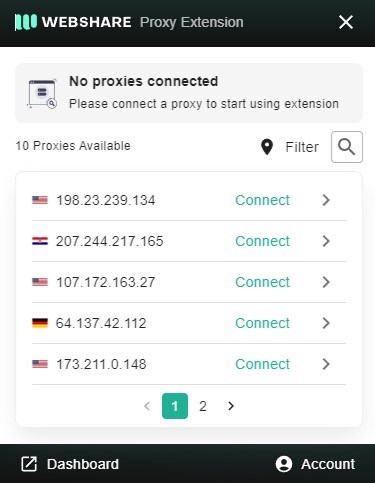
Step 3: Connect to Proxy
To complete the process, choose the proxy you want to use. It’s best to choose a proxy from a location where Omegle is not restricted. Then, click ‘Connect’. You should be automatically connected to the proxy server.
Omegle Proxy for Windows Instructions
You can also choose to configure your proxy directly on your Windows system. Here’s how to go about it:
Step 1: Go To Proxy Settings
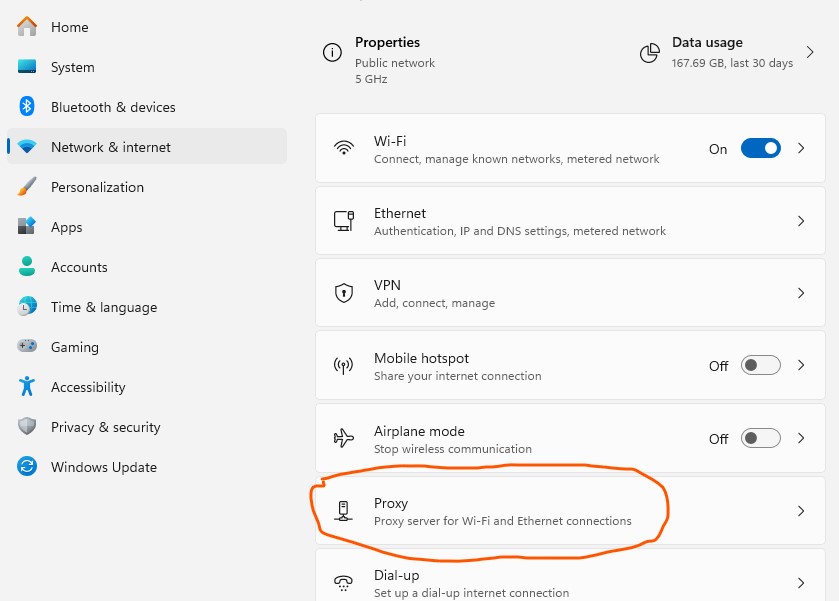
The first step is to open your Windows Settings. There are two ways to do this: either by entering ‘settings’ into your Windows search bar or by pressing the Windows + I buttons. Once your settings are opened, navigate to Network & Internet, and then to Proxy settings.
Step 2: Set Up Proxy

Once you’ve opened the Proxy settings, select ‘Manual Proxy Setup’. The one you choose will determine how you proceed. Here’s how to set it up:
- Click on ‘Setup’ to start your configuration
- A configuration window will pop up. Here, click on the toggle button beside ‘Use a proxy server’ to turn it on
- Next, key in your proxy’s server address and port. If you don’t know where to find these, go to your Webshare dashboard.
- In the box labelled ‘Use the proxy server except for addresses that start with the following entries’, key in the addresses you’d like to visit without a proxy.
- To update your settings, click ‘Save.’
Omegle Proxy for Android Instructions
You might also want to set up your proxy to your mobile phone. Having your proxy configured on your mobile device makes it easier to chat with friends and strangers on Omegle whenever you want, as you can access it while on the go. Here’s how to do it on an Android device:
Step 1: Connect to Wi-Fi
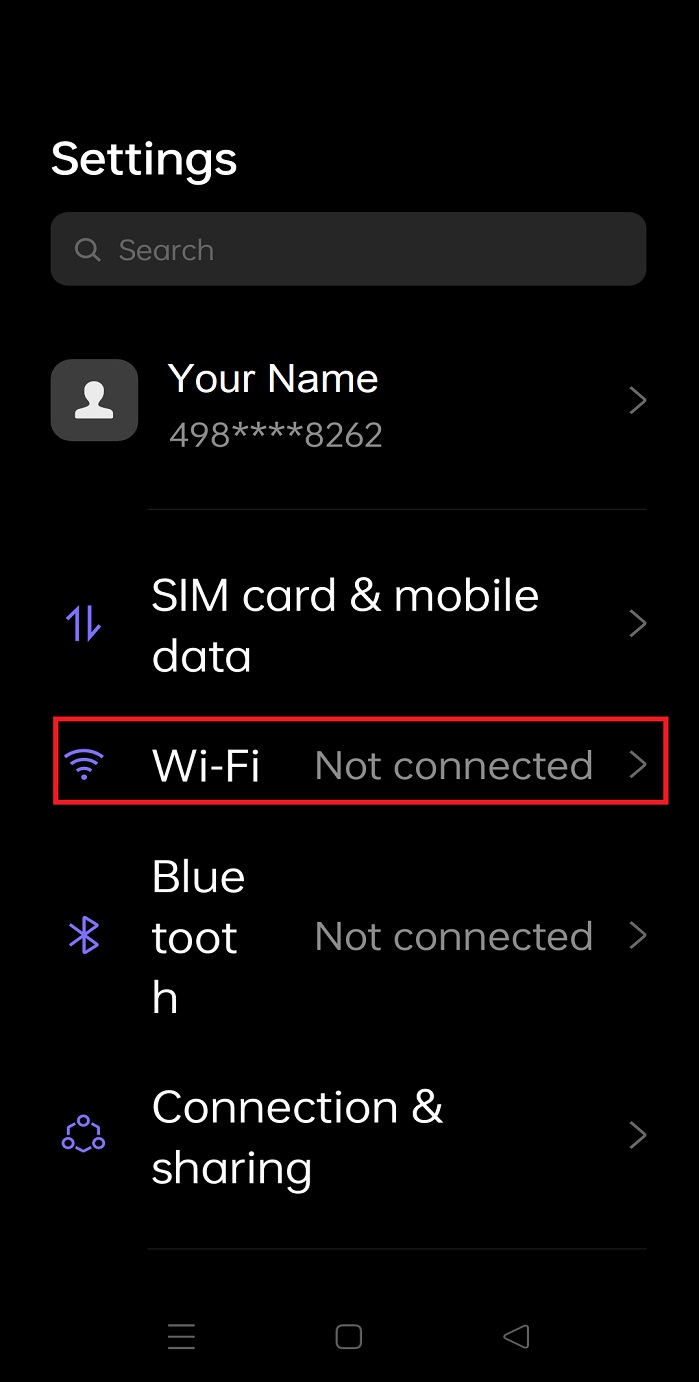
First, you need to connect your Android to a Wi-Fi network. When setting up your proxy on a mobile device, you need to connect to a Wi-Fi network, as you cannot use a proxy on a mobile network. To do this, go to your device’s Wi-Fi settings and connect to your selected Wi-Fi network.
Step 2: Set Up Proxy
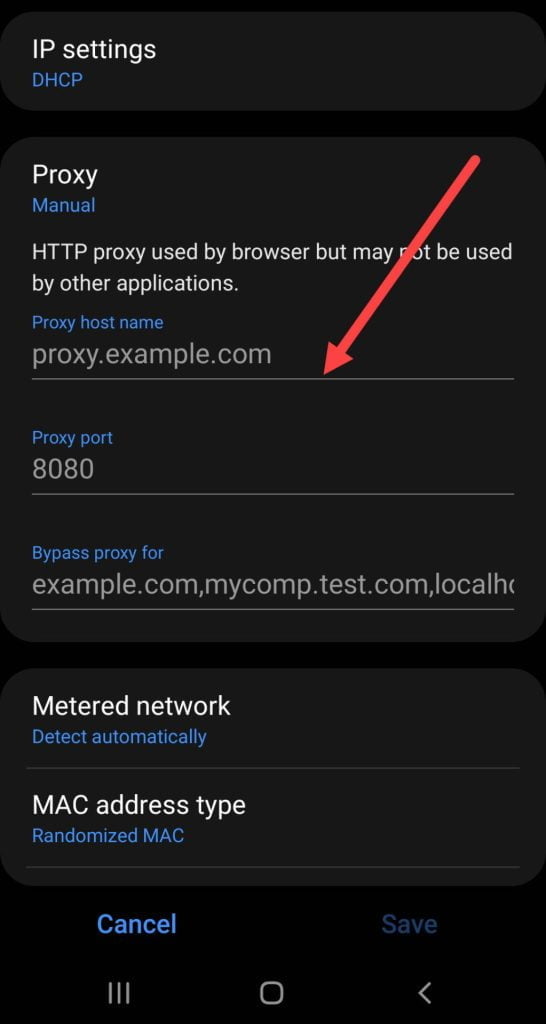
Once you’ve successfully connected, open your selected Wi-Fi network’s settings and go to ‘Advanced Settings’. There, navigate to proxy settings. When you click it, you’ll be given three options. Choose ‘Manual’ and input the hostname and port of your proxy.
Step 3: Authenticate Proxy
You will be prompted to authenticate the proxy you are trying to connect to.
Proxy username and password will be listed in your dashboard proxy list, where you took the IP and port in previous steps.
How to test Omegle Proxy?
Once you’ve completed your proxy setup by choosing a preferred authentication method, the next thing to do is to confirm if you configured it properly. You can do this by going to your Webshare dashboard to see if the proxy’s IP address is displayed. If you configured your proxy properly, the IP address will be displayed on your dashboard. To confirm that it works, simply open the Omegle platform to see if you can access it.
How to Turn off Omegle Proxy?

When you’re done chatting on Omegle, you’ll need to turn off your proxy. Here’s how to do it:
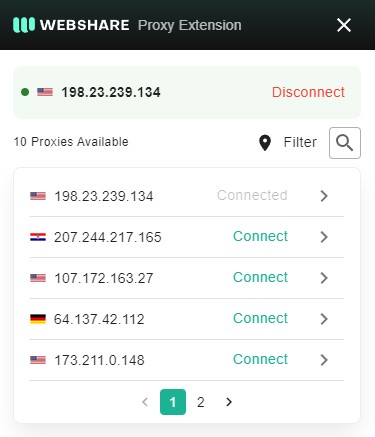
- Chrome: If you set up your proxy on Chrome, you can turn it off by going to your Chrome extension tray and selecting the Webshare icon. Then, click ‘Disconnect’.
- Windows: For Windows, to turn off your Webshare proxy, you need to go back to your Windows Proxy Settings. There, toggle the ‘Use a proxy server’ button to ‘Off’ and then click save. This will immediately disconnect your proxy.
- Android: If you set up your proxy on your Android, you can disconnect by going to your Android’s Wi-Fi settings and navigating to proxy settings. There, you’ll see three options. Select ‘None’, then click ‘Save changes’.
-fotor-bg-remover-20250204113548.png)


