

Omegle is an online chat platform that was founded in 2009. It connects users randomly for text and video conversations. Unlike other chat platforms, it does not require users to register. But though Omegle requires no registration, it’s not a platform where all is permitted. You can be blocked for breaking the platform’s rules. If you’ve been blocked from Omegle, you can learn how to get unblocked with a proxy below.
How to Unblock Omegle in 4 Easy Steps
Unblocking Omegle involves four easy steps. Here’s what to do:
Step 1: Choose a Proxy
The first thing you need to do to unblock Omegle is to choose a proxy. This helps you bypass the restriction, giving you easy access to the platform. You can get a proxy from credible proxy providers like Webshare. This is a proxy service that gives you access to 10 free proxies. You will also be able to use some premium features without needing to upgrade. All you will be required to do is create an account to be able to access the proxies on your dashboard.
Step 2: Setup the Proxy
After registering an account with Webshare, the next thing to do is to set up your proxy. Here’s what to do:
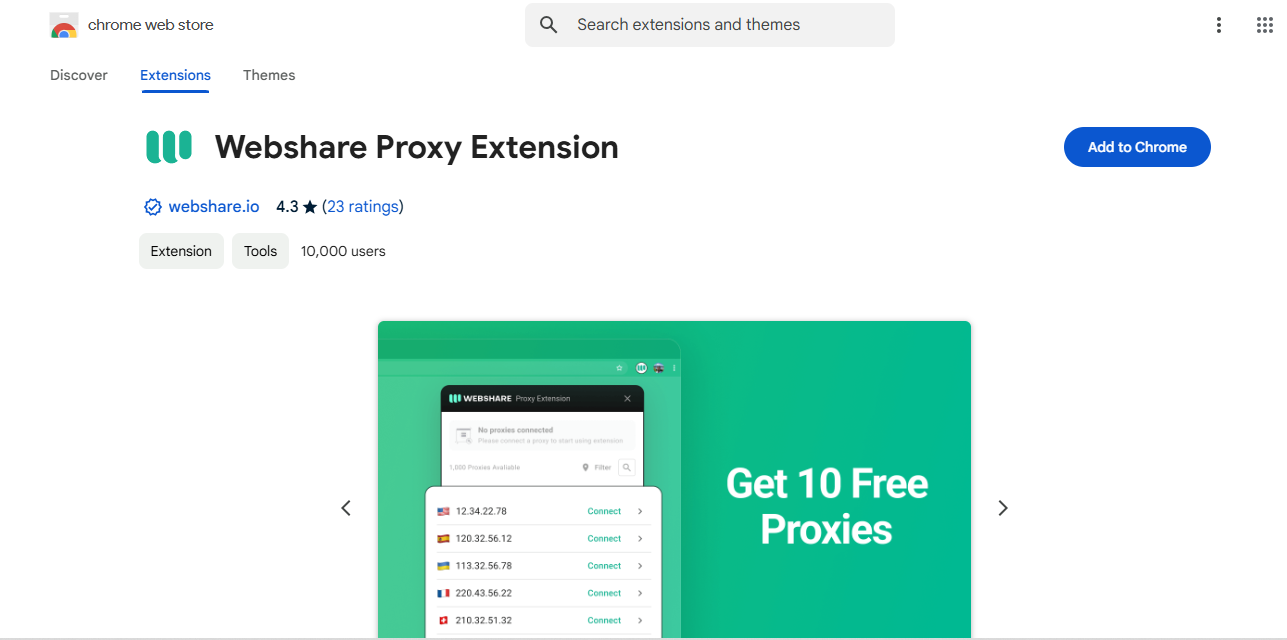
- Chrome: When you set up your Webshare proxy on your Chrome browser, you will be able to easily use the proxy when browsing. To set up your proxy on Chrome, you need to download a proxy extension. Search Webshare Proxy Extension from your Chrome Web Store and click ‘Add to Chrome’ to install it.
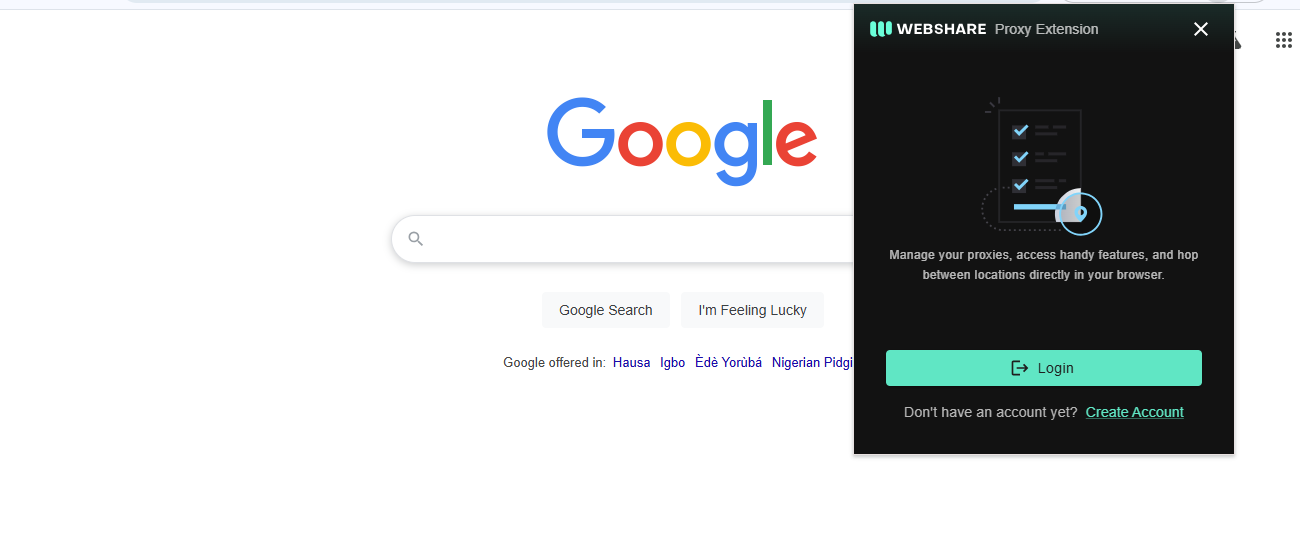
Once the Webshare extension is installed, you can set it up by clicking on the green Webshare icon on your Chrome extension tray. You will need to log in with your account details. Once your login is successful, you will be redirected to your Webshare dashboard. There, you can select the proxy you want to connect to and then click ‘Connect.’ When selecting a proxy, make sure you go for one in a location that works well with Omegle.
- Firefox: You can also set up your Webshare proxy on Firefox. As with Chrome, you will need to download the Webshare extension. However, while with Chrome, you can use the extension directly, with Firefox, you need to download FoxyProxy. This is Firefox’s proxy manager, and you can find it by searching for ‘FoxyProxy Standard Extension’ on the Firefox Add-ons page. To install it, click the ‘Add’ button beside it. Then, load your FoxyProxy and go straight to Options. There, open the settings and go to Proxies. You will need to click ‘Add’ to enter your Webshare proxy’s details and then click Save. Your proxy’s details should be available on your Webshare dashboard as soon as you log into your account.
- Mac: You can also connect your proxy directly to your Mac system without using any browser. To do this, go to the ‘Proxy List’ page on your dashboard and note your proxy IP, port number, username, and password. Next, you’ll need to select the type of proxy you want. There are three options: HTTP, HTTPS, and SOCKS5. You can then proceed to configure it. Note that the different types of proxies require different steps.
- IOS: Finally, you can also choose to use your proxy on your iPhone. You’ll have to connect your iPhone to a Wi-Fi network to do this. This is because a proxy server cannot be set up on a mobile network. You will need to open the Wi-Fi settings on your iPhone and connect to the Wi-Fi network you want to use. After this, go to the network’s proxy settings and select ‘Manual configuration’ to input your proxy details.
Step 3: Connect to Proxy
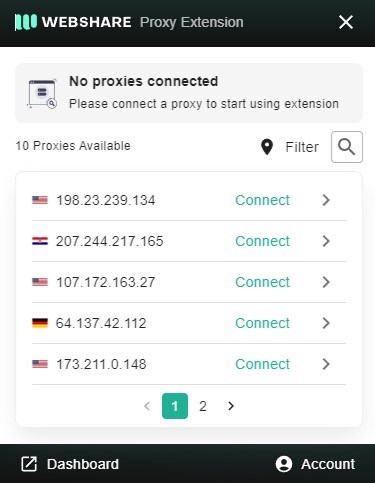
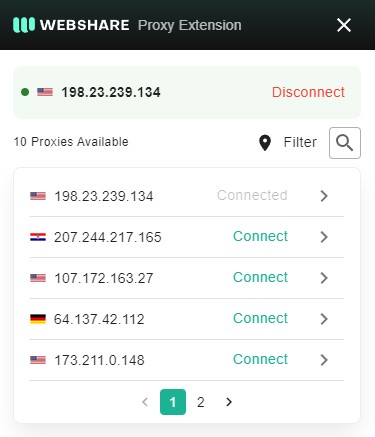
Once you’ve set up your proxy, the next step is to connect to your proxy server. To do this on Chrome, all you need to do is click ‘Connect’ after choosing the proxy you want from the Webshare extension. To connect your proxy on Firefox, however, after clicking save on the FoxyProxy settings page, you need to go back to the main page and click on your proxy. You’ll be automatically connected.
To connect to your proxy on your Mac, you will need to go to your device’s Proxies tab and click on Apply. You will be connected, regardless of the proxy type you selected. To connect on your iPhone, after inputting your proxy details, simply click ‘Save’.
Step 4: Go to the Omegle Website
Once your connection is successful, you can open the Omegle website and enjoy unrestricted access.
Why Have I Been Blocked from Omegle?
A user can be blocked from Omegle for several reasons. Some of these are as follows:
Your IP is Banned
If your IP address is banned, you won’t be able to access Omegle. Your IP address can be blocked if Omegle detects unusual activity from it.
Banned Account
Another reason why you might be unable to access Omegle is because your account has been blocked. This can happen for various reasons. For example, if you break the website’s policies, you might receive an automatic ban. Also, the platform uses a human moderation system, meaning other users can report you for breaking the website’s rules, such as using swear words or posting naked pictures. If Omegle investigates the report and finds it accurate, your account might be banned.
Technical Issues
You might also be unable to access Omegle because of technical issues. For example, if you’re using an outdated browser without proper security features, or which doesn’t have JavaScript, you might have trouble accessing the website.
Network Issues
You can also be blocked from Omegle due to network complications. For example, you might be blocked if you try to access the platform with a bad proxy. That’s why it’s important to get your proxies from trusted providers like Webshare.
Parental Control
If there’s a parental control restricting access to Omegle, this can also prevent you from accessing the website.
What is a Proxy Server for Omegle?
A proxy server is a network server that works as a bridge between your device and the internet. It is responsible for forwarding your internet request to the website you’re trying to access. When you try to open a website like Omegle, your device sends a request to the website. Your request might either be accepted or denied. If you’re using a proxy, when you send your request, it doesn’t go straight to the website. Instead, it is first sent to the proxy’s server, where it is redirected and sent to Omegle from a different IP address. So, the website will receive your request from an IP address that neither belongs to your device nor comes from your location. This will give you access to the website.
There are different types of proxies you can use. There are forward proxies, transparent proxies, and anonymous proxies. In addition to giving you unrestricted access to websites like Omegle, using a proxy also ensures that you browse safely, free from harmful content.
-fotor-bg-remover-20250204113548.png)


