Get 10 Free Proxies For OpenBullet
Automation tools like OpenBullet have become incredibly popular for tasks such as web scraping, penetration testing, and account testing. One of the key components to using OpenBullet efficiently is understanding how to set up and use proxies. This article provides a guide to setting up proxies in OpenBullet, with tips on free proxy options, the best proxies to use, and best practices for integration.
What is OpenBullet?
OpenBullet is an open-source web testing suite that enables users to perform a wide variety of testing and automation tasks. It is mainly used to test website security. Therefore, it is found to have a major application among cybersecurity personnel. However, due to its versatility, OpenBullet is also widely used to automate repetitive web tasks and extract data from websites.
What is a Proxy in OpenBullet?
In OpenBullet, a proxy acts as an intermediary between the user's computer and the target server, routing requests through an alternate IP address. This helps users maintain anonymity, bypass geo-restrictions, and avoid IP bans when performing repetitive tasks such as web scraping, penetration testing, or credential checking. OpenBullet supports a variety of proxy types, such as HTTP, HTTPS, and SOCKS4/5, individually or as a batch. Effective use of proxies ensures smoother operations and improved task efficiency.
How to claim your free proxies?
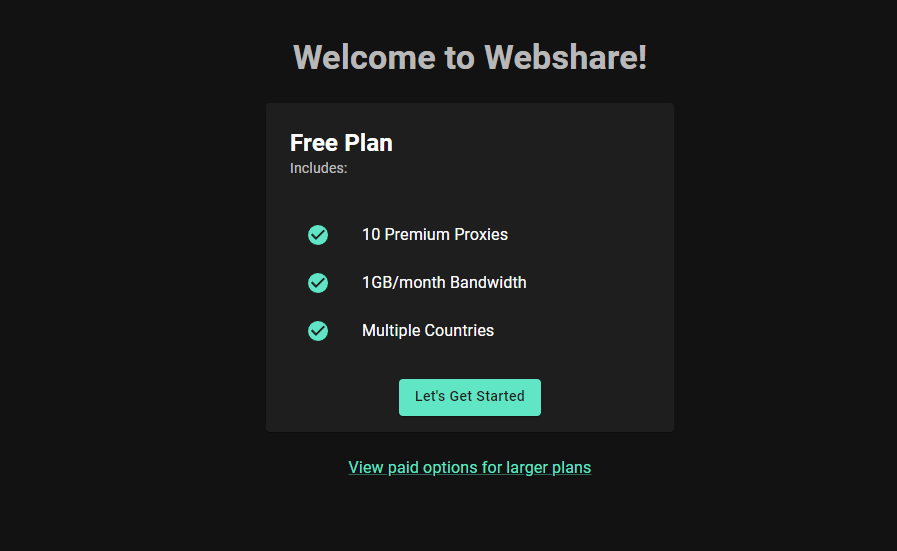
- Visit Webshare.io and create a free account.
- Navigate to the plans section and select the free proxy plan.
- Once registered, you’ll receive access to 10 datacenter proxies, along with login credentials.
These proxies are ideal for testing OpenBullet setups, scraping small-scale data, or automating lightweight tasks. As your requirements grow, Webshare also offers premium plans with additional features like residential proxies and higher bandwidth limits.
How to setup a proxy server with OpenBullet?
We will now discuss the steps required to set up a proxy server with OpenBullet. Follow each step carefully for the best results.
Download OpenBullet
A new version of OpenBullet was introduced recently called OpenBullet 2. To download OpenBullet 2 you must go to the OpenBullet 2 documentation page. Select the installation tab and you will see that there are installation options for Windows, Linux as well as MacOS. For the sake of this article, I will be demonstrating the Windows installation.
For Windows, there are two Open Bullet 2 versions, a Web Client and a Native Client. I will be going forward with the web client. When you select the web client option, you will see download buttons for the Web Updater, .NET Runtime and ASP.NET Core Runtime. Download all 3 files onto your computer. However, if you already have the latest versions of .NET Runtime and ASP.NET Core Runtime on your computer, you don’t have to download it again.
Once you open the updater, it will ask whether you want to download early builds or stable builds. Select Stable builds. Afterwards, it will proceed to download the necessary files. Go to your downloads and open the OpenBullet2.Web.exe file. You will see the screen below.
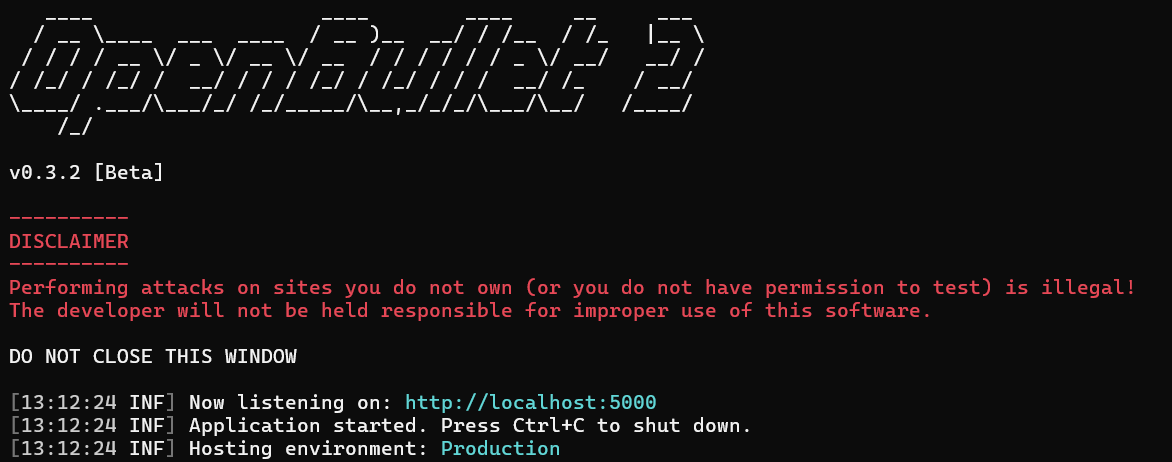
Now all you have to do is paste “http://localhost:5000” in your favorite browser and it will load the web client of OpenBullet 2.
Create a new Proxy group
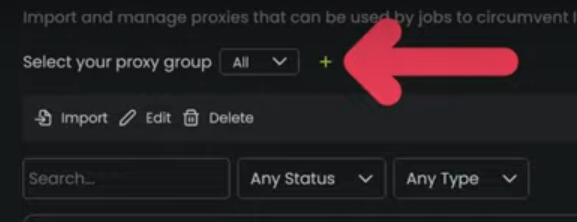
Go to the “proxies” tab in the Menu. Here, click on the plus icon on the top to add a new proxy group. Use a suitable name for the group.
Fill out your Proxy settings
Once you’ve created a group, select “import”> “from text”. Now a form will appear to request your proxy details. You can find your proxy details by going to your Webshare account and clicking on the proxy list tab. From the list of 10 free proxies you received, select one and copy its details to the OpenBullet web client. You have to paste it in the following format.
IP: Port: Username: Password
Eg: 64.132.639.124: 4452: username: password
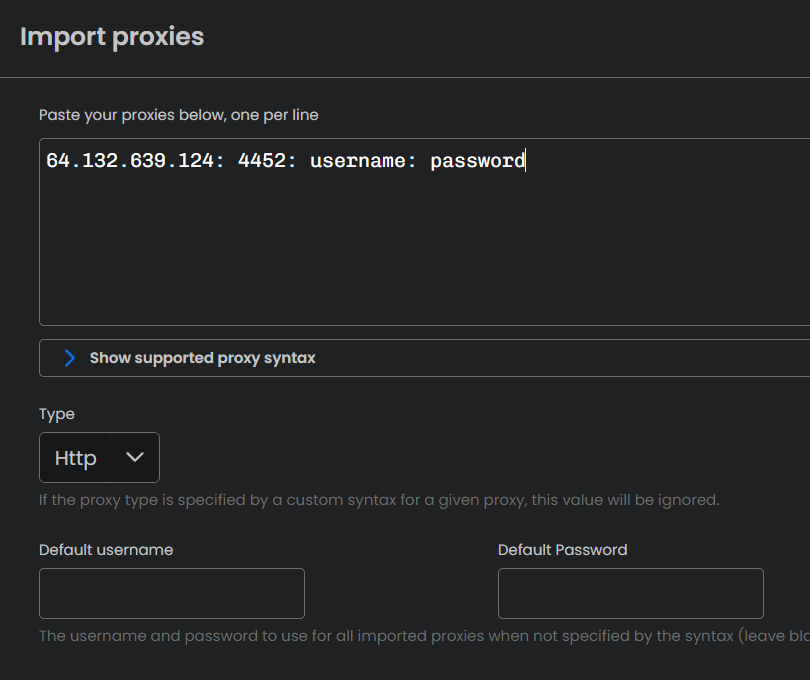
Now, click the proxy type drop-down and select the type of your proxy. Next, just click on the import button.
How to test a proxy connection on OpenBullet?
To test your proxies, go to the “Jobs” tab. There is a blue color “New +” icon on the top-right of the screen. Click it and a prompt will appear. There will be 2 options, out of which select “Proxy Check Job”. Now, you will be directed to a new page to create a proxy check job.
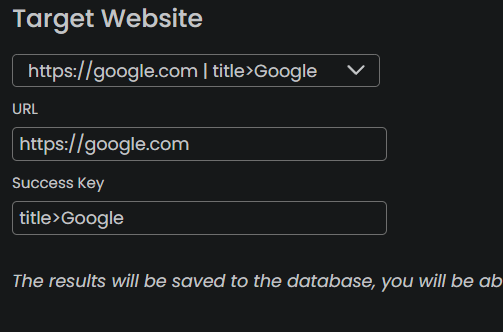
Scroll down until you see the “Target Website” section. Click on the dropdown and select the default website which is https://google.com or you can add a custom website and add the URL in the input field below.
After you have completed the above steps, click on the “Create Job” button on the top-right of your screen. Now, you will come to a page with many job options. All you have to do is click the start button in the “Job controls” section.

If the proxy connection is successful, it will display in green that it works. If it fails, the log will show that the proxy is not working in red.
How to set up a proxy list with OpenBullet?
Let’s say that you want to configure more than one proxy with OpenBullet. It is a simple procedure. Let’s see how it works.
First, go to the proxies tab and create a proxy group as I have mentioned before. Afterwards, take your list of proxies and organize them as follows.
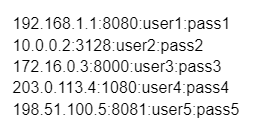
There are 2 ways of importing the proxy list to OpenBullet. The first method is selecting “import”>”from text” and pasting the entire list onto the input field.
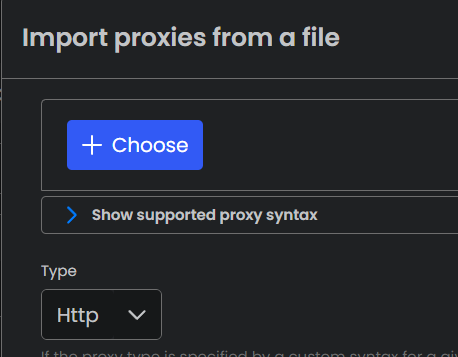
The second method is selecting “import”>”from file” and selecting the file, which you have used to save the proxies.
After the above step, the integration process is similar to integrating a single process. Therefore follow the steps in the previous section of the article.
How to set up a residential proxy with OpenBullet?
Residential proxies are ideal for tasks that demand high trust and authenticity, as they utilize IP addresses linked to real devices. To set up residential proxies, you first need to obtain the necessary credentials. Visit the Webshare subscription page to purchase the type of residential proxy you need.
Webshare offers three methods for setting up a residential proxy, direct connection, rotating proxy endpoint, or backbone connection. After obtaining the proxy credentials, you can configure it in OpenBullet just like a regular proxy server. The only difference is in the proxy details you will be importing proxies into OpenBullet.
How to turn off the proxy on OpenBullet?
To turn off a proxy in OpenBullet, select the Jobs tab and go to the “Proxy Check Jobs” table. For every job, there is a “<” icon, which is the action button. Click on it and it will show you many options.
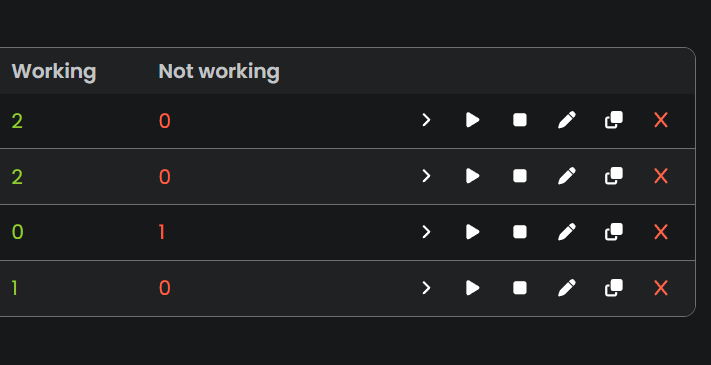
Click on the remove option and the job will be removed. Afterward, your proxy connection will also stop.
What are the best proxies to use on OpenBullet?
The best proxies for use with OpenBullet are typically residential proxies, due to their high anonymity and association with real devices, which help avoid detection. Residential proxies are ideal for tasks requiring authenticity, such as web scraping and account automation. Rotating proxies are also effective because they automatically change IP addresses, reducing the risk of being blocked. Datacenter proxies can be used for less sensitive tasks but may be flagged more easily due to their non-residential nature. Always ensure you choose proxies from reputable providers like Webshare, who offer high-quality, reliable proxy services for OpenBullet operations.
This concludes our guide on configuring proxies with OpenBullet. You should now be able to browse securely and efficiently with proxies. While most proxy services charge upfront, Webshare provides 10 free proxies without even requiring a credit card. You can take advantage of this offer by signing up for a free Webshare account and integrating these proxies with OpenBullet.


