


Pinterest has become a melting pot of ideas and an important source of inspiration for millions of users who log on daily. If you were one of these many users and suddenly have no access to Pinterest, your concern is justified, especially when you don’t know what you could have done wrong.
Like most social media platforms, Pinterest reserves the right to restrict access to the platform. Fortunately, there are ways to get around this restriction if needed. In this guide, we will consider restoring access using a proxy.
Before starting: Get free proxies for Pinterest
As effective as the proxy approach can be, it does rely on you having one to begin with. Thankfully, there are services that allow you to get, connect to, and manage proxy addresses conveniently, usually on a single account.
Paying for a solution might be asking too much, but you need not worry. If you can’t currently afford a premium proxy service account, you can take advantage of the currently running offer on Webshare. This allows you to get up to 10 free proxies without having to drop credit card details.
Easiest method: Pinterest proxy for Chrome
Having a few free proxies to work with is just the beginning. Next, we need to discuss some possible approaches to the problem, starting from the easiest and working our way out. The most intuitive solution would be to use a proxy with your Chrome browser, and here’s how.
Step 1: Setup the Proxy
Chrome is very modular in its setup, allowing users to customize their browser to suit their needs with extensions and plugins. This feature will come in handy when trying to set up a proxy. First, you’ll need to head over to the Chrome extension page on the Webshare site.
You’ll immediately notice a few things on this page. First, you should spot an image showcasing this extension’s appearance. Next to the image, you’ll also see a brief description of the plugin, and beneath that description will be the Add extension for free button.

Pressing this button should do one of two things. It should redirect you to the Chrome webstore, or open a new tab that lands on the Chrome webstore page. Either way, you’ll be taken directly to the Webshare store front on the Chrome.
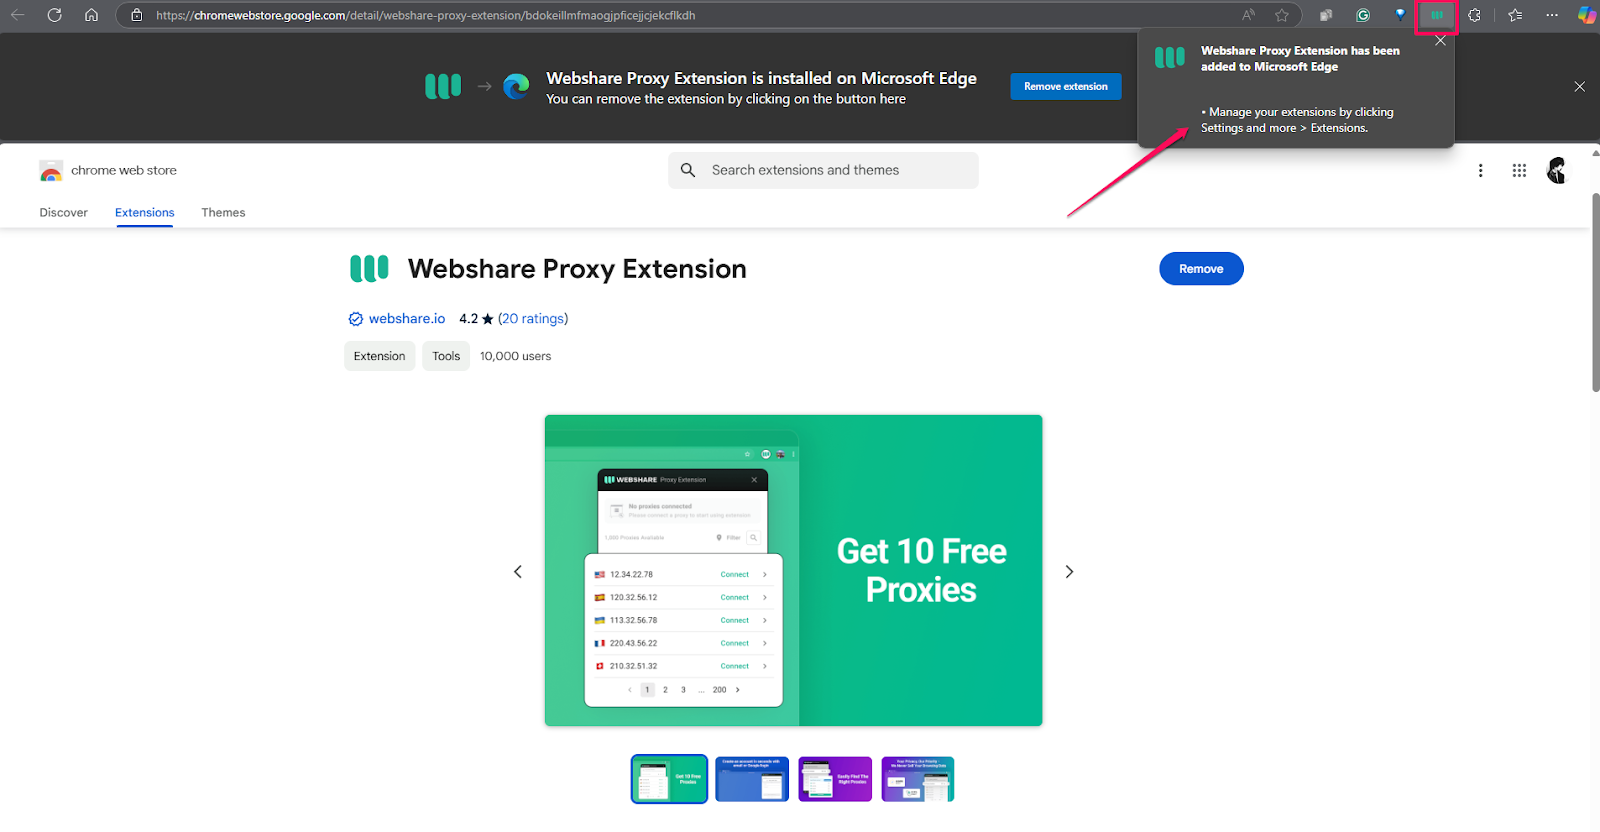
Alternatively, you could forgo this step and search for Webshare directly on the Chrome website. Once you’re on the right page, look for and press the blue Get button in the top right corner.

You will immediately be prompted to initialize the download. The first pop-up you notice on your screen will include a list of permissions essential for Webshare to run on your Chrome browser.
Properly read through each permission so you’re aware, and feel free to write them down or research them if there is any confusion. Once you're confident in the installation, you can click the Add extension button.

What happens next, happens fast and you could miss it if you don’t pay attention. First, a download containing the extension files should begin.
Once concluded, the extension install will immediately begin, and you can confirm a successful installation by the flashing Webshare icon that should appear on your address bar.
Step 2: Connect to Proxy
Now that Webshare has successfully been integrated with your Chrome browser, it’s time to connect to a proxy. Select the Webshare icon on your address bar or in your plugin list.
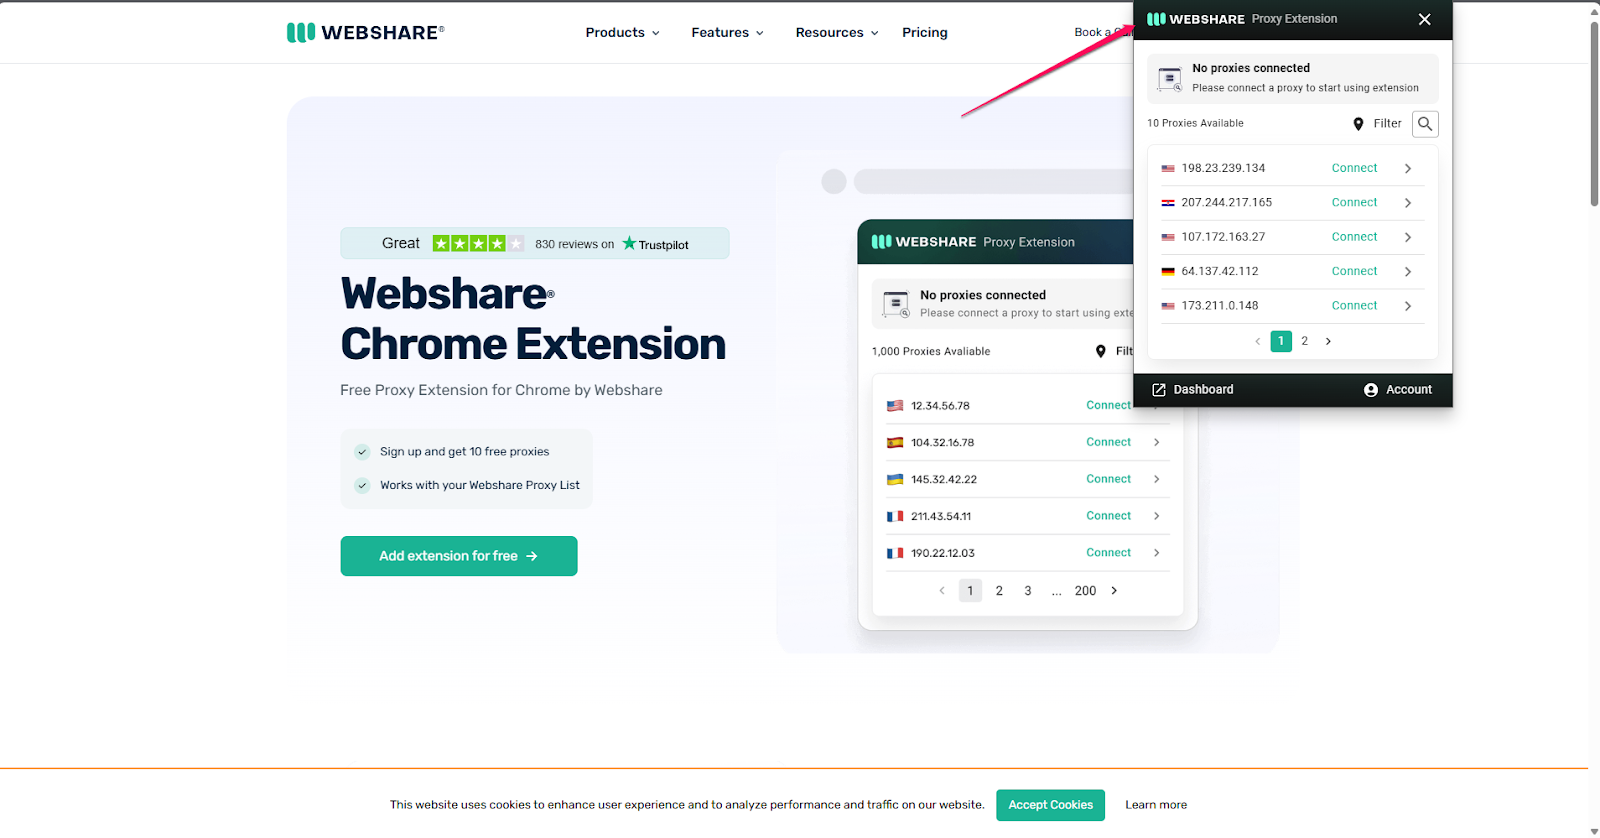
Your Webshare widget might be looking a little bare at first, and this is because you don’t have any proxies yet. However, this won’t be a problem once you create an account or log into a recently created one. Once you do this, you will notice a few proxy addresses from varying regions you can use.
Pinterest isn’t region-locked specifically, but to duplicate the selection of pins you’re familiar with, it might be best to choose a proxy address close to your current location.

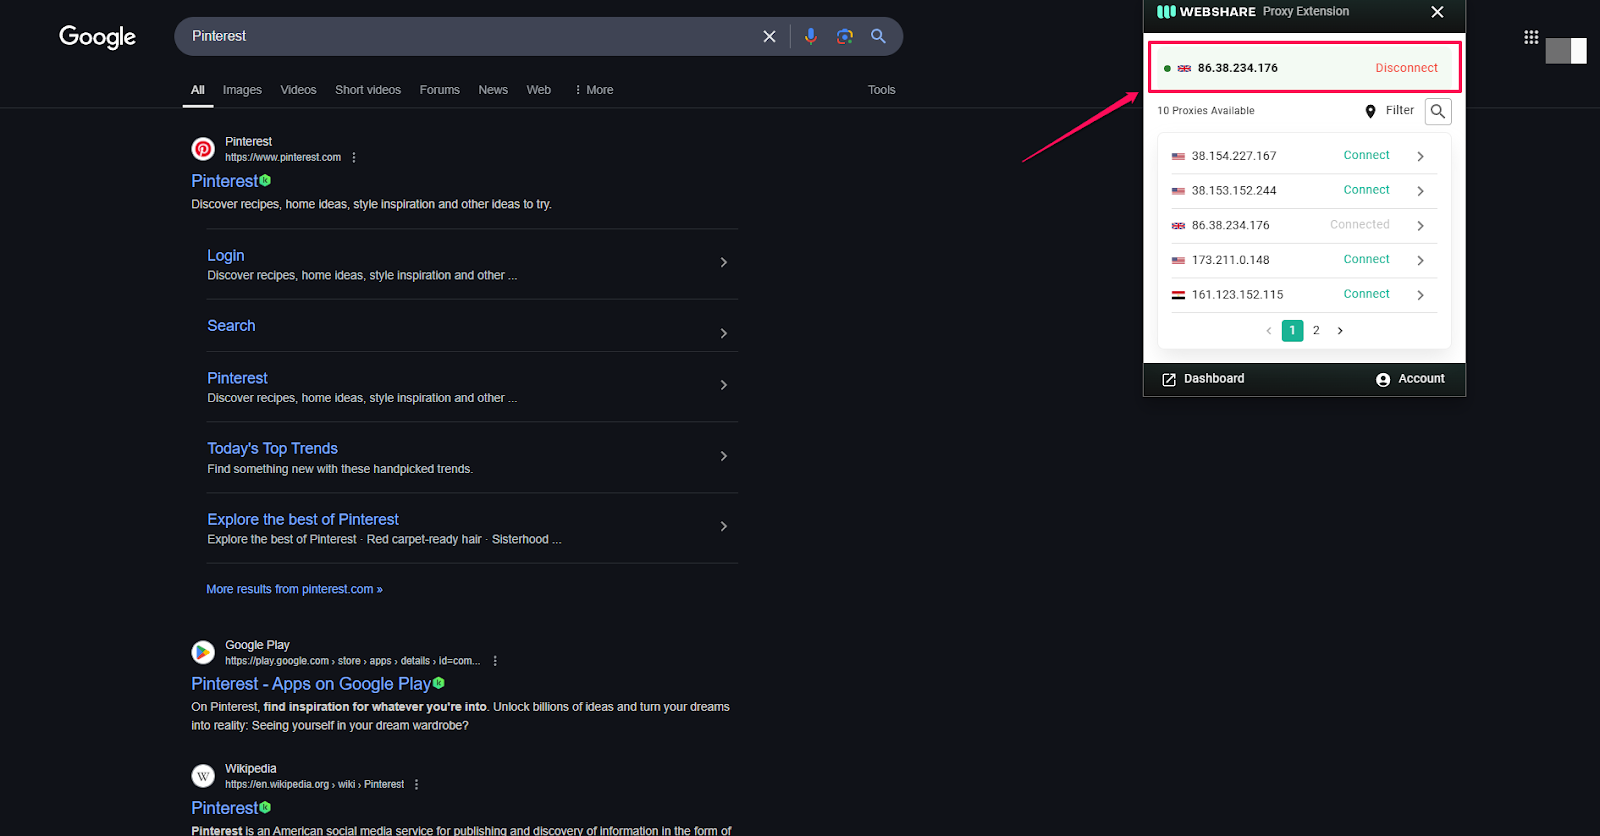
Once you’ve chosen a proxy address, select the green Connect button next to it. Connection takes no time, and you’ll notice that your chosen proxy address now appears at the top of the widget with a green connection indicator beside it.
Step 3: Go to Pinterest Website
If you’ve been following along, then you should have the Webshare extension installed and know how to connect to a chosen proxy. All of this information will be essential when trying to connect to Pinterest.

First, confirm that you are connected to the proxy address you would like to use. Next, navigate to Pinterest, either by searching for the website or passing the URL directly into your address bar. Either way, you should be able to access Pinterest now without problems.
You could choose to make a new account for browsing pins or just navigate the platform anonymously. Either way, your access won’t be interrupted..

Pinterest Proxy for Windows
Going one level up in complexity, we have a solution that works on the Windows operating system. Luckily, you can also get this done by following the instructions below to the letter.
Step 1: Secure Your Proxy Details
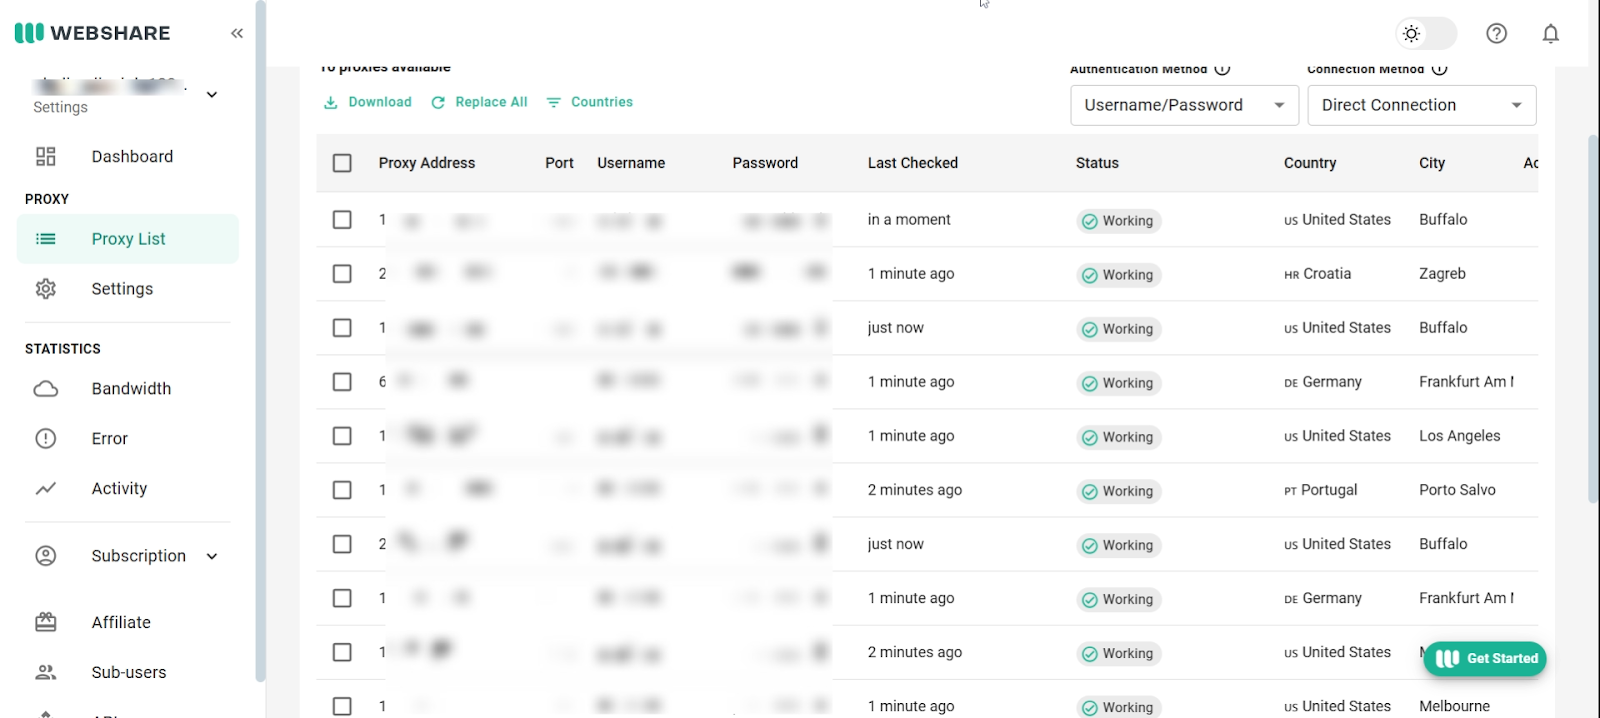
Before diving into the setup on your Windows computer, there’s some information you will definitely need. You can get all relevant details related to each proxy address from the Webshare dashboard. It is stored in a convenient table and easy to understand.
Step 2: Manually Connect to Proxy
While a little less convenient compared to the one button connection used on Chrome, setting up a proxy on your Windows device is still straightforward. First, open your Windows settings, and search for proxy in the search bar.
The page you’re directed to can be used for both automatic and manual proxy connection. This solution will focus on the Manual proxy setup section. Click the Setup button in the Use a proxy server tab.
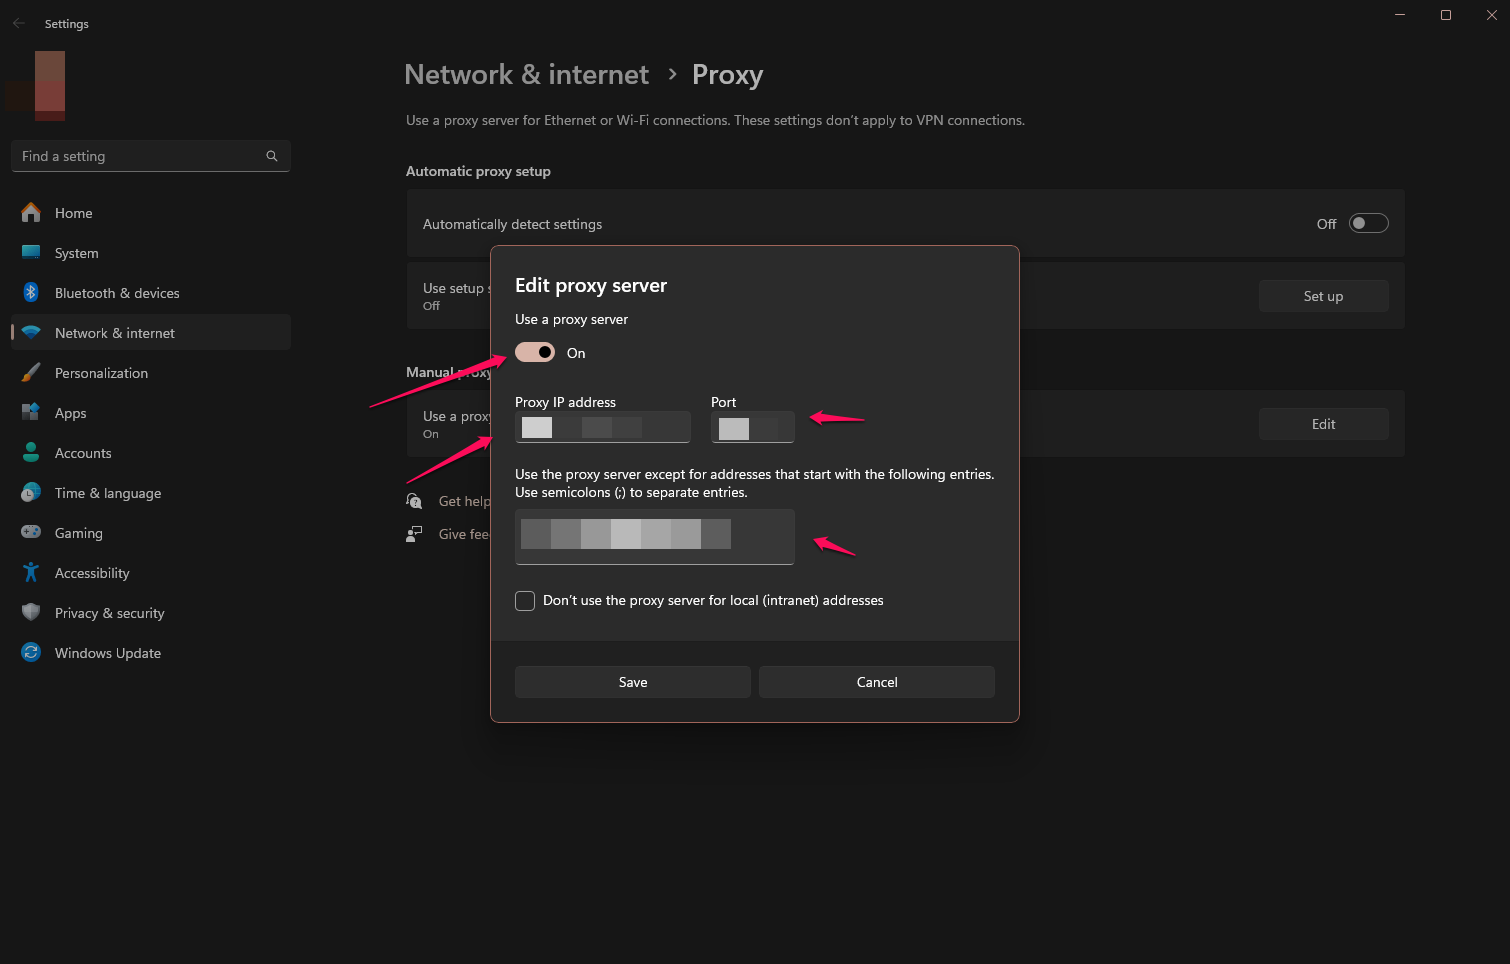
Selecting this button will reveal fields that correspond to the details you’ve saved or noted from your Webshare dashboard. It’s important that you cross-check every number or letter. The smallest mistake will invalidate the entire process.
Once you’ve entered the relevant details and confirmed them, click the Save button to start the connection. Once done, you’ll be able to launch any browser on your computer and open Pinterest.
Pinterest Proxy for Android
Android mobile devices allow users to get their hands dirty and provide more functionality and usability settings. Thanks to this, the process of setting up a proxy manually can be replicated on an Android device, and here’s how.
Step 1: Head Over To Your Wi-Fi Settings
Locate your Network or Wi-Fi settings. You could choose to either search for the right setting or look under the section designated for Connections.
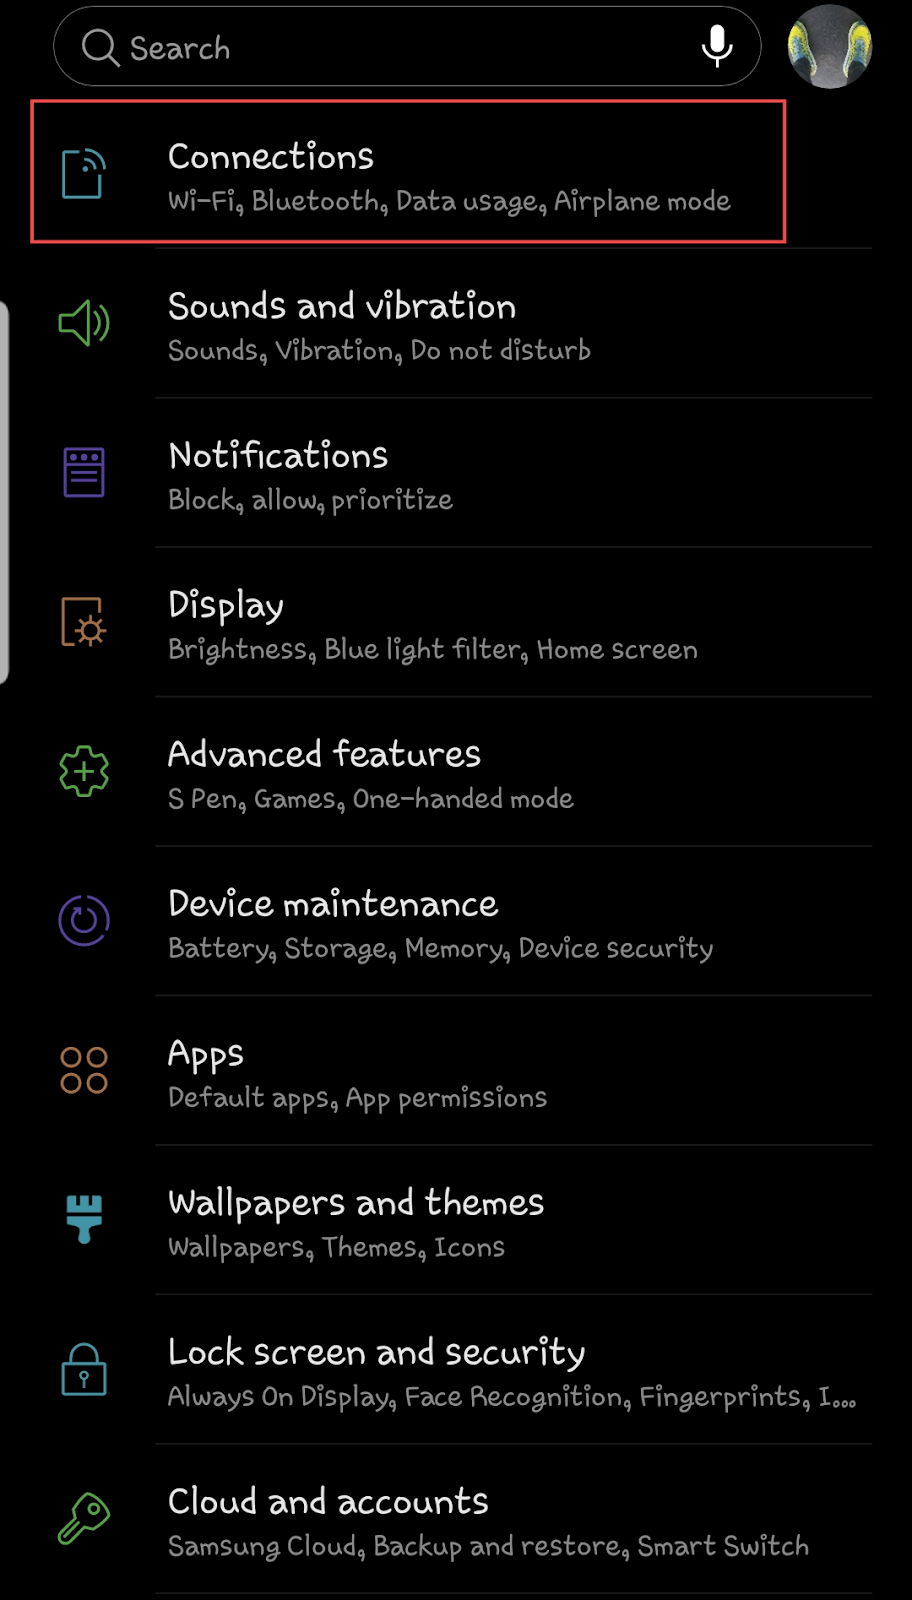
You might not immediately find proxy-related options in your connections menu, but that’s fine. Most devices keep these settings under advanced network settings. Note that this could appear as “more network settings” on some devices.

Step 2: Configure Your Proxy
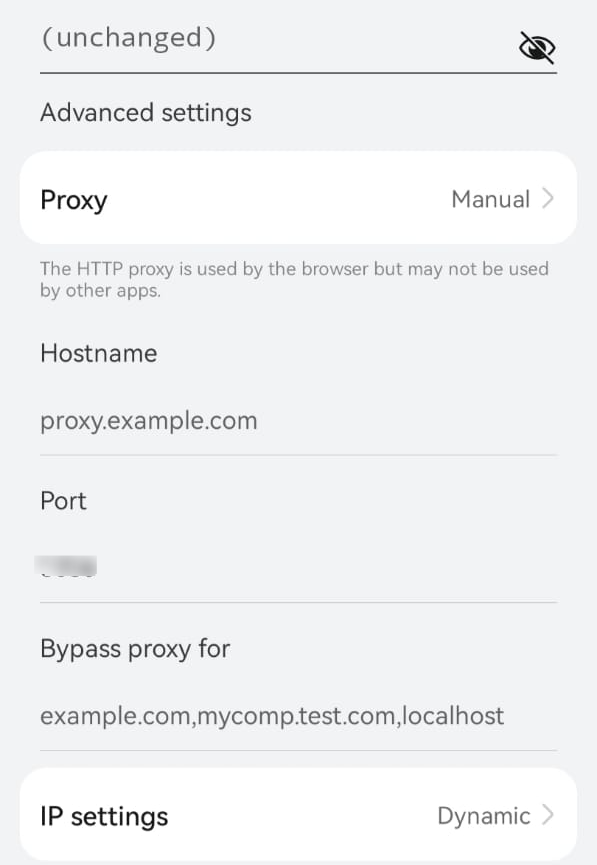
When you click on the proxy setup option, this should trigger a small menu outlining the setup methods you can choose from. None is typically selected by default, but for this walkthrough, you should toggle the Manual option.

Similarly to the Windows setup, selecting Manual should lead you to a page that provides fields for all the information you’ve gathered from your Webshare dashboard. Validate each detail as you enter it.
Step 3: Verify Your Proxy
To ensure that not just anyone can get access to your proxies, you’ll typically be required to input a unique username and password, alongside your other proxy details. As expected all of this information can be found on your Webshare dashboard.
As soon as you verify the proxy with the username and password pair, you should be able to connect to your proxy and open Pinterest on your Android device.

How to Test a Pinterest Proxy
A successful connection is the ultimate test for your proxy. If you’re working with the Chrome solution, you will know your connection is successful when you see the green indicator beside your chosen proxy address. However, all solutions are confirmed to work when you can access your desired site, such as Pinterest.
You can also check if the proxy works by opening region-unique sites like Google. If you notice a location header that matches the proxy location you’ve connected to, then your proxy is working as intended.
How to Turn Off a Pinterest Proxy
While each method of connecting to a proxy for Pinterest varies in difficulty, disconnecting from all of them is fairly straightforward. The section below will highlight how you can disconnect from a chosen proxy address.
For Chrome
Recall that when you choose a proxy address to connect to, it is boldly displayed at the top of the Webshare proxy extension window in your browser. This position is strategic and facilitates turning off your connection at the click of a button.
You should also see a Disconnect button to the right of it in a red font. You can safely disengage your proxy connection by pressing this button.
For Windows
The Windows and Android setups were more tedious, requiring you to enter your proxy details manually. Similarly, you will have to go back to each of those fields and delete the information you’ve entered. Once you confirm that all the fields are empty, select the Save button to disconnect.
You can easily identify a successful disconnection from the proxy menu. If you look under Use a proxy server, it will read off.
For Android
The Android proxy settings work as toggled states. Remember that None is the default state before we had to switch to Manual. Breaking the proxy connection is as simple as going back to that dialog box and switching it back to None.
Final Thoughts: What’s the Best Proxy to Use With Pinterest?
Picking the right proxy service can be difficult, especially if you have no prior experience. You can get by using any premium proxy provider when trying to get back on Pinterest. If you have a decent budget, you can opt for a plan that appeals to you and reinstate your access. However, many of these plans are expensive, and most users aren’t ready to commit financially.
In this case, you might want to consider Webshare. The biggest positive about this platform is the 10 free proxies you get upon creating an account. These allow you to test the waters before opting for a premium account.


