Get 10 Free Proxies For SessionBox
In this article, we’ll explore two essential methods for integrating proxies with SessionBox. First, we will guide you through the process of setting up a single proxy in SessionBox, ensuring you understand how to configure and utilize this feature for enhanced browsing privacy and security. Following that, we will delve into the more advanced setup of batch proxies in SessionBox, providing instructions to efficiently manage multiple proxies simultaneously.
What is SessionBox?
SessionBox is a comprehensive tool designed for managing multiple web sessions simultaneously within a single browser instance. It operates as both a browser extension and a web application, providing robust features for users who need to handle various online identities or tasks concurrently without the need for multiple browsers or incognito tabs.
From a technical standpoint, SessionBox creates isolated browser environments, known as containers, for each session. These containers maintain separate sets of cookies, local storage, and cache, ensuring that data from one session does not interfere with another. This isolation is essential for activities such as managing multiple social media accounts, performing web testing, or conducting online research.
Before starting
To set up Webshare proxies on SessionBox, you will need an account on Webshare. To get started, visit Webshare, where we offer 10 premium proxies for free to new users, without the need for a credit card. Simply sign up for an account, and the proxies will be automatically assigned to you.
How to set up a single proxy in SessionBox?
Setting up a single proxy in SessionBox involves a series of straightforward steps. Follow these instructions to configure your proxy and ensure it is properly integrated:
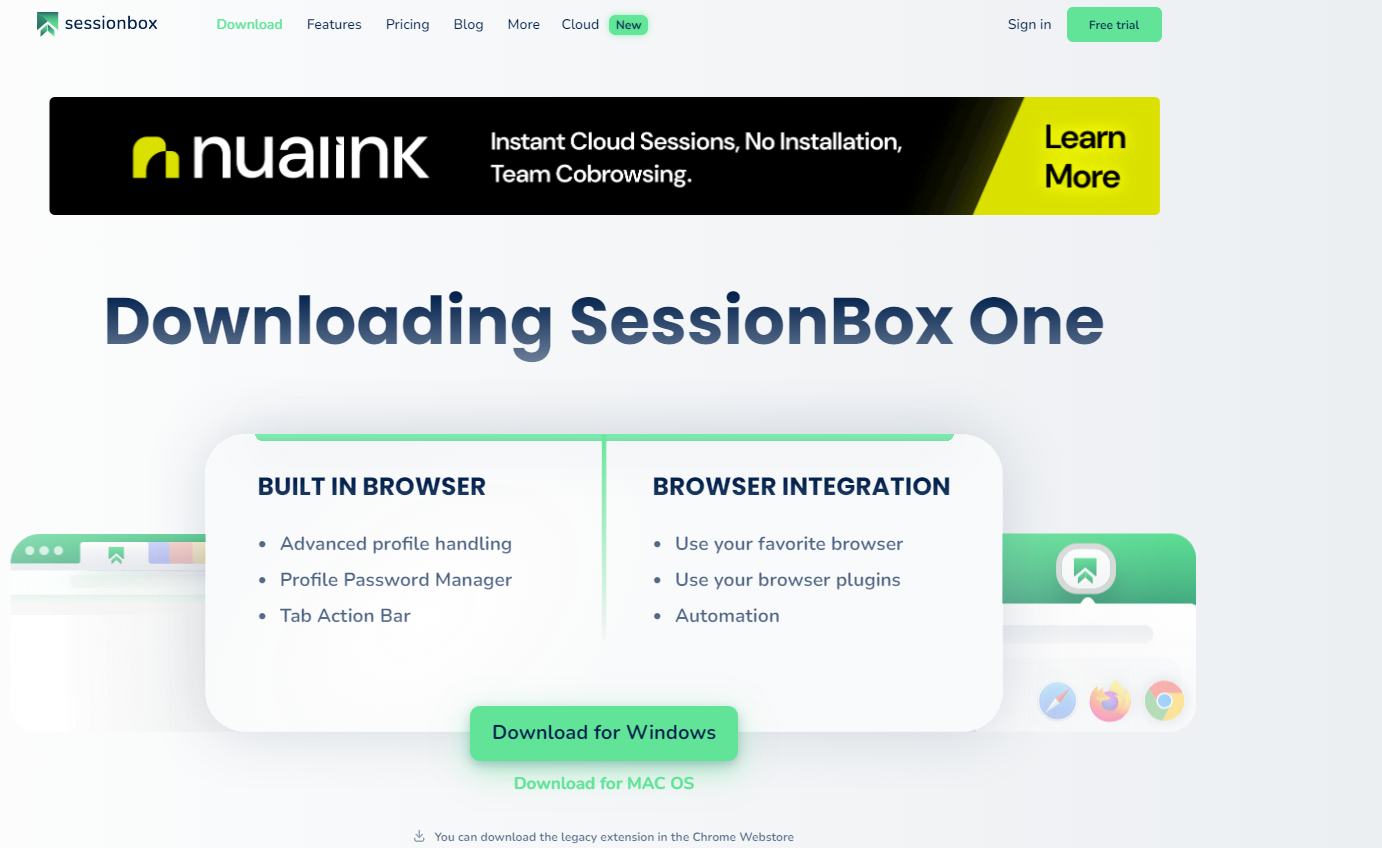
1. Download SessionBox
To get started with SessionBox, the first step is to download the application:
- Visit the SessionBox Website: Open your web browser and go to the SessionBox website. This is the official site where you can access the application download.
- Download the Application: Click on the download button to start the download process. Ensure you download the correct version compatible with your operating system.
- Install the Application: Once the download is complete, open the installer file and follow the on-screen instructions to install the SessionBox application on your device.
- Launch and Set Up: After installation, launch the SessionBox application. You will need to sign up for a new account or log in with your existing credentials to start using the app.
2. Create a profile
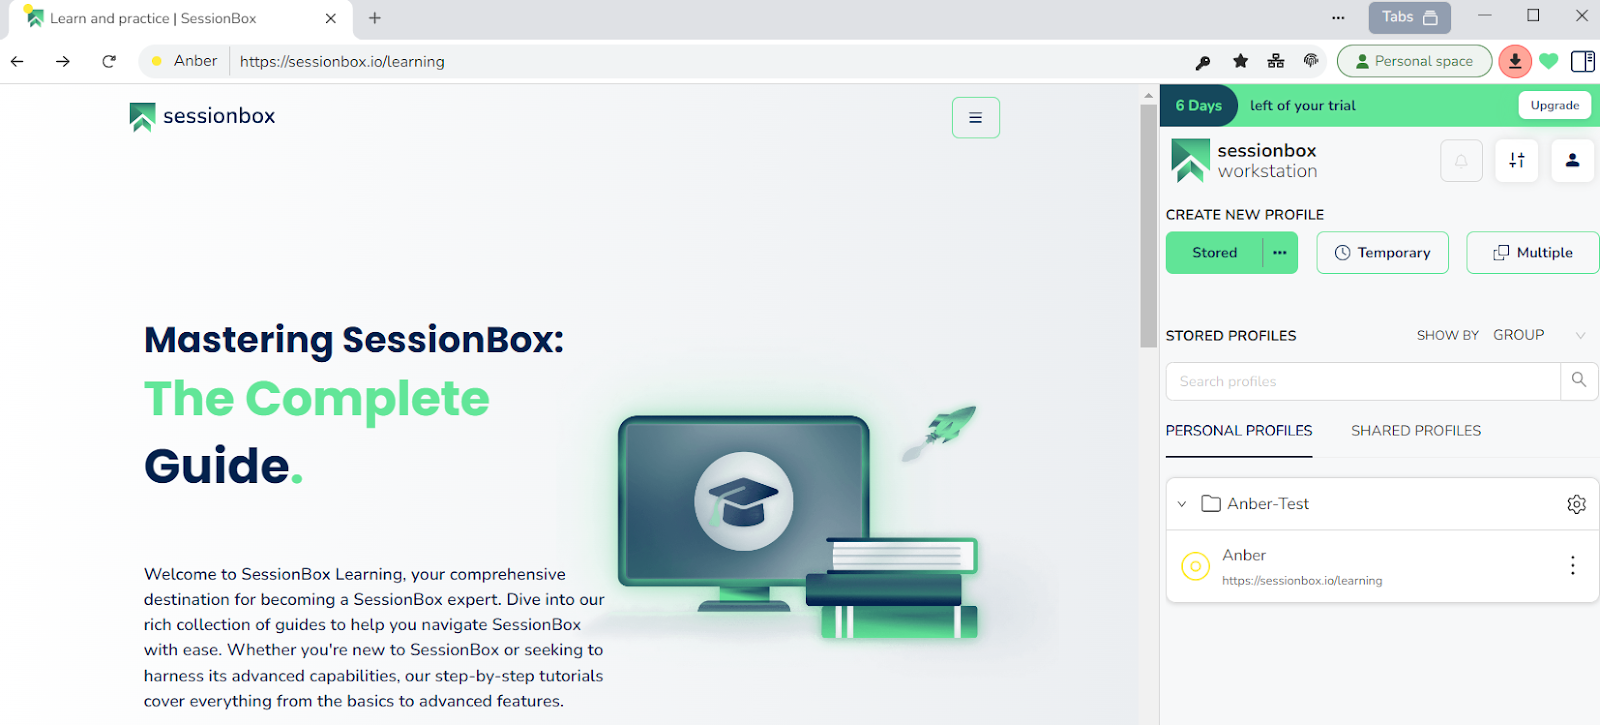
Creating a profile in SessionBox allows you to manage multiple browsing sessions with ease. Here’s how to create a new profile:
- Open SessionBox: Launch the SessionBox application on your browser.
- Navigate to Profile Creation: On the main screen, you’ll see the Create New Profile section. Here, you can choose between different types of profiles: Stored, Temporary, or Multiple.
- Select Profile Type:some text
- Stored: Click on the Stored button if you want to create a permanent profile that retains session data.
- Temporary: Select Temporary for a profile that will not save session data after closing.
- Multiple: Choose Multiple to create a group of profiles for simultaneous sessions.
- Name Your Profile: Enter a name for your profile in the provided field. This helps in identifying the profile easily.
- Manage Profiles: You can view and manage your created profiles under Personal Profiles or Shared Profiles. Each profile can be edited or deleted using the settings icon next to the profile name.
3. Add a proxy
To set up a proxy in SessionBox, follow these steps:
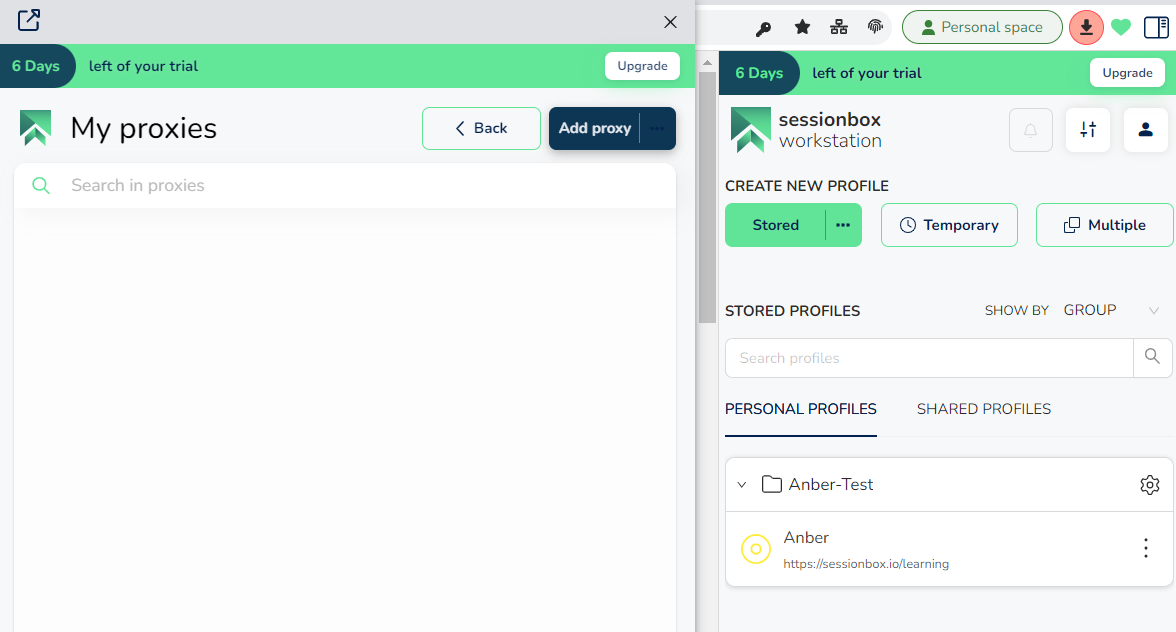
- Access the Proxy Manager: First, click the settings icon in SessionBox One to open the settings menu.

- Navigate to Proxy Management: Scroll down the settings menu and click on Manage proxies to access the proxy management interface.

- Add a New Proxy: Click the Add proxy button.
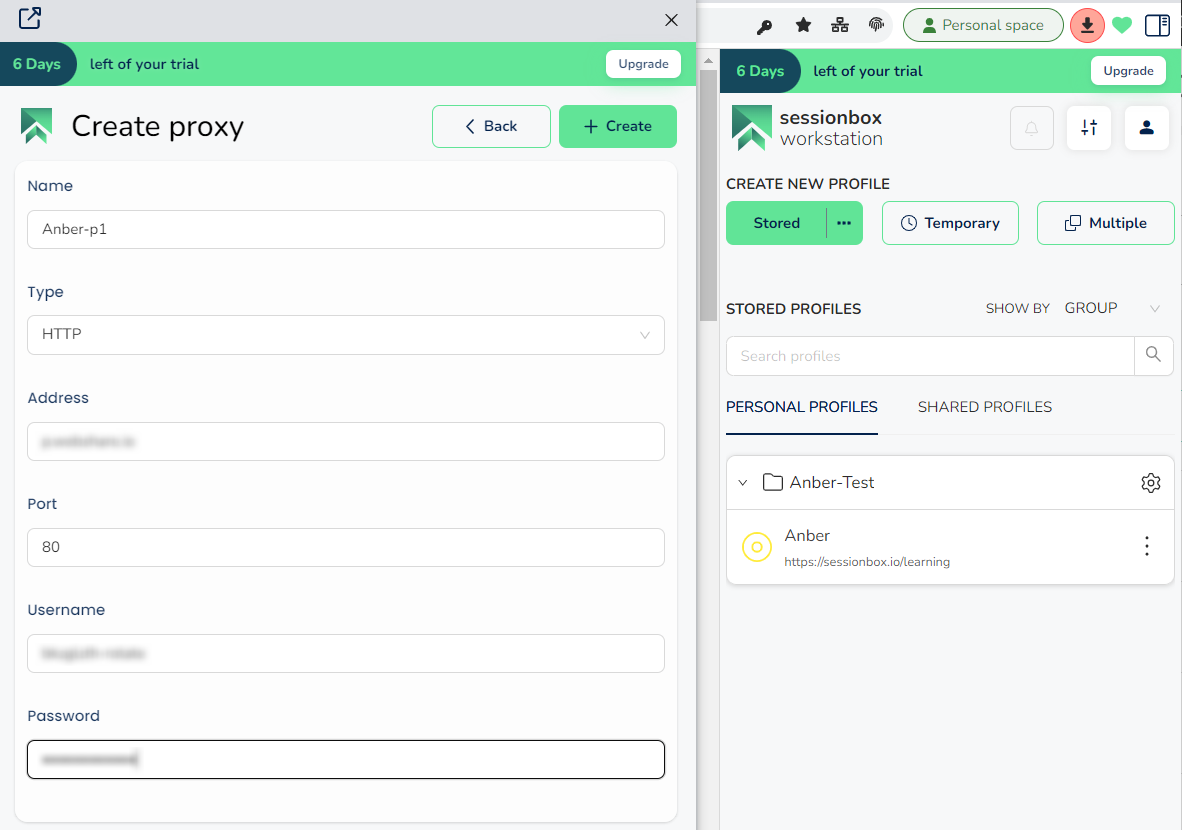
You will be prompted to enter several details for the proxy:
- Name: A label for identifying the proxy.
- Type: The type of proxy (e.g., HTTP, HTTPS, SOCKS5).
- Address: The IP address of the proxy server.
- Port: The port number for the proxy server.
- Username and Password: The authentication credentials for the proxy.
These details can be obtained from your Webshare proxy dashboard, where all necessary information for each proxy is provided. Access it by logging in to your account. Enter the required information and save the configuration to add the proxy to SessionBox.
4. Static IP Address Configuration
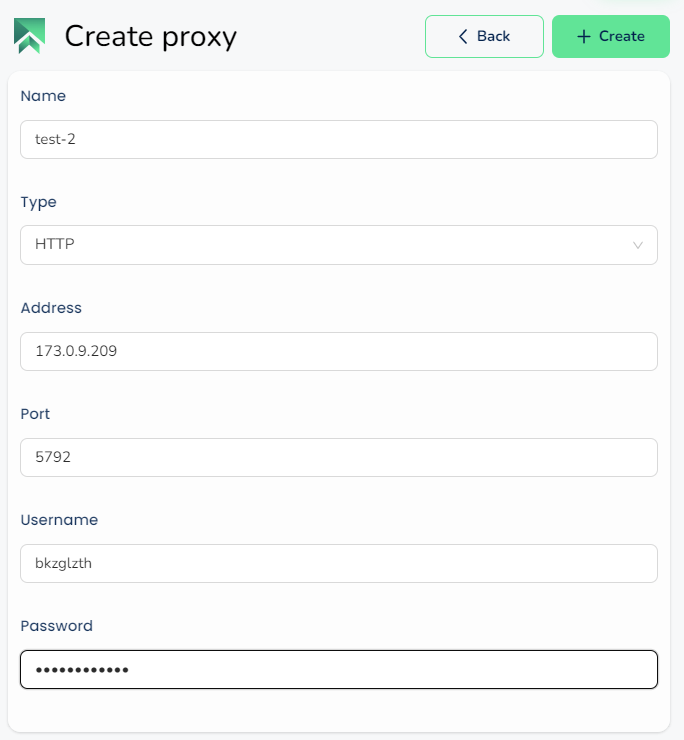
Static IP address proxies include Proxy server (datacenter proxies) and Static residential proxies. To set up a proxy connection, you will need specific information found on your account’s proxy list page.
- Proxy Type (Internet protocol): Select HTTP or SOCKS5.
- IP/Host: Enter the Proxy Address number provided in your account’s proxy list (e.g., 145.129.221.156).
- Port: Use the specific port number listed (e.g., 1122).
Example configuration for a static IP address proxy is as:
5. (Optional) Rotating IP Address Configuration
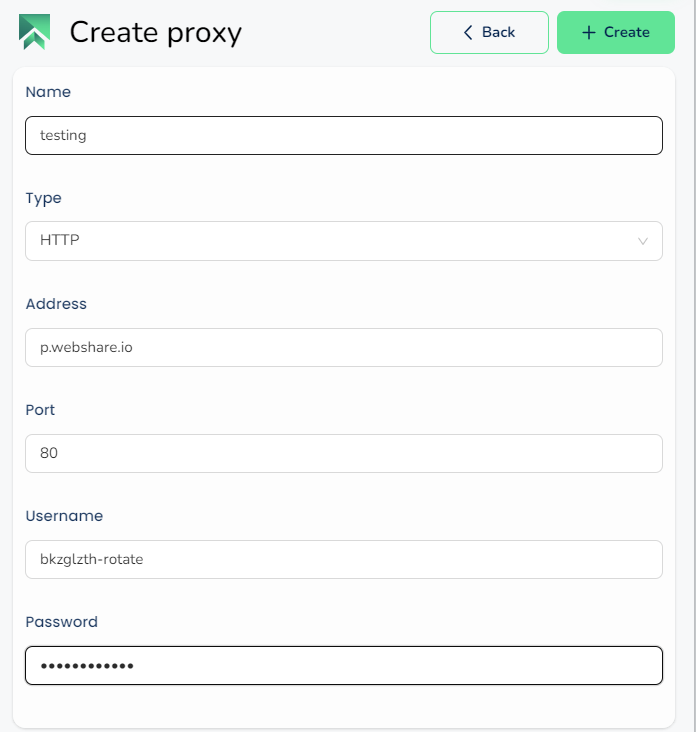
Rotating IP address proxies include Datacenter proxies and Residential proxies. These can be configured using the Rotating Proxy Endpoint available to all users.
- Proxy Type (Internet protocol): Select HTTP or SOCKS5.
- IP/Host: Use the domain name provided (e.g., p.webshare.io).
- Port: Enter the proxy port number (e.g., 80).
To use country-specific rotating IP addresses, configure the country settings on your Rotating Proxy Endpoint configuration page. Select your preferred countries by clicking the ‘Filter by Country’ button under Proxy Country.
Please note that changing your Proxy country will update your Proxy username field, which you will need to update in your settings.
Example configuration for a rotating IP address proxy is as:
How to set up batch proxy list in SessionBox
Setting up batch proxies in SessionBox is a straightforward process that allows you to import multiple proxies simultaneously. Follow these steps to add batch proxies efficiently:
1. Using the import proxy feature
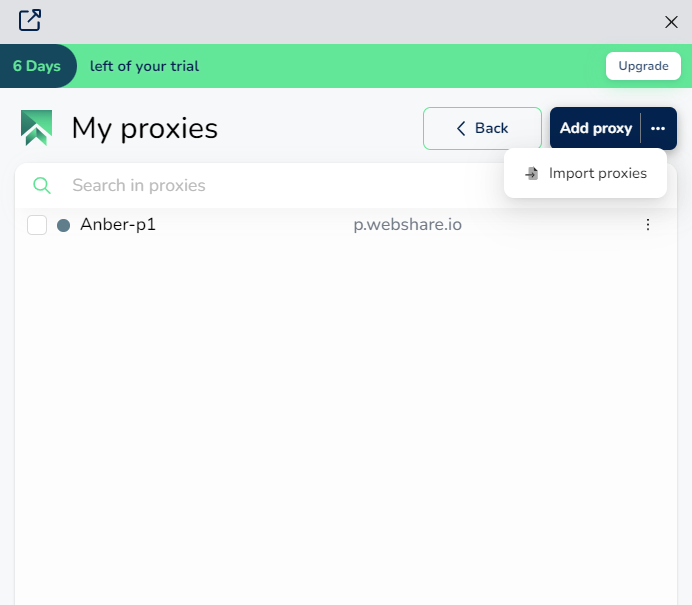
In the Manage proxies section of SessionBox, you can utilize the import feature to add multiple proxies at once. Click on the three-dot icon next to the Add proxy button and select Import proxy. This will open the batch import interface.
3. Importing proxies into SessionBox
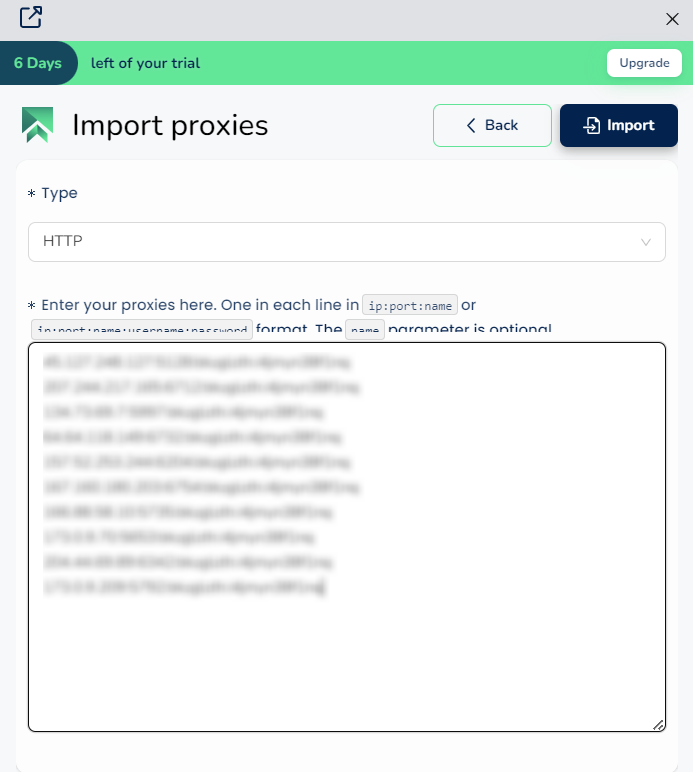
Once you have your proxy list ready, return to SessionBox to complete the import process. Select the appropriate proxy protocol in the import interface, paste your proxies into the provided text field, and click the Import button. This will add all the proxies from your list into SessionBox, allowing you to manage multiple proxies effortlessly.
4. Editing a profile to assign a proxy
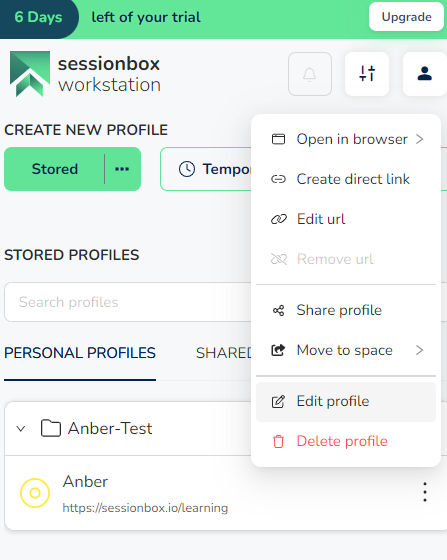
Return to SessionBox One controls, and click the three dots next to the profile you want to edit. Select Edit profile from the dropdown menu. This will open the profile settings for further customization.
5. Assigning a proxy to a profile
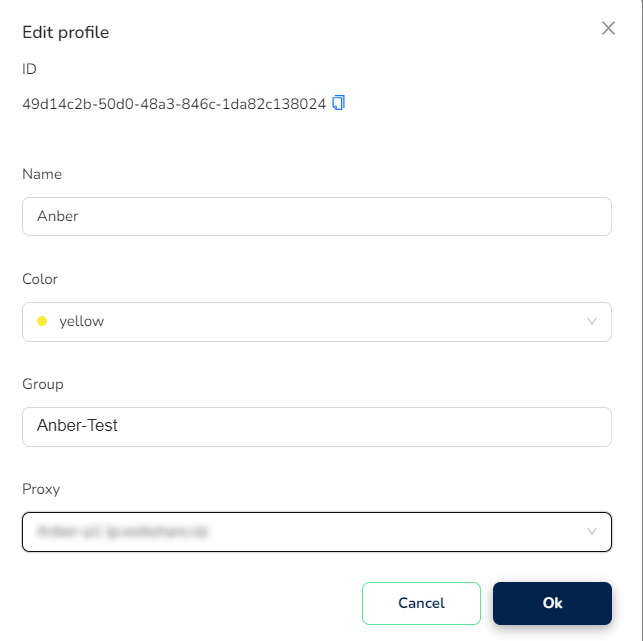
In the profile settings, click on the Proxy field. From the list of your imported proxies, select the one you wish to assign to the specific profile. Once selected, click Ok to save your settings and apply the proxy to the profile.
6. Verifying proxy functionality
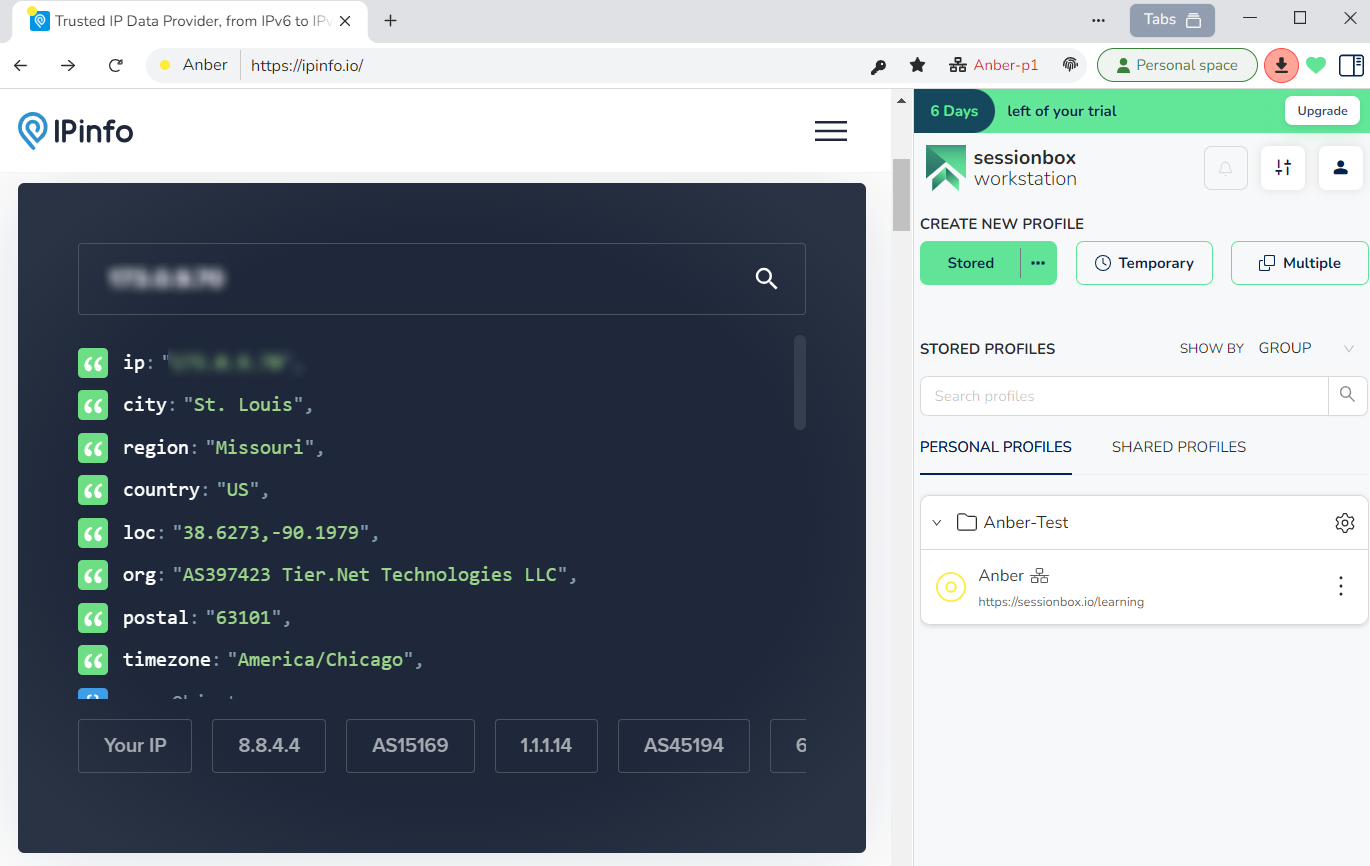
To ensure that your proxy is working correctly, visit an IP-checking website. This will help you confirm that your IP address matches the proxy you have assigned, verifying that the proxy is properly configured and functioning as expected.
Wrapping up: Proxy Setup in SessionBox
The single proxy setup provides granular control over individual browsing sessions, while the batch proxy configuration streamlines the process for managing multiple profiles simultaneously. These methods enable precise proxy management, enhancing both security and operational efficiency across various use cases. Don't forget that you can start completely for free with Webshare!


