Temu is an online marketplace that offers a wide range of products at affordable prices, and especially in the past few years it has become a very popular destination for online shoppers around the world. But despite its prevalence some people might not be able to access the service without the use of a proxy server, so in this article we are going to dive into the steps required to set up a proxy service on your browser or device.
Before starting
While the proxy functionality has been built-in to most devices and applications, the actual proxy servers are something that one needs to gather before being able to use them. There are both free and paid proxies available online, and they may differ significantly in terms of performance, security and reliability.
Without endorsing any specific supplier, you can use your favorite search engine to look up proxy servers, and maybe use social media to verify the legitimacy of those services. Once you have found your proxy servers, you will need to keep track of a few important pieces of information: the URL address of the server, the port number and potentially any credential information, such as username and password. With this information at hand, you are ready to set up the proxy server connection in your browser or device with the steps outlined below.
Easiest method: Temu Proxy for Chrome
The simplest way to use a proxy server is to just configure one in your own browser. This way only the traffic from the browser is routed via the proxy server, leaving all the rest untouched. Configuring the proxy settings in Chrome is easy by using the Webshare Chrome proxy extension.
1. Open the link to Chrome web store and click on Add to Chrome
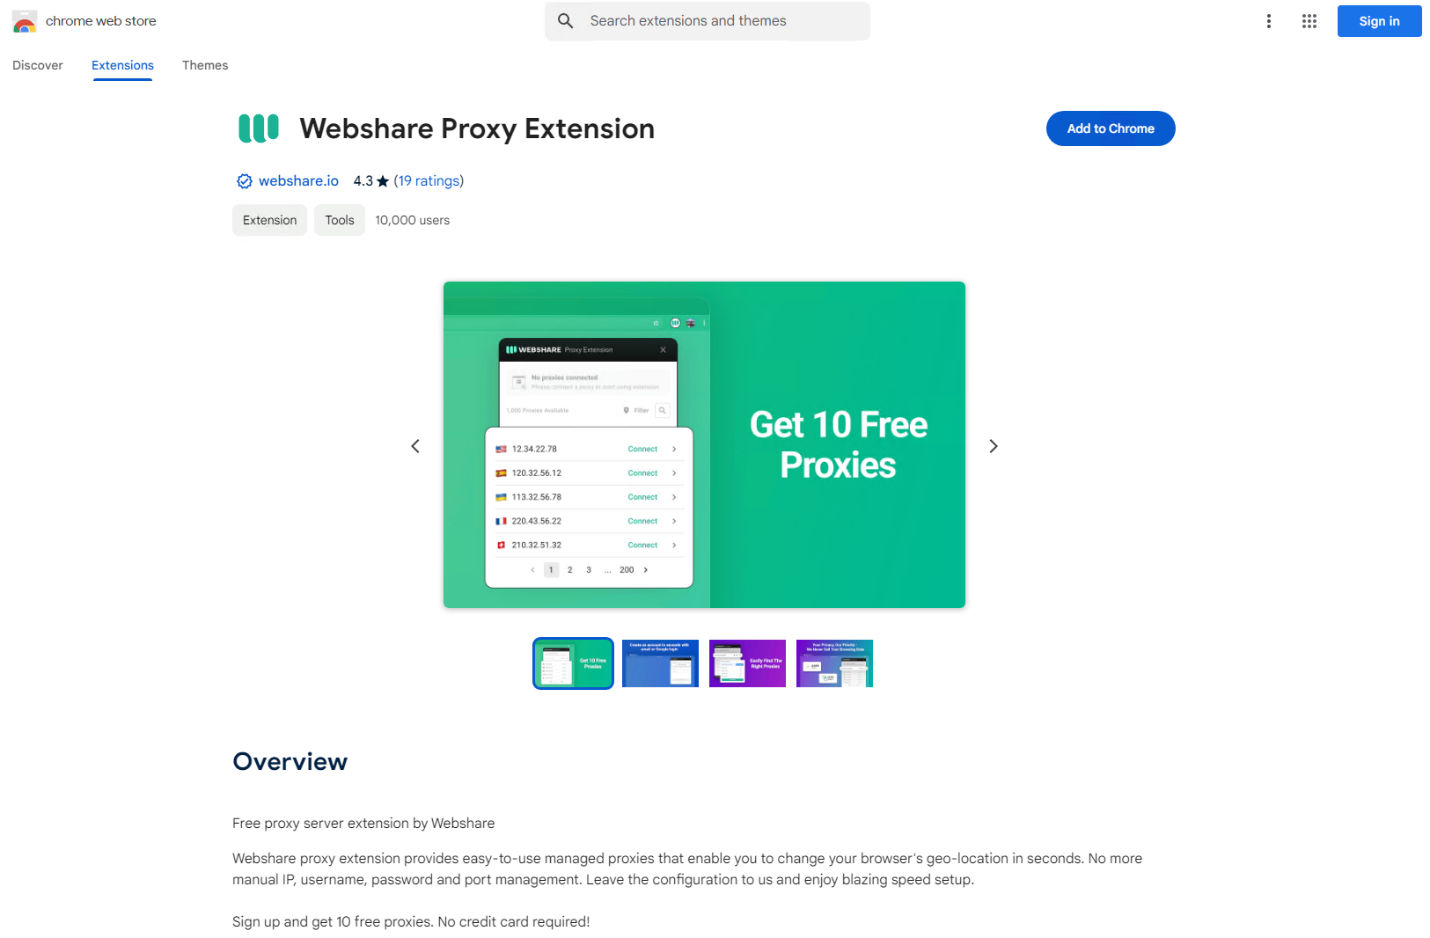
2. Click Add Extension
3. After the extension is installed, click on the puzzle piece in the tool bar to show extensions, and click the pin icon next to Webshare proxy extension
4. Open the extension and click on Create account to either use your existing Google account or to create a new one with your email address
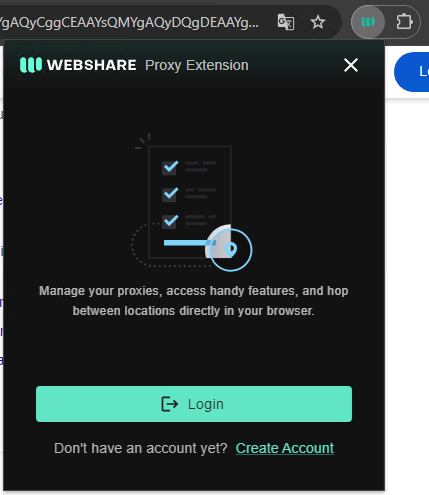
5. Once you sign up you get 10 free proxies to use with the extension
6. Click on Connect next to any server on the list
Temu proxy for Windows instructions
If you wish to route all your traffic via the proxy server, you can configure it using your operating system's built-in features.
1. Look up Proxy Settings under Network & internet in System settings

2. Click Set up under Manual proxy set up
3. Enable the proxy server, and enter the proxy IP address and port number
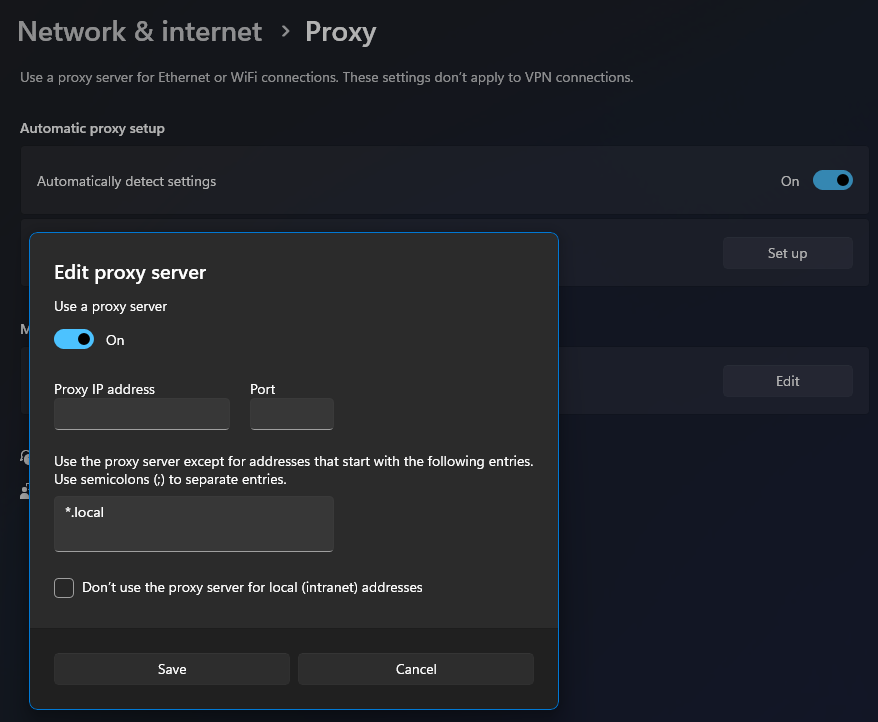
4. Click Save
If you get prompted for username and password, you can access them at your Webshare dashboard proxy list.
Temu proxy for Android instructions
While these steps can differ a little depending on what Android device you are using, typically you can configure a proxy server on an Android device by doing the following:
1. Open Wi-Fi settings
2. Select the Wi-Fi network you are using and tap on the gear icon
3. Tap View more and scroll down to see the proxy settings
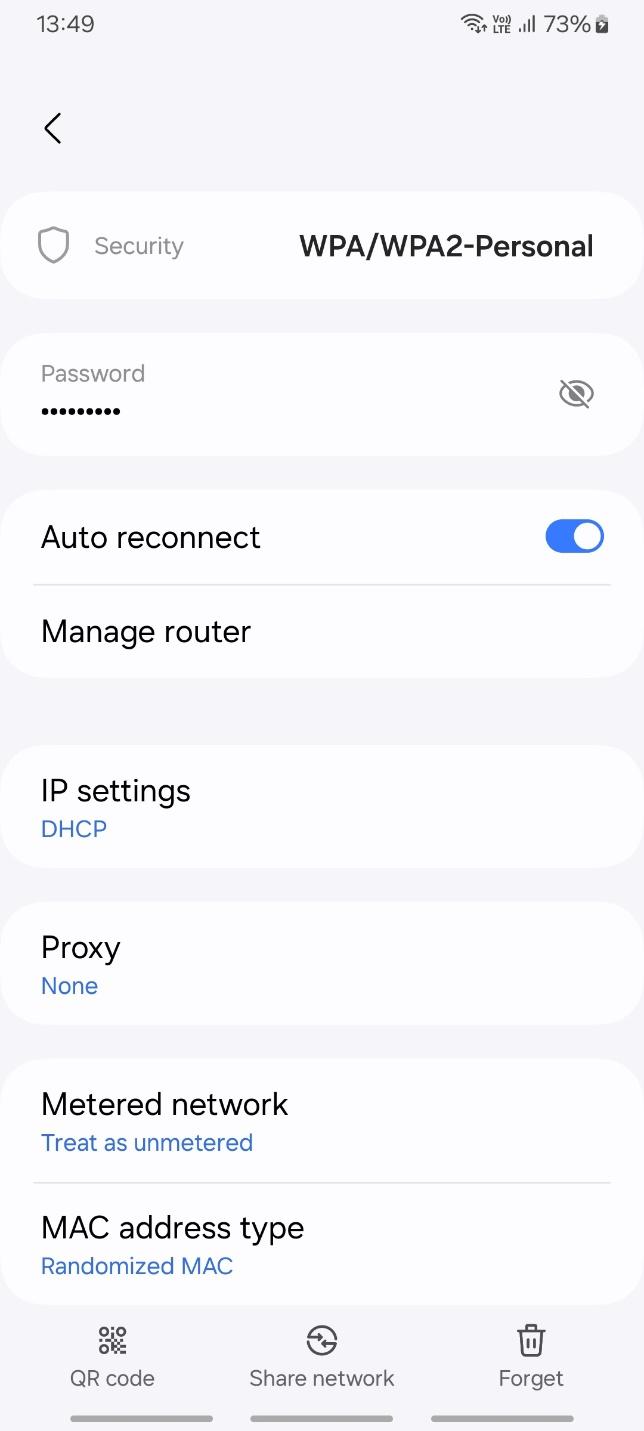
4. Tap Proxy and choose Manual to see the fields for the proxy address and port
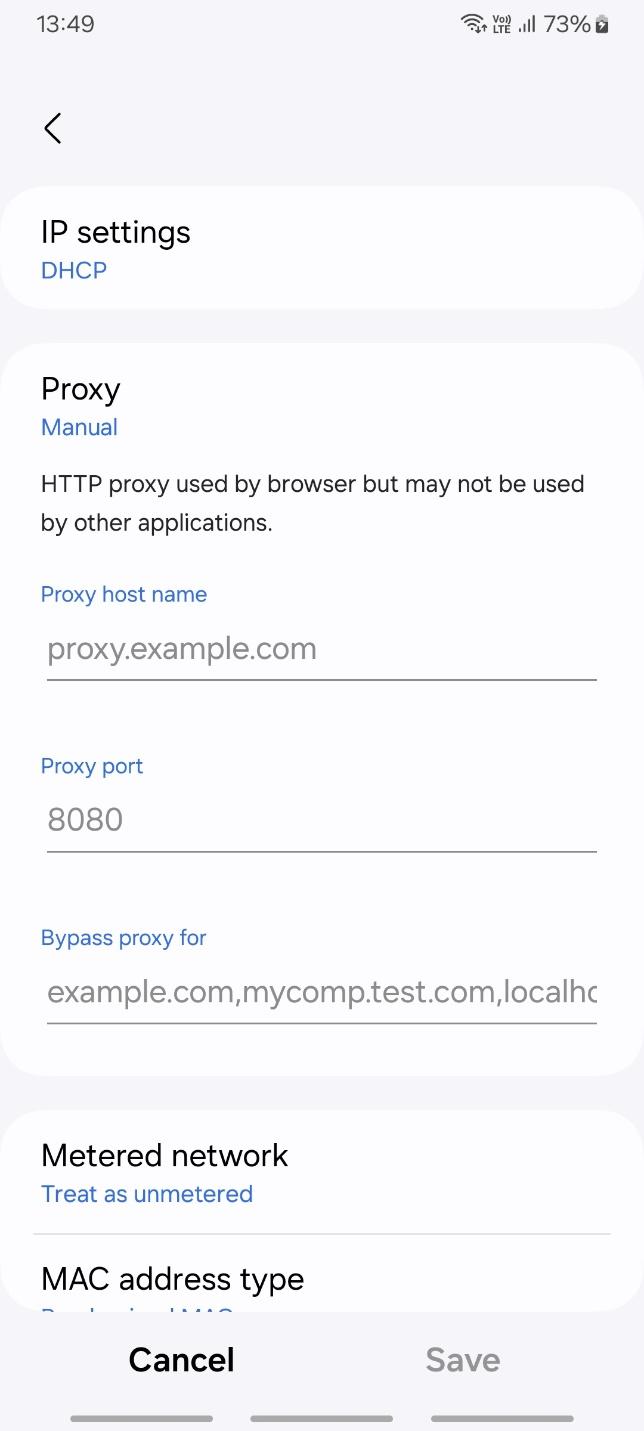
5. Enter the details and tap Save
If you get prompted for username and password, you can access them at your Webshare dashboard proxy list.
And that's it! You're set up to browse Temu under a proxy.


