

Get 10 Free Proxies For Ticketmaster
Ticketmaster is one of the largest online marketplace to buy tickets to concerts, theater shows, and more. It partners with event organizers to sell tickets worldwide. Despite its reliability, Ticketmaster has strict purchase limits and high demand for popular events.
Many people use proxies to bypass Ticketmaster’s restrictions. Ticketmaster proxies help end users avoid purchase limits, prevent IP bans, and increase their chances of securing tickets. However, Ticketmaster has advanced security measures to detect and block bots and low-quality proxies. To stay undetected, users must use high-quality proxies.
This article explains how to set up and use ticketmaster proxies, the types of proxies that work best, and how to test if your proxy is working properly.
Before starting
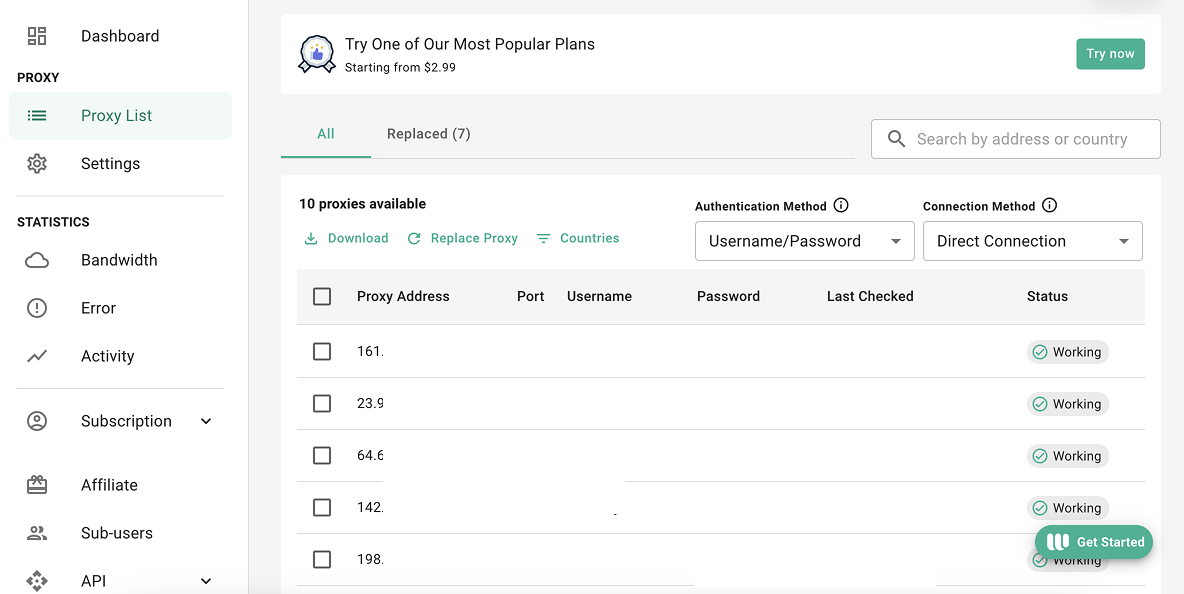
The first thing you should do is find some free proxies to be used as ticketmaster proxies. Among the many providers, Webshare is a good place to obtain proxies. They provide up to 10 free proxy servers once you create an account with them. You don’t need to share your credit card details to access the free proxy details.

To get started, visit Webshare and create an account. Once registered, navigate to the "Proxy List" section from the left-hand menu. There, you will find all your proxy details.
Easiest method: Ticketmaster proxy for Chrome
Using Webshare Proxy is one of the easiest methods to access Ticketmaster with a different IP address.
Step 1: Install and open the Webshare Proxy extension
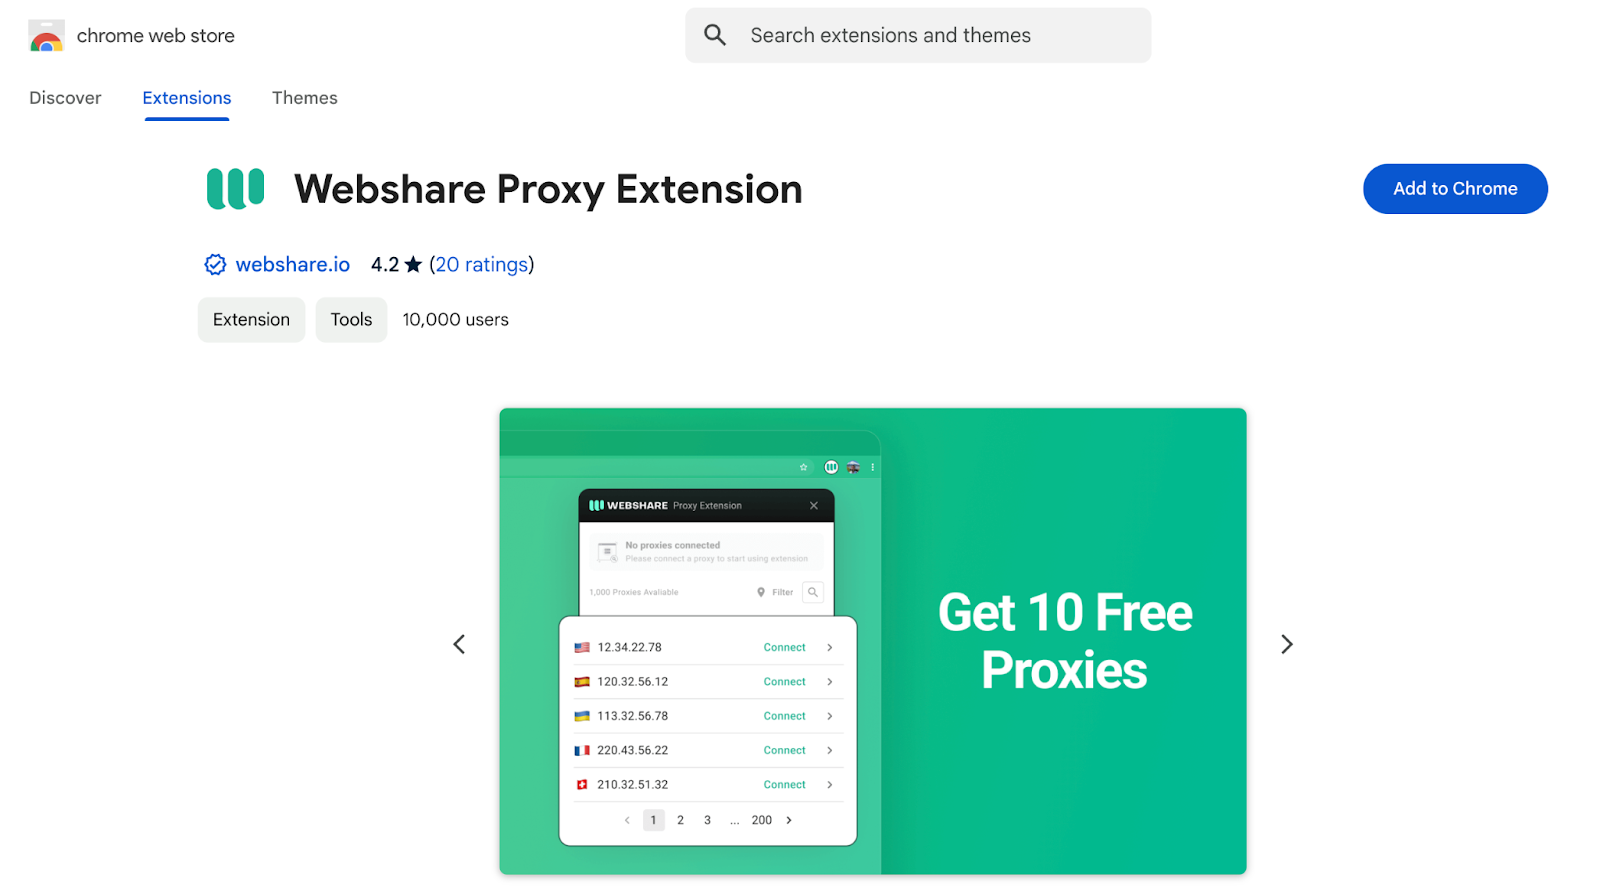
Before you can use a proxy, you need to install the Webshare Proxy Extension for Chrome.
Visit the Webshare Chrome proxy extension page and click “Add to Chrome.”
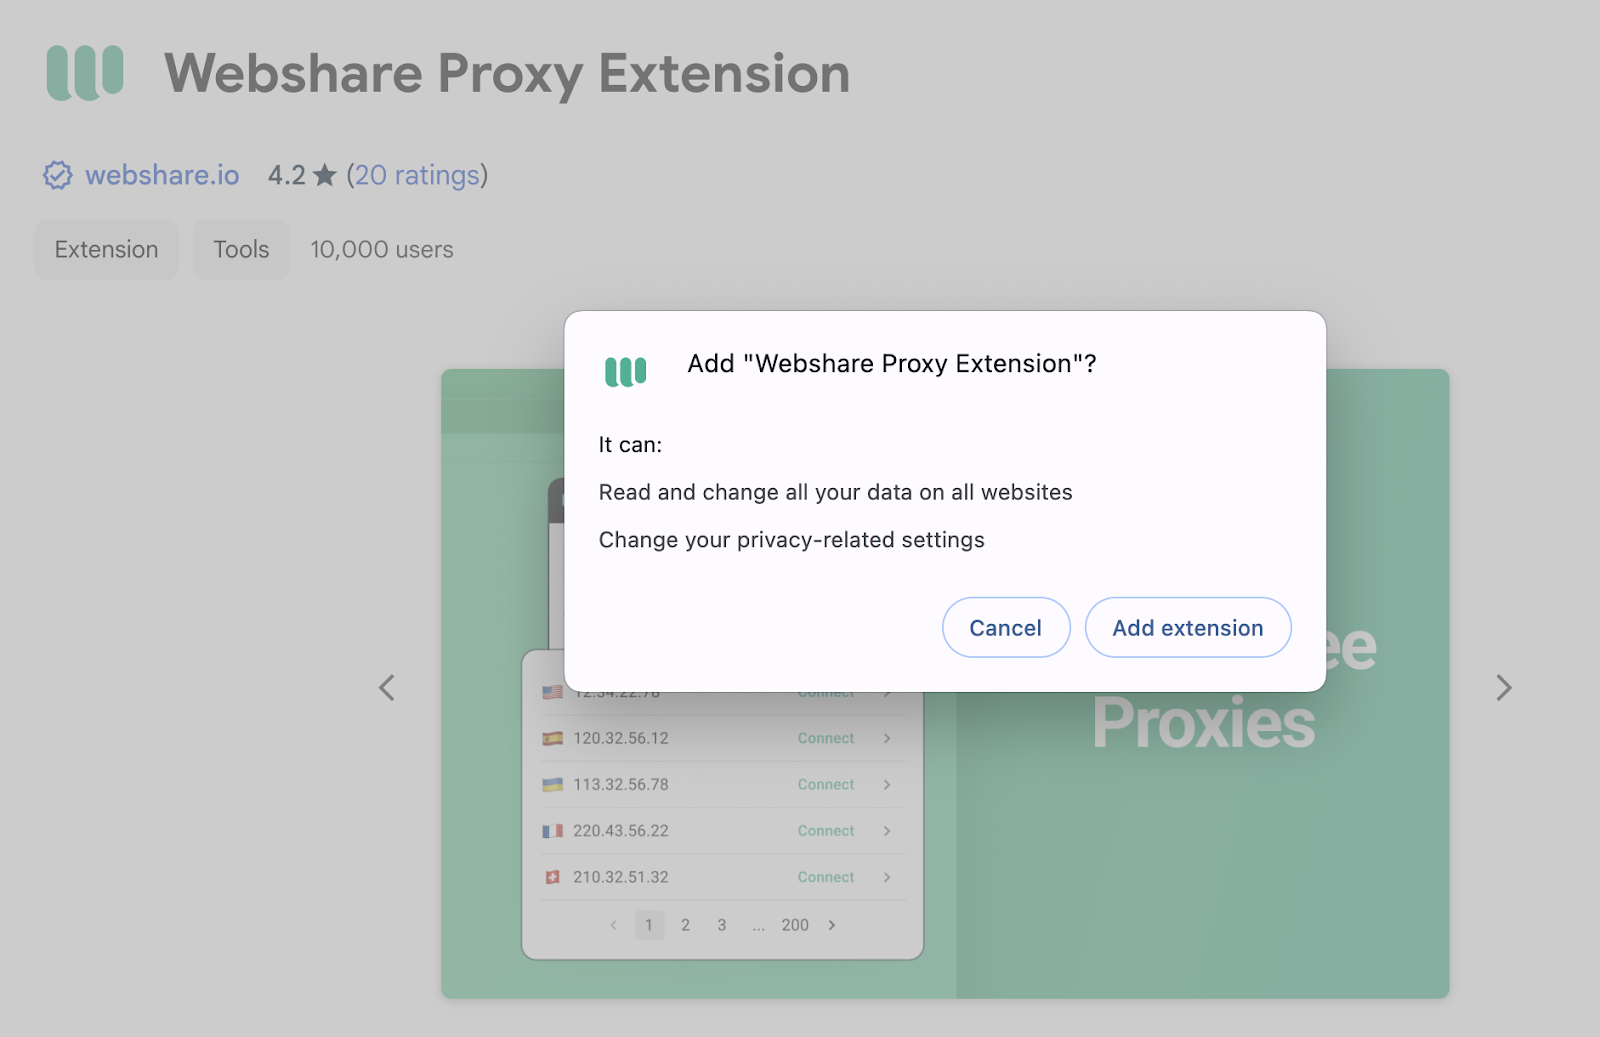
This will open a confirmation popup. Click “Add extension” to finish the installation.
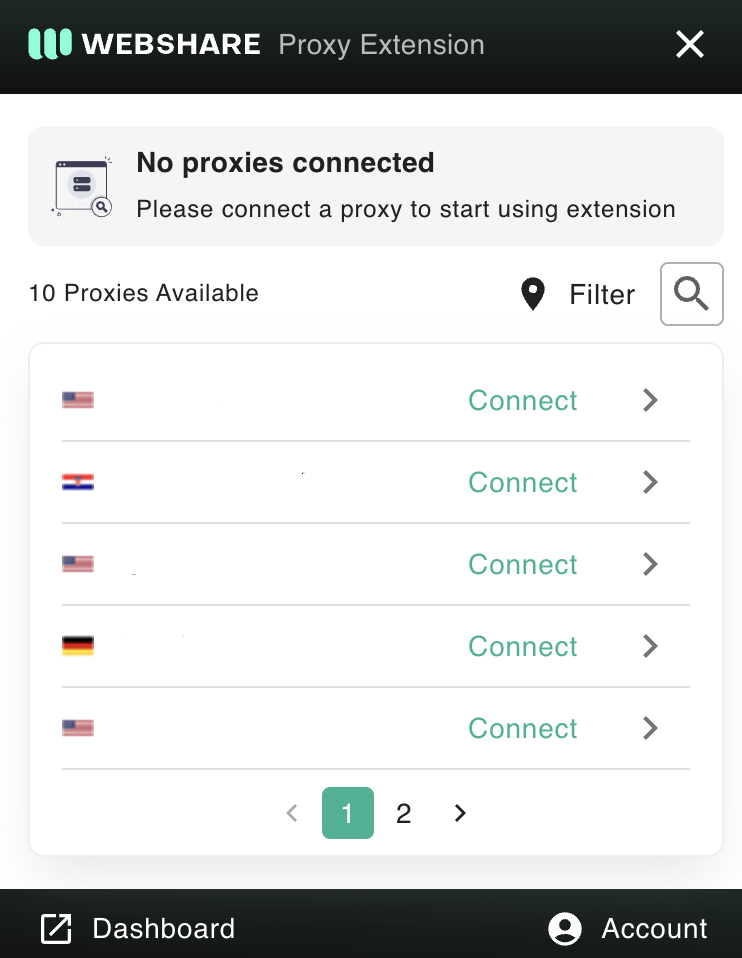
Once installed, locate the Webshare icon in the extension toolbar and click on the extension icon to open it.

Step 2: Log in and connect to a proxy
Now that the extension is installed, it’s time to log in and activate a proxy.
If you are already signed into your Webshare profile in Chrome, you won’t need to log in again. Otherwise, enter your Webshare username and password to sign in.
After logging in, the extension will display a list of available proxy servers from your Webshare account.
Browse the list and pick a proxy that you prefer.
Click “Connect” to start and use the proxy.
When you browse the internet, your Chrome browser will use the selected ticketmaster proxies.
Ticketmaster proxy for Windows instructions
You can configure Ticketmaster to use a proxy on your Windows PC through the system settings.
Step 1: Access Windows Proxy Settings
Access the proxy settings on your Windows system.
In the Windows Start Menu search bar, type the keyword "Proxy Settings".
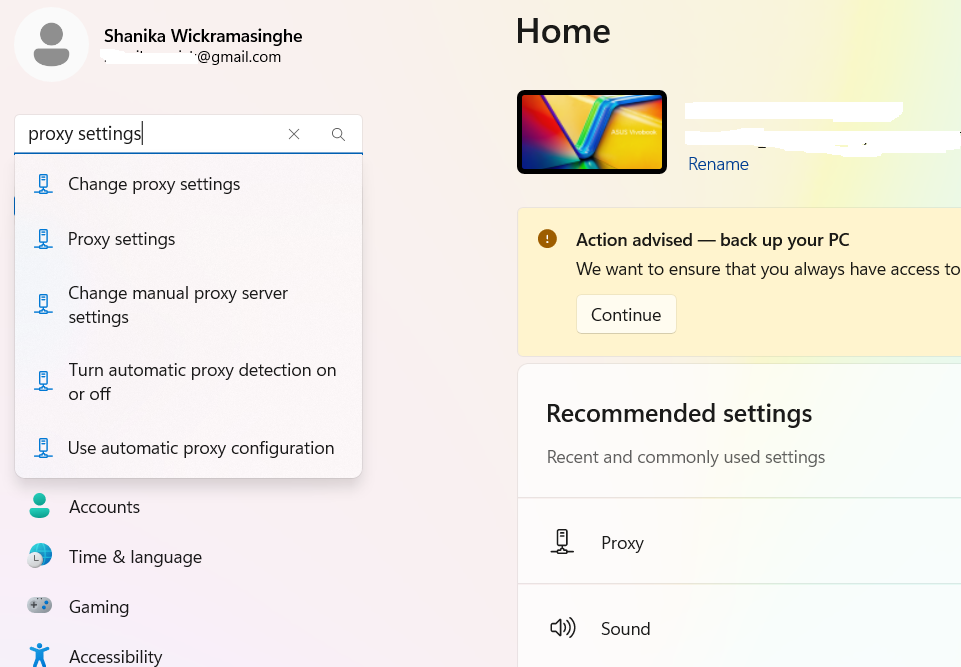
Select the Proxy Settings option to see the configuration window.
In this window, you will find two options.
- Automatic Proxy Setup - This helps Windows to detect and configure proxy settings automatically.
- Manual Proxy Setup - You need to enter the proxy details manually. This is the recommended approach.
Step 2: Configure and Apply Proxy Settings
Let’s manually enter the proxy details.
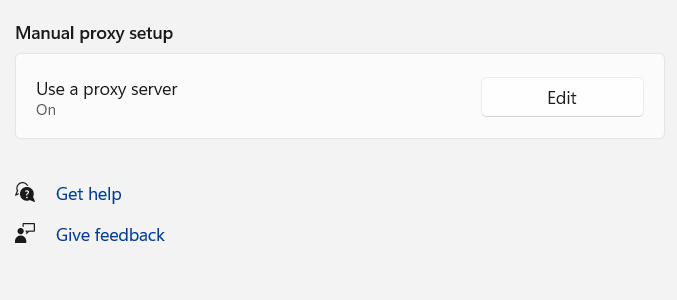
Go to the section Manual Proxy Setup and turn on the "Use a proxy server" option.
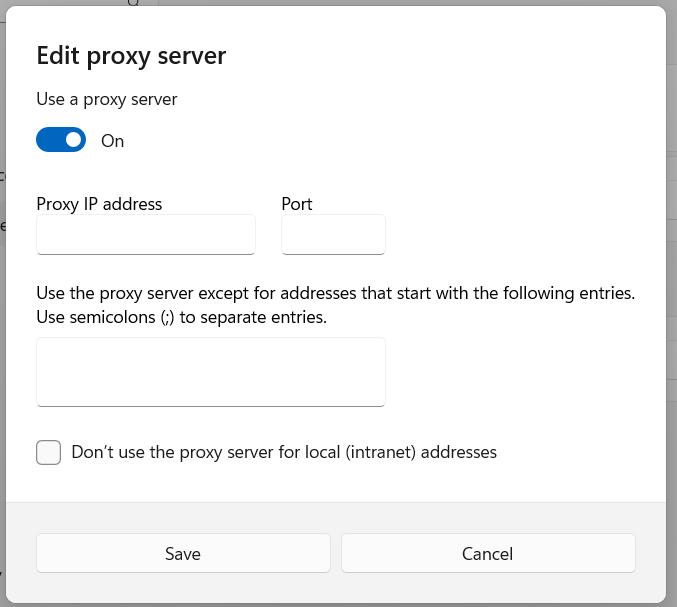
Enter the proxy server hostname or IP and port provided by your proxy service provider.
Add the proxy addresses in the bypass field if you want certain websites to be accessed without using the proxy.
Tick the checkbox "Don’t use the proxy server for local addresses." to maintain local network access.
Click "Save" to update the changes.
Your Windows PC is now using the selected proxy.
Ticketmaster proxy for Android instructions
The method for configuring a proxy on your Android device depends on whether you're using Wi-Fi or mobile data.
Step 1: Access Wi-Fi Proxy Settings
To set up the proxy, you need to access the network settings on your Android device.
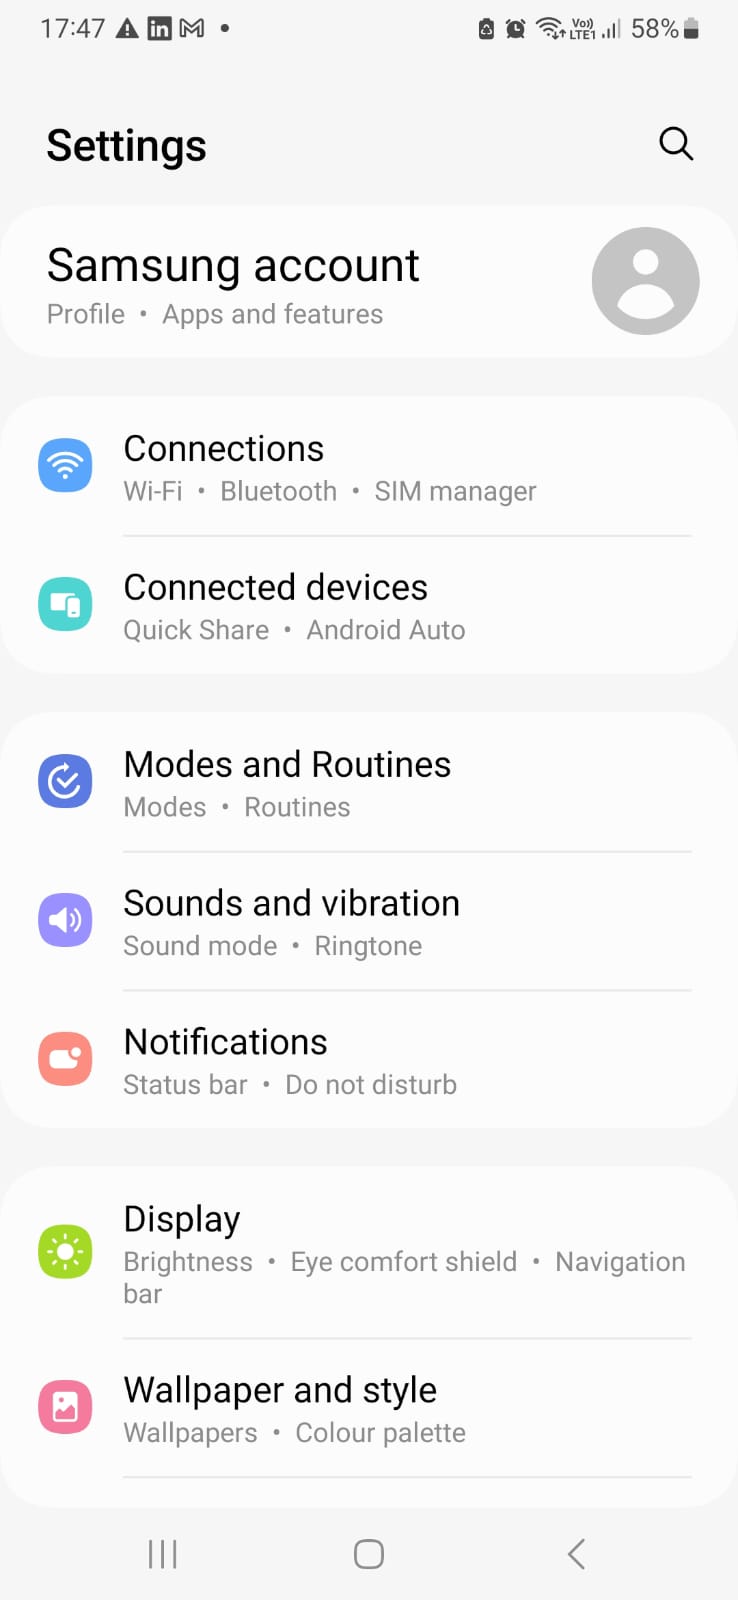
Access the Settings app and navigate to "Connections" (or "Wi-Fi"- This might depend on your device).
Identify the Wi-Fi connection you are connected to or wish to configure.
Press and hold the network name until additional options appear.
Tap the "Settings" icon.
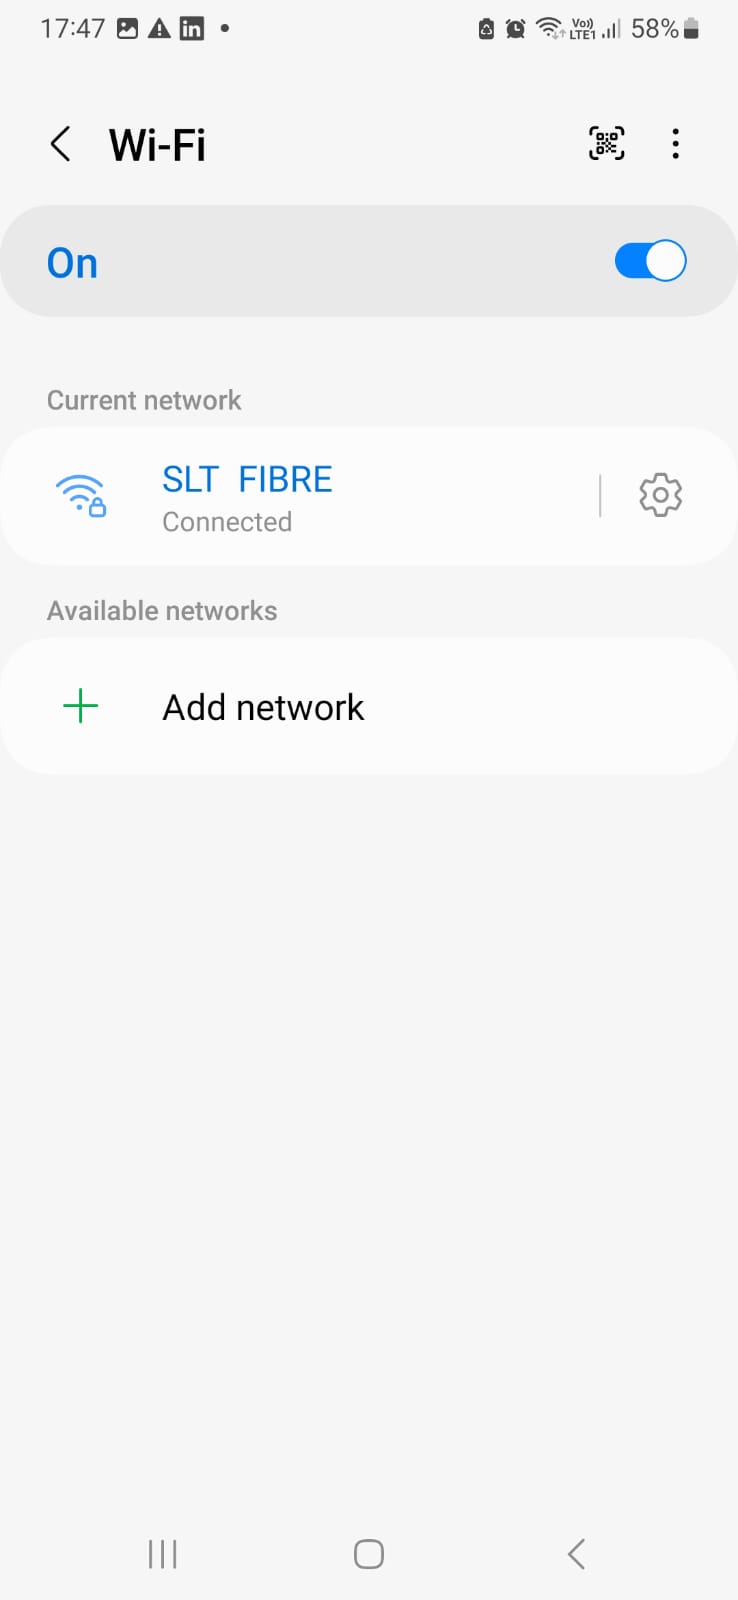
Scroll down and select "View more" to expand advanced settings.
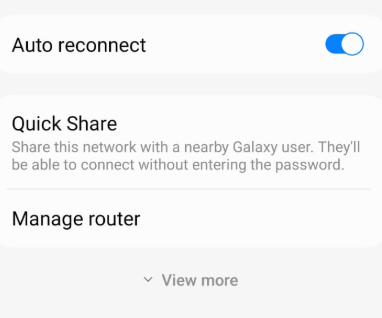
Step 2: Enter Proxy Details and Apply Settings
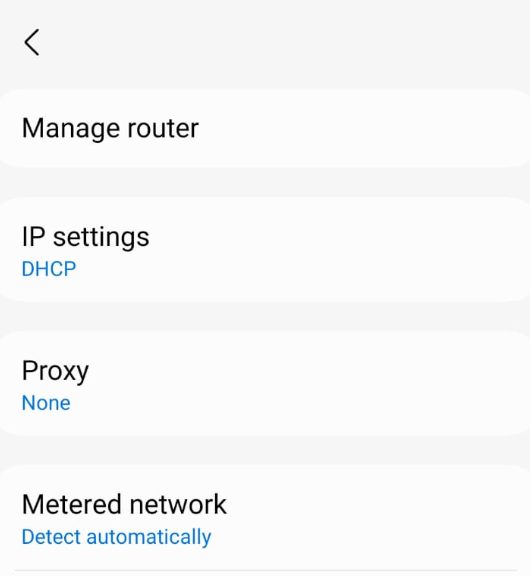
Tap the "Proxy" option, where you will see three choices.
- None - No proxy is used.
- Manual - Allows you to enter proxy details manually.
- Proxy Auto-Config - Automatically detects proxy settings.
Select "Manual" and enter the proxy server address & port provided by your proxy provider.
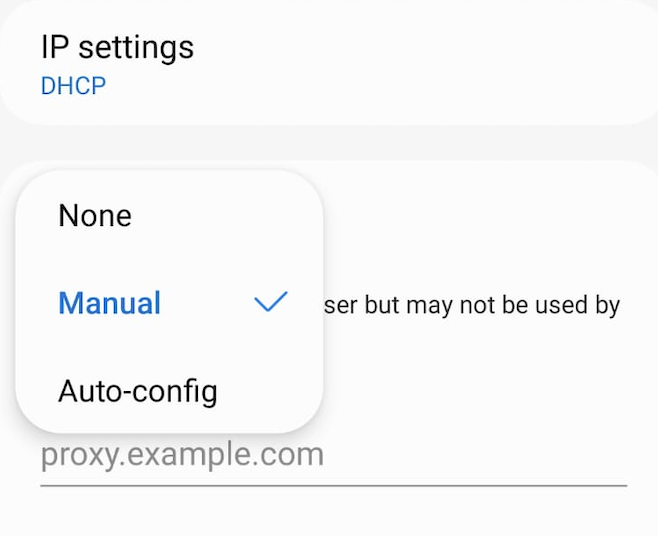
If you need certain websites to bypass the proxy, input their addresses in the "Bypass proxy for" field. Multiple addresses should be separated by commas (e.g., proxy1.com, proxy2.com).
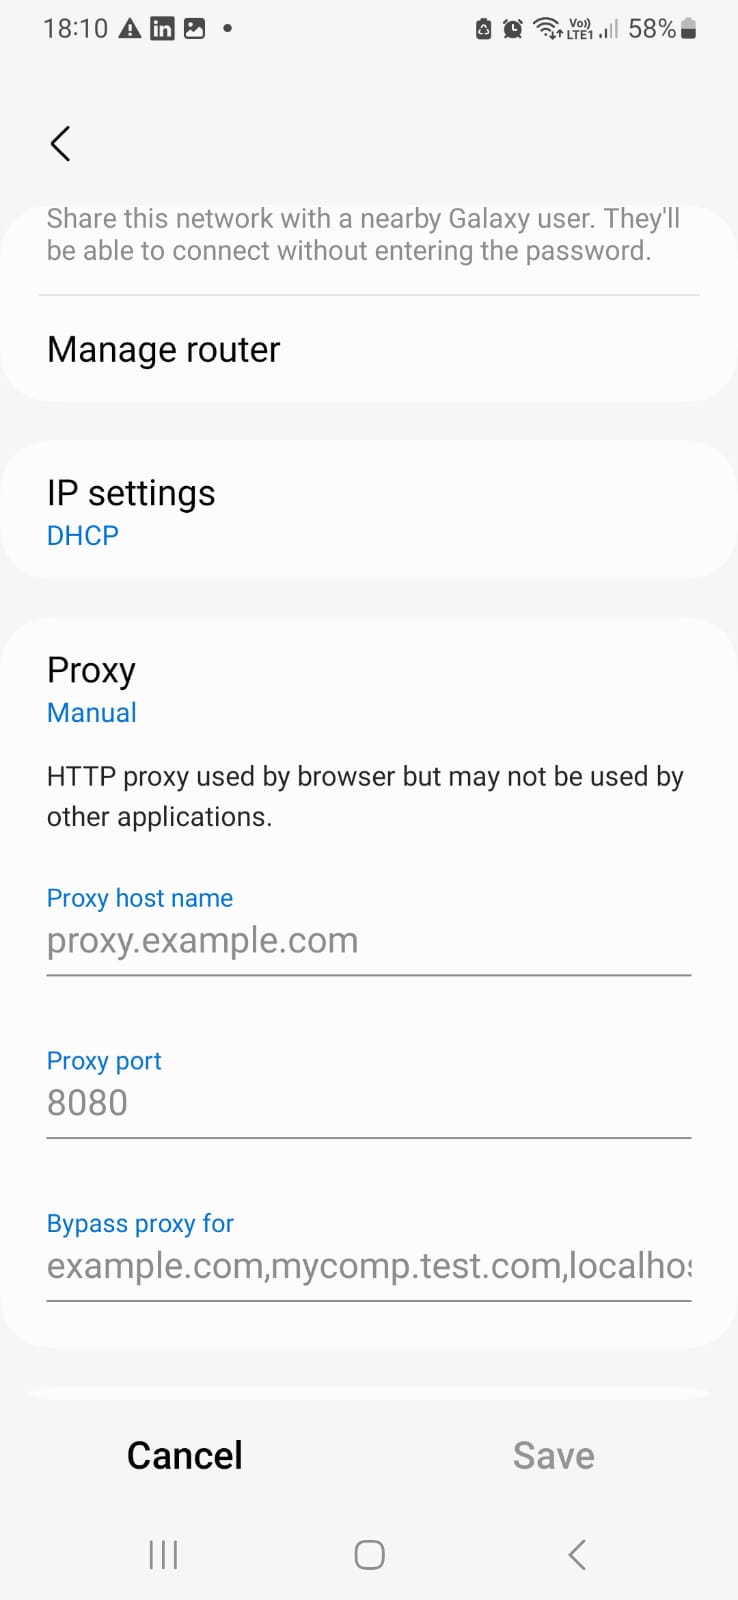
Double-check all the details and tap "Save" to apply the settings.
Your device will now route all traffic through selected Ticketmaster proxies whenever you are on this Wi-Fi connection.
How to test Ticketmaster proxy?
It’s important to verify that the configured proxy is working correctly. Let’s check on two simple methods to check if your proxy is active.
1. Test the Proxy Using the Ping Command
One way to check if your proxy is active is by using the ping command.
Start the Command Prompt or Terminal.
Type the following command.
ping <proxy_host>
If the proxy is working, you will receive a response with details like latency and response time.
2. Use an Online IP Checker
Another quick way to confirm that your proxy is working is by checking your IP address online.
Open a web browser and visit an IP checker website (e.g., "What is my IP").
Without a proxy, the site will show your real IP address and location.
Activate your proxy and refresh the page. If the IP address changes, it means the proxy is working correctly.
How to turn off Ticketmaster proxy?
You can turn off the proxy by following these steps.
1. Disable Proxy in Chrome
- Click on the Webshare Proxy icon in your browser toolbar.
- Select the “Disconnect” option and click it to disable the proxy.
2. Turn Off Proxy on Windows
- Open the Windows Start Menu.
- Next, search for the keyword “Proxy Settings.”
- Click on the search result to access the Proxy Settings window.
- To disable Automatic Proxy Setup, switch off both the settings “Automatically detect settings” & “Use setup script.”
- To disable the Proxy Setup, you have to toggle off “Use a proxy server.”
3. Remove Proxy on Android (Wi-Fi)
- Go to the Settings app and go to Wi-Fi.
- Find the Wi-Fi network where you had set up the proxy and tap on it.
- Tap the “Settings” icon & select “View more” to access advanced settings.
- Select “None” to switch off the proxy under the field “Proxy”.
What is the best proxy to use with Ticketmaster?
The most suitable proxy for Ticketmaster can differ based on your purpose. Different proxy types serve different needs.
For Day-to-Day Browsing
If you’re using a proxy simply to access Ticketmaster without restrictions, then a static residential proxy is a great option. These proxies provide a reliable connection and are less likely to be detected or blocked by websites.
For Automated Tasks
If your goal is to automate processes (eg:- check ticket availability, monitor prices), a data center proxy can be a good choice. These proxies provide fast speeds and a large pool of IPs.


