


TikTok's popularity knows no bounds; however, not everyone enjoys the same experience. Huge factors like content limitations, regional restrictions, and privacy concerns can affect how users interact with the platform.
This is where a proxy comes in. By routing your connection through a different server, a proxy allows you to bypass restrictions and even improve loading speeds. However, setting one up isn’t always straightforward. In this guide, we’ll walk you through everything you must know to use a proxy with TikTok effectively.
Before starting
To use a proxy with TikTok, you need to secure a reliable proxy service first. Your choice of proxy will determine how smoothly you can bypass restrictions and maintain privacy. If you’re looking for a quick and hassle-free option, Webshare should be your go-to, as it offers 10 free proxies to new users upon registration.
What’s more, no credit card info is required to claim your free proxies. You only need to visit the Webshare website and create an account, and you will receive your proxy credentials instantly. With your proxy ready, the next step is setting it up on your device.
So, whether you are using TikTok on Chrome, Windows, or Android, we will walk you through the process to ensure a seamless and unrestricted experience.
Easiest method: TikTok Proxy for Chrome
If you use TikTok on Chrome and need a simple way to connect through a proxy, a browser extension can make the process easy. Webshare offers a dedicated extension that streamlines proxy configuration, eliminating the need for manual settings.
Below are the steps involved for a Chrome setup:
Step 1: Install the Webshare Chrome Extension
Head to the Chrome Web Store and search for the Webshare extension. Click Add to Chrome, then confirm installation when prompted. Within seconds, the extension will be ready to use, allowing you to set up your proxy details with just a few clicks.

Step 2: Access the Extension and Create an Account
Your installed extension might not appear immediately in your browser’s toolbar, even after a successful connection. No worries. For easy access, simply click on the puzzle-shaped Extensions icon in the top-right corner of Chrome. Find Webshare in the list and select the pin icon to keep it visible at all times.
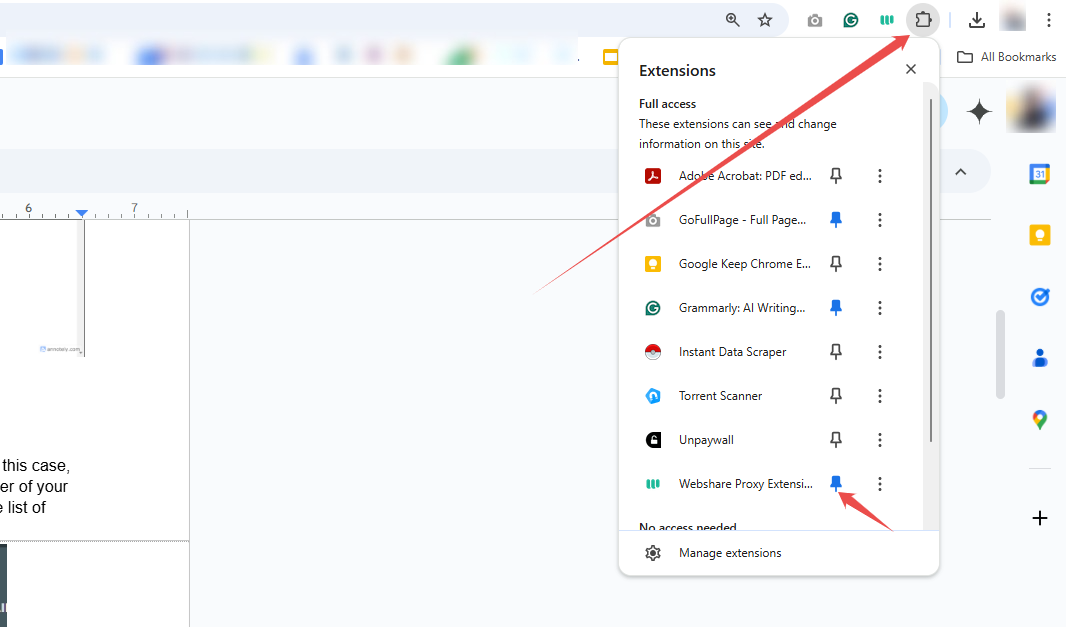
Now, open the extension by clicking on the Webshare logo. If you are an existing user, simply log in using your credentials. New users can sign up by selecting Create Account. The registration process takes only a few seconds, and you can either enter an email and password or link your Google account for a faster sign-up.
Step 3: Connect to a Proxy in Webshare
When you log in, you will likely see a message stating, “No proxies connected.” This basically means you need to select a proxy. Now, remember the 10 free proxies Webshare provided upon signup? This is the point at which you are expected to use them. Luckily, each proxy is marked with a flag and an IP address showing its location.

You are expected to browse the options and choose one that suits your needs. After choosing, hit the Connect button next to the selected IP address, and the extension will instantly activate the proxy for you.

Step 4: Manage Connections and Access TikTok
Webshare lets you filter proxies by country or IP address, giving you more control over your proxy settings. This makes it easier to find the perfect connection tailored to your needs. Once you've made your selection, you're all set to access TikTok with your proxy activated.
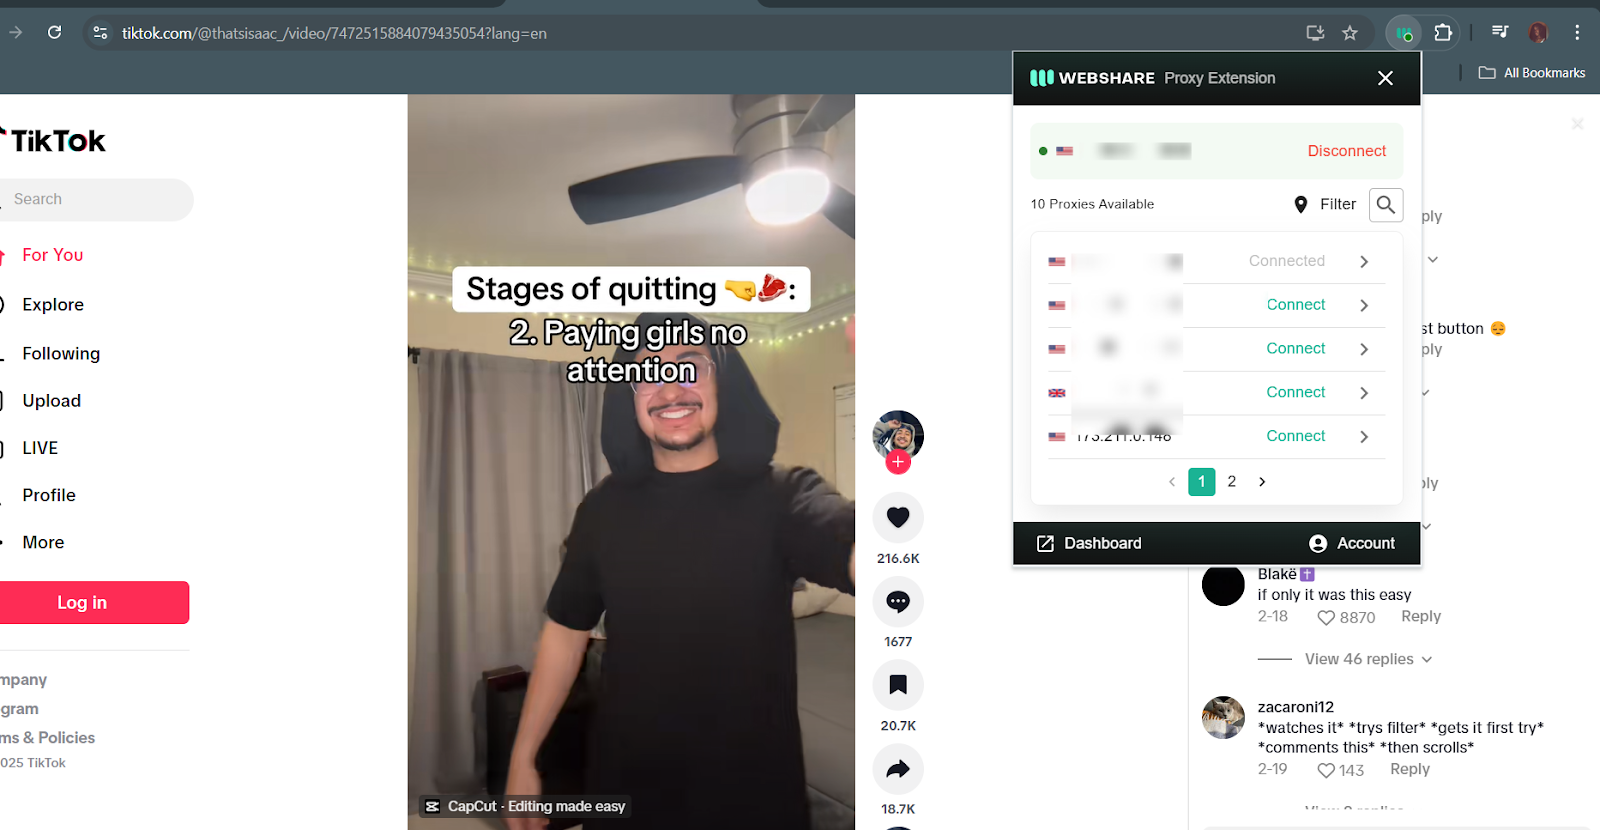
Do you wish to switch proxies? No big deal; just toggle between different options or disconnect with a single click.
TikTok Proxy for Windows Instructions
If you want all your internet traffic, not just Chrome, to run through a proxy, you can configure your proxy settings directly in Windows. Here’s how to set it up:
Step 1: Access Your System Settings
First, open the Windows search bar and type Proxy Settings. Click Open from the search results, which will take you to your system’s proxy configuration page. Here, you will have the option to set up your connection manually.
Step 2: Enable Manual Configuration and Enter Your Webshare Proxy Details
Turn off Automatically detect settings and scroll to the Manual Proxy Setup section from the Proxy Settings page. Toggle the switch to enable manual proxy use. This opens the settings needed to input your Webshare proxy details.
Before going further, head back to the Webshare website and review the list of available proxies. Each proxy entry has details like IP address, port number, username, and password. For this setup, you only need the IP address and port number.
Once you’ve chosen a proxy, return to your Windows proxy settings and enter the required details in the appropriate fields.

Double-check the information, tick the confirmation box, and click Save to apply the changes. Your system will now start routing all internet traffic through the selected proxy.

Step 3: Verify Your Connection
To verify your connection, open your browser and search “What is my IP address?” on Google. If your setup was successful, the displayed IP address should match the one from your selected proxy.
Once confirmed, you can access TikTok without restrictions, enjoy a smoother browsing experience, and maintain greater privacy.
TikTok Proxy for Android Instructions
Configuring a proxy on an Android device may vary slightly depending on the brand and software version. However, the core steps remain the same.
Here is how to set up a proxy on your phone to unlock TikTok without restrictions:
Step 1: Access Your Wi-Fi Settings
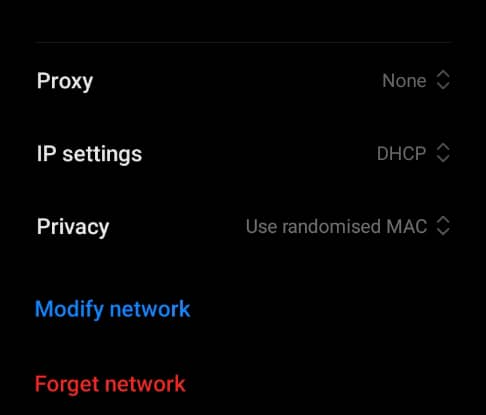
Start by opening your device’s Settings app and heading to the Wi-Fi section. Connect to your preferred network, then tap the gear icon or Additional settings option.

This will reveal advanced options, including Proxy, IP settings, Privacy, among others, as illustrated below:
Step 2: Configure Your Proxy Manually
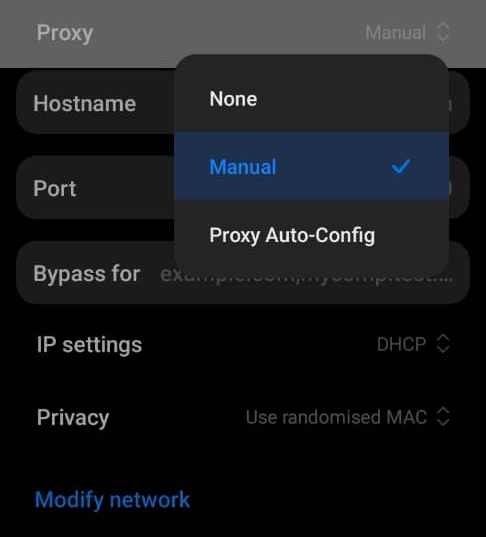
Within the Additional Settings menu, locate the Proxy option. Tapping on it will bring up a dropdown menu with three options. Choose Manual to enable custom proxy settings.
Now, retrieve your proxy details from Webshare. You’ll need the IP address and port number, particularly. You can find this in the Proxy List section of your Webshare dashboard.

Carefully enter these details (IP address and port number) into their respective fields to ensure a smooth connection.
Step 3: Authenticate and Activate Your Proxy
For your proxy to function properly, Webshare requires verification. You can authenticate using one of two methods: Username/Password Authentication or IP Verification.
With the first method, go to your Proxy List in Webshare and copy the login credentials associated with your chosen proxy. When prompted, enter your username and password to authenticate.
For a more seamless setup, choose IP Verification instead. This method allows Webshare to grant proxy access by approving your device’s IP address, eliminating the need to enter login details each time.
Once verified, your proxy will be fully activated, enabling unrestricted browsing on TikTok. Whether bypassing geo-blocks, managing multiple accounts, or enhancing your online privacy, your Android device is now set up for a smooth and secure TikTok experience.
How to Test TikTok Proxy
Just because your proxy is set up doesn’t mean all your internet traffic automatically routes through it. Proper testing is a must to confirm that TikTok recognizes your connection as coming from the intended location.
To verify, open your browser and visit an IP-checking tool like IPinfo. Compare the displayed IP address, location, and ISP with the proxy details you selected in Webshare. If everything matches, congratulations, your proxy is active and working correctly!
For TikTok to recognize your new location, clear your browser cache and cookies before launching the app or website. Once that’s done, you should be able to access TikTok without restrictions, bypass geo-blocks, manage multiple accounts, or improve privacy.
How to Turn Off TikTok Proxy
There may come a time when you no longer need a proxy while using TikTok. This could be for troubleshooting, faster browsing, or simply reverting to your original network settings. In any case, turning off a proxy is a quick process that depends on your operating system.
Since you use the Webshare extension on Chrome, disconnecting the proxy is pretty straightforward. Start by clicking on the Webshare icon in your browser toolbar. In the pop-up window, you’ll see an option to Disconnect.
Simply click the button, and the proxy will be deactivated. This will return your connection to its default state, allowing you to browse TikTok without the proxy.
For Windows users, open Settings, go to Network & Internet, and navigate to the Proxy section. Under Manual Proxy Setup, locate the toggle for "Use a proxy server" and switch it off. Click Save, and your connection will return to its default configuration.
On Android, first, open the Settings app on your device and head to the Wi-Fi section. Select your active network and tap the gear icon next to it. Then, go to Advanced or Additional settings and find the Proxy option.
Change it from Manual to None. After saving the changes, your device will stop routing traffic through the proxy and will revert to the usual internet connection.
With any of these methods, you’ll be free to browse TikTok as you normally would, without any proxy settings in place.
Conclusion
And just like that, you are now equipped to use a proxy with TikTok like a pro! Regardless of what you intend to do online, setting up a proxy is a game-changer. Remember, Webshare remains a solid choice, offering 10 free proxies without requiring credit card info.
As you may already know, proxies aren’t just about access. They offer an additional layer of security by helping you stay anonymous while browsing. Now that everything is in place, feel free to scroll, create, and engage with TikTok without limits.


