Get 10 Free Proxies For Tor Browser
In this guide, we will show you the steps required to obtain proxies from a reputed site like Webshare and then integrate them with Tor Browser.
What is Tor Browser?
Tor Browser is a web browser which prioritizes anonymity. It is perfect for those who want to protect their online activities from being monitored. Tor sends your internet traffic through a network of nodes, called "the Onion Routing" system. This process hides your location and browsing data from third parties.
One of Tor’s best features is its ability to bypass censorship and access content that might otherwise be restricted based on geographical location. Some of its other features are automatic encryption for all data and built-in tools to block tracking scripts and cookies. Tor Browser is also customizable and supports multiple add-ons and extensions. This allows users to improve their privacy further. Tor focuses on anonymity and is perfect for journalists, activists, or anyone else who values secure, untraceable browsing across the web.
Before starting

Before setting up the proxy server for Tor Browser, we must first obtain some proxies. Obtaining proxies can sometimes be expensive but fortunately, Webshare gives you 10 free proxies right after you create your account. You don’t even have to provide your credit card information. Just sign up on the Webshare website to get proxy details including the IP address, port number, username and password. These details will be needed to configure the proxy in the Tor browser.
How to set up a single proxy in Tor Browser?
Follow the steps given below to set up a single proxy in Tor Browser.
1. Download Tor Browser
Go to the official Tor Project landing page and then you have several options to download Tor Browser for different operating systems.
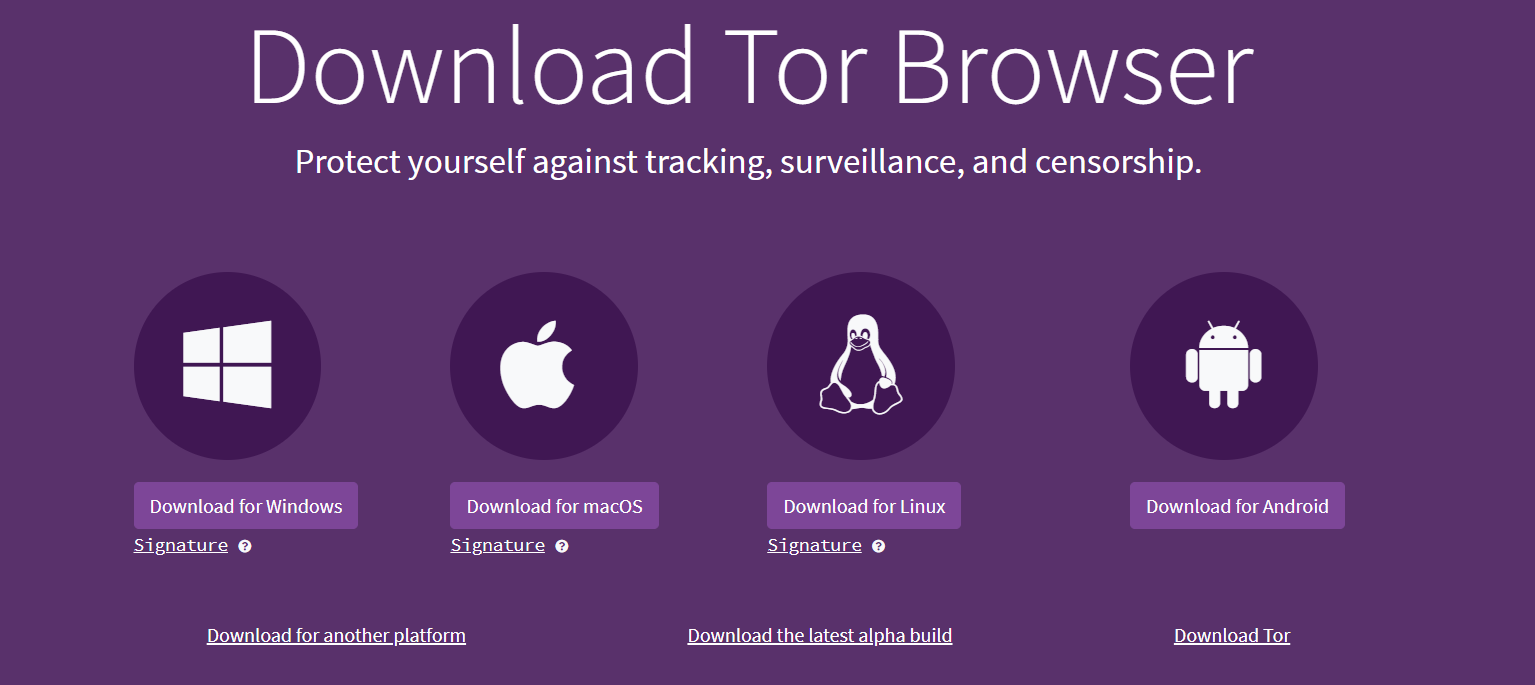
Just download the version for the operating system you use. Once you click the download button, there won’t be any additional steps like other browsers. The download will begin right after you provide the download location. Using the setup file that you have downloaded, you can go ahead and install Tor Browser on your computer.
2. Go to Connection settings
You will see the following screen when you open the Tor Browser.

Since you haven’t configured the proxy before, you have to click on the “Configure Connection” button. Now go to the “Connection” tab. Here you will see many options, but you have to scroll down until you find the Advanced settings.
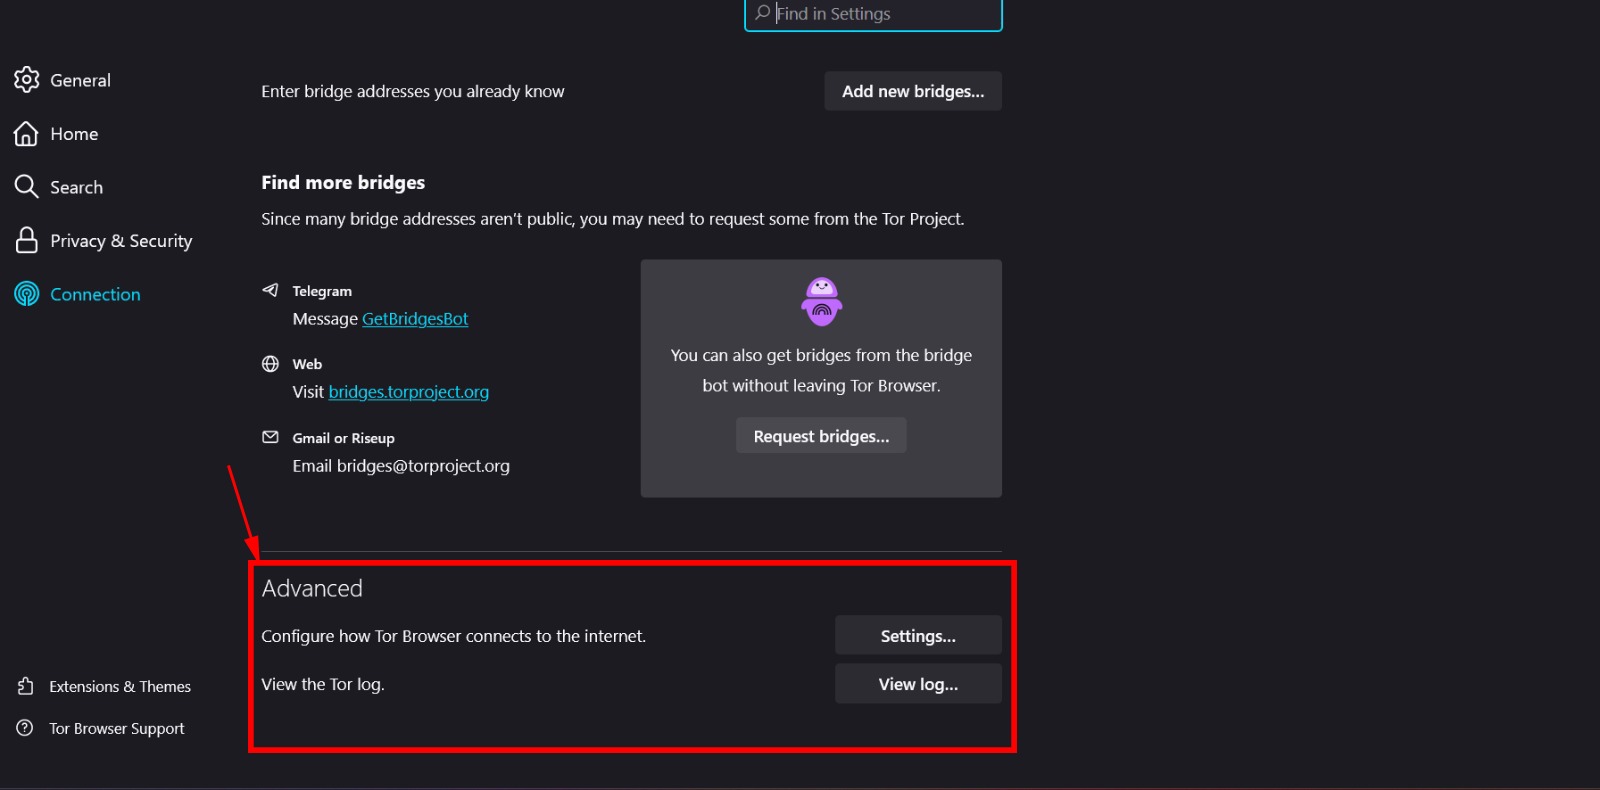
Under the advanced settings, click on the “settings” option.
3. Fill out your proxy settings
Read this part carefully since it is the most important part of this process. After clicking on the settings option, you will see a form to fill out your proxy details. First, tick the statement “I use a proxy to connect to the internet”. Next, select your proxy type as HTTP/HTTPS.
Now go to the proxy list in Webshare. Select a proxy that you like and fill out the proxy address, port, username and password in the form. You can copy each proxy detail from Webshare by just clicking on it.
Eg: Name: proxy1, IP: 49.123.241.122, Port:4220, Username: username, password: password
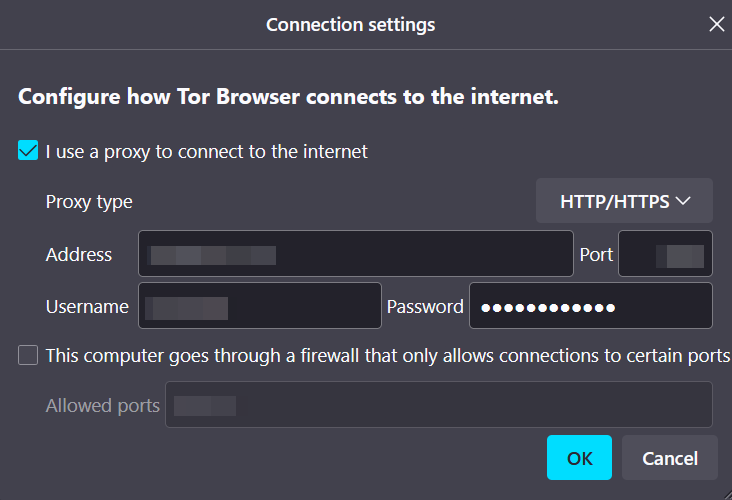
If you want more security, you can enable a firewall which only allows connections through certain ports in the Tor browser. To do this just tick the statement, “This computer goes through a firewall that only allows connections to certain ports”. Next, fill out the ports you wish to allow in the “Allowed ports” field.
After filling out these details, simply select the “ok” button.
4. Test proxies
Tor browser gives you the option to test the proxies that you have added. Just select the “Test” button.
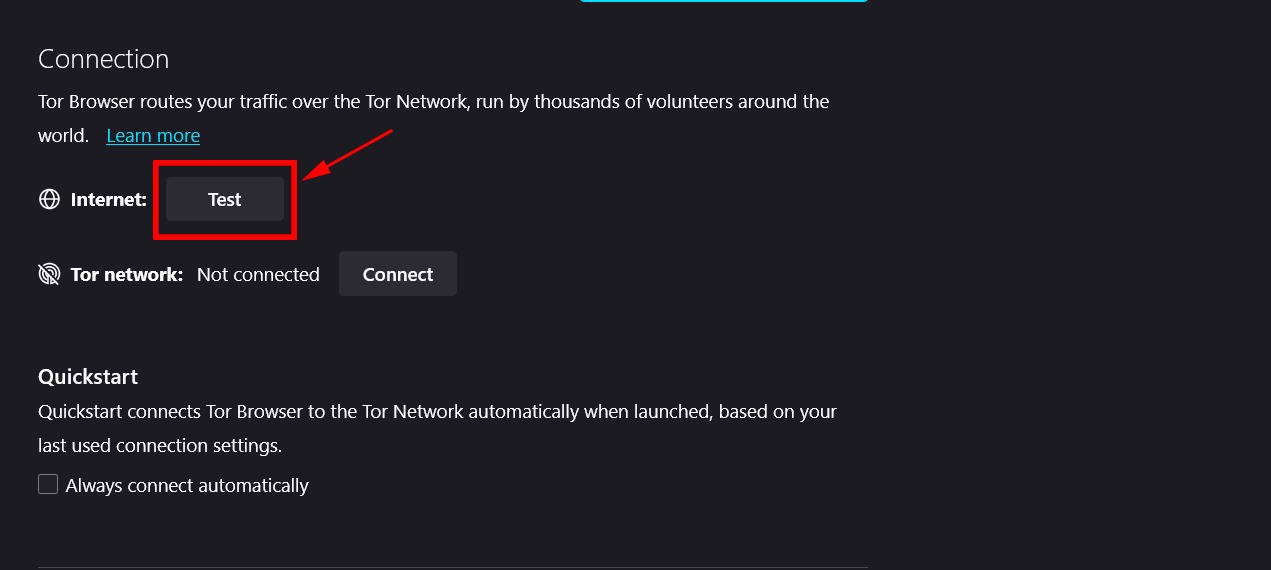
If it says “online”, that means the proxy details that were provided were accurate. However, if it keeps loading, that means the proxy you have entered is inoperative. If so, try again with the correct details.
5. Establish the connection
If your proxy passed the test, all you have to do is click on “Connect”.
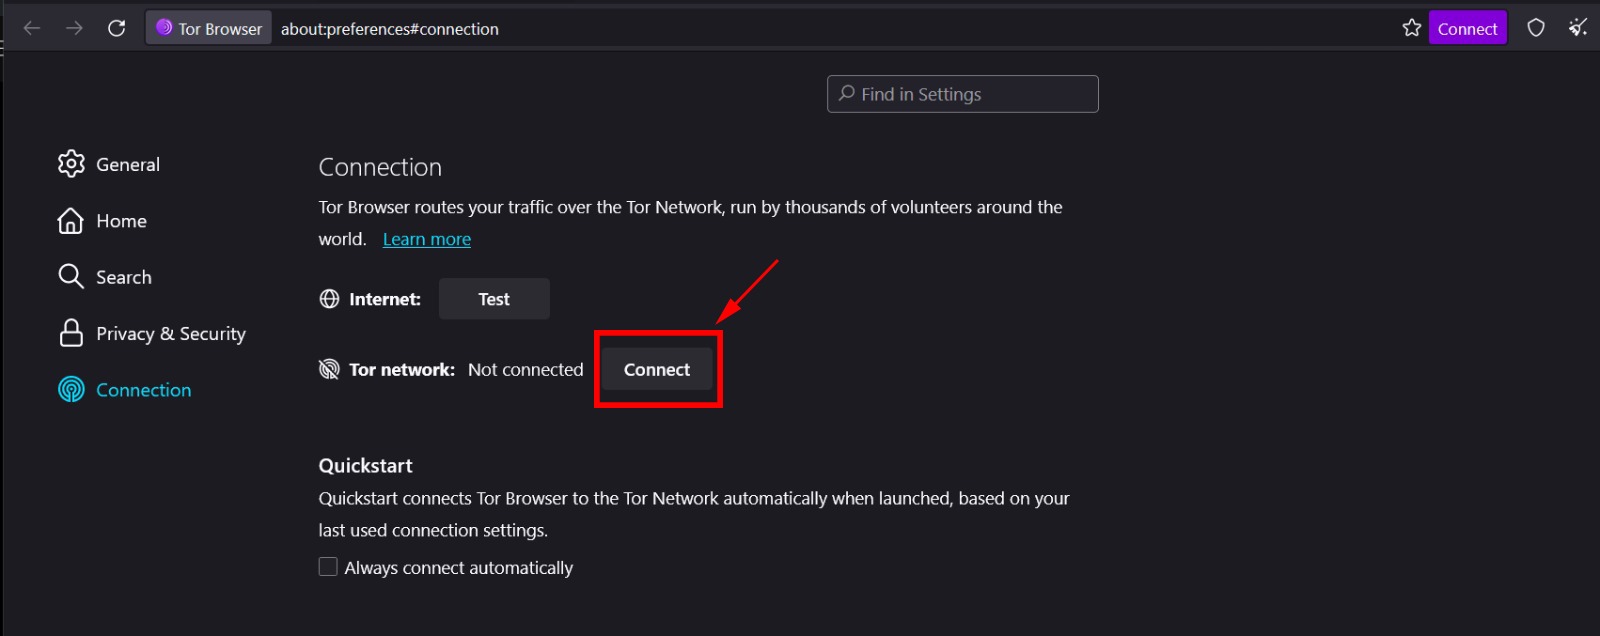
There will be a brief loading page saying “Establishing connection” and after that, you will be directed towards the DuckDuckGo search engine.

Once you come to the DuckDuckGo page, you have successfully set up the proxy server for the Tor browser.
DuckDuckGo does not track users or store their search history. Therefore, it helps you to anonymously browse the internet.
6. Start Browsing
After establishing the connection, you can freely search the web with your new proxy. The Tor browser already provides a high level of anonymization, but using a proxy server further increases your security. Therefore, you don’t have to worry about your data being tracked ever again. If you are unsure whether you are using the proxy, you can go to a site like IPinfo to view your IP details.
That’s everything you need to know about configuring proxies in the Tor Browser! We hope this article makes the process easier for you.
Here’s a quick note to help you make the right choice. You can sign up for an account on Webshare without a credit card and access 10 premium proxies at no cost. These proxies can enhance your Tor Browser experience. Therefore don't miss this fantastic opportunity to get these free proxies and browse in peace.


